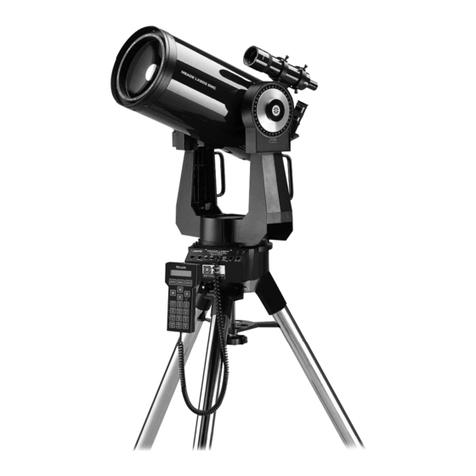
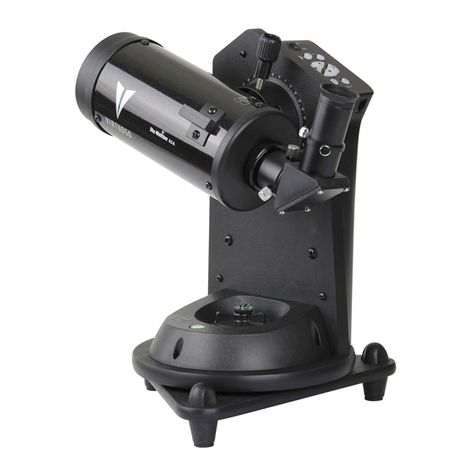
Vixen Viper-MC90L User manual

Instruction Manual
Preface
Thank you very much for your purchase of a Vixen VIPER astronomical
telescope. VIPER is a new type of compact telescope, which offers easy access
to the wonders of the night sky. Enjoy star observation from your window,
veranda, or nearby park. It is also an ideal complement for outdoor activities
since it is easily carried to the country or seaside for better viewing.

Please read the instructions carefully before use to ensure proper use of
the instrument.
Always keep this instruction manual near the telescope, even after reading.
This instruction manual describes necessary precautions for the safe use of
the telescope to prevent injuries to yourself and others as well as damage to
property. Read the entire user manual prior to using of this product.
Warning!
Never look directly at the sun with your naked eyes or through any telescope or
its finder or guiding scope. Permanent and irreversible eye damage may result.
Precautions
Do not leave the instrument lens uncapped in the daytime. Telescopes may
become heated and result in a fire.
Do not use the product while traveling or walking. This may cause injuries
from collision or falling.
Keep caps, desiccant, or vinyl packing materials away from children, to
eliminate danger from swallowing or suffocation.
Do not use the product in a wet environment. Do not touch the productwith
wet hands which may result in an electrical shock.
Never disassemble the product. This may cause an accident from fire,
electrical shock, or failure. This will also void your warranty.
Caution on Handling and Storage
Do not leave the product inside a car in bright sunshine or in front of any
heat sources.
When cleaning, do not use organic solvents such as alcohol.
Keep the plastic packaging material away from small children to avoid
injuries.
Avoid exposing product to rain, water droplets, heavy dew, mud or sand.
Avoid touching any lens or mirror surface directly with hands.
In
case lens
becomes dirty, such as with fingerprints, gently wipe it using a commercially
available lens cleaner and lens cleaning paper.
Blow off dust on lens using a commercially available blower brush.
For storage, keep in a dry and ventilated location.
Remove battery when storing for a long period.
Checking Contents
First, make sure the following items are contained in the packing.
An optical tube (Maksutov-Cassegrain type,
90
mm dia.)
A platform (Fork-arm type altazimuth)
A K25mm eyepiece (48x131.7mm dia.)
An eyepiece adaptor for straight-through viewing (31.7mm dia.)
A finder scope, 8x21mm (Erect-image)
An intelligentjoystick controller
A battery holder for 8 pieces of size
AA
dry cells, 12V (equipped in the body).
Finder BracketScrew
-
K25mm
Eyepiece lens
Eyepiece lens setscrew
Finder
8x21
mm
Opticaltube setscrew
.-
..
<
-
.
-..
-
-
..
7..
Adjusting,._
1'
-
-
.':
.
1
~-.
-
...
.
.----
--'
Verticalnlovement
-..
.
._-_
.-
-
..
-
.
-
Screw
.
.
-.-
..,_.
...I
.-
-
---:
-.
~
-
..
--
-I'
.
..
-
-
axis-
.
..
.
.-
--
.
..
.
-
.
i
-
-
.
-
--
.
.
_
. .
..
.
-.
Fir16le1
Leg
--..-
.
.
.
-..~-
.-
-
-
-
.
-
.-
-.
-
--
..
.
--
/-
8..
..
-.
.
. Tube
.
-"
.--
.
Eyepiece sectio~l
.
.
-.--.
~,
-
--
-.
'
.
,.
--
.,
.::
-
.
'
,
8.
.
.
I<,C--_.
.
-
attachment
ICliatj4~11altuli~ro~)
<._
.
.
-
-.
.
_
...
.,
.
.
.
.
-
I
.
.
,:,
.
. ..
.
9
_-.
_ _
__
base
Eyepiece section
_
-..
-.
-.
.--,.
.-
.,.
*
,---
,..
~Di~ectviewi~rcj)
.-..-
-
.
.<
..
-
--
-,-
...
-
.
.
,
I
'
.,
.
Vertical
I
Horizontal
-
-
'-:.-=---
__...
---
_
_
_/.-
.
-
.
,
'.
Sl~iftLever
/.
.ti
.
:
8
'
--------ARM
.
..
Focus knob
,,'
,
..
,
.
---
.-
--:.
-~
.-
i'
"
Eyepiece lens. .
-..-
..
. .
,.
.
I
.
--
,'..
..
.~
~
setscrew
,,'
,
..
,-_
-
.
i
. .
,
..
..
_-'
,
.
.._
;,
,--
.:
-
--y
I
Battery Box--
-.
.
.
..
.
.-
.-
--
-
.
,:
--- .
.
---.-
-
-
..
.
.,. ~o~stickcontroller hook
.
,
..: -.
-
...
-.--.;:.:./
,
.
.
----
-
-
.-
..
'.
.
--I
--
.
-
z
.-
.-
.-
,.-.
-,
Joystick Controller
.
/..I
..
-.,-"
__i
Hook
.-
-
-
.
. ..
.
.
.
.
.
.--
..---Joystick
.
-
-..
,
..
..
..
...
.
,.
.,.
-,-.-,
.
.
_--
-.
,
--
-.
--
-
~-
-
._ .-
..,
-.
.
,
.
.
3
3-..
,
_._
-.-
,
9
2
,,-
,'
PowerSwjtCI~----"-
,.
--':'
',
.
,
_,..
--
I
.
,.,
,.-
,-
---i,..y
-.
-
-
-.
<
,.
.
----.I.
:
_
-1-
,
...
,
-
.,
,
,
.
,
-
--__
,'
I/
Joystic
j on troller
DC 12V
,
Connection Adapter
Mode Indicator Connection

1) How to assemble
1. Attachment of the optical tube to the arm
1-1 Place the platform so the arm is located on the right. (Fig. 1)
1-2Turn the upper and lowerdovetail, so the optical tube setscrew comes to the
upper position. (Fig. 2).
Leave the optical tube setscrew loose. (Fig.
3)
Loosen

1-3 Hold the optical tube with the eyepiece section facing you and the optical
tube dovetail plate is on the right. (Fig.
4)
E.<epiece
-
section
-
1-4 Insert the optical tube dovetail plate onto the dovetail slide bar of the upper
and lower revolving dovetail. Fasten the optical tube setscrew. (Fig.
5)
<Fig.5>
Opticaltube setscrew
*
Fixthe optical tube very securely to avoid danger from unexpecteddetachment
of the optical tube during use.
*
When observing near the zenith, place the optical tube to be more toward the
front.
2.
Attaching finder scope
2-1 Loosen the finder bracket setscrew. Attach the finder scope in the correct
direction (Fig.
6),
and fix the screw. (Fig.
7)
--.
{Front}
(Rear}
Finder
Ti.jht
up
thefillelel 1)1dcket scr
errr
Finder bracket
setscrew

3.
Inserting battery cells
3-1 Open the cover of the battery holder box, and take out the battery holder (Fig.
8)
*
Battery holder can be easily taken out when the knob is pulled.
<Fig.$>
3-2 Insert battery cells into the battery holder (Fig.
9).
Pay attention to the
polarity.
3-3 While facing up, insert the battery holder into the battery holder box after the
battery holder is filled with battery cells. (Fig. 10)
*
Insert the battery holder so its contact will match with that in the battery holder
box.
When taking power from outlet
You can powerfrom a home outlet if you have anAC adapter 12V (optional).
.
.
..
.
~
.-
-
tf
:{or1
h4wz
,111
AC
~(I.l;)tel
12':
i(:)l)ti011,1ll. 4'01.1
.
..
.
,.
..
CAI1
tdke pOA*lel
fl0lll
the
r:Nlt!et .1t 110111~.
..
.
,
-
I
.
~
4.
Connecting controller
4-1 Cor~nectthe joystick type controller with the terminal port CONT. (Fig. 11)

5.
Applying powersupply
5-1 Turn on the power supply. (Fig. 12)
2)
How to use
1.
Movingthe telescope
Move the telescope by using the joystick type controller, which is connected to
the main body. Depending on the degree of inclination of the stick, the telescope
can be moved at a sidereal rate speed of around 2x18x, 64x, 128x, 300x, 800x.
For example, if the joystick is tilted to the right, the telescope will turn to move to
the right (Fig. 14),if it is tilted forward, the telescopewill turn to move downwards.
(Fig. 15)
(In erect-image mode. By changing mode, movement can be changed. Refer to
the later MODE CHANGE).
*
Sidereal rate:A speed that stars moves.
Contr
oll
to
UI,"."
CIS
Doh1ld.11
(1s
Direction
Changing speed
Depending on a degree of inclination of thejoystick, the telescope can be moved
at approximately 2x, 8x164x, 128x, 300x1and 800x faster than a sidereal rate.
Joystick
.-
.
-
-.
.-
.
~.
-
When moving at a low speed, move the joystick back and forth, rather than
keeping a steady tilt of the joystick.

2.
Adjusting finder scope
It is not easy to find a target star, since the telescope uses high magnification
power. Therefore, to facilitate your search for a star, use the finder scope which
has a lower magnification. Be sure that the field of view of the telescope is
aligned with that of the finder scope.
2-1 Pulldown the mirror shift lever. (Fig. 17)
<Fig.I
7>
Veltic.11
HOI izont.il
S!lift
Lever
2-2 Loosen the eyepiece setscrew, and insert an eyepiece into the eyepiece
section (diagonal mirror). (Fig. 18). Fasten the eyepiece setscrew. (Fig. 19)
Eyepiece Setsc~elrr
..-
.
--.-
E!;epiece
-
-
EyepieceSectio11lDi.1goi1.21Ivlil
I
01
I
Liies
2-3 While looking into the eyepiece, move the telescope so the top of a utility
pole or tower, approximately
500
meters away, comes into the center of the field
of view. (Fig. 20). When an object comes into the center of the sight, turn the
focusing knobto achieve focus. (Fig. 21).
<Fig21
.
.
EyepieceLetis
In this case, the image in the eyepiece (diagonal mirror) appears reversed side
to side from that which is actually observed by the naked eye.When the mode of
the joystick is in the Erect-Image Mode, an image that is reversed side to side
from the tilt direction will move. (Refer to the page of Erect-Image Mode)

Uie~illqi~lldcje
of
eyepiece lells(cli.~cjo~~,ll
inir
lo1
I
.
2-4
To alignthe field of view of the finder scope and eyepiece together, look into
the finder scope steadying the telescope (Fig. 22). Adjust the finder scope by
turning the three finder adjustment thumbscrews to bring a target object into the
center of the cross hair line, which is viewed through the eyepiece (diagonal
mirror). (Fig.
23)
Potatethe ac!i~lstlnel\ttllil~nl)zr~
ens

In this case, an image that is seen in the finder scope appears in the same
orientation as is seen by the naked eye.
2-5 When a target object comes into the center of the cross hair lines in the
finder scope while looking into the eyepiece (diagonal mirror), finder scope
adjustment is complete.
This procedurewill not be required again unless the finder scope or telescope is
moved or the finder scope adjustment thumbscrews will not move. The three
adjustment thumbscrews of the finder scope are designed to be a push-in and
pull-up screw. Do not try to adjust them at the same time, but minutely adjust
each screw individually.
3.'
Observation
Gazing with eyepiece (diagonal mirror).
*
This is used for observingstars.
3-1
Loosen the eyepiece setscrew and insert an eyepiece into the eyepiece
section (diagonal mirror) of the body. (Fig. 25). Fasten the eyepiece setscrew.
(Fig. 26).
..
..
.
.
-
.
.-------..Eyepiece
.,.
::.--.?
.I.
-.
..
.
.
,'
.
-
:..
.
..
;
lells ..
.- .-
.
i-i-.
-.
-.
.
.
~-
.
.
-
~~.
-
--
.
I..
..
..
.,
.
.
,.
;.
-.
-.
,
.
-
--.
..
-
.-
,
,
. .
.
Eyepiece Setscreirr
3-2 Pulldown the mirror shift lever. (Fig. 27)
iFig.273
,.
..
,
Ve~tic.>l
HOI
izontdl
Shift
level
3-3 Slew an object into the center of the cross hairs by operating the joystick
type controller while looking into the finder scope. (Fig. 28)
*
Make sure in this case that the mode of the joystick is in the erect-image mode.
(Refer to the mode change)

3-4 Adjust focusing upon turning the focusing knob while looking into the
eyepiece (diagonal mirror). (Fig.; 29
-
30)
<-iSI.3~>
ViehilltJI1)l~tJeof Eyel,ieee lens
(I~idcjolldl1uli1
I
OI
By
I
otdlilltjfocus knol,, ~tljrlstthe tocus.
--
-
-
*--
-
-
-
-
-
,
-
--
<'
LY
f7F'
w
-A
-
1
:&-b.&;
3
+-,----
-.-
----=-b=L*
<
-_
_-
A
-.
-
-
I
~rt
of Focus
Focus
111
cdse hllellt.11get is seen
till
oogh
eycl'ieca lensltli,~gonallnil
r
ol
1.
thet.11(jet
hillI)eseen
dr,
ol,l,osite tlif ectioll of side-to-sitle.
3-5 If necessary, operate the joystick corresponding to the diurnal movement
(earth's rotation) of the star.
In the case where the mode of the joystick is in ,the erect-image mode, an
image that is seen in the eyepiece (diagonal mirror) will move to the opposite
direction from where the joystick is tilted. (Refer to the page of Three Modes)
Gazing with eyepiece (Straight-through viewing). 'This is used with stars
at lower positions or when terrestrial landscape is observed.
3-6 Attach the eyepiece adapter for straight-through viewing with the eyepiece
section (straight-,through viewing) of the body. Loosen the eyepiece setscrew
and insert the eyepiece to the end. (Fig. 31). Fasten the eyepiece setscrew.
(Fig. 32).
cFig.313
~Fig.32,
Eyepiecelens
-
Eyepiece
Eyepiece,~d;rl>te~ setscleA
fol (li~ect vie&

3-7 Pull up the mirror shift lever. (Fig. 33).
<Fig.34>
'
ViePiilVJill?,?!~"
0f
Fi111:el
T,II get
Velticdl
Hor izo~ltdl
Shift level
3-8 Bring an object into the center of the cross hairs by operating the joystick
controller while looking into the finder scope.
3-9Adjust focusing by turning the focusing knob. (Fig. 35
-
36)
Focus k1>o!,
Fielcl
of
wie~
of
eyepiece !en%
~ith
cli,~gon.~lmil
I
91.
.
.=Fig
,36>
111
cdise Allentd~get
iis
seen
hit11
st1digl~t-t111ot~glbvieki~~g.tl>etd~<jet
ill
Oe
seen
,IS
upsitle-(lo
AIL
3-10 If necessary, operate the joystick corresponding to the diurnal movement
(earth'srotation) of the star.
*
In the case where the mode of the joystick is in the erect-image mode, an
image that is seen will move to an opposite direction of side-to-side and up and
down from where the joystick is tilted. (Refer to the page of Three Modes)
*
Since observation of the universe may not require an erect image, images that
can be seen with VIPER are reversed from side to side (using eyepiece:
diagonal mirror) and upside down 180 degrees rotated (using eyepiece:
straight-through). It is possible to observe a normal erect image, if a terrestrial
erect-image diagonal (optionallysupplied) is attached.

4.
Mode Change
Joystick type controller offers three operational modes to change the movement
of the telescope. Familiarize yourself with those movements by looking at
terrestrial scenery before beginning stargazing.
Pr~sliJoystick
Ivlove Joystick to tlie Riglit
El
ect i~ii~ige11lve1teilinl.ige CIi.~llge
~iso<le ~iiocle Ivlocle
Iri.~go~i,illili~
I
01
liiotle
Prlsll Joystick
,
,-
.
.
-
..
{;I
eel) light is
trll
neil
03.
r
Settilig
of
iliveltecl illl.ige
liiocleis co11ll1lete.l
How to change mode
4-1
Pressthejoystick of the controller in the center. Agreen lightwill illuminateto
notify that it is in the setting mode. (Telescope cannot be moved during setting
mode).
4-2
Upon tilting the joystick to the right, three red lights will illuminate

From left:
Erect-Image Mode
+
Diagonal Mirror Mode
+
Inverted lmage Mode
4-3
If the joystick is depressed when the light is illuminated at the desired mode,
mode will be selected at that mode. And when the mode is selected, the green
light will turn off and a red light at the selected mode will remain illuminated.
5.
Three Modes
5-1
Erect-Image Mode (Initial setting mode when power is made on)
~elesco~ewill move in the direction that the joystick is tilted. Use this mode
when searching for an object while looking into the finder scope, or attaching a
terrestrial erect-image diagonal (optionally supplied) with eyepiece.
Although this can be used during viewing the object in the eyepiece, the
direction between the field of view and where the joystick is tilted does not
match.
In the case where an object is viewed in the eyepiece (diagonal mirror):
Viewing imqge will move in an opposite direction from side to side from where
the joystick is tilted. To synchronize movement of the joystick with the viewing
object, change to the Diagonal Mirror Mode.
In the case where an object is viewed through the eyepiece (straight-through
viewing): The viewed image will move in an opposite direction in upside down
and from side to side from where the joystick is tilted. To synchronize movement
of thejoystick with viewing object, change to the Inverted lmage Mode.
-
--
--
-
rvlove joystick to
,:
7,-*
the
I
irjltt
II~XT-.
>
-
-
-;*
I
-
Fielilof vie
h
of Fillcle~
Elect-imdcjenlocle
8
Eyepiece lells Icli.\(jol14~llnir
I
01
1
.
lvli~uejoystick to
the
I
irjht
7
-
-
-
-
-
<.
-
T.ll(ret is seen .lt the centel
El ect-i~\l.lcjemoi!e
.:
Eyepiece re:)$
1St1
.~i(rht-thlor~ijh)
.
Fielil of uieh of Eyepiece lens Tdl (jet
is
see11.lt the celltel
(St1diijllt-thlC*II(JIII lvlove j0:ystick to
tl~z
I,nttnm
I
ic~llt

5-2
Diagonal Mirror Mode (corresponding mode with eyepiece (diagonal
mirror))
Telescope will move in the same up and down direction where the joystick is
tilted, however, it will move reversely to the side-to-side direction from the
joystick. When looking into the eyepiece (diagonal mirror), a viewing object
appears reverse side-to-side. In the Diagonal Mirror Mode, the actual image and
that in the eyepiece (diagonal mirror) move in the same direction as the joystick
movement.
Fieltl of vieh of Eyepiece lens T,~Iget is seen .~tthe centel
hit11
tlidi~~lldllllil
101.
fvlove joystick to
the left top
5-3
Invertedlmage Mode(corresponding modewith eyepiece (directview))
Telescope will move in the reverse direction from both up and down and side to
side direction from where joystick is tilted. When looking into the eyepiece (direct
view), image of viewing object appears reversed (180 degrees) in the up and
down direction from the actual image. In this lnverted lmage Mode, images that
can be seen in the eyepiece and the movement of the joystick correspond in the
same direction.
Inverted Irndge lvlo<le
6
Eyepeice lens hith(li.lgo~ldlnlir
I
or
.
Fieltl of Vieh of eyepiece lens T,lrget is seen .~tthe cctllte~
(St1dic~llt-thror~cJh, fvlove joystick to
the lefttop
Erect-Image Mode
Diagonal Mirror Mode
lnverted lmage Mode
Use this mode when tracking a target object by finder
scope, or observing terrestrial objects when using
terrestrial erect-image diagonal (optional).
Use this mode while looking into an eyepiece
(diagonal mirror).
Use this mode while looking into an eyepiece (direct
view)

Specifications of
VIPER-MC9OL
Optical Tube: Maksutov-Cassegraintype, with straight-through and angled
viewing mirror shift lever
Objective effective diameter: 90mm (3.5 in), multi-coated
Focal length (F ratio): 1200mm(47 in) (Fl13.3)
Dimensions:Approx. 300mm (11.8 in)
(L)
x 112mm (4.5 in) (Max O.D.),
Weight: Approx. 1.6kg (3.5 Ibs)
Finder scope: 8x, dia. 21mm (.8 in) (erect-image)
Platform: Folk-armtype altazimuth mount
Drive: High speed two-axis motor,with joystick type controller
Dimensions: Approx. 280(H)mm (11 in), Diameter of the platform approx.
160mm (6.3 in)
Weight: Approx. 1.3kg(2.9 Ibs)
Powersupply: SizeAA dry cell x 8 pieces used (optional)
Accessories: Eyepiece K25mm (magnification48x, real field of view 56',
31.7mm dia. (1.3 in)), straight-through eyepiece adaptor (Dia. 31.7mm,
(1.3 in))
Vixen
Co.,
Ltd.
Other Vixen Telescope manuals

Vixen
Vixen GP2 PHOTO GUIDER S User manual

Vixen
Vixen Starbook-S Manual

Vixen
Vixen GREAT POLARIS User manual

Vixen
Vixen VMC260L User manual

Vixen
Vixen Sphinx User manual

Vixen
Vixen 70X50 finder scope with illuminated reticle User manual

Vixen
Vixen BT81S-A User manual

Vixen
Vixen BT-ED70S-A User manual

Vixen
Vixen BT81S-A User manual

Vixen
Vixen BT80M-A User manual

Vixen
Vixen R150S User manual

Vixen
Vixen VMC260L User manual

Vixen
Vixen BT126SS-A User manual

Vixen
Vixen BT126SS-A User manual

Vixen
Vixen GP-DX User manual

Vixen
Vixen Porta A80Mf User manual

Vixen
Vixen Porta ED80Sf User manual

Vixen
Vixen Refractors A81M User manual

Vixen
Vixen Starbook-S Instruction Manual

Vixen
Vixen VMC260L User manual