- 3 -
Copyright by UTEK Technology Co., Ltd., all rights
reserved.
The information in this document has been carefully checked and is believed to be correct
as of the date of publication. UTEK Technology Co., Ltd. reserves the right to make changes
in the product or specification, or both, presented in this publication at any time without
notice.
UTEK assumes no responsibility or liability arising from the specification listed herein.
UTEK makes no representations that the use of its products in the manner described in this
publication will not infringe on existing or future patents, trademark, copyright, or rights of
third parties. Implication or other under any patent or patent rights of UTEK Technology Co.,
Ltd grants no license.
All other trademarks and registered trademarks are the property of their respective holders.
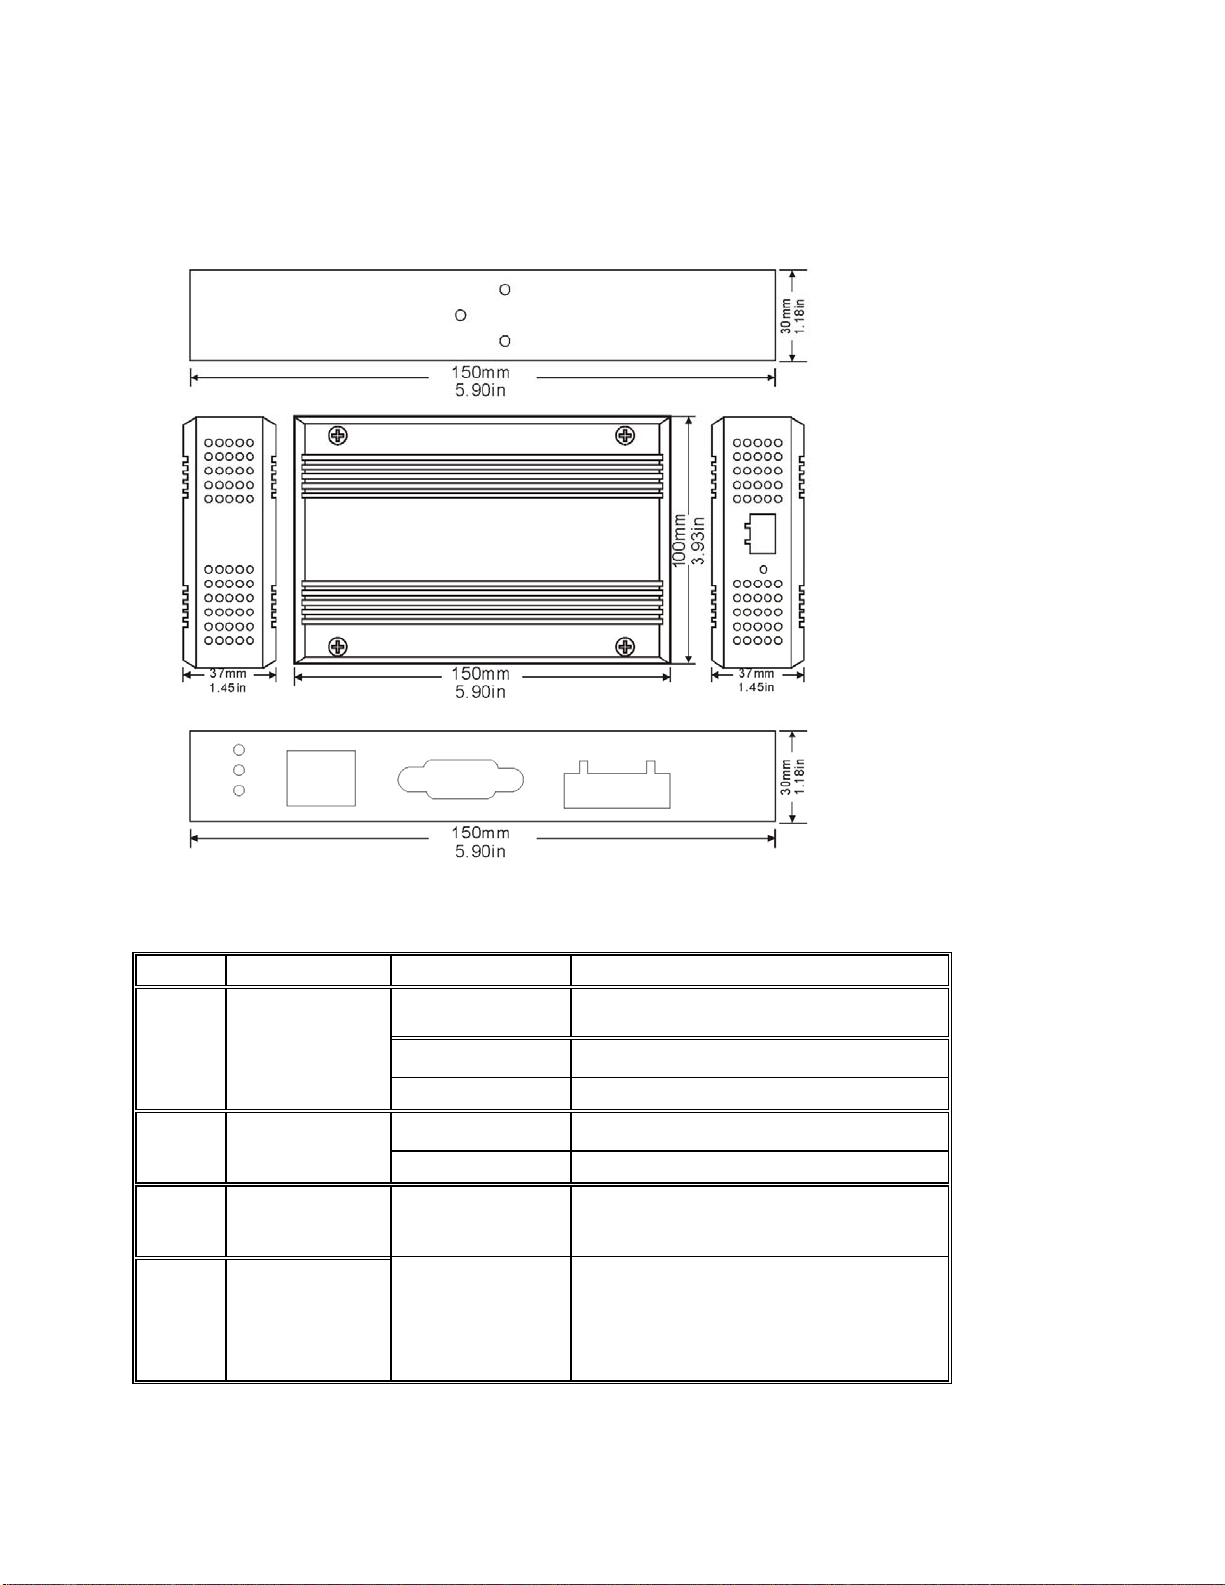
1. Getting to Know your UT-6301
1.1 Introduction
The UT-6301 is a RS232/RS485/RS422 to TCP/IP converter integrated with a robust system and network
management features designed for industrial equipment to be accessed and controlled via Intranet or Internet.
By integrating RTOS (Real Time Operating System) and complete TCP/IP protocol stack capability, UTEK’s
UT-6301 provides not only a robust and high performance system to make your device connecting to Network,
but also ease installation and Internet access.
The UT-6301 Web Configurator is a breeze to operate and totally independent of the operating system platform
you use.
1.2 Main features
The following are the main features of UT-6301
TCP/UDP server/client support
The UT-6301 support four types of connection: TCP server, UDP server, TCP client and UDP client, user can
select one of types to meet application requirement.
DHCP Client
DHCP (Dynamic Host Configuration Protocol) client obtains the TCP/IP configuration at start-up from a
centralized DHCP server, which means it can get IP address, an IP default gateway and DNS server.
PPP Over Ethernet
PPPoE is a protocol for connecting remote hosts to the Internet over DSL connection by simulating dial-up
connection.
Dynamic DNS
With dynamic DNS support, you can have a static hostname alias for a dynamic IP address, allowing the host to
be more easily accessible from various locations on the Internet.