01
TABLE OF CONTENTS
TABLE OF CONTENTS
PRECAUTIONS
CAUTIONS ON USING THIS PRODUCT
PACKAGE CONTENTS
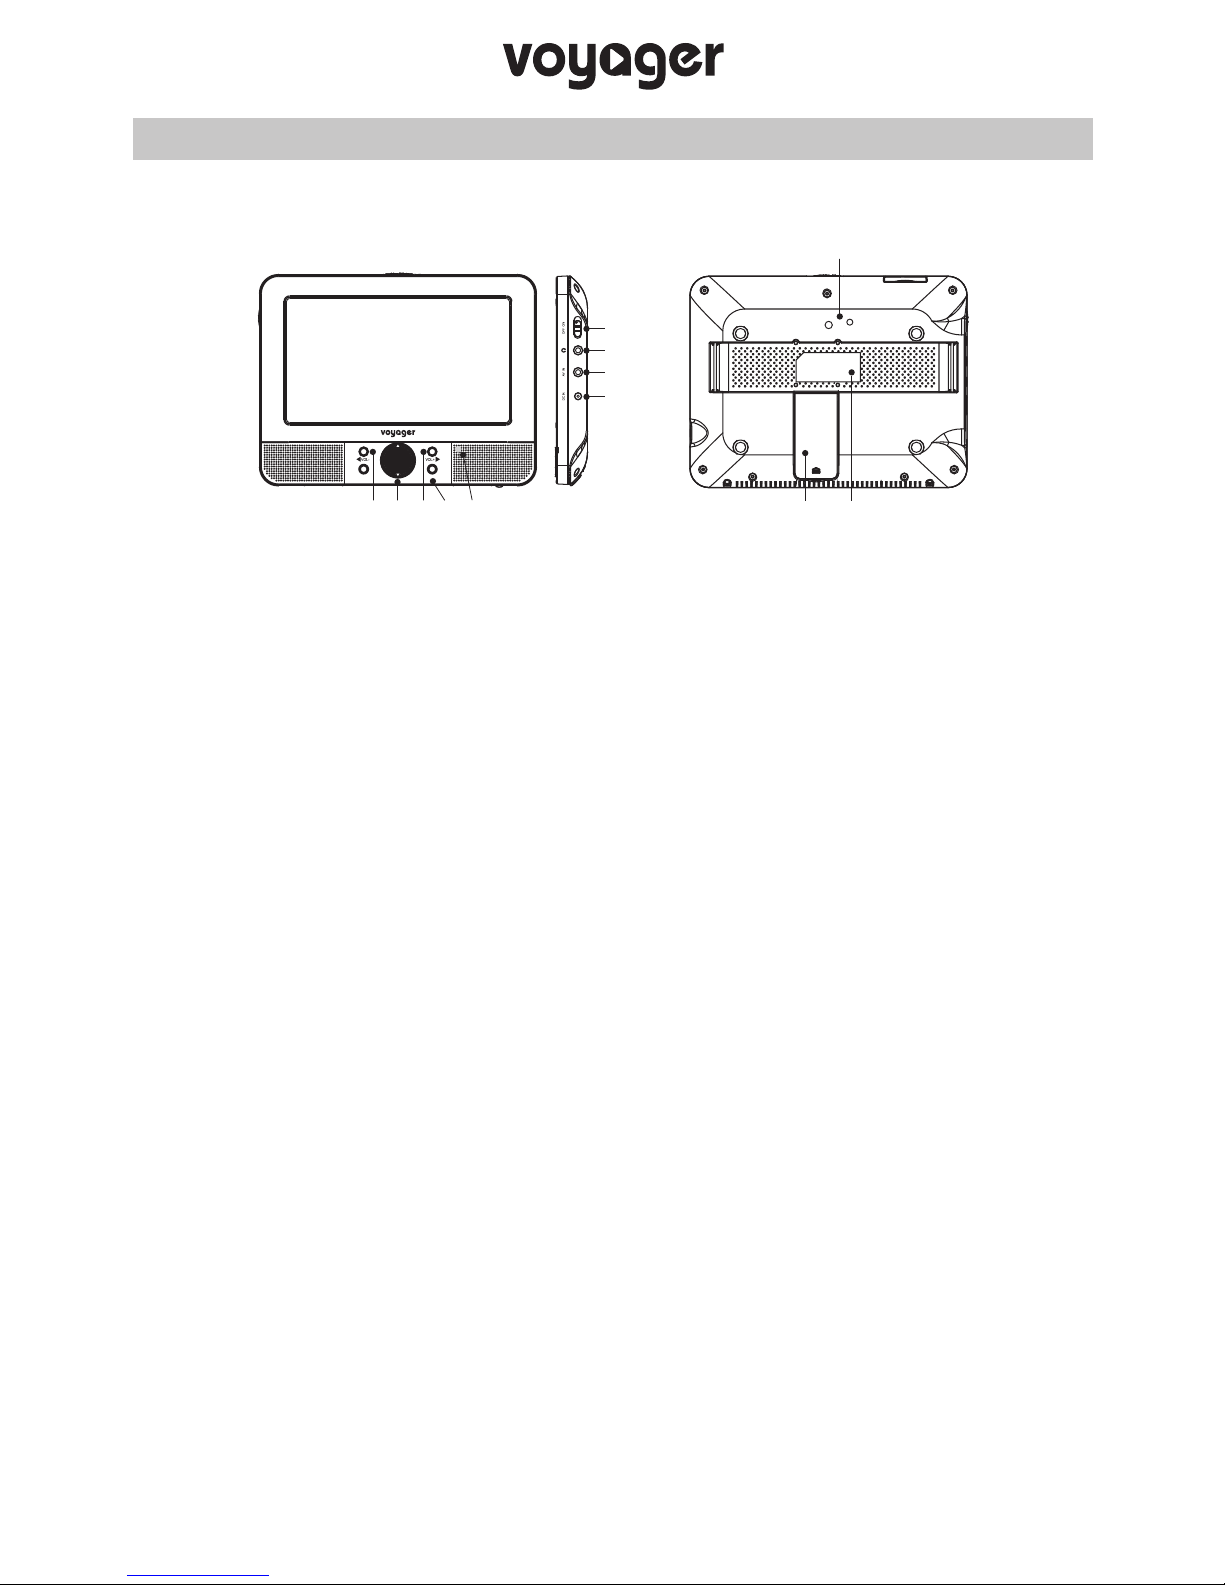
PLAYER PARTS & CONTROLS
VYDVD7 SERIES DVD PLAYER
VYDVD7 SERIES MONITOR
VYDVD9 SERIES DVD PLAYER
VYDVD9 SERIES MONITOR
EASY FIT CAR MOUNT & INSTALLATION
CAR MOUNT BRACKET
CAR MOUNT
SYSTEM CONNECTIONS
CAR ADAPTOR FUSE INFORMATION
INSERTING A DISC
AUDIO / VIDEO CONNECTIONS
REMOTE CONTROL
REMOTE CONTROL BATTERY REPLACEMENT
MEDIA PLAYBACK
VIDEO COMPRESSION FORMATS
WIRELESS HEADPHONES
SYSTEM SETUP
GENERAL
VIDEO
PREFERENCES
PASSWORD
PRODUCT SPECIFICATION
SMASHED SCREEN IDENTIFICATION
PIXEL STATEMENT
TROUBLE SHOOTING
.............................................................................................................
.........................................................................................................................
..................................................................................
.............................................................................................................
.........................................................................................
...............................................................................................
........................................................................................................................
........................................................................................................
....................................................................................
..................................................................................................................
.............................................................................................
................................................................................................................
....................................................................
...................................................................................................................
.........................................................................................
............................................................................................................................
..................................................................................................................................
..................................................................................................................
.........................................................................................................................
....................................................................................................
...................................................................................
..................................................................................................................
.............................................................................................................
.........................................................................................
...............................................................................................
......................................................................................................
......................................................................................................
01
02
03
04
05
08
10
13
15
16
17
19
19
20
21
24
25
26
27
28
29
30
31
32
33
33
34
This manual covers the following VOYAGER models:
1) VYDVD7: Voyager 7" DVD Player
2) VYDVD7-PM: Voyager 7" DVD Player/Monitor
3) VYDVD7-PP: Voyager 7" DVD Player/Player
4) VYDVD9: Voyager 9" DVD Player
5) VYDVD9-PM: Voyager 9" DVD Player/Monitor
6) VYDVD9-PP: Voyager 9" DVD Player/Player