Waeco mobitherm MO-5-12 User manual

Type
MO&l
2
Type
MO-9124
Installation and Operating Instructions


Preconditions for functioning of the Car-Oven
Operation requirements for the Car-Oven
Power supply
12V
DC for Type MO-5-1 2 and 24V DC for Type MO-9-24.
Secure with a fuse of
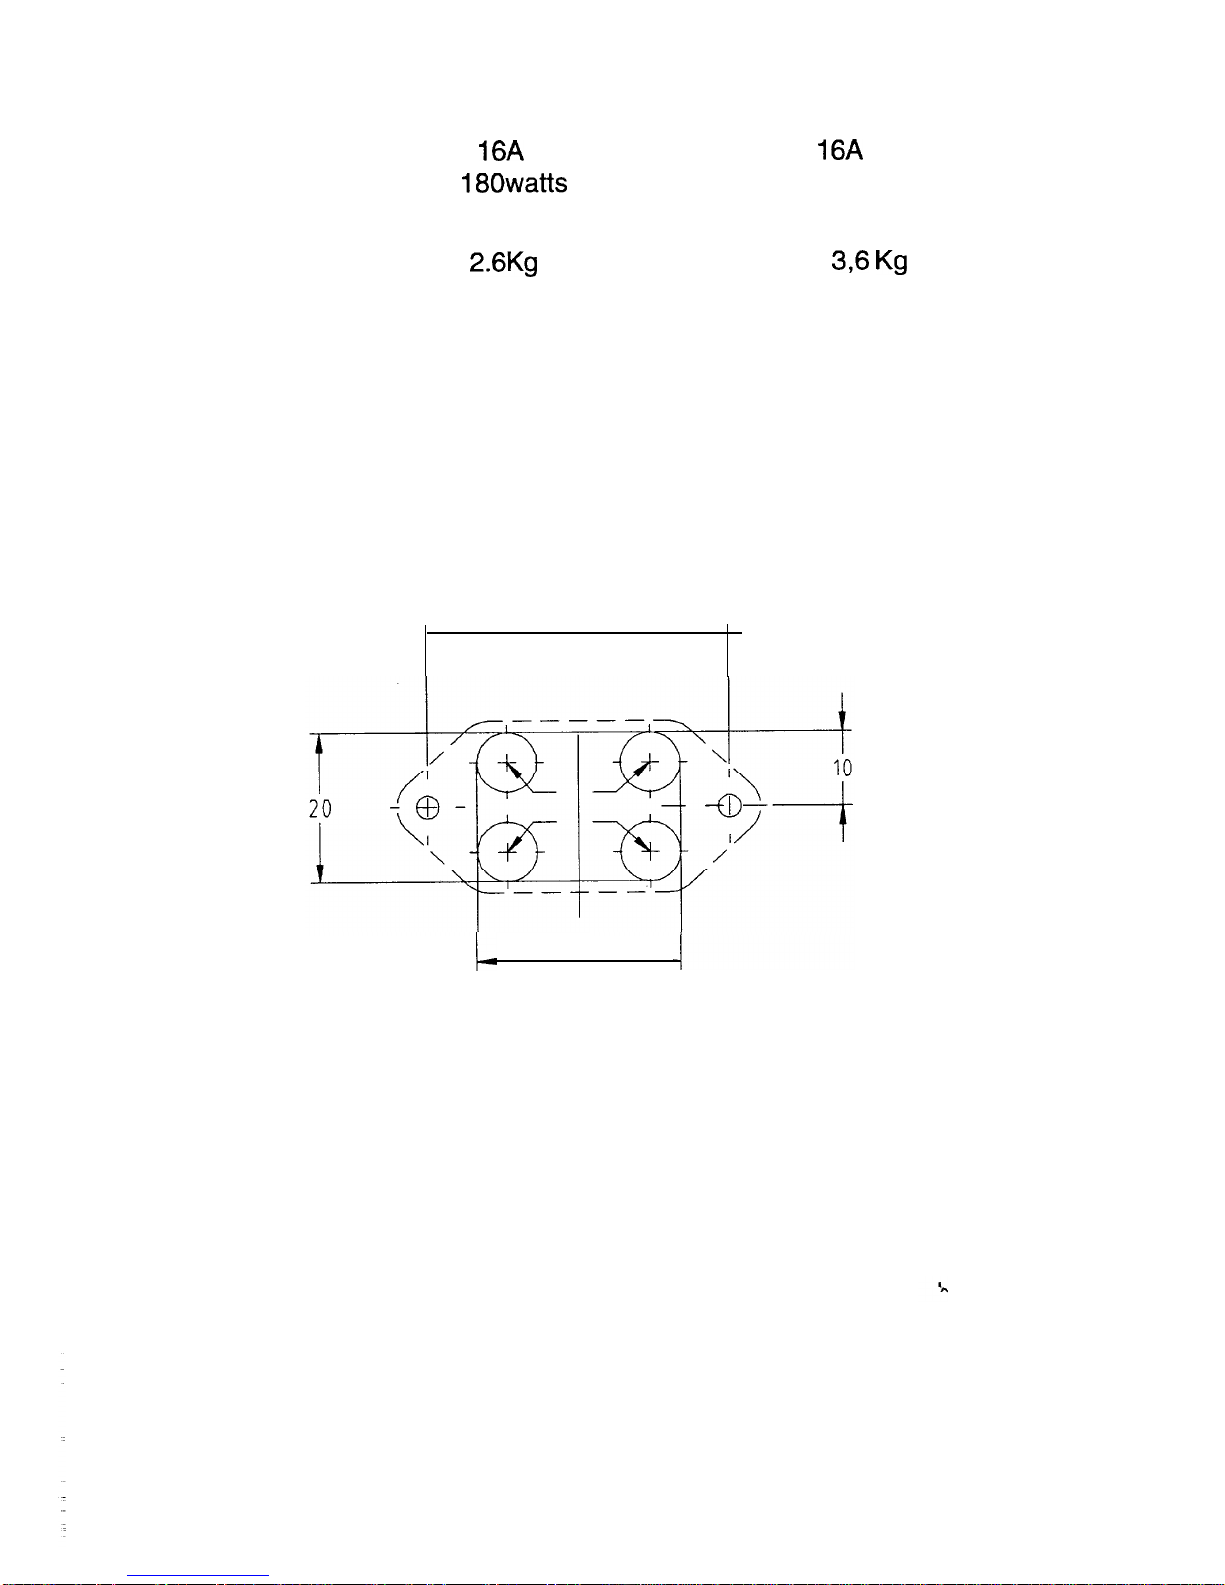
16A:
Car-Oven is not constructed for commercial usage.
Car-Oven with power cord
Grill shelf, baking tray
Delivery kit
f
Flush mountable plug
’Manual
Required tools and installation materials
Following material is required depending on Required tools:
way of installation:
d
-
Measure, Marker pen, Screwdrivers
-
2 different coloured wires with 0
2,5mm2
for electrical connection to the plug
-
Drilling
maschine,
Set of drill bits
-
Small Saw-blade
-1
fuse16A
-
Cable lug, Cable binders, Insulation tape
-
Crimping pliers, Soldering iron, Solder
Jnstallation
of plug
Safety instruction
A
I
It is recommendable to connect an Because of the risk of short circuits,
.
additional fuse to the positive power, always disconnect the negative pole
supply. In case of damage of the of the battery before starting work.
cables or short-circuit the fuse will In the case of vehicles with a
supple-
protect against further damages. mentary battery, also disconnect this
Place the fuse as close to the battery
negative pole.
as possible. Caution! On disconnecting the
Improper cable connections may negative pole of the battery, all the
result in short circuits which can volatile memories of the convenience
cause:
electronics will lose their stored data.
-
cable fires
Depending on the vehicle’s equip-
- triggering of the
airbag
ment,
the following date may have to
-
damage to electronic control
equip-
be reprogrammed:
ment
Radio code, clock, Timer, Board
-
failure of electrical functions
(blink-
computer, Seat position
ers, brake lights, horn, ignition, Instructions on how to reset these
lights). can be found in the relevant operating
instructions.
3

Safety instructions
Connecting cable
_
0
Battery
.
-
If cables have to be inserted through
-
If possible battery connect the
Car-
metal walls or other sharp-edged
O
Oven to a second (not starter
materials, use a cable duct or cable battery), because the starter battery
bushes!
may be discharged by the oven. It
-
Do not lav cables loose or with
sham
might happen that you can’t start the
bends on’electrically conductive
’
materials (metal)!
-
Do not pull the cables!
-
Do not lay 230V mains cable and
12/
24V DC cable together in the same
cable duct!
-
The specified minimum cable
cross-
section must be complied with!
-
Secure cables properly!
-
Lay cables in such a way that no
one can trip over them!
-
Lay cables in such a way that they
are not exposed to the risk of
damage!
-
For
electricial
connection take
2 different coloured wires to avoid
any false connection.
engine of the vehicle due to weak
battery.
-
Take care regarding sufficient
capacity of battery. Min. capacity
44Ah at
12/24V
batteries.
Length and diameters of Cables
-
The diameter of a cable with 5 m
0
length must be 0
2.5mm2
using a
12/24V
battery.
In case longer cables are used the
diameter has to be adapt accordingly.
Instruction for installation of plug
Before installation please pay atten-
tion to following points:
0
-
Check free space behind the
cockpit before drilling holes at
intended location of the plug.
-
Use the installation pattern of the
plug on page 8.
Fig. 1
4

+
Glue the pattern to the place the plug
will be installed.
+
Drill holes 0
8.0mm,
see fig. 2
+
Saw with the small saw-blade from
drilling hole to drilling hole.
+
Put in the plug and mark the screw
holes.
4
Remove the plug and drill holes for the
two 3mm screws.
+
Prepare cables with cable lugs etc. but
do not connect to battery yet.
+
Install the fuse to the positive power
cable as close as possible to the
battery.
+
Cut the insulation of the cables and
wind the fine wire and solder to the pins
of the plug (fig. 3).
+
Connect the positive (battery +) cable to
the battery first and afterwards the
negative (battery -) cable.
+
Put in the plug and fix the screws.
I
Fig. 4
5

Operation of Car-Oven
Location of Car-Oven
A
Before final mounting please read
-
The place the Car-Oven is located
should
be even and horizontal.
-The Car-Oven must be protected
against moisture.
-The Car-Oven gets hot during use.
Keep safety distance to other
objects/ parts of vehicle.
Description
1. Switch for top/bottom heater
1 a. Switch for top heater
1 b. Switch for bottom heater
2. Timer
3. Grilling shelf
4. Baking tray
+
Before first usage of Car-Oven please
clean the interior space with a moisten
dishcloth.
Safety instruction for operation of Car-Oven
-
The metal cover of the Car-Oven
-
Don‘t heat meals etc. in closed tins.
I
.
gets hot during operation
Attention!
Danger of explosion.
-
Don‘t store any objects which may
-
Check temperature before consume
burn like journals etc. in case the the meal.
Car-oven is switched on
uninten-
tional.
-
Tins and cups etc. used in the
Car-
Oven might be
very
hot. Attention!
-
Use plates, cups etc. which with-
stand temperatures up to 200
“C.
-
While preparing meals for babies
check temperature to avoid any
injuries.
-
Dry compartment of Car-Oven after
use in case their occurs condensa-
tion.
6

Operation
+
Place the meal on the grilling shelf or
the baking tray and close the glass
door.
+
Select heater element (top
$!!
or
bottom
$
or both
#
) depending on
meal to be prepared.
+
Select heating time and turn the control.
The Car-Oven starts operation.
+
After timer expired, the Car-Oven
switches off automatically by giving a
bell signal.
Maintenance
0
-
For cleaning the Car-Oven use a
moisten soft dishcloth. Don‘t use
0
aggressive chemical cleaning soaps,
alcohol etc.
-
Don‘t put the Car-Oven into water for
cleaning
-The Car-Oven can be opened on the
back side to pour small crumbs:
+
Disconnect power supply
+
Remove screw and the crumb tray
+
Pour out crumbs and fix the crumb
tray again.
screw

Input voltage
Consumption
Volume
Weight
Technical data
12VDC
24V DC
16A 16A
at max.
180watts
at max. 350 watts
5 Litres
9 Litres
2.6Kg
396
Kg
,
.
Technical modification and availability reserved
LO
13
27
This manual suits for next models
1
Table of contents
Popular Oven manuals by other brands

CDA
CDA SK511 Installation, use and maintenance

Pratica
Pratica Miniconv Claaoic HPE80 Installation and operation manual

Technika
Technika BELLISSIMO Instructions for use and installation

Whirlpool
Whirlpool OMR58CU1SX manual

Fontana Forni
Fontana Forni MARGHERITA 60X60 user manual

BOSCARE
BOSCARE TO5712TB-UL manual