WALDENT Airotor User manual

A supply of dry, clean and uncontaminated compressed air must be provided. Dirty and moist
air leads to a premature deterioration of the ball bearings. The turbine needs a drive pressure
of 2.2 bar for operation. Lubricate the instrument before using it for the rst time.
The instrument must be coupled to a 2-hole Borden hose. Verify the connection of the ducts
of the instrument with those of the tubing, join them on and screw the xing nut by using
only ngers.
• Do not use an unqualified bur.
• Diamond bur shafts should follow the demands of ISO standard diameter of 1.59 - 1.60mm.
• Do not use a bent, damaged, or a short handle bur.
Bur Specications
For LED - The air ows into the built-in micro-generator, converting the kinetic energy into
electrical energy for LED lights. The discharge of airow through the motor gives the
high-speed rotation cutting eect.
For Non LED -The discharge of airow through the motor gives the high speed rotation
cutting eect.
• Operating pressure: 0.25MPa - 0.3MPa (0.3MPa
preferred ).
• Rotation Speed: 350,000 rpm for Super torque
head & 280,000 rpm for standard head.
• Borden 2-hole connection
• Air consumption: 55L/min
• Noise ≤ 60db
• Operating pressure: 0.18MPa - 0.25MPa.
• Rotation Speed: 350,000rpm for Super torque
head & 280,000rpm for standard head.
• Borden 2-hole connection
• Air consumption: 34-37Nl/min
• Noise ≤ 60db
Technical data (For LED) Technical data (For Non - LED)
Operation Principle
Introduction
OPERATION MANUAL
Dear dentist, thanks for choosing our handpiece. We hope that you will be benetted greatly
with this new, economical and high-quality product. Please observe the following notes to
assure continuous trouble-free and safe product operation. In case of any problems related to
the product, please consult our local customer assistance.
1. Dental Airotor Handpiece - 1 piece
2. Cap wrench - 1 piece
3. Operation manual
4. Chuck - ( if screw - type chuck )
Package Content ( For Non - LED )
1. E- generator integrated LED dental handpiece - 1 piece
2. Cap wrench - 1 piece
3. Operation manual
4. Chuck - ( if screw - type chuck )
Package Content ( For LED )
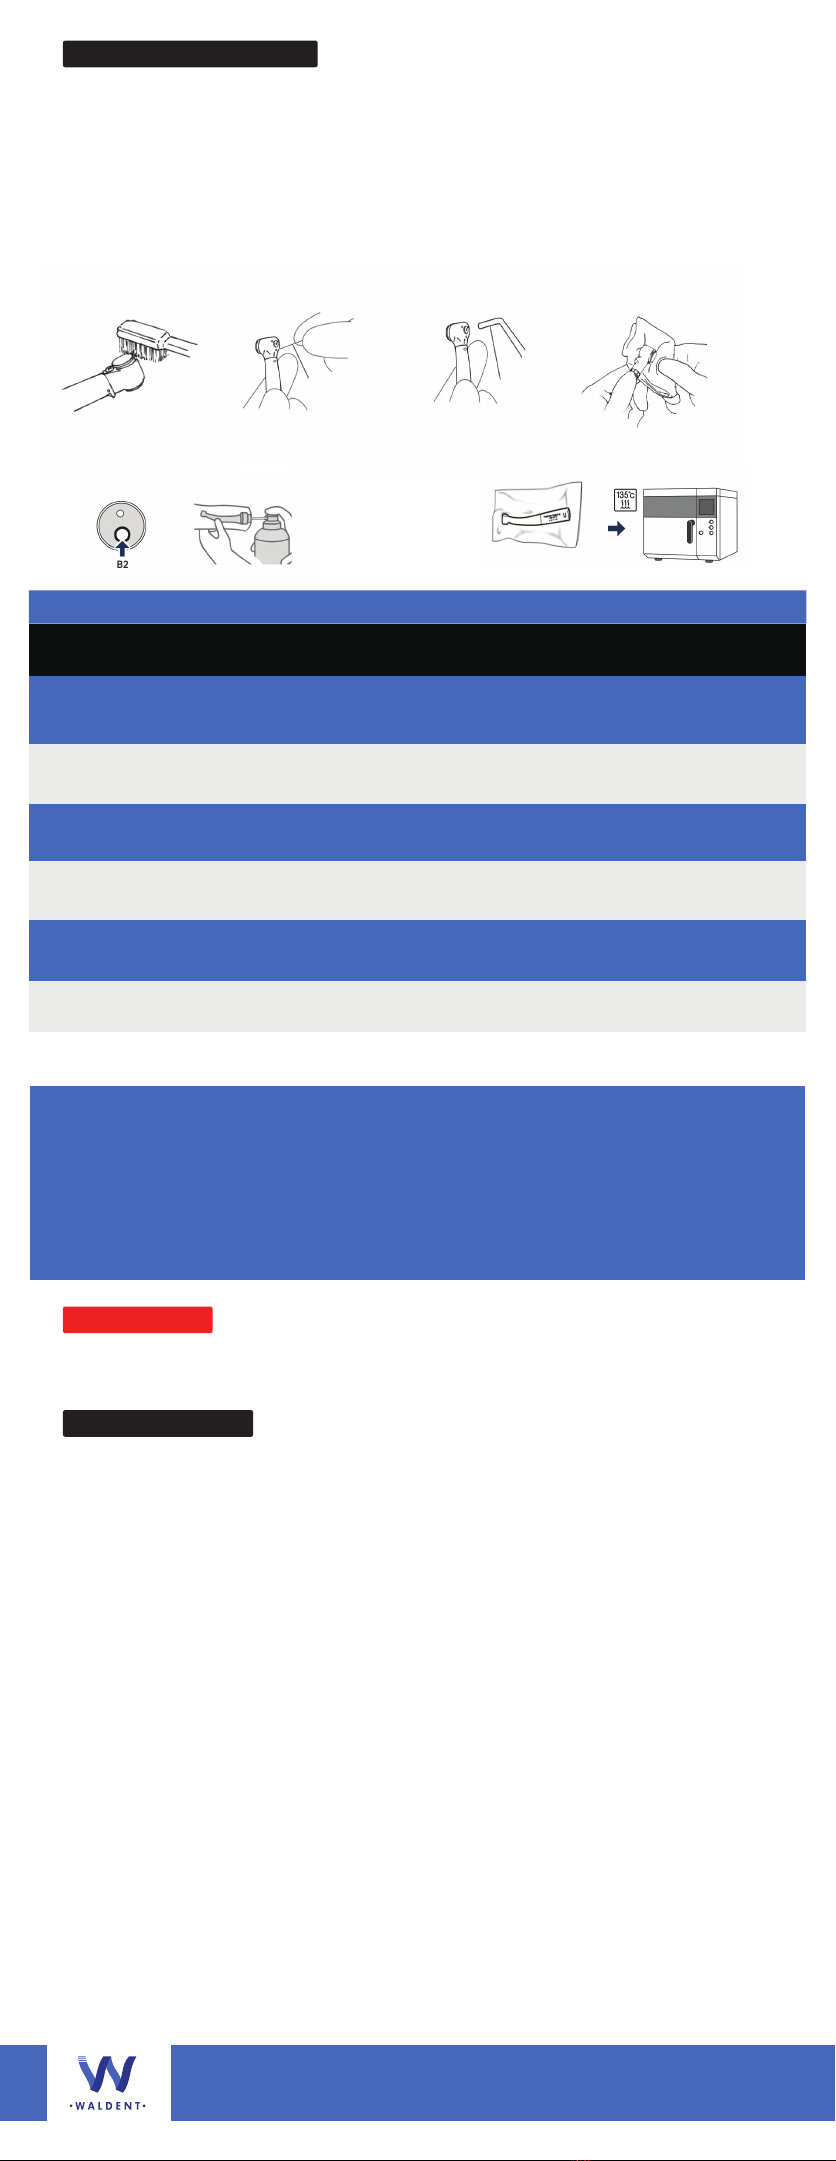
Connection of Units
Screw type chuck (conventional chuck)
Bur removal: Mount the chuck wrench with the knurled knob pulled out. Push the knob into the head and make a ¼
turn in the counter- clockwise direction. Bur is ready to be removed (do not turn the knob more than a ¼ turn).
Bur mounting: To mount a bur, turn the knob in the clockwise direction with the knob pushed into the head.
Push type chuck
Bur removal: Press the push button in the head cap with tip of thumb to click, and remove the bur.
Bur mounting: Insert the bur into the head until it stops (1-2mm deep approx). Press the push button and further insert
the bur all the way into the head until it stops.
Cautions
Mounting and Dismounting burs
• Do not run the handpiece with the bur not fully inserted; bearings may fail prematurely due to poor bur concentricity
and resultant vibration.
• Never run a handpiece without a bur.
Cautions
• In case of cutting procedures having heavy vibrations such as in crown removal, there may be a case where it
becomes difficult to remove the bur. In such a case, pull out the bur with pliers while pushing the push button with
the wrench.
Cautions
• Do not exceed the recommended airpressure. This is important to prevent higher
speed which could causes breaking of the bur and premature bearing failure.
Airotor
Dental High Speed Air Turbine
Push - Type Chuck Screw - Type Chuck
Hold down the push
button.
Insert the bur
TM

• Uncouple turbine from hose. Remove mill or diamond bur.
• Clean up the external part using 70% hydrated ethyl alcohol or any other disinfecting agent without having ammonium
or acid basis or chlorine.
• Do not immerge the handpiece in disinfection baths.
• Lubricate the turbine before each sterilization cycle. Handpieces which are not subject to a sterilization process must be
lubricated before each work cycle (in the morning, at noon, and evening).
• Improper care and lack of maintenance may lead to a premature wear and failure of the handpiece. Sterilize the
handpiece and bur changer in autoclave up to 135˚C. Autoclave for 20 minutes at 121˚C and 15 minutes at 135 ˚C;
withdraw handpiece from autoclave after the sterilization process is over.
Turbine maintenance and spray
Cartridge Replacement
1. How to remove a cartridge:
Mount a dummy bur in the chuck. Turn the head cap counter clockwise with the head cap wrench, and remove the head
cap. Push up the dummy bur, and the cartridge is easily removed from the head.
2. Mounting cartridge
Align the small pin in the cartridge with the slot in the handpiece head, and insert the cartridge into the head. Mount and
screw in the head cap with fingers till tight. Further tighten with the head cap wrench.
Warranty
1. This product is warranted against manufacturing defects for 6 Month from the date of effective delivery of the product.
The cartridge is warranted for 90 days while bearing is excluded from warranty.
2. The warranty is limited to repair or replacement of parts having manufacturing defects duly evidenced by the
manufacturer or by the authorized technical assistance network.
3. This warranty does not include the repairing of faults due to non-observance of use and maintenance instructions,
tumbles or beats, improper storage, action of natural agents and technical assistance carried out by non- authorized
personnel.
4. This warranty would cease as per the normal course of the validity terms, if alterations are introduced in the product or
use of improper fittings and if technical assistance is carried out by non-authorized personnel.
5. The repair or replacement of parts within the warranty period will not extend the original validity terms of the warranty.
6. This warranty is limited to the repair or replacement of defective parts only.
7. The parts replaced during the warranty period belong to the company and users must not claim to retain the damage /
defective parts.
8. Charges resulting from transport of parts of the product will be the customer’s responsibility.
9. This warranty is valid in the country where the sales documents were permitted.
If the above methods do not resolve the problem, please contact the manufacturer.
Noisy
Problem Reason
Exceptional issues and their solution
Solution
Light is dim or does
not emit light
Poor power
Cannot hold the bur
Leakage
Connections with
chair is not proper
1. Bearing damaged
2. Curved bur
3. Cap without cushion
1. The generator or LED is damaged
2. Un-used for a long time
1. Foreign body blocking the hole in the head
2. Chair exhaust pipe plug is not suitable
1. Bur is not standardized
2. Spindle is damaged
1. Connection is not well tightened
2. O- ring is damaged
1. The chair joint is damaged
1. Change bearing or bur
2. Put new washer
1. Change generator or LED
2. Will work if adjusted to 0.4MPa operation
1. Use a file into the air holeto clean
2. Vent the air to the vent hole
1. Change the bur
2. Change the spindle
1. Proper connection should be established
2. Change plug O-ring
1. Change chair connector
The threads in the head are very ne. Do not turn the head cap with the wrench from the rst turn. Use of other company’s
cartridge may void the warranty of the handpiece.
Cautions
Clean the spray hole
with a wire
Cleaning Disinfection
Clean the spray hole with
3-way syringe
Use a soft cloth soaked in
disinfectant
Lubrication Sterilization
2-3 Sec.
Waldent Innovations Private Limited
Website : www.waldent.com
Autoclave Pouch
TM
Table of contents
Other WALDENT Dental Equipment manuals
Popular Dental Equipment manuals by other brands

Eighteeth
Eighteeth Fast-Pack user manual

KaVo
KaVo MASTER lase Short instructions for use

Pelton & Crane
Pelton & Crane Spirit 3000 Series installation instructions

Jorvet
Jorvet J0453 user manual

Ivoclar Vivadent
Ivoclar Vivadent SR Ivocap operating instructions

Dentsply Sirona
Dentsply Sirona Midwest Stylus Plus operating instructions

Fona
Fona CDRelite B2272100 user guide

Mikrona
Mikrona MIGMA 200-E PLANNING / MOUNTING GUIDELINES

Saeyang
Saeyang Marathon Multi600 manual

Sirona
Sirona Sinius CS Installation requirements

KaVo
KaVo INTRA PROPHYwiz 181 P Instructions for use

Dentsply Sirona
Dentsply Sirona CEREC Omnicam AC operating instructions