Watchguard Force WGF-PTZC User manual

ALL-PACK1 Watchguard Force Camera Quick Start Guide - Version: WGF-PTZC-Q121
Setup (1)
WGF-PTZC Watchguard Force PTZ Camera Quick Start Guide
1. Download the “SmartLife” mobile application, available for both iOS and Android Devices.
On iOS devices, it can be downloaded from the App Store, and for Android, the Play Store.
2. Open the app once it is downloaded. You will be prompted to login, or create a new account
if you do not already have one. (Fig. 1)
3. Once you have logged in, select the “Add Device” button. (Fig. 2)
4. Select “Security & Video Surveillance”, and select “Smart Camera (Wi-Fi)”. (Fig. 3)
Before beginning, it is recommended to congure the camera before installation.
Box Contents:
• 1x USB Power Supply
• 1x USB Power Cable
• 1x Mounting Bracket
• 1x Camera
Optional (not included):
• Micro SD card - used for recording
Fig. 1 Fig. 2 Fig. 3
Visit help.c5k.info for more information and support
Setup (2)
5. If you have purchased an SD card (for recording footage), install it in the SD card slot on the
camera. (Optional)
6. Connect the camera to the included 5V power supply.
7. Wait until the light on the camera is ashing red. If it does not ash red after 2 minutes, press
and hold the Reset button until you hear 3 beeps. The Reset button is located next to the SD
Card Slot.
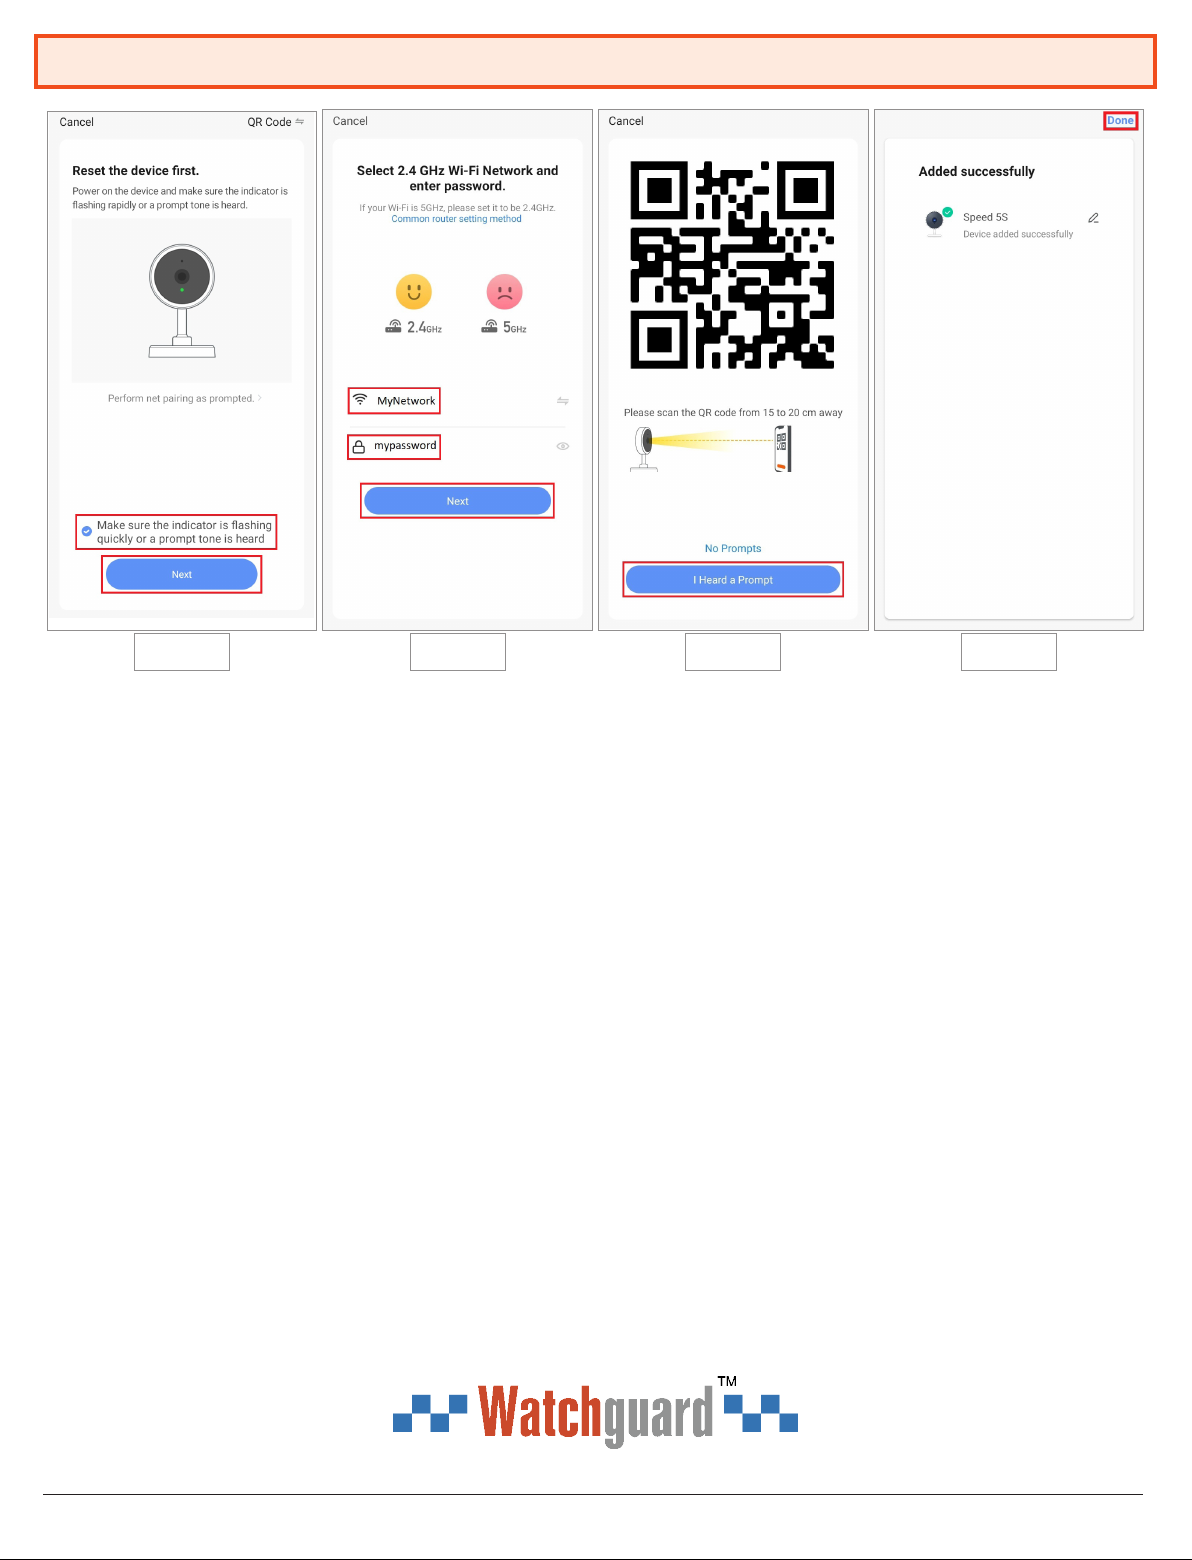
8. Tick the box on screen and select “Next” on the mobile application, to conrm that the light
is ashing red. (Fig. 4)
9. Ensure your phone is connected to the Wi-Fi network that the camera will be connected
to. Enter the Wi-Fi password of the network the camera will be connecting to, then select
“Next”. You may be required to turn on your location settings. (Fig. 5)
10.Hold the QR code that is displayed on the mobile application, up to the camera. Once the
camera scans the code, a noise will be heard and the LED on the camera will begin ashing
blue. (Fig. 6)
11.Select “I heard a Prompt” on the mobile application. The camera will now get congured,
this can take up to 2 minutes. If the camera fails to connect to the mobile application, repeat
steps 6 onwards.
12.Select “Done”. The camera will now be connected to the mobile application. (Fig. 7)
13.Using the included mounting bracket, mount the camera to a indoor location.
Fig. 4 Fig. 5 Fig. 6 Fig. 7
Table of contents
Other Watchguard Security Camera manuals


