WaterJet Classic WJ-700 User manual

Oral Irrigator
User’s
Guide
Model: WaterJet Classic
WJ-700

Thank you for selecting the WaterJet Flosser oral
irrigator.
CONGRATULATION!
The WaterJet Flosser oral irrigator cleanses your
teeth and gums, removing food particles from
between your teeth and reducing bacteria that can
lead to gingivitis and other periodontal diseases.
To maximize your benet from the WaterJet Flosser
oral irrigator, it is important that you read and
understand the information in this instruction
manual.

CONTENTS
12
11
10
7-9
6
4-5
Troubleshooting
Important Safeguards
Features
Operation
Maintenance
Warranty

IMPORTANT SAFEGUARDS
SAFETY:
DANGER:
READ ALL INSTRUCTIONS
BEFORE USING.
To reduce the risk
of electrocution:
When using electrical appliances, especially when
children are present, precautions should always be
followed, including, but not limited to the following:
Always unplug this product immediately after use.
Do not handle charger with wet hands.
Do not place in or drop into water or other liquid.
Periodically check the cord for damage.
Do not use the unit while bathing.
Do not place or store the unit where it can fall or
be pulled into a tub, sink, or toilet.
Do not reach for a unit that has fallen into water.
Unplug immediately.
WARNING:
To reduce the risk of burns,
electrocution, fire, or injury
to persons:
Do not plug this device into voltage system that is
different from the voltage system specied on the
device.
Never operate this product if it has a damaged
cord or plug,if it is not working properly,if
dropped or damaged, or dropped into water.
Do not direct water under the tongue, into the ear,
nose or other delicate areas. This appliance is
capable of producing pressures that may cause
serious damage in these areas.
Use this product only for it’s intended use as
described in the manual or as recommended by
your dental professional.
Do not use attachments not recommended by
the manufacturer
Never drop or insert any object into any opening
or hose.
Do not use while wearing any oral jewelry.Remove
prior to use.
Fill reservoir with warm water or other
mouthwash or prescribed solution as
recommended by your dental professional

SAVE THESE INSTRUCTIONS.
IMPORTANT SAFEGUARDS
Do not use where oxygen or aerosol sprays are
being administered.
Do not add soda, salt or any other abrasive
substance to the water in the reservoir as doing
so will damage your WaterJet Flosser.
If you have had oral or periodontal surgery in the
previous twelve months, contact your dentist prior
to use.
Do not use this product for more than 8 minutes
in each two-hour period.
Closely instruct and supervise children 8
years and above and individuals with special
needs in the proper use of this product
Children should be supervised to ensure that
they do not play with the appliance
There are no consumer serviceable parts in
this appliance and it does not require
maintenance

FEATURES
On/Off switch
Standard
Tip

Plug this device into voltage system that is specied
on the device. If the outlet is controlled by a wall
switch, be sure it is turned on.
Lift off the water reservoir from the base and ll with
lukewarm water. Place the reservoir securely back on
to the base.
To remove tip from the handle, press the tip
eject button placed on the side of the hande
and pull tip from handle
Removing the tips without pressing the tip eject
button can damage the handle.
Insert the jet tip into the opening on the handle. Push
down rmly! Jet tip should snap into place.
OPERATION
Preparing the Reservoir
Inserting and Removing Tips

Direct the jet tip into the
bottom of the sink basin
and turn the on/off
switch on the box
of the unit to the
“on” position. Bend over the sink and guide the jet to your teeth and
gums. Start with the back teeth and work toward the
front teeth. Glide tip along gumline and pause briey
between teeth. Continue until you have cleaned the
inside and outside of both the upper and lower teeth.
Keep your mouth slightly open to allow the water to
run into the sink.
Turn the unit off. Empty any water remaining in
the reservoir after use. Unplug the unit.
If you used mouthwash or other solution, after each
use, rinse the unit to prevent clogging by partially lling
reservoir with warm water and running unit with tip
pointed into sink until unit is empty.
Direct the stream of water towards the gumline at 90
degrees, so that contact is made where the tooth and
gums meet. Manoeuvre the ow of water from tooth to
tooth remembering to pause briey between each tooth.
Direct the water ow by turning
the ring at the top of the handle
Adjusting the Pressure Setting Recommended Technique
Placement in Mouth
OPERATION
ON
OFF
H
L
When Finished
Lean low over sink and place the jet tip in
mouth. Aim the tip toward teeth.
As soon as water begins to ow
from the jet tip, slide the
pressure control
slider to the
setting that you
intend to use,
that is comfort-
able to you
Lowest position allows
you to pause completely the water ow
You can temporarily stop the ow anytime by moving
the pressure control switch at the lowest position
First time use:
Adjust pressure control at maximum pressure, point
the handle into sink and turn on the device

Place the periodontal
tip in contact between
teeth and the
gumline. Lean the soft
tip against a tooth at a
45-degree angle and
gently place the tip
under the gumline,
into the pocket. Start the irrigator by setting it at the
lowest pressure and clean by gently following
gumline, inserting the periodontal tip in between
teeth. Continue tracing along the gumline to massage
the gums and safely deliver solution into the gingival
pockets below the gumline.
Use the Orthodontic
Tip to simultaneously
brush and rinse
hard-to-reach areas
around braces. Start
on the last molar
(back tooth). Place tip
at 90-degree angle to
the tooth at the gumline. Gently glide tip along
gumline, pausing briey to lightly brush area between
teeth and all around orthodontic bracket, before
proceeding to the next tooth and outside of both the
upper and lower teeth. Continue process until you
have cleaned the inside.
Lean your head over
the sink. Glide the
pressure button to
the lowest setting.
Start the irrigator
and place the
tongue cleaner at
the back of your
tongue and move it
forward to clean your tongue. Repeat to cover entire
tongue. Set the pressure to the lowest setting and
adjust to a higher setting for more water pressure as
it feels comfortable.
SPECIAL ACCESSORIES
OPERATION
Periodontal Tip
Tongue Cleaner Tip
Orthodontic Tip

MAINTENANCE
Make sure to throw out the water inside the tank, and
run the appliance for 2 to 3 seconds to drain the water
after usage. Otherwise bacteria could collect in the
remaining water.
Reservoir may be washed with soapy water. Before
cleaning, unplug from the electrical outlet. Wash the
dirt off from inside using a brush or similar, and wipe
off with a cloth.
There are no consumer serviceable parts in this
appliance and it does not require maintenance
Wipe the exterior when necessary with a soft cloth and
mild non-abrasive cleanser.
Do not submerge the unit in water or any other liquid.
Dry the reservoir when not using for a long period.
Rinse after using with mouthwash

PROBLEM
Jet Tips and
Tongue Cleaner
Leakage between the tip
and handle knob
Tip not fully engaged
Remove tip and reinstall
Periodontal Tip
Tear in soft tip Tip is worn Replace with new tip
Base
Hose tho the handle leaks Damage to the hose
Can be replaced by authorized
service center or contact our
company for a self service repair kit
Reservoir leaks Missing reservoir value or reservoir
valve is upside down.
Replace reservoir valve.
Turn valve right-side up
Inadequate pressure Reservoir not positioned properly Re-position reservoir. Press down
rmly on the reservoir.
Unit doesn’t start Motor not running Be sure outlet is fuctioning:
test with another appliance (check
electrical reset button and/or wall
switch)
CAUSE CORRECTIVE ACTION
TROUBLESHOOTING

WaterJet will repair or replace (at our option) your unit
free of charge for 24 months from the date of
purchase if the appliance is defective in workmanship
or materials.
This guarantee does not cover: damage due to
improper use, normal wear or use as well as defects
that have a negligible effect on the value or operation
of the appliance. The guarantee becomes void if
repairs are undertaken by unauthorized persons and if
original WaterJet parts are not used.
To obtain service within the guarantee period, hand
in or send the complete appliance with your
purchase receipt to an authorized WaterJet
distributor/customer service centre in your country.
Purchaser is responsible for all postage and freight
charges and any other expenses incidental to
claiming against this Warranty.
WARRANTY
WaterJet
600 W Santa Ana Blvd Ste 114A PMB 224
Santa Ana, CA 92701, USA
Made in China
www.waterjet-osser.com
Table of contents
Popular Personal Care Product manuals by other brands
Madeli
Madeli IMAGE Slique IM-IM2036-00 Specifications, Installation and User’s Guide

DURAVIT
DURAVIT LM 7820 Mounting instructions
ConvaTec
ConvaTec ESTEEM + Soft Convex How to use
Braun
Braun Oral-B PRO1 manual

Trisa electronics
Trisa electronics 1713.47 Instructions for use
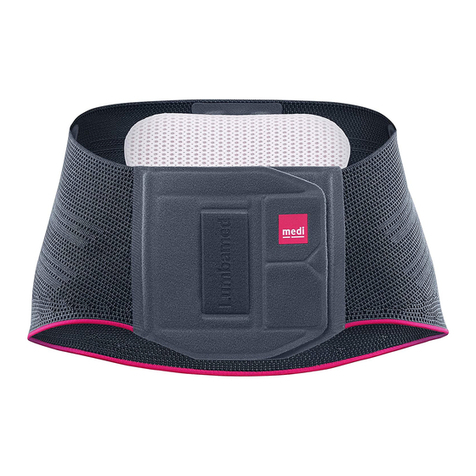
medi
medi Lumbamed plus Instructions for use
