Waters Elements Matt User manual

Elements Matt
Fitting Instructions

Foreword...
Thank you for purchasing a Waters Elements
Freestanding bath, It will give you many years of
peaceful relaxation, and we hope you don’t just have
a bath, you Love your bath...
Prior to installation
Please ensure that your plumbing system is adequate
and that you have sufficient space to complete the
installation.
Please Note:
We recommend that you employ a suitably qualified
plumbing professional to complete the installation of
your new bath. We can not accept responsibility for
poor or incorrect installation. Please keep these
instructions in a safe place for future reference.
Seb Waters
www.watersbaths.co.uk

Unpackaging...
Step 1
Carefully remove the box from the wooden crate
ensure you are extra careful when dismantling the
wooden crate. Lift the box carefully over the top of the
bath.
Carefully unwrap all the shrink wrap and foam
protection from around the bath. Remove all
packaging from the working area.
1,
www.watersbaths.co.uk
8mm Self Drill
Screws x2
8mm Self Drill
Screws x2
8mm Self Drill
Screws x2

www.watersbaths.co.uk
Position...
Step 2
Once unwrapped, carefully check the bath to ensure
it is perfect condition before undertaking installation.
For biggest impact we suggest that bath is located a
minimum of 150mm away from any wall
Locate the bath in its intended position and draw
around the lower outer edge and mark the waste
location with a pencil. Access to the waste and any
isolation valves should be considered.
3,
150mm 150mm
150mm
Wall
2,

www.watersbaths.co.uk
Levelling...
Step 3
With the bath in it’s intended position use a large
spirit level to check that it is level on both the
horizontal and vertical plains. Only if the bath is level
will all the water drain to the waste outlet.
Ensure you allow for any variation of the floor surface
and that the bath has been levelled in its intended
final location.
4,

www.watersbaths.co.uk
Waste...
Step 4
In most instances the waste will have to be recessed
into the floor and connected using a flexible fitting.
Once the pipe work is completed and ready to
receive the bath we recommend raising the bath on a
number of blocks – this will allow working access for
you to connect the waste to the underside of the bath.
Please be careful the bath is secure as to not hurt
yourself or damage the bath.
Once tight add silicone, remove the blocks and lower
the bath into position, ensuring that the pipe work is
not damaged.
5,
www.watersbaths.co.uk
Remember you do not need to fit your bath directly over the soil pipe. It can be positioned
anywhere within the shaded area.
Trap
Plug hole
Flexible pipe
Connector
safe area
Soil pipe

www.watersbaths.co.uk
Fixing...
Step 5
Before final fixing check that the bath is level and
connected to the plumbing system, by adding water
and ensuring it drains away adequately leaving no
puddles and that there are no leaks.
Once checked, half fill the bath to ballast it before
securing it to the floor.
Apply silicone adhesive evenly between the base of
the bath and the floor filling the 1-2mm gap.
10-12 Hours
6,

www.watersbaths.co.uk
Warranty
& Guarantees
To demonstrate our confidence in the quality and reliability our products, all Waters Baths of
Ashbourne Baths are guaranteed to be free of defects in material and workmanship during use
by the original purchaser for a period of 20 years and bespoke paint finishes 2 years from date
of purchase.
Subject to the terms contained herein, Waters Baths will, at its discretion, repair or replace any
defective product, or refund the purchase price. In no event shall the liability under this warranty
exceed the original purchase price of the product. Waste kits and accessories are not covered
under this guarantee.
Exceptions.
The guarantee does not extend to:
-Damage caused by cleaning, maintenance, or installation performed other than strictly in
accordance with the information contained in the fitting Instructions;
-Damage caused by the use of strong chemicals in cleaning;
-Damage caused by the use of strong dyes or colourants
-Scratching, or staining of the finish over time due to water impurities or atmospheric conditions;
-Damage caused by extreme temperature conditions;
-Damage due to installation error, product neglect, misuse, or abuse, accident, or negligence,
whether caused by the purchaser, a contractor, or a service provider, or any other cause beyond
the sellers control.
Replacement.
Waters Baths of Ashbourne will replace or repair the installed defective products subject
to the following conditions:
-Any claim is made in writing to our office within 10 days of the problem being apparent;
-Any claim is by the original purchaser, this guarantee is not transferable;
-The product has been used in the manner that it was intended, this protection does not apply
to any products that have been misused in any way;
-The product must have been installed and cared for in line with our Installation and care instructions.
(See Installation and care Instructions for proper cleaning, maintenance, and installation
information.)
Making a Claim.
To file a claim, contact Waters Baths of Ashbourne through your supplying retailer or by writing
to us at Waters Baths of Ashbourne, Long Lane, Dalbury Lees, Ashbourne, Derbyshire, DE6
5BG. Please be sure to provide all relevant information along with supporting images regarding
your claim, including a complete description of the problem, the model name, size and any
bespoke finish applied to the product, along with the date and place of purchase. Also include
your original invoice. In order to assess any claim, we may have to inspect the product as installed
before removal and must be provided with access to the product upon request.
Except as provided herein, seller makes no guarantee of any kind, express or implied, with
respect to the product, its merchantability, or fitness for a particular purpose. Seller shall not be
responsible for any indirect, incidental, or consequential damages resulting from the delivery,
installation, or use of the product.
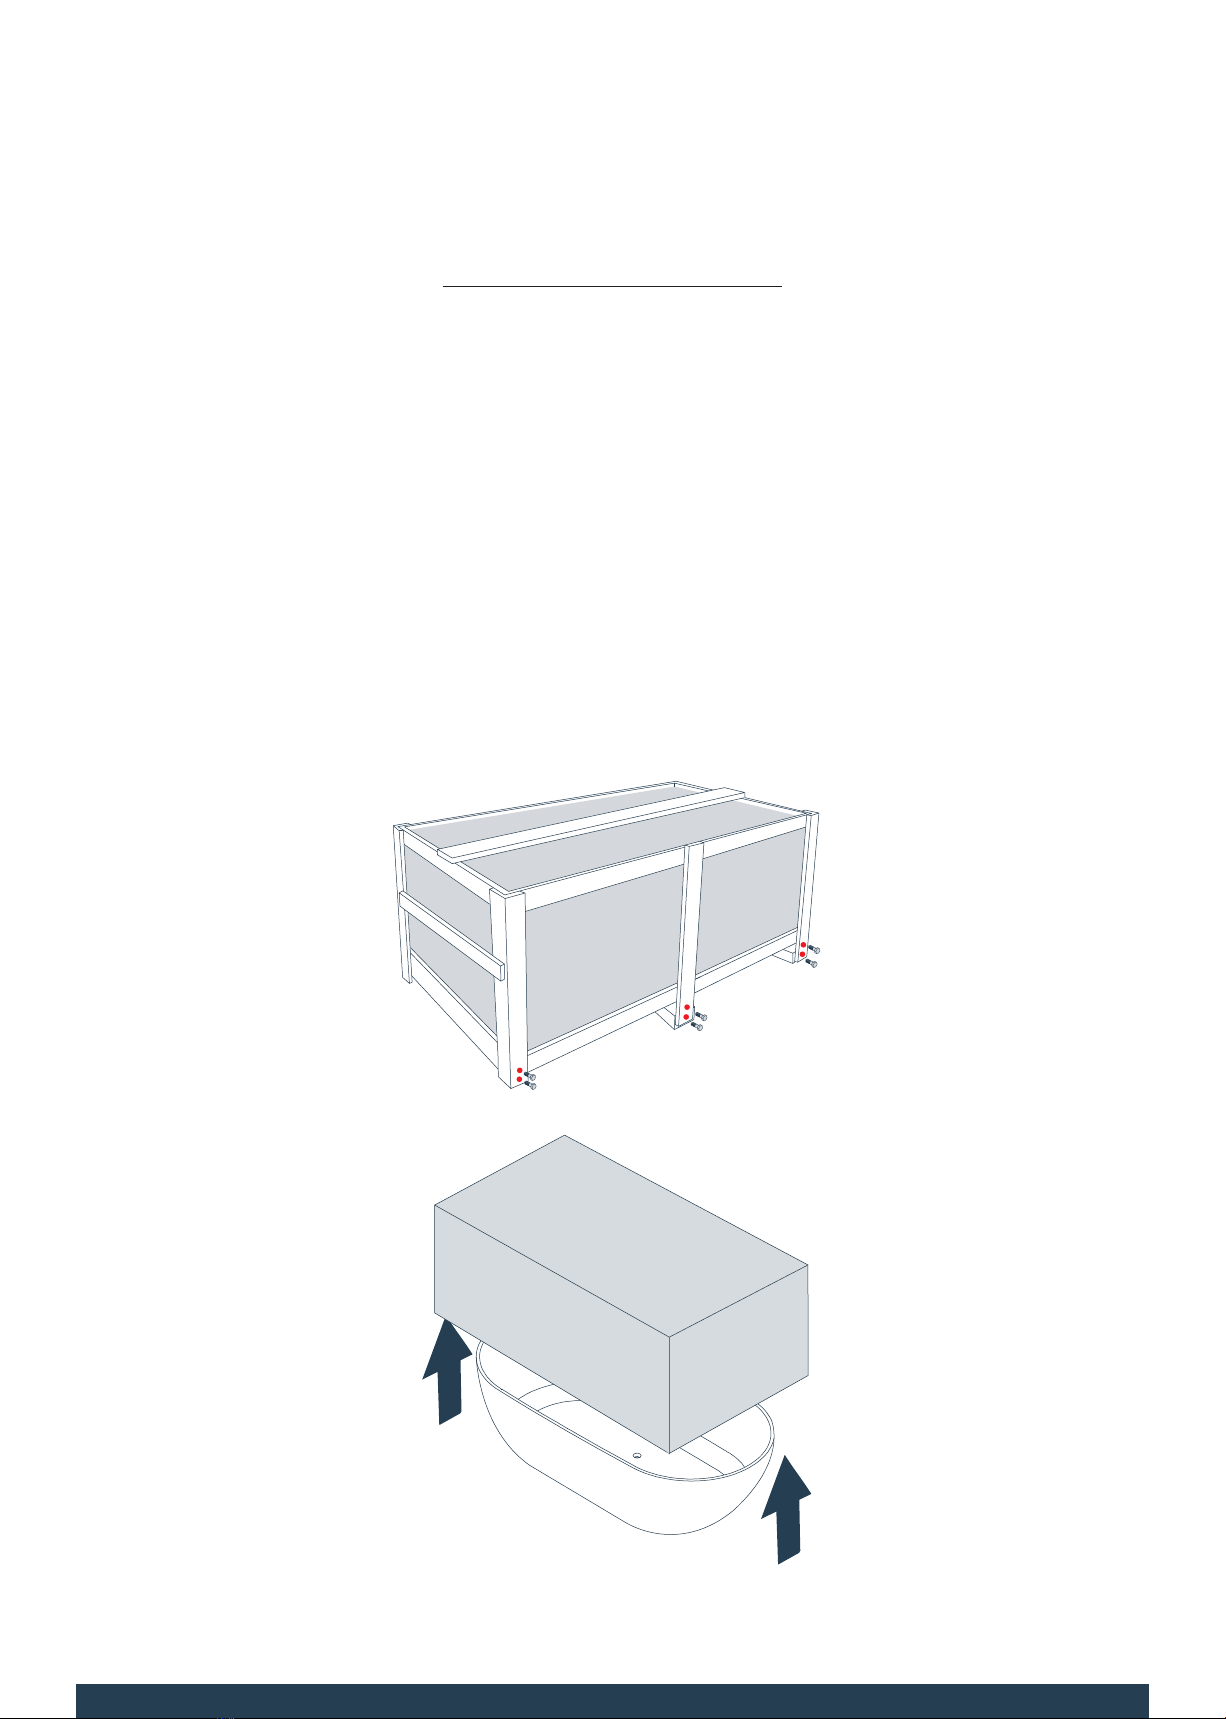
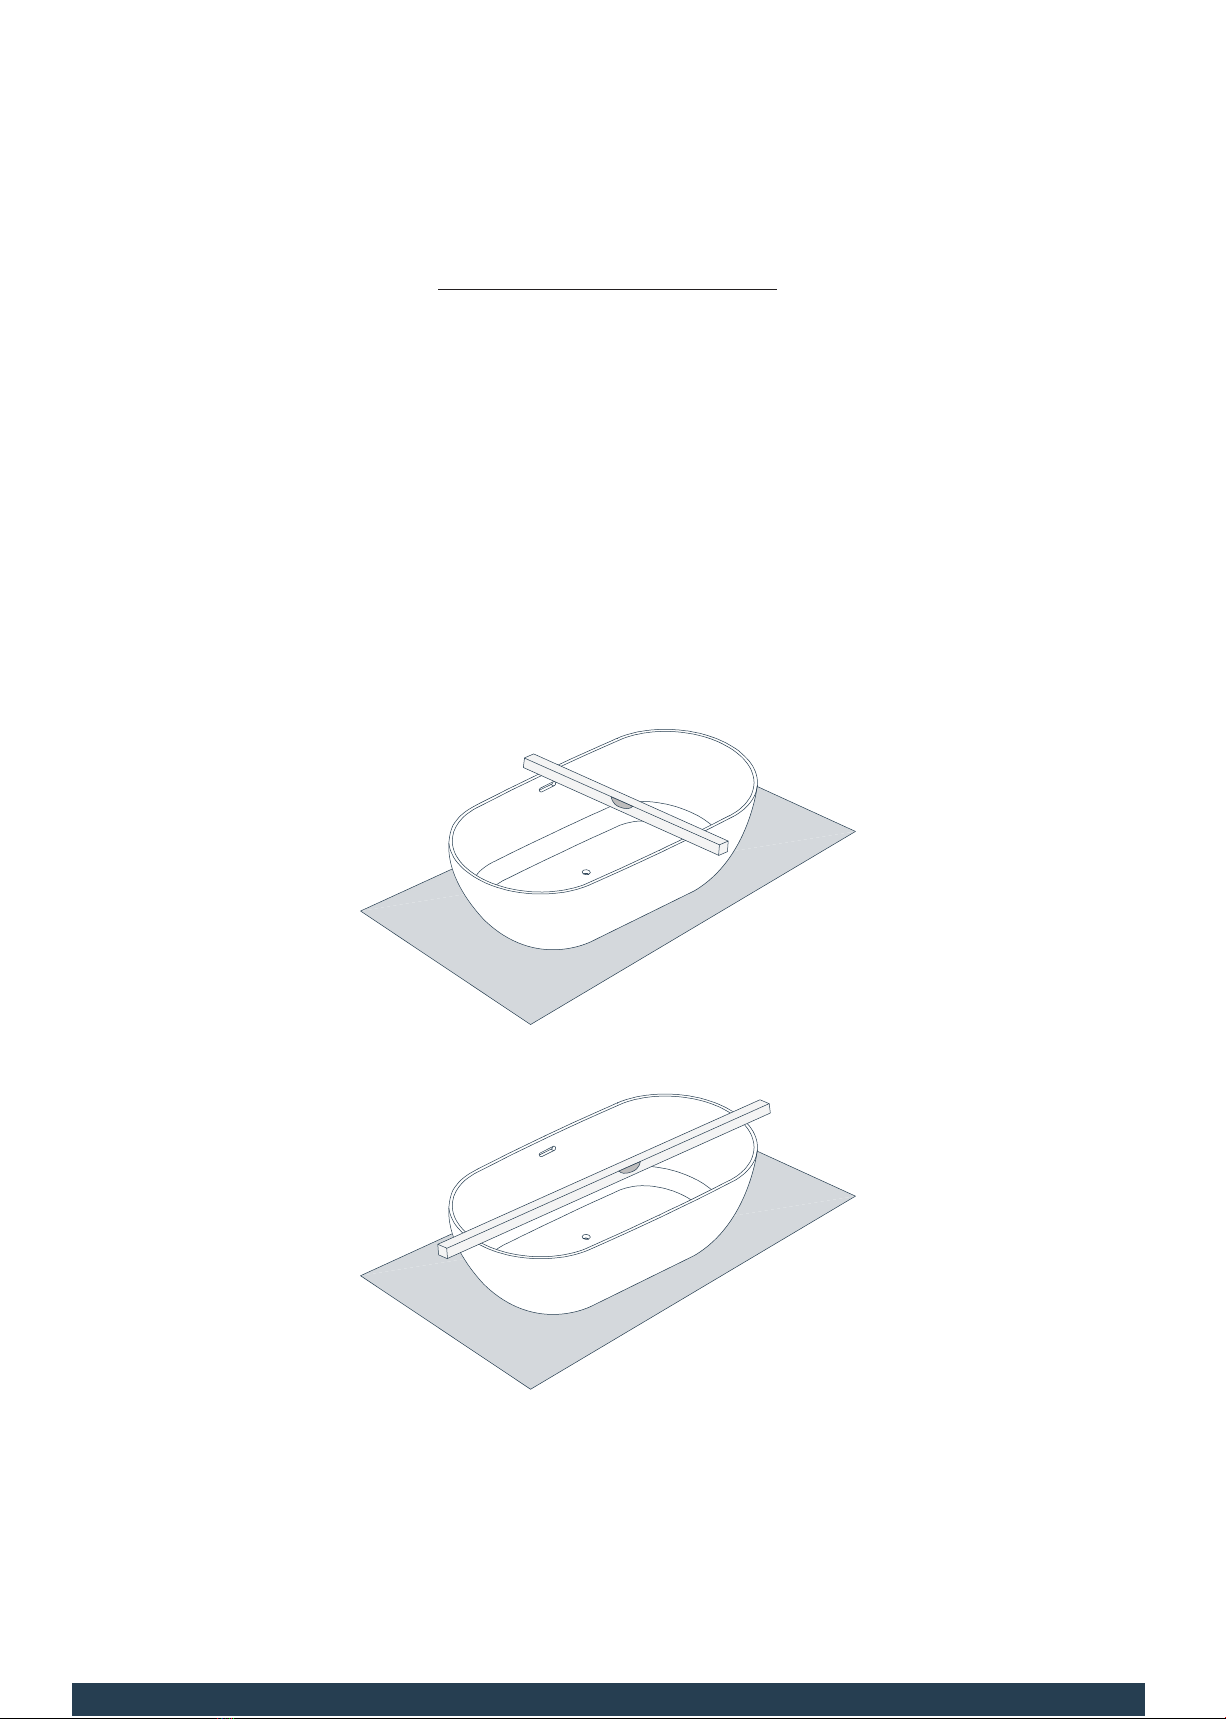
Before installing the bath please read our installation and care instructions. If you have any questions
please contact your supplying dealer or us directly on +44 (0) 1332 824166 or via email on

www.watersbaths.co.uk
Care Instructions...
Care Info
Thank you For your purchase. Please follow our simple
care guide to ensure your new bath will last a lifetime.
Rinse with warm water and wipe away any residue with a
damp clean lint free cloth.
Rinse with warm water add a little of the cleaning product
to the abrasive sponge and clean the entire interior area
taking care to dilute the cleaning product. Ensure it’s fully
rinsed away before leaving the bath.
Vigorously rub the affected area with the dry abrasive
sponge. If not removed add a drop of the cleaning product
to the sponge and continue. Never allow the cleaning
solution to dry, immediately remove it with water, and
ensure any residue is washed away.
Small scratches may be removed by following the stain
instructions or by lightly sanding the area with the super
fine wet and dry paper supplied in the care kit. Deep
scratches and chips can be repaired and your bath entirely
resurfaced by factory trained staff, bringing your bath back
to “as new” condition. Please contact us for information
about these services.
Bathing with bath bombs and coloured oil’s may leave
residue if they are left to soak for prolonged periods. Avoid
bathing with recently applied fake tanning products as
they can be difficult to clean and may result in factory
refinishing. Aggressive cleaning products and gels should
not be used in the bath as surface damage may result.All
cleaning products should be well rinsed and not left to dry.
Should you have any further questions please don’t
hesitate to contact us directly on: info@watersbaths.co.uk
or 01332 824166.
Everyday Care...
Periodic Cleaning...
Removing Stains...
Removing Scratches...
Things to Avoid...
Finally...

www.watersbaths.co.uk
Notes
& Drawings

www.watersbaths.co.uk
Notes
& Drawings

www.watersbaths.co.uk
Lawns Farm, Long Lane, Dalbury Lees,Ashbourne, Derbyshire, DE6 5BG.
Table of contents