Waterway Renegade User manual

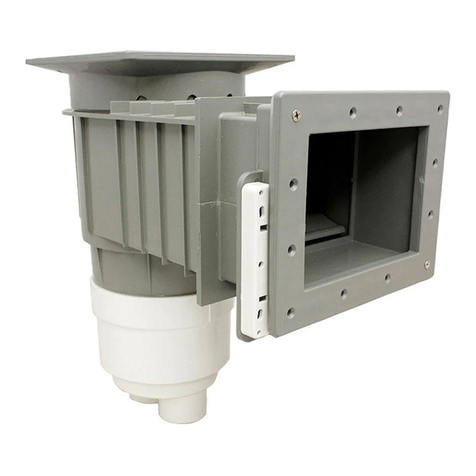
Renegade In-Ground Vinyl Liner Skimmer
Installation and Operating
Instructions
Part Number Description
540-8400 2ʺSockets
540-8420 11⁄2ʺNPT
540-8430 11⁄2ʺSockets
540-8440 2ʺ NPT
540-5720 2ʺ S Deep Basket
540-5700 2ʺ S Deep Basket Venturi
Part Number Description
540-8500 2ʺSockets
540-8520 11⁄2ʺNPT
540-8530 11⁄2ʺSockets
540-8540 2ʺ NPT
540-5710 2ʺ S Deep Basket
540-5730 2ʺ S Deep Basket Venturi
Table of Contents
I. Mounting Skimmer To Pool Wall ............2
Option 1 (Through Wall Mounting)..........2
Option 2 (Flush Mounting) ..................3
II. Operation Of Skimmer ........................4
III. Installation of Optional Equipment ..........5
VI. Winterizing Skimmer ..........................5
V. Trouble Shooting ..............................5
VI. Dimensions ....................................6
VII. Replacement Parts & Accessories ..........7
Wide Mouth
Standard

Section i: Mounting Skimmer to Pool Wall
A. For optimum skimmer performance, place the skimmer relative to water flow and wind directions.
B. The "Renegade" standard and wide mouth skimmers were designed to be mounted two different ways. Option 1
describes how to mount the skimmer with the throat extending through the pool wall and Option 2 explains how to mount
the skimmer against the outside of the pool wall. (a.k.a. flush mounting).
Option 1:Through Wall Mounting
1. If your pool wall has been prepunched and pre-drilled, then skip to step #5.
2. Cut out pool wall panel per the dimensions in the following table:
STANDARD RENEGADE WIDE MOUTH RENEGADE
Height
Min
Width Height Width
Max
711
/
16ʺ79
/
16ʺ 97
/
8ʺ 93
/
4ʺ93
/
4ʺ93
/
4ʺ177
/
16ʺ175
/
16ʺ
3. Slide the face of the skimmer through the opening and mark the location of the holes in the three (3) flanges.
(see Figure S-1 for Standard throat or Figure W-1 for Wide Throat)
4. Remove the skimmer and drill 7/32ʺ diameter holes in the locations you marked in step #3.
NOTE:
If this skimmer is being installed into a metal panel, then leave the flange spacers in place. If this skimmer is
being installed into a foam or wood panel between 11/16
ʺ
and 3/4
ʺ
thick, then remove the flange spacers by
squeezing the tabs together on the back side of the mounting flange and pushing until the spacer comes loose.
5. Insert the skimmer face through the cut out in the panel until the spacers or flanges rest flush against the outside of the
pool wall.
6. Mount the skimmer to the pool wall with the four (4) 11
/
4ʺlong phillips pan head mounting screws provided (Item #19).
Insert the screws from the inside of the pool through the holes you drilled in step #4 and screw into the skimmer flanges.
7. Mount the gasket (Item #10 for Standard or Item #22 for Wide Mouth) on the skimmer face by aligning the tabs on the
back of the gasket with the tab slots in the skimmer face and push into place. Install the Vinyl Liner according to the pool
manufacturer's instructions. (A silicone adhesive can be used to help hold the the gasket in place.)
8. Mount the second gasket ( Item #10 for Standard or Item #22 for Wide Mouth) to the back of the face plate (Item #9 for
Standard or Item #21 for Wide Mouth) the same way you put the gasket onto the face of the skimmer in step #7.
9. Tightly fasten the face plate/ gasket to the skimmer face by using the 11
/
4ʺphillips flat head screws provide (twelve (12)
screws for the Standard and sixteen (16) screws for the Wide Mouth, Item #8). Make sure to pierce the Vinyl Liner through
the face plate holes one at a time prior to inserting screws.
10. Cut out the Vinyl Liner along the inside edges of the face plate.
NOTE:
The screws secure through the following: (1) Face Plate, (2) Gasket, (3) Vinyl Liner, (4) Gasket, and into (5) Skimmer Face.
F
IGURE
S-1 F
IGURE
W-1
2
Renegade In-Ground Vinyl Liner Skimmer
Installation and Operating
Instructions
Min
Max Min
Max Min
Max

Option 2: Flush Mounting
1. If pool wall has been pre-punched and pre-drilled than skip to Step #7.
2. Cut out pool wall panel per the dimensions in the following table:
NOTE:
The screws secure through the following: 1) The face plate, (2) Gasket, (3) Vinyl Liner, (4) Pool Wall, (5) Gasket, and into (6) Skimmer Face.
CAUTION:
(1) Do not stress pipe at the port connections by lifting or moving the pipe after skimmer port connections have been made.
(2) Be sure to plug any unused skimmer ports with plastic style NPT Plugs provided (Item #23 for 2
″
NPT or #24 for 11
⁄
2
″
NPT). Failure to
do so will void the manufacturer's warranty. (3) If you need to pressure test the skimmer after installation, use Waterway's Pressure Test
Kit (Part Number 540-6500).
4. Using a 7/32″diameter drill bit, drill out the holes you marked in step #3.
5. Repeat step #3 bit instead of marking the skimmer mounting holes, Mark the location of the remaining holes.
6. Using a 9/32″diameter drill bit, drill out of the holes you marked din step #5.
7. Mount the gasket (Item #10 for Standard or Item #22 for Wide Mouth) on the skimmer face by aligning the tabs on
the back of the gasket with the tab slots in the skimmer face and push into place.
8. Secure the skimmer to the pool wall by using the four 1
1
/
4″ long phillips pan head screws provided (Item #19).
9. Install your Vinyl Liner by by following the pool manufacturer's instructions.
10. Push the second gasket (Item #10 for Standard or Item #22 for Wide Mouth) onto the back of the face plate (Item #9
for Standard or Item #21 for Wide Mouth) the same way you put the gasket onto the face of the skimmer in step #7.
11. Tightly fasten the faceplate/ gasket to the skimmer face by the 11
/
4″phillips flat head screws provided (twelve (12)
screws for the Standard and sixteen (16) screws for the Wide Mouth, Item #8). Make sure to pierce the Vinyl Liner
through the face plate holes one at a time prior to inserting screws.
12. Cut out Vinyl Liner along the inside edge s of the face plate.
3. Center the opening in the gasket (Item #10 for Standard or Item #22 for Wide Mouth) over the cut out in the pool wall
and mark the location of the four (4) skimmer mounting holes. (See Figure S-2 for Standard Throat or Figure W-2 for
Wide Mouth.
3
STANDARD RENEGADE WIDE MOUTH RENEGADE
Height Min Width Height Width
Max
711
/
16″79
/
16″ 97
/
8″ 93
/
4″93
/
4″93
/
4″177
/
16″175
/
16″
Min
Max Min
Max Min
Max

4
Section II: Operation of Skimmer
B
ASIC
U
NIT
FLOW ADJUSTMENT - To adjust the flow of through
the skimmer, move the flow control plate to close the
port to the pump to decrease flow, or move the plate
to open the port to the pump to increase flow through
the skimmer.
S
KIMMER
W
ITH
F
LOAT
V
ALVE
O
NLY
FLOAT VALVE OPERATION - The float valve assembly
is designed to prevent any air from entering the pump
line when the water level gets too low. If the water level
drops below the skimmer opening, or if water flow is
obstructed, the float inside the valve will automatically
close off the skimmer which will cause the skimmer to
draw its water supply of the the main drain line only,
thus preventing air lock in the pump. When the pump
is shut off, and the water level is corrected, the flow
valve will open back up automatically, allowing normal
skimming operation. To adjust the flow with the float
valve, slide the flow control plate, on the bottom of the
float valve, back and forth until desired flow is achieved.
S
KIMMER
W
ITH
F
LOAT AND
E
QUALIZER VALVES
E
QUALIZER
L
INER
- An equalizer line is used when you
have two or more skimmers plumbed into a common
suction line. The operation of the float valve is the
same, but since you have more then one skimmer con-
nected to the suction line, the equalizer line will help
prevent air lock in the pump.
S
KIMMER
W
ITH
V
ENTURI
The Venturi Skimmer may be operated simultaneously
with the normal skimmer function or with the suction
from the pump shut off allowing only Venturi powered
skimmer action.

A. Float Valve
1. Press the float valve gasket (Item #6), flat side up, into the groove at the bottom of the skimmer.
2. Place the float valve (Item #5) onto the gasket nd press to sea the gasket.
3. To adjust the flow through the skimmer, slide the flow control plate, on the bottom of the float valve, over the
hole to reduce the flow, or away from hole to increase flow.
Section III: Installation of Optional Equipment
B. Equalizer Valve (for part numbers 540-8400 and 540-8500 only)
1. Place o-ring (Item #13) into the o-ring groove on the bottom side of the equalizer valve.
2. Thread the equalizer valve (Item #12) into the front port of the skimmer.
3. Using the equalizer valve wrench (Item #11), tighten the equalizer valve until valve is seated. The o-ring is seated.
C. Face Plate Cover
1. Center the face plate cover (Item #7 for Standard and Item #20 for Wide Mouth) over the face plate and press
into place.
D. Vacuum Plate
NOTE:
The vacuum plate is designed to be used with two (2) different types of vacuum hoses. Depending
on what type of hose you have will determine which side of the vacuum plate will face up.
1. Remove the lid from the skimmer by unscrewing the two (2) screws and lifting the lid off the skimmer.
2. If you installed a float valve (Item #5), remove it by removing the basket then removing the float valve. Also, if
you installed an equalizer line or main drain, you must block off that port by turning the flow control plate (Item
#4) over that port. Replace the basket.
3. Place the vacuum plate ((Item #16) over the skimmer basket.
4. Fill your vacuum hose with water and slide it onto the vacuum plate.
5. Be sure to replace the lid and secure it with the two (2) screws when possible. Failure to do so could result in
serious personal injury.
Section IV: Winterizing Skimmer
1. Drain pool level well below the skimmer opening.
2. Plug BOTH ports with Waterway Plastic style NPT Plugs. (Item #23 for 2″NPT or Item #24 for 11⁄2″NPT)
3. Cover the top of the skimmer to prevent any rain/water accumulation in the skimmer.
Section V: Trouble Shooting
P
ROBLEM
C
AUSE
R
EMEDY
Pool surface not clean, inade-
quate skimming effect.
Skimmer basket full of debris, improper water
flow through skimmer, water level incorrect in
pool, poor water circulation.
Clean skimmer basket, open flow control
plate, raise or lower water level, increase
surface water circulation.
Pool surface clean, but bottom
is dirty.
Main drain obstructed, poor water circulation.
5
Clean main drain, increase circulation at
bottom of pool.
Open valve to 1/4 position.
Valve in off position.
Skimmer with Venturi Pump
not getting water.

6
Section VI: Dimensions

7810-0200.1108
I
TEM
P
ART
N
UMBER
D
ESCRIPTION
Q
UANTITY
R
EQUIRED
1 540-6490WW Square Lid with Waterway Insert 1
1ralloCerauqS0159-9152
3 819-4350 #8 x 5⁄8ʺPhillips Pan Head Screw 1
1etalPlortnoCwolF0746-9154
5 542-6200 Float Valve Assembly (Optional) 1
1)lanoitpO(teksaGevlaVtaolF0046-1176
7 519-9520 Standard Face Plate Cover (Optional) 1
8 819-6945 #12 X 11⁄4ʺPhillips Flat Head Screw 12 (For Standard)
1etalPecaFdradnatS0359-9159
2teksaGdradnatS0159-11701
11 611-4600 Wrench for Equalizer Valve (Optional) 1
12 540-6010 Equalizer Valve Assembly (Optional) 1
13 805-0224 Equalizer Valve O-Ring (Optional) 1
14 519-6560 Collar Extension Ring (Optional) 1
1ylbmessArooDrieW0559-05551
1)lanoitpO(etalPmuucaV0846-91561
1eldnaHhtiwteksaB0423
-24571
17a 542-9600 Deep Basket with Handle (Not Shown) 1
3recapSegnalFgnitnuoM0259-31781
19 819-0030 #12 X 11⁄4ʺPhillips Pan Head Screw 4
20 519-9540 Wide Mouth Face Plate Cover (Optional) 1
1etalPecaFhtuoMediW0559-91512
2teksaGhtuoMediW0259-11722
23 715-9910 2ʺ1gulPcitsalPTPN
24 715-1230 11⁄2ʺ1gulPcitsalPTPN
1)lanoitpO(tiKtseTerusserP0056-04552
1gnittiFelzzoNremmikSirutneV0169-24562
1gnittiFtroPteltuOeveelS0569-91572
Section VII: Replacement Parts and Accessories
Table of contents
Other Waterway Swimming Pool Filter manuals
Popular Swimming Pool Filter manuals by other brands

HEISSNER
HEISSNER F540-00 Instructions for use

Axiall
Axiall Accu-Tab 2000 P Series Installation and operating instructions

ARIONA POOLS
ARIONA POOLS ALBORAN Series Instruction and maintenance manual

Zodiac
Zodiac TITAN SERIES TP500 user guide

Bestway
Bestway FLOWCLEAR 58677 owner's manual

Evolution
Evolution A15TS Installation and operation manual

CMP
CMP POWERclean ULTRA Installation & operation

SMC Networks
SMC Networks AutoChlor SMC20TA instruction manual

Shott
Shott 2000 instruction manual

Zodiac Pool Systems
Zodiac Pool Systems andy AquaPure EI Series Installation and operation manual

Oase
Oase BIOsys Skimmer Directions for use

Jacuzzi
Jacuzzi L160C Owner's manual and installation guide