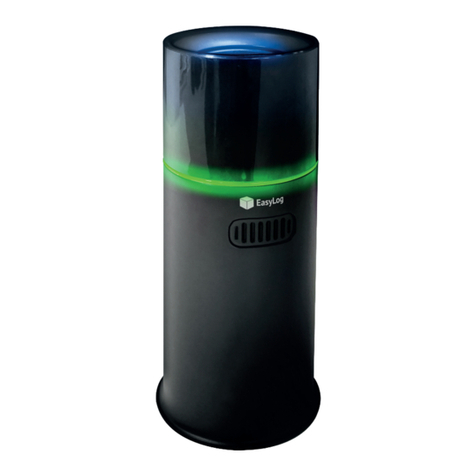
Watts Clever EW4006 User manual

WIRELESS
Energy Monitor
Monitor household electricity use
Instruction Manual EW4006

3
Fig. 2
Notes on Safety Parts and Usage
Caution
●Do not allow conductive materials such as rings, bracelets or keys to touch
the batteries, otherwise a short circuit may cause the batteries and / or
conductive material to overheat and cause burns.
●Do not connect any part of The WIRELESS Energy Monitor directly to the
electrical supply. The WIRELESS Energy Monitor Sensor Clips around the
outside of your existing electricity meter wire.
●Do not locate the Power Transmitter, Sensor Clip, its lead or the Energy
Monitor within reach of children.
●Do not locate any part of the product or its leads near heat sources such as
radiators, cookers, etc.
●Do not use outdoors, in a bathroom, near water or in areas subject to high
moisture levels.
●Do not let the Sensor Clip lead lie or hang where it could be pulled on or
tripped over accidentally.
●Do not use The WIRELESS Energy Monitor for other than the intended use.
●Do not open the product other than to replace the batteries using the slide
off battery covers.
●Do not use this product near emergency / intensive care medical equip-
ment.
●Do not use this product where the use of radio frequency products can
cause malfunction in other equipment (for instance hospitals, aircraft, etc)
●Do not allow liquids to spill into the units or subject the units to excessive
smoke, dust, mechanical vibration or shock.
●Do not dispose of old batteries in a fire as they may explode.
●Do not open or mutilate the batteries. Released electrolyte from the bat-
teries is corrosive and may cause burns or injury to the eyes or skin. The
electrolyte may be toxic if swallowed.
●Do not rely on the displayed information to calculate the cost of your elec-
tricity bill. The WIRELESS Energy Monitor is an educational device and is
not intended to replace your energy supplier’s energy meter.
Installation
The WIRELESS Energy Monitor Sensor Clip fits
around one of your electricity meter wires with-
out any requirement for a direct electrical con-
nection.
UNDER NO CIRCUMSTANCES SHOULD YOU REMOVE THE PLASTIC INSULA-
TION OF YOUR ELECTRICAL INSULATION WIRES.
The WIRELESS Energy Monitor is a passive device and
does not require a direct connection to the electricity
supply. Installation by a qualified electrician is not re-
quired. Please ensure you have read the Important Safety
Information at the beginning of this manual before install-
ing this product.
Locate your electricity meter. There are many different
types of electricity meter and your property may be fitted
with an older mechanical meter, or a newer digital meter
as shown (Fig. 2). If you are not sure the meter may typi-
cally be identified from other electrical equipment as it
will have a numeric display or dials indicating the current
meter reading.
First, without touching anything, inspect the electrical
wires for any signs of damage to their protective plastic
insulation.
If you can see any damage or any exposed inner metal
cores of the wires do not touch - seek expert advice be-
fore installing The WIRELESS Energy Monitor.
Find a suitable location for the Sensor Clip from which
the sensor clip cable will reach to the electricity meter.
The location should ideally be away from any large metal
objects as this may affect radio range. If desired you may
fit a screw to your wall and fix the Sensor Clip to it using
its rear screw fixing slot.
Fig. 1
LCD display1
Reset3
Mode2
Pair4
Energy
Monitor
Power Transmitter
Sensor Clip
Disp5
Set6
Up7
Down8
2

Parts and Usage
Fig. 3
If fitting a screw take care to ensure that there
are no buried electrical cables or pipes in the
wall.
A typical electricity meter will have 4 wires that
terminate within it (as shown in Fig. 1) and the
Sensor Clip needs to be fitted around any one
of these wires.
The sensor clip is hinged in the middle and may
be opened by pulling on the release catch and
then prising the two halves apart. Now gently
clip the sensor around one of the wires that
goes into your electricity meter at a distance of
at least 5cm away from the meter.
Installing the Energy Monitor
The Energy Monitor should be placed in a central location, within 30m of the
Power Transmitter, so that it will be easily seen. It may be placed on a table
top or shelf and is angled when standing to allow it to be easily read when
placed on a table.
If desired you may attach the Energy Monitor to the wall using the wall bracket
supplied.
Fit the batteries in the rear of the unit, by removing the slide off battery cover.
When the batteries are inserted the first time will need to be set the time-date-
unit cost – please see the following section.
Parts and Usage
Pairing the two units
1. When the batteries are first inserted or changed in either the Power Trans-
mitter or Energy Monitor, the two units will need to be paired.
2. Press and release the [ Pair4] button on the Energy Monitor and the
[ LCD display1] will flash [ --.- ].
3. Within 30 seconds press the button on the transmitter unit.
4. When the Energy Monitor detects the Power Transmitter. [ LCD dis-
play1] will change to flashing [ 0.00 ]. The units are now paired.
●Normal operation will resume after a delay of up to a minute (once the En-
ergy Monitor has stopped flashing).
●If the Energy Monitor shows [ Err ] then pairing failed.
●Try locating the Energy Monitor nearer to the Power Transmitter and repeat
(but not too close – allow at least a 1 meter gap between the units).
Initial set up
The WIRELESS Energy Monitor needs to know the date, time, currency, and
unit cost of your electricity so that it can calculate monthly-yearly totals, high
and low levels, and costs of your electricity usage.
1. When new batteries are inserted, the Energy Monitor will require the
above to be input into the unit.
2. Using the [ Up7] and [ Down8] buttons, enter the last 2 digits of the
current year and then press the [ Set6] button.
3. Using the [ Up7] and [ Down8] buttons, enter the last number of the
month and press the [ Set6]button.
4. Using the [ Up7] and [ Down8] buttons, enter the day of the month and
press the [ Set6] button.
5. Using the [ Up7] and [ Down8] buttons, enter the hour in 24 hour
format and press the [ Set6] button.
6. Using the [ Up7] and [ Down8] buttons, enter the minutes and press
the [ Set6] button.
7. Using the [ Up7] and [ Down8] buttons, enter the currency you wish to
use and press the [ Set6]button.
8. Using the [ Up7] and [ Down8] buttons, enter the cost per unit of
electricity unit as indicated on your electricity bill. And then press the
[ Set6] button once more and then unit will show in the display [ 0.00 ].
54

Display Mode
Power
Press the [ Mode2] button once. Each time you press it will cycle through
showing [ POWER ] – [ COST ] – [ CO2 ] in the display.
Press the [ Disp5] button and the currently displayed mode will change be-
tween showing [ HIGH ] / [ LOW ] costs for the day, and MONTH and YEAR
totals to date.
●At 24.00hr each day the high and low figures with go back to zero.
●At 24.00hr on the last day of each month the monthly figure will revert to
zero.
●At 24.00hr on the 31st December the yearly figures will revert back to zero.
To delete all information and reset all figures to zero then press and hold the
[ Reset3] button for 5 seconds with a pencil or other pointed object.
Cost
CO2
Important Information
Before installing and using your new WIRELESS Energy Monitor please take
time to familiarise yourself with the important safety information, installation
guide and set-up instructions.
Mains voltage electricity is dangerous and can kill. If you are unsure about the
quality or safety of your electrical installation obtain professional advice from
an electrician prior to installing The WIRELESS Energy Monitor.
The WIRELESS Energy Monitor Sensor Clip is fitted around one of your elec-
tricity meter wires without any requirement for a direct electrical connection.
UNDER NO CIRCUMSTANCES SHOULD YOU REMOVE THE PLASTIC INSULA-
TION OF YOUR ELECTRICAL INSTALLATION WIRES.
DO NOT approach damaged, loose or exposed electrical cabling. If you notice
anything unusual such as burn marks, holes in the insulating materials or dam-
age to the meter.
DO NOT install your WIRELESS Energy Monitor and contact your electricity
provider immediately.
Multi-tariff Users
This product is designed as a simple and cost effective way to monitor your
electricity usage and to understand how to lower you energy usage and costs.
To keep the operation as simple as possible we have not included the option
to enter different sets of tariff for your energy use. If you have 2 or more tariffs
then we recommend you enter the higher tariff. You will still be able to assess
the rise and fall in energy use and what the impact of turning on and off ap-
pliances.
Battery Replacement
If the batteries are running low in the transmitter unit then the battery 1 sign
will flash on the display screen. If the batteries are running low in the Energy
Monitor then the battery 2 sign will flash on the display screen.
When you remove and replace the batteries you will have to re-pair the trans-
mitter and Energy Monitor and re-enter the initial data again.
76

For more detailed instructions, FAQ’S, and product support please visit our websites.
www.wattsclever.com www.blog.wattsclever.com www.support.wattsclever.com
Product Specifications
Model • EW4006
Dimensions • 84 (L) x 80 (W) x 39 (H) mm
(Energy Monitor only)
Wireless transmission • 433 MHz SRD band
Maximum rated sensor current • 100A
Min current sensitivity • 0.1A
Transmission Distance • 30m
Over 1 year battery life for both the transmitter
and receiver
Room 1407, 14/F,
New Victory House,
93-103 Wing Lok Street,
Sheung Wan, Hong Kong
W www.wattsclever.com
T +852 2815 6700
Watts Clever
(International) Limited
© 2011 Watts Clever
(International) Limited
All Rights Reserved
Made in China
Table of contents
