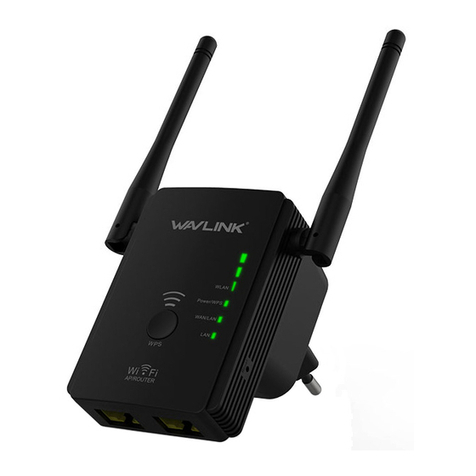
Wavlink I-WL2-AC12 User manual

FEATURE
- Dual band with maximum speed up to 5G 867Mbps and 2.4G 300Mbps.
- Weatherproof and build in lightning arrested withstand harsh outdoor conditions.
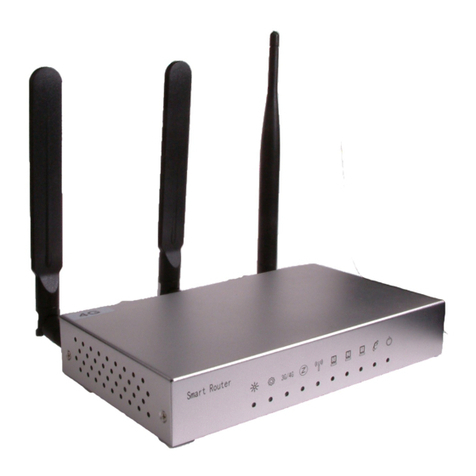
- Four 7dBi omnidirectional antennas eliminate Wi-Fi dead zones.
- High power amplifier for stronger signal transmission.
- Gigabit port provides faster connection.
- Passive PoE support for flexible deployment.
- Support AP/Router/Repeater/EasyMesh agent mode.
- MU-MIMO function lets the router talk to several devices simultaneously over the same
Wi-Fi band.
HARDWARE OVERVIEW
Top view
Bottom view
DEFAULT PARAMETERS
Web: http://wifi.wavlink.com 2.4G SSID: WAVLINK-N XXXX
Default IP: 192.168.10.1 5G/AC SSID: WAVLINK-AC XXXX
Login Password: admin Wireless Password: open
LED INDICATORS
12.4G RP-SMA Antenna Connectors
2S5G RP-SMA Antenna Connectors
33 x Wi-Fi Signal LEDs
4Status LED
5WAN/LAN LED
6LAN Backhaul LED
7POWER LED
8Reset/PAIR Button
9LAN Backhaul Port
10 WAN (PoE IN)/LAN Port
11 Grounding Terminal
WI-FI SIGNAL
Mode Description
AP ON ON ON Wi-Fi signal output power 100%.
Repeater
ON ON ON Better reception: signal 81%-100%.
ON ON OFF Good reception: signal 60%-80%.
ON OFF OFF Weak reception: signal below 0-59%.
INSTALLATION
1. Please follow the installation steps when assembling the device.
1Pass RJ45 cable through the spiral
cover
2Pass RJ45 cable through the rubber
seal
3Pass RJ45 cable through the holder
4Connect the RJ45 cable to PoE IN/
WAN port
5Spin 2.4G antenna into the 2.4G
external RP-SMA connector
6Spin 5G antenna into the 5G external
RP-SMA connector
7Screw the holder
8Plug the rubber seal to the holder
9Screw the spiral cover
2. Install the device.
2.1 Firstly, fasten the device to somewhere firm, then install the device in the holder.
Remark
If you happen to live in the zone where lightning happens a lot, we suggest that you install
the device through grounding connection in order to strengthen the lightning-resistant
function.
Power On The device is powered on.
Off The device is not receiving electrical power.
LAN/Backhaul
On The Ethernet port is connected.
Off The Ethernet port is disconnected.
WAN/LAN On The Ethernet port is connected.
Off The Ethernet port is disconnected.
Status
Fast flash Another router has not been connected when the
device is the repeater mode.
SHOW flash
The another router has been connected but
the device has no access to the network in the
repeater mode.
On The device keeps on in the AP mode;
The device can access the network normally.
12
3
4
5
67
12
8
11
10 9
19
28
37
5
4
6
TV LED/LCD
FLOOR STAND
AC1200 DUAL BAND HIGH-POWER
OUTDOOR ROUTER/AP/EXTENDER
USER'S
MANUAL
- 1 -

2.2 Now please follow the steps below.
Attention
1) Ensure that you use a certified CAT5e/CAT6 Ethernet cable with RJ45 connectors
2) Make sure the length of the Ethernet cable from PoE to the device is less than 60
meters (196 ft).
CONFIGURATION
1. Connection
1.1 Via Wireless
Turn on your Wi-Fi, search SSID of this product on your wireless devices (smart phone,
tablet computer, laptop, etc.) and connect to it.
For Windows users For Mac users
1.2 Via Cable
Router
LAN Cable
Connect Ethernet cable to your PC/laptop and device's LAN Backhaul port, then you can
start configuring the device.
2. Technically speaking, the product web UI will guide you to the login page once you have
connected to the device successfully in your first time, but if it doesn’t, please manually
input 192.168.10.1 or wifi.wavIink.com in the address bar of your browser on PC/
laptop or phone, the default password is admin.
3. Select your Country/Region (ATTENTION: please select the Country/Region
correctly for the restrictions of use related to each individual country/region) and
Time Zone. For your network security, we suggest that you set a new login password.
1
4
2
3
1Connect the "PoE" port of PoE converter to the PoE IN(WAN) port of the device.
2Connect “LAN DATA IN” to “LAN” of your router.
3Plug in the device through the power adapter.
4Push the “ON/OFF” button to turn on or off the device.
Router
Note: The three colored bars in "Change Password" area indicates the strength of the
login password.
ATTENTION: check the instruction for select the country/region with
bandwidth authorized (ETSI) on page 4.
USER'S
MANUAL
- 2 -
AC1200 DUAL BAND HIGH-POWER
OUTDOOR ROUTER/AP/EXTENDER

4. Mode Selection
This product has four modes.
4.1 Repeater Mode
For Repeater mode, we recommend you choose "WISP", you can manually enter the WiFi
SSID you need to connect or select the WiFi SSID in the list, and the Password needs to be
the same as the WiFi password that this product has connected, then click on "Connect".
4.2 EasyMesh Agent Mode
If you have a router that supports EasyMesh function, then you can build a mesh system
with this mode.
Please configure according to the following steps:
1. Log in to 192.168.10.1 or wifi.wavIink.com.
2. In Mode Selection, please choose “EasyMesh Agent Mode”.
3. Click on the “Start Pairing” button.
4. Now please start pairing process on the EasyMesh controller, if you are not sure how to
start, please ask manufacturer for help.
4.3 LAN Bridge (AP mode)
Please connect the LAN DATA IN port of the POE converter or the LAN Backhaul port of the
device to the upper router. Then you can change the SSID or use the default one, as for the
Encryption Mode, the default is WPA2-PSK, we recommend you to select WPA3/WPA2-
MIX if your devices support. For your network security, please create a new password
according to the rule. Then click on “Save” and wait for the setting process to complete.
The Self Management is open in default, you can manage this device (web UI) through the
assigned IP or domain name.
4.4 Router Mode
Before configuring, please make sure your upper router has connected to the LAN DATA IN
port of the PoE converter.
If you choose the Router Mode, the system will guide you to select the WAN Type. As for
the Encryption Mode, the default is WPA2-PSK, we recommend you to select WPA3/
WPA2-MIX if your devices support. For you network security, we suggest you create a
Password.
Which WAN Type am I supposed to choose?
If you use DSL line and you are only provided an account name and a password by your
ISP, choose PPPoE. If you use cable TV or fiber cable, choose DHCP (Dynamic IP). If
you are provided information such as IP address, Subnet Mask and Default Gateway.
choose Static IP.
WI-FI PASSWORD MANAGEMENT
When you need to change your Wi-Fi password, please click on “Wireless”.
USER'S
MANUAL
- 3 -
AC1200 DUAL BAND HIGH-POWER
OUTDOOR ROUTER/AP/EXTENDER

FIRMWARE UPGRADE
If you need to update firmware, please proceed as the following steps:
Option I
1. Download the latest firmware file from Wavlink website.
2. Extract the firmware from the downloaded file.
3. Log in to wifi.wavIink.com or 192.168.10.1, then choose “Advanced” and select
“Firmware Update”.
4. Click on to locate the firmware file.
5. Click on “Upload” and choose “Apply”, and wait for the firmware upgrade process to
complete.
Option Il
1. Log in to 192.168.10.1 or wifi.wavIink.com, then choose "Advanced" and select
"Firmware Update".
2. Click on "Check New Version" to find the latest version. 3.Click on “Download and
Upgrade”, and wait for the firmware upgrade process to complete.
After updating firmware, please Reset The Device And Clear Your Browser Cache.
What is firmware upgrade and why do I need it?
Firmware contains fixed for bugs and new features, please keep the latest firmware to
improve the experience of using the product. Please do not use the wrong firmware,
otherwise, it will damage your device and void the product warranty.
For more details, please visit our website www.wavIink.com Our Technical Support:
FAQ
Q1. What can I do if I can not access the Internet?
- Make sure your Internet works normally, please contact your ISP(Internet Service
Provider) if it doesn't.
- Initiate your browser, enter 192.168.10.1 or wifi.wavIink.com, then set up the
following quick start guide.
- Reboot your device and try it again.
Q2. Why can’t I visit the web UI by inputting the IP address 192.168.10.1 or wifi.
wavIink.com?
- If you can't log in to the IP address or URL in AP Mode, please check the IP address
arranged by the upstream router, then try to restart the process.
- Make sure you have connected to the WiFi of the Wavlink device.
- Please try to clean the cache of the browser.
- Try to log in the management page via another browser.
- Try to log in the management page via other devices.
Q3. What can I do if I forget my administration management password
- Please refer to Q3 to reset the device, the default password is admin.
Q4. How do I find the best location for mesh devices
- Please put your mesh devices in a relatively open space to avoid obstacles such as
metal objects, reinforced concrete walls and so on.
GNU GENERAL PUBLIC LICENSE NOTICE
This product includes software codes developed by third parties. These software codes are
subject to either the GNU General Public License (GPL), Version 2, June 1991 or the GNU
Lesser General Public License (LGPL), Version 2.1, February 1999. You can copy, distribute,
and/or modify in accordance with the terms and conditions of GPL or LGPL.
The source code should be complete, if you want us to provide any additional source code
files under GNU General Public License (GPL please contact us in these matters. We are
committed to meeting the requirements of the GNU General Public License (GPL). You are
welcome to contact our local office to get the corresponding software and licenses. Please
inform us of your contact details (full address) and the product code. We will send you a
software package with the software and license for free.
The respective programs are distributed WITHOUT ANY WARRANTY without even the
implied warranty of MERCHANTABILITY or FITNES FOR A PARTICULAR PURPOSE.
Please refer to the GNU General Public License website for further information.
http://www.gnu.org/licenses/old-licenses/lgpl-2.0.html
https://www.gnu.org/licenses/gpI.html
ATTENTION: BANDWIDTH USAGE LIMITATIONS (ETSI)
In Europe there are restrictions on the use of indoor and outdoor frequencies for the 5G
band. Please select the correct bands according to the type of installation (indoor / outdoor).
CHANNEL FREQUENCY MHz INSTALLATION
36 5170-5190
INDOOR USE ONLY
40 5190-5210
44 5210-5230
48 5230-5250
52 5250-5270
INDOOR USE ONLY
DFS ON
56 5270-5290
60 5290-5310
64 5310-5330
100 5490-5510
OUTDOOR USE
ONLY DFS ON
104 5510-5530
108 5530-5550
112 5550-5570
116 5570-5590
120 5590-5610
124 5610-5630
128 5630-5650
132 5650-5670
136 5670-5690
140 5690-5710
WEEE Directive & Product Disposal
At the end of its serviceable life, this product should not be treated as
household or general waste. It should be handed over to the applicable
collection point for the recycling of electrical and electronic equipment, or
returned to the supplier for disposal.
USER'S
MANUAL
- 4 -
AC1200 DUAL BAND HIGH-POWER
OUTDOOR ROUTER/AP/EXTENDER

CARATTERISTICHE
- Doppia banda con velocità massima 5G 867Mbps e 2.4G 300Mbps.
- Impermeabile e protezione contro i fulmini per resistere a condizioni esterne difficili.
- Quattro antenne omnidirezionali 7dBi eliminano le zone Wi-Fi morte.
- Amplificatore ad alta Potenza per trasmissione di segnale ancora più potente.
- Porta Gigabit fornisce una connessione più veloce.
- PoE Passivo supporta implementazione flessibile.
- Supporta modalità AP/Router/Repeater/EasyMesh.
- Funzione MU-MIMO permette al router di dialogare con diverse periferiche
simultaneamente sulla stessa banda Wi-Fi.
PANORAMICA HARDWARE
Vista dall’alto
Vista dal basso
PARAMETRI PREDEFINITI
Web: http://wifi.wavlink.com 2.4G SSID: WAVLINK-N XXXX
Default IP: 192.168.10.1 5G/AC SSID: WAVLINK-AC XXXX
Login Password: admin Wireless Password: open
INDICATORI LED
1Connettori antenna 2.4G RP-SMA
2Connettori antenna 5G RP-SMA
33 LED segnale Wi-Fi
4LED di stato
5LED WAN/LAN
6LED LAN
7LED ALIMENTAZIONE
8Tasto Reset/PAIR
9Porta LAN
10 Porta WAN (PoE IN)/LAN
11 Terminale di terra
SEGNALE WI-FI
Modalità Descrizione
AP Acceso Acceso Acceso Potenza uscita segnale Wi-Fi 100%.
Repeater
Acceso Acceso Acceso Ricezione ottima: segnale 81%-100%.
Acceso Acceso Spento Ricezione buona: segnale 60%-80%.
Acceso Spento Spento Ricezione debole: segnale sotto 0-59%.
INSTALLAZIONE
1. Seguire i seguenti passaggi per assemblare il dispositivo.
1Passare il cavo RJ45 attraverso il
tappo vite
2Passare il cavo RJ45 attraverso la
guarnizione in gomma
3Passare il cavo RJ45 attraverso il
supporto plastico interno
4Collegare il cavo RJ45 alla porta PoE
IN/WAN
5Avvitare l’antenna 2.4G nel
connettore RP-SMA
6Avvitare l’antenna 5G nel connettore
RP-SMA
7Fissare il supporto
8Inserire la guarnizione in gomma
nel tappo a vite
9Avviare il coperchio a spirale
2. Installare il dispositivo
2.1 Innanzitutto fissa il dispositivo in modo stabile, quindi installa il dispositivo nel
supporto.
Osservazione
Se vivi in zone dove sono molto frequenti i fulmini, ti suggeriamo di installare il dispositivo
tramite il collegamento di terra in modo da rendere più forte la funzione di protezione
contro i fulmini.
Alimentazione Acceso Il dispositivo è alimentato.
Spento Il dispositivo non riceve alimentazione elettrica.
LAN/Backhaul Acceso La porta di rete è connessa.
Spento La porta di rete è disconnessa.
WAN/LAN Acceso La porta di rete è connessa.
Spento La porta di rete è disconnessa.
Stato
Lampeggia
velocemente
Un altro router non può essere collegato
quando il dispositivo è in modalità repeater
Lampeggia
lentamente
Un altro router è stato connesso
ma il dispositivo non ha accesso alla rete
in modalità repeater
Acceso Il dispositivo rimane in modalità AP;
Il dispositivo può accedere alla rete normalmente.
12
3
4
5
67
12
8
11
10 9
19
28
37
5
4
6
TV LED/LCD
FLOOR STAND
ROUTER/AP/EXTENDER PER ESTERNO
DUAL-BAND ALTA POTENZA AC1200
MANUALE
D’ISTRUZIONE
- 5 -

2.2 Ora seguite i passaggi indicati di seguito.
Attenzione
1) Assicurarsi di utilizzare un cavo di rete Cat5e/Cat6 competo di connettori RJ45
certificato
2) Assicurarsi che la lunghezza del cavo di rete dal PoE al dispositivo sia inferiore ai 60
metri (196 ft).
CONFIGURAZIONE
1. Connessione
1.1 Via Wireless
Accendere il Wi-Fi, cercare la SSID di questo prodotto sulle vostre periferiche wireless
(smart phone, tablet computer, laptop, etc.) e collegarle.
Per utenti Windows Per utenti Mac
1.2 Via Cavo
Router
LAN Cavo
Collegare il cavo di rete al vostro PC/laptop e alla porta LAN del dispositivo, ora potete
iniziare a configurare il dispositivo.
2. La web UI del prodotto vi guiderà alla pagina di accesso una volta che avrete connesso
con successo il dispositivo per la prima volta, ma se non dovesse succedere, inserire
manualmente 192.168.10.1 o wifi.wavIink.com nella barra degli indirizzi del vostro
browser su PC/laptop o telefono, la password preimpostata è admin.
3. Selezionare il vostro Paese/Regione (ATTENZIONE: si prega di selezionare
correttamente il Paese/Regione per le limitazioni d’uso legate ad ogni singolo
paese/regione) e il Fuso orario. Per la vostra sicurezza di rete, vi suggeriamo di
impostare una nuova password di accesso.
1
4
2
3
1Collegare la porta "PoE" del convertitore PoE alla porta PoE IN(WAN) del dispositivo.
2Collegare “LAN DATA IN” a “LAN” del vostro router.
3Collegare alla rete elettrica il dispositivo tramite l’alimentatore.
4Accendere il dispositivo premendo il tasto “ON/OFF”.
Router
Nota: Le tre linee colorate nell’area "Change Password" indicano la forza della password
di accesso.
ATTENZIONE: verificare le indicazioni a pagina 8 relativamente alle
larghezza di banda autorizzate per paese/regione.
MANUALE
D’ISTRUZIONE
- 6 -
ROUTER/AP/EXTENDER PER ESTERNO
DUAL-BAND ALTA POTENZA AC1200

Selezione modalità
Questo prodotto ha quattro modalità.
4.1 Modalità Repeater
Per la modalità Repeater raccomandiamo di scegliere “WISP” puoi manualmente inserire
il WiFi SSID a cui connetterti o selezionare il WiFi SSID nella lista, se necessario la password
è la stessa del WiFi a cui il prodotto è stato connesso, quindi clicca su “Connect”
4.2 Modalità EasyMesh Agent
Se hai un router che supporta la funzione Easymesh, puoi costruire un sistema mesh con
questa modalità.
Effettuare la configurazione seguendo i passaggi di seguito riportati:
1. Accedere a 192.168.10.1 o wifi.wavIink.com.
2. In selezione modalità scegliere “EasyMesh Agent Mode”.
3. Cliccare sul tasto “Start Pairing”.
4. Ora avvia il processo di associazione sul controller Easymesh, se non sei sicuro di come
iniziare, chiedi aiuto al produttore.
4.3 LAN Bridge (AP mode)
Connettere la porta LAN DATA IN del convertitore POE o la porta LAN Backhaul del dispositivo
al router superiore. Ora è possibile cambiare la SSID o usare quella preimpostata, siccome
la modalità di crittografia preimpostata è WPA2-PSK, consigliamo di selezionare
WPA3/WPA2-MIX se le tue periferiche lo supportano. Per la sicurezza della tua rete, crea
una nuova password secondo le regole. Cliccare quindi su “Save” e attendere che il
processo di configurazione sia completo.
Il Self Managment è aperto per impostazione predefinita, è possibile gestire questo
dispositivo (interfaccia utente Web) tramite l'IP o il nome di dominio assegnato.
4.4 Modalità Router
Prima di effettuare la configurazione, assicurarsi che il router superiore sia connesso alla
porta LAN DATA IN del convertitore PoE.
Se viene scelta la modalità Router, il Sistema vi guiderà per selezionare il tipo WAN.
Siccome la modalità crittografia preimpostata è WPA2-PSK, consigliamo di selezionare
WPA3/WPA2-MIX se le vostre periferiche le supportano. Per la sicurezza di rete,
suggeriamo di creare una Password.
Quale tipo di WAN dovrei scegliere?
Se utilizzi una linea DSL e ti viene fornito un solo account e una password dal tuo ISP,
scegli PPPoE. Se utilizzi la TV via cavo il cavo in fibra, scegli DHCP (IP dinamico). Se
ti vengono fornite informazioni come indirizzo IP, subnet mask e gateway predefinito,
scegli IP statico.
MANUALE
D’ISTRUZIONE
- 7 -
ROUTER/AP/EXTENDER PER ESTERNO
DUAL-BAND ALTA POTENZA AC1200

GESTIONE PASSWORD WI-FI
Quando è necessario modificare la password del Wi-Fi, cliccare su “Wireless”.
AGGIORNAMENTO FIRMWARE
Se hai necessità di aggiornare il firmware, prrocedi secondo quanto indicato di seguito:
Opzione I
1. Scaricare l’ultimo file del firmware dal sito Wavlink.
2. Estrarre il firmware dal file scaricato.
3. Accedere a wifi.wavIink.com o 192.168.10.1, quindi scegliere “Advanced” e
selezionare “Firmware Update”.
4. Cliccare su per trovare il file del firmware.
5. Cliccare su “Upload” e scegliere “Apply”, attendere che il processo di aggiornamento
del firmware sia completo.
Opzione II
1. Accedere a 192.168.10.1 o wifi.wavIink.com, quindi scegliere “Advanced" e
selezionare “Firmware Update”.
2. Cliccare su “Check New Version” per trovare la nuova versione
3. Cliccare su “Download and Upgrade”, e attendere che l’aggiornamento del firmware
sia completo.
Dopo aver effettuato l’aggiornamento, si prega di riavviare il dispositivo e svuotare la cache
del browser.
Cos'è l'aggiornamento del firmware e perché è necessario?
Il firmware contiene correzioni per bug e nuove funzionalità, si prega di conservare il
firmware più recente per migliorare l'esperienza di utilizzo del prodotto. Si prega di
non utilizzare un firmware sbagliato, altrimenti danneggerà il dispositivo e invaliderà
la garanzia del prodotto.
Per maggiori dettagli, visitare il nostro sito Web www.wavIink.com Il nostro supporto
tecnico: [email protected]
FAQ
D1. Cosa posso fare se non riesco ad accedere a Internet?
- Assicurarsi che Internet funzioni normalmente, se ciò non fosse, contattare il vostro
ISP(Internet Service Provider).
- Avviare il browser, inserire 192.168.10.1 o wifi.wavIink.com, quindi impostare la
seguente guida rapida.
- Riavviare il dispositivo e provare di nuovo.
D2. Perchè non posso visitare l’interfaccia web utente inserendo l’indirizzo IP
192.168.10.1 o wifi.wavIink.com?
- Se non riuscite ad accedere all’indirizzo IP o all’URL in modalità AP, verificare
l’indirizzo IP impostato dal router a monte, quindi provare a ripetere il processo.
- Assicurarsi di essere connesso al WiFi del dispositivo Wavlink.
- Pulire la cache del browser.
- Cercare di accedere alla pagina di gestione tramite un altro browser.
- Cercare di accedere alla pagina di gestione tramite altri dispositivi.
D3. Cosa posso fare se ho dimenticato la password di gestione come amministratore?
- Riavviare il dispositivo, la password predefinita è admin.
D4. Come riesco a trovare la migliore posizione per i dispositivi mesh?
- Posizionare i dispositivi mesh in uno spazio relativamente aperto per evitare
ostacoli come oggetti metallici, muri in cemento armato o simili.
ATTENZIONE: LIMITAZIONI D’USO DELLA BANDA (ETSI)
In Europa ci sono delle limitazioni per l’uso delle frequenze indoor e outdoor per la banda
5G. Si prega selezionare in base al tipo di installazione (indoor / outdoor) le bande corrette.
CANALE FREQUENZA MHz INSTALLAZIONE
36 5170-5190
SOLO USO INTERNO
40 5190-5210
44 5210-5230
48 5230-5250
52 5250-5270
SOLO USO INTERNO
DFS ATTIVO
56 5270-5290
60 5290-5310
64 5310-5330
100 5490-5510
SOLO USO ESTERNO
DFS ATTIVO
104 5510-5530
108 5530-5550
112 5550-5570
116 5570-5590
120 5590-5610
124 5610-5630
128 5630-5650
132 5650-5670
136 5670-5690
140 5690-5710
Direttiva RAEE e smaltimento del prodotto
Al termine della sua vita utile, questo prodotto non deve essere trattato
come rifiuto domestico o generico. Deve essere consegnato al punto di
raccolta appropriato per il riciclaggio delle apparecchiature elettriche ed
elettroniche o restituito al fornitore per lo smaltimento.
MANUALE
D’ISTRUZIONE
- 8 -
ROUTER/AP/EXTENDER PER ESTERNO
DUAL-BAND ALTA POTENZA AC1200
Table of contents
Languages:
Other Wavlink Network Router manuals
