WBT CC1100 Instruction Manual

CC1100 COMPACTOR
USER AND SAFETY
MANUAL

Contents
1- Contents
2- Key features of the CC1100 compactor
3- Overview drawings
4- Machine dimensions and weight
5- CC1100 compactor safety
6- Recommended precautions
7- CC1100 compactor labels for operation and PPE
8- CC1100 compactor operation instructions
10- Daily and monthly checks
11- Parts list
12- Hydraulic system
13- Hydraulic power pack
14- Hydraulic cylinders
15- Hydraulic schematic
16- Moving and storage
17- Certificate of conformity
1

Key Features of the CC1100 Compactor
The CC1100 bin compactor has been designed to be user friendly and reliable.
Reducing waste volumes by up to 75% therefore reducing the cost of waste
collections.
The CC1100 compactor features a safety plate to ensure the bin wheels are not
damaged. On/off key on the control panel and a single phase hydraulic control
system with 2 handed controls for user safety.
- Reduces waste volumes by up to 75%
- Audible beeper when machine is in use
- Easy and safe to operate
- Reducing cost of waste removal
- Compacts standard 1100 litre bins
- 30 second cycle time
- Small footprint, minimal floor space required
- Compaction force 2.3 Tons
2

Overview Drawings
3

Machine Dimensions and Weight
Machine Weight 320KG
4

CC1100 Compactor Safety
The CC1100 compactor has been designed to be as safe as possible to operate.
The machine is fitted with a rotary isolator.
The operational control box is situated to the side of the machine giving the
operator a clear view of the bin to be compacted and the surrounding area.
The controls require the operator to use both hands ensuring that the machine
cannot be operated by accident and keeping the operators hands away from the
moving parts
The machine emits an audible signal during operation to make anyone in the
vicinity aware it is working.
5

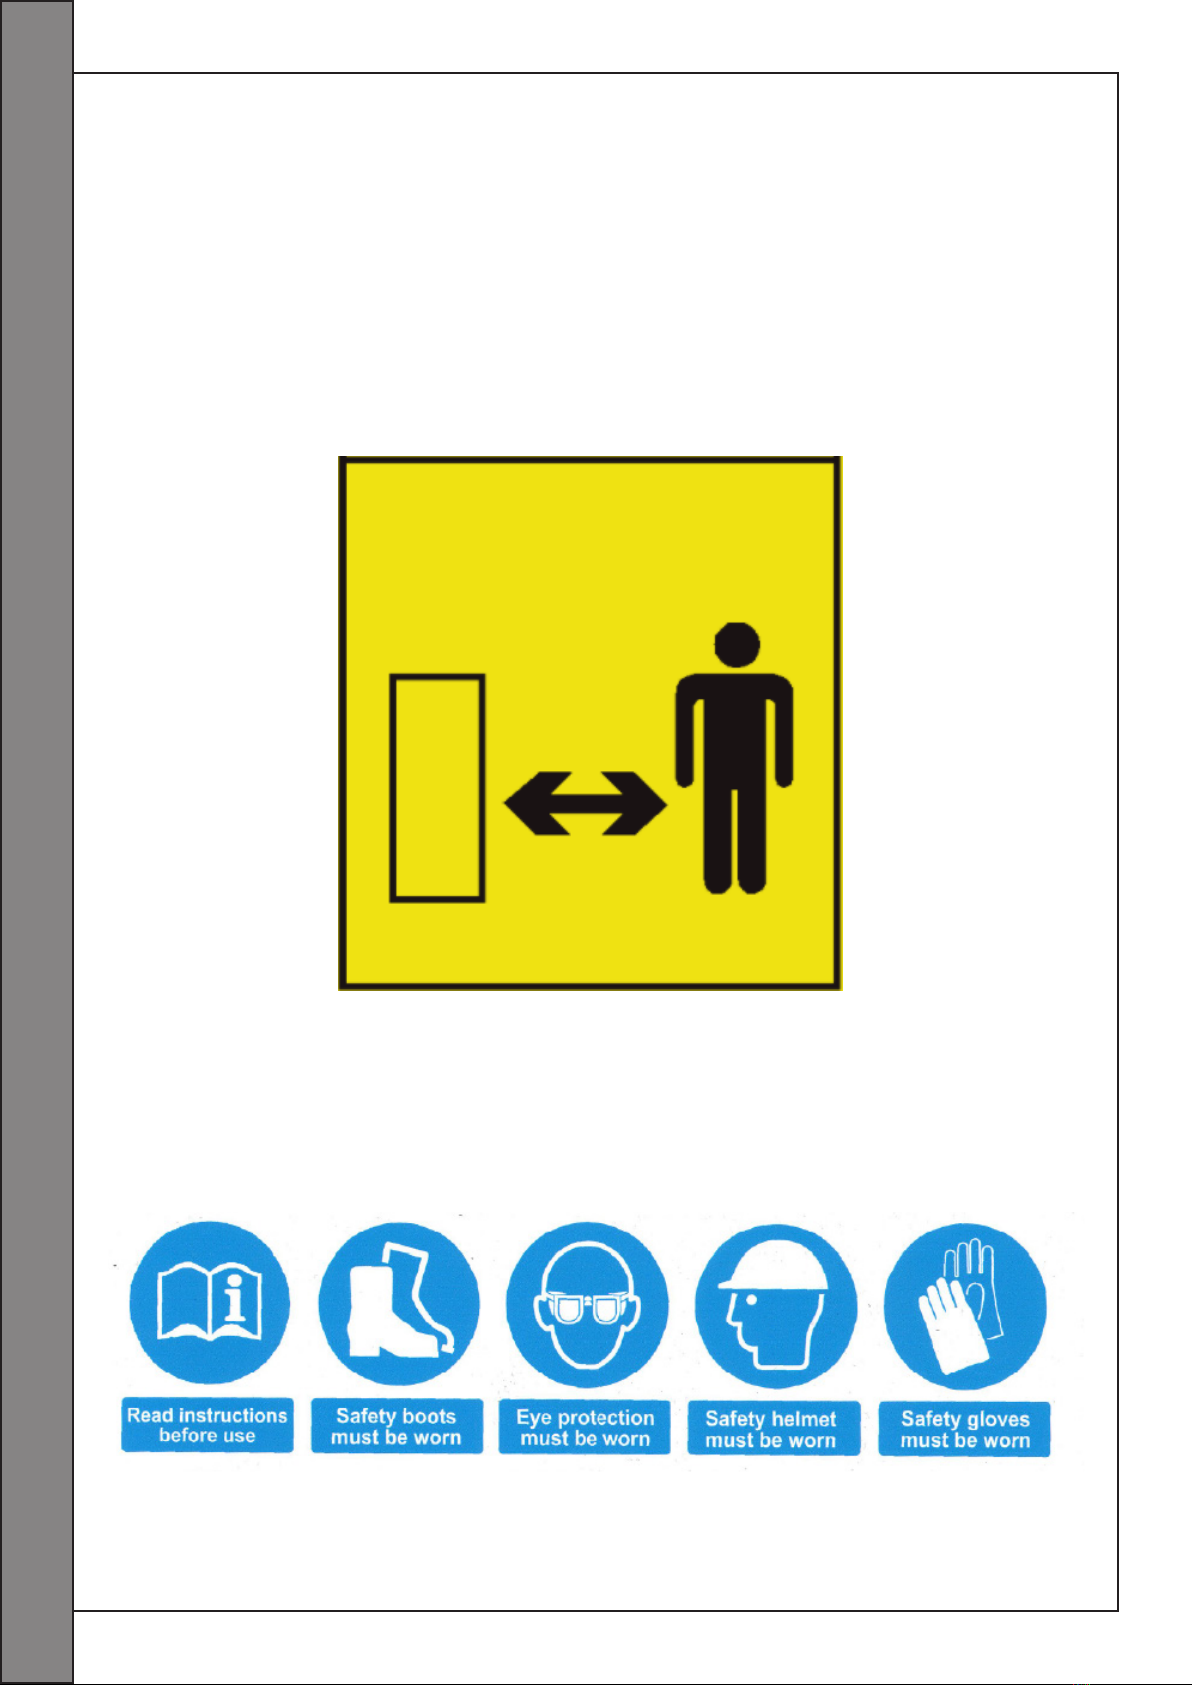
Recommended Precautions
-Only trained and authorised operators should be permitted to use the machine
-Operators must read and obey the instructions displayed on the machine
-Never operate machine on uneven ground or a ramp
-Never operate machine on the edge of a raised dock or platform
-Never operate machine with any covers or guards removed
-Anyone other than the operator must keep 2 meters clear of the machine whilst
it is in operation
-Ensure the working area around the machine is clear of obstructions before use
-Before connecting machine to mains supply, ensure voltage and frequency
correspond with thats listed on the range plate
-Do not use extension leads to connect machine to mains supply
-Do not operate if power supply lead and insulation is damaged
-Do not connect a damp power plug or socket
-Ensure the supply socket is fitted with a residual current device
-Ensure there is complete continuity between the machine and an effective
earthing
6

CC1100 Compactor Safety Labels for Operation and PPE
All safety stickers are clearly mounted on the machine in clear view. Please
ensure the correct PPE is being used before operating the machine.
7

Operating Instructions
Before Operation
1- This machine should only be operated by authorised personnel
2- Ensure the machine is on stable and level ground
3- Ensure there are no overhead obstructions
4- Ensure the foot brake has been applied on the compactor
5- Ensure that all personnel other than the operator are well clear of the machine
6-Ensure the compactor head is in the upright position
8

2- Turn the compactor on with the On/Off switch on the control panel
3- Whilst holding down the dead man button begin to press the lower button to
start compaction (if either button is release the machine will stop)
4- When the compactor is in use a safety beep will being to sound
5- Once the bin has compacted press the dead man button with the raise button
to move the compactor head back into the up right position ( if either button is
release the machine will stop)
To compact the bin
1- Load the bin as shown in the image below
6- Remove the bin and repeat as required.
NOTE!!! The compactor can be stopped at any time by simply releasing the
buttons
On/Off
switch
Raise and lower
buttons
Dead man
button
9

CC1100 Compactor Inspection Schedule
Daily Checks
1- Visually check that there is no damage to the frame, compactor arm and
compactor head
2- Check the condition of the caster and ensure the foot brake is working
3- Check hydraulic hoses and connectors for any leaks
Monthly Checks
1- Check cables and connections to ensure they are all in good condition
2- Check that all warning and safety stickers are legible
3- Check the bolts holding the castors are tight
Yearly Maintenance
1- Replace hydraulic oil in the power pack
2- Check for any damaged or worn parts, refer to the parts list on page 11
10

Parts List
11

Hydraulic System
The hydraulic system comprises of a single phase power pack
( YBZ5-C4.2-0.8A3E4 ) with the following specification a 0.75kw S1 rated electric
motor close coupled to a 2 speed gear pump for fast approach at low pressure
and maximum compacting force.
The power pack has an integrated double valve for directional control and a
relief valve for controlling the systems hydraulic pressure.
The hydraulic compacting cylinder is a 703/3 60 bore 30 rod 300 stroke
See pages 13 & 14 for drawings of the above.
12

Hydraulic Power Pack
13

Hydraulic Cylinder
14

Hydraulic Schematic
P1
G1/4
P2
G1/4
15

Moving and Storage
Moving
The CC1100 should always be kept in a upright position and rest on all 3 castors
with the front castor brake applied. The CC1100 is moved by releasing the foot
break and pushing the machine into the desired position ensuring it is on even
ground with no overhead obstructions.
It is important that extra care is taken when moving the CC1100 on sloping
ground as the machine weighs 320KG. The machine should never be moved
when carrying a bin.
Transportation
The machine should always be transported in its upright position, the foot brake
should be applied and the machine should be strapped into place by an
Appropriately rated strap. It is recommended that the machine is strapped
across the base frame.
Storage
If the machine is not being used for an extended period of time its should be
stored in a clean dry place with good ventilation and an ambient temperature
not less than 0 degrees C.
The compactor heads should be left in the upright position ensuring the cylinder
rod is not exposed to outside elements.
Before storing the machine clean it thoroughly and apply the foot brake.
16

Name: Ian Paul Couch
Position: Managing Director Signature:
9 EC DECLARATION OF CONFORMITY
DECLARATION OF CONFORMITY
Business Name and Full Address of Manufacturer
C & C Hydraulics Ltd
Unit 3, Aireside Business Park
Royd Ings Avenue
Keighley
BD21 4BZ
Name and Address of Authorised Representative
As above
Name and Address of the Person in Community Authorised to Compile the Technical
File
Ian Couch
C & C Hydraulics Ltd
Unit 3, Aireside Business Park
Royd Ings Avenue
BD21 4BZ
Description of Product
CC1100 Compactor
Function, Model, Type, Serial Number
Function: Bin Compactor Model: CC1100 Compactor
Type: Serial Number:
Standards Used
EN ISO 4413 2010, EN ISO 12100 2010, EN ISO 13849-1 2006, EN 61000-6-4 2007,
Place of Declaration
Unit 3, Aireside Business Park,
Royd Ings Avenue
Keighley
BD21 4BZ
Date of Declaration
17/05/2021
Declaration
I declare that the machinery fulls all the relevant provisions of the following directives:
Machinery directive 2006/42/EC, Electromagnetic compatibility directive 2004/108/EC.
Person Empowered to Draw Up Declaration
17
Other WBT Cables And Connectors manuals
Popular Cables And Connectors manuals by other brands

Abu Garcia
Abu Garcia Max Series manual

Altinex
Altinex RT300-101 user guide

StarTech.com
StarTech.com ST122W manual

Davis Instruments
Davis Instruments Crimp-Type Splice Connector install guide

Bosch
Bosch CPP 0000 A installation manual

Siemens
Siemens SIMATIC NET PROFIBUS SpliTConnect... Assembly instructions

Cablexpert
Cablexpert DSP-2PH4-001 user manual

Kenwood
Kenwood KCA-iP301V instruction manual

Carbonheat
Carbonheat Multiflex 20 installation instructions

Lenze
Lenze EWS Mounting instructions

Comprehensive
Comprehensive CSW-VG440A user manual

Speaka Professional
Speaka Professional 2360877 operating instructions