manuals.online logo
Brands
  1. Home
  2. •
  3. Brands
  4. •
  5. Weber
  6. •
  7. Grill
  8. •
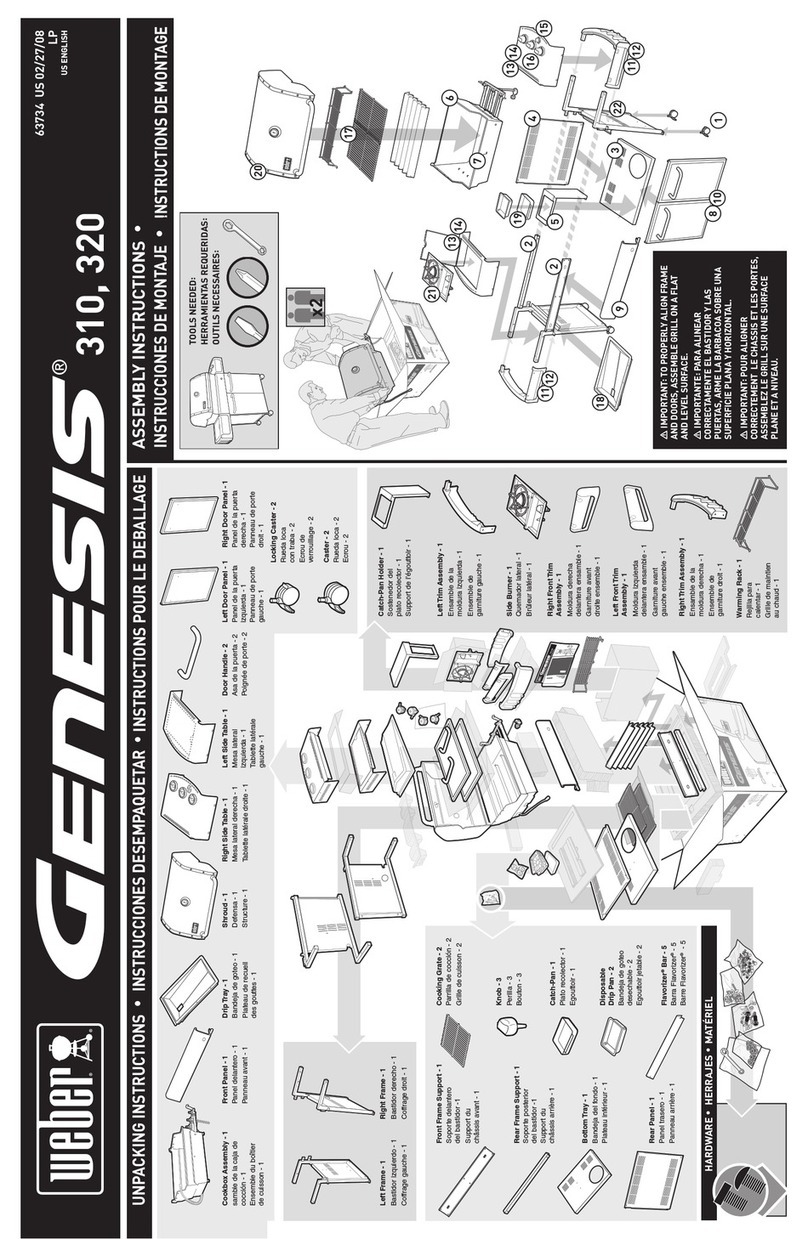
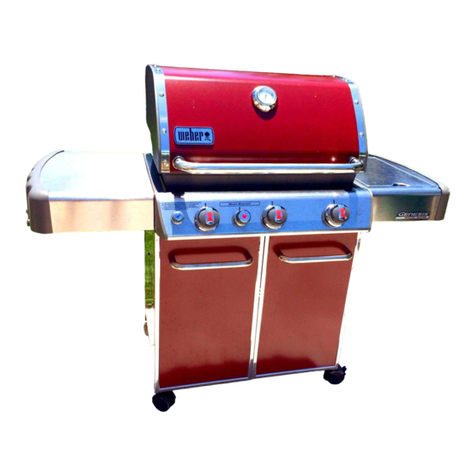
  9. Weber GENESIS E-320 Installation guide

Weber GENESIS E-320 Installation guide

E/SP - 320
ASSEMBLY INSTRUCTIONS • INSTRUCCIONES DE MONTAJE • INSTRUCTIONS DE MONTAGE
TOOLS NEEDED:
HERRAMIENTAERRAMIENTAS
REQUERIDAS:
OUTILS NECESSAIRES:
Cookbox Assembly -1
Cámara para asar - 1
Cuvé - 1
Caster Frame - 1
Montura Lateral (Derecha
exterior Izquierda Posterior) - 1
Châssis des roulettes - 1
Left Trim Assembly - 1
Garniture gauche - 1
Pieza de ajuste izquierda - 1
Flavorizer®Bars - 5
Barras Flavorizer®- 5
Barres Flavorizer® - 5
Wheel Frame - 1
Montura Lateral (Izquierda
exterior /Derecha Posterior) - 1
Châssis des roues - 1
Hubcaps - 2
Tapacubos - 2
Couvre-moyeux - 2
Wheels - 2
Tapacubos - 2
Roues - 2
Warm-Up™ Basket - 1
Canasta Warm-Up™ - 1
Panier Warm-Up™ - 1
Warming Rack - 1
Parrilla para calentar - 1
Grille de réchauffage - 1
Rear Panel - 1
Panel trasero - 1
Panneau arrière - 1
Right Panel - 1
Panel derecho - 1
Panneau droit - 1
Left Panel - 1
Panel izquierdo - 1
Panneau gauche - 1
Bottom Rack - 1
Estante inferior - 1
Plateau inférieur - 1
Bottom Tray - 1
Bandeja del fondo - 1
Plateau inférieur - 1
Catch-Pan Holder - 1
Soporte de la bandeja para
recoger el exceso de grasa - 1
Support pour égouttoir - 1
Catch-Pan - 1
Bandeja para recoger
el exceso de grasa - 1
Egouttoir - 1
Disposable Drip Pans - 2
Bandejas recogegotas - 2
Egouttoir - 2
Cooking Grate - 2
Parrilla para asar - 2
Grille de caisson - 2
Door Handle - 2
Asa - 2
Poignée - 2
Right Trim Assembly - 1
Pieza de ajuste derecha - 1
Garniture droite - 1
Wrench - 1
Llave - 1
Clé - 1
11mm (7/16) inch Wrench - 1
Llave de 11,1 mm - 1
11mm (7/16) po Clé - 1
Nylon Washer - 8-9
Arandela de nilón - 8-9
Rondelle en nylon - 8- 9
Handle Hardware - 4
Elementos de ferretería del mango - 4
Boulonnerie de Poignée - 4
Panel Hardware - 6
Elementos de ferretería del Panel - 6
Boulonnerie de Panneau - 6
1 inch Bolts
(1/4 x 20 x 1 inch Bolt) - 8-9
Pernos de 1”
(Pernos de1/4” x 20 x 1”) - 8-9
Boulons de 1 po
(1/4 x 20 x 1po) - 8-9
Right Panel Hardware - 2
Elementos de ferretería
del panel derecho - 2
Boulonnerie de
panneau droit - 2 1
2
3
4
5
6
8
12
18
3
5
6
14
15
16
17
18
13
11
109
87
89837_US_11/05/07
Condiment basket - 2
Canastilla de condimentos - 2
Panier à condiments - 2
Sideburner -1
Quemador lateral - 1
Brûleur latéral - 1
Side Burner Knob - 1
Perilla de control del quemador lateral- 1
Bouton de commande du brûleur latéral - 1
Left Door Panel - 1
Panel de la puerta izquierda - 1
Panneau de porte gauche - 1
Right Door Panel - 1
Panel de la puerta derecha - 1
Panneau de porte droit - 1
b
3
• Install bolts at indicated locations. Use supplied tool to tighten. Finish tightening bolt with metal wrench provided or
a 11mm (7/16”) wrench.
• Instale los tornillos en el lugar indicado. Para apretarlos, utilice los utensilios suministrados. Termine de apretar el tornillo con
la llave de metal suministrado o con una llave fija de 11 mm (7/16 pulg).
• Placez les boulons aux emplacements indiqués. Utilisez l’outil fourni pour les serrer. Vérifiez si chaque boulon est bien serré
avec une clé à fourche de 11 mm.
4
Assembly: Consumer - 30 Minutes. *Professional - 15 Minutes.
Asameblea: Consumidor - 30 Minutos. *Profesional - 15 Minutos.
Assemblage : Consummateur - 30 minutes. *Professionnel - 15 minutes.
• Arrow sticker to the front.
• Adhesivo de la flecha hacia el frente
• Autocollant flèche sur le devant
• Push down firmly until Bottom Rack Locking Clip, “locks” under the rail.
• Presione hacia abajo firmemente hasta que el bloqueo de la parrilla inferior encaje
bajo las guías.
• Appuyez fermement jusqu’à ce que le dispositif de blocage inférieur s’enclenche
sous le rail.
a
%
321

Push down firmly on both sides to ensure
bottom rack is locked under the rails.
WARNING: Do not go to next
step if bottom rack is not
locked in place.
Presione firmemente en ambos lados para
asegurarse de que la parrilla inferior quede
encajada bajo las guías.
ADVERTENCIA: No pase al
siguiente paso hasta que la
parrilla inferior esta encajada
en su sitio.
Appuyez fermement des deux côtés afin
d’assurer le blocage de la grille inférieure
sous les rails.
AVERTISSEMENT: ne passez
pas au point suivant si la grille
inférieure n’est pas bloquée
en place.
6 7
5
• Arrow sticker to the front.
• Adhesivo de la flecha hacia el frente
• Autocollant flèche sur le devant
16
17
18
b
a
a
b
a
b
8
9
10
11
12
13
14
15
(1)
(2)
WARNING: The side burner
orifice (1) must be parallel to the
side burner tube opening (2).
ADVERTENCIA: El orificio (1) del
quemador lateral debe de estar
paralelo a la abertura (2) del tubo
del quemador lateral.
MISE EN GARDE: L’orifice du
brûleur latéral (1) doit être
parallèle à l’ouverture du tube du
brûleur latéral (2).

Other manuals for GENESIS E-320

1

This manual suits for next models

2

Other Weber Grill manuals

Weber Performer Gold User manual

Weber

Weber Performer Gold User manual

Weber Summit S-460-NG User manual

Weber

Weber Summit S-460-NG User manual

Weber Spirit E210 CLASSIC User manual

Weber

Weber Spirit E210 CLASSIC User manual

Weber Q 300 User manual

Weber

Weber Q 300 User manual

Weber LUMIN User manual

Weber

Weber LUMIN User manual

Weber 42372 User manual

Weber

Weber 42372 User manual

Weber SUMMIT 56568 User manual

Weber

Weber SUMMIT 56568 User manual

Weber 57882 User manual

Weber

Weber 57882 User manual

Weber Genesis 310 User manual

Weber

Weber Genesis 310 User manual

Weber Summit 620 User manual

Weber

Weber Summit 620 User manual

Weber GENESIS 1000 User manual

Weber

Weber GENESIS 1000 User manual

Weber Genesis II S-335 User manual

Weber

Weber Genesis II S-335 User manual

Weber 55204 User manual

Weber

Weber 55204 User manual

Weber 55283 User manual

Weber

Weber 55283 User manual

Weber PERFORMER DELUXE 54786 User manual

Weber

Weber PERFORMER DELUXE 54786 User manual

Weber Summit Gold D NG User manual

Weber

Weber Summit Gold D NG User manual

Weber Q 3600 User manual

Weber

Weber Q 3600 User manual

Weber SPIRIT 310 PREMIUM User manual

Weber

Weber SPIRIT 310 PREMIUM User manual

Weber 2800N+ User manual

Weber

Weber 2800N+ User manual

Weber 40871 User manual

Weber

Weber 40871 User manual

Weber 3000 User manual

Weber

Weber 3000 User manual

Weber Spirit Premium 320 User manual

Weber

Weber Spirit Premium 320 User manual

Weber PLATINUM SERIES 2 2200 NG User manual

Weber

Weber PLATINUM SERIES 2 2200 NG User manual

Weber S-210 GBS User manual

Weber

Weber S-210 GBS User manual

Popular Grill manuals by other brands

Klarstein 10040285 manual

Klarstein

Klarstein 10040285 manual

Kamado Joe CLASSIC II owner's manual

Kamado Joe

Kamado Joe CLASSIC II owner's manual

Teesa TSA3223 owner's manual

Teesa

Teesa TSA3223 owner's manual

EXPERT GRILL S2281801M owner's manual

EXPERT GRILL

EXPERT GRILL S2281801M owner's manual

GBG PCGRILLSS quick start guide

GBG

GBG PCGRILLSS quick start guide

ZAKARIAN K50465 manual

ZAKARIAN

ZAKARIAN K50465 manual

Toastmaster A710 Owner's operating and installation manual

Toastmaster

Toastmaster A710 Owner's operating and installation manual

Broil King PORTA CHEF 320 CART Assembly manual & parts list

Broil King

Broil King PORTA CHEF 320 CART Assembly manual & parts list

Outback THG3302P Assembly and operating instructions

Outback

Outback THG3302P Assembly and operating instructions

Barbecue King CLASSIC 800 instructions

Barbecue King

Barbecue King CLASSIC 800 instructions

Masterbuilt GRAVITY GRIDDLE MB20043622 manual

Masterbuilt

Masterbuilt GRAVITY GRIDDLE MB20043622 manual

Zanussi ZCBBQ22TK-C MANUAL & SAFETY INSTRUCTIONS

Zanussi

Zanussi ZCBBQ22TK-C MANUAL & SAFETY INSTRUCTIONS

Silvercrest SKG 1000 B2 operating instructions

Silvercrest

Silvercrest SKG 1000 B2 operating instructions

NORDIC SEASON KG201812 Assembly and instruction manual

NORDIC SEASON

NORDIC SEASON KG201812 Assembly and instruction manual

Gasmate SOHO BQ1096 manual

Gasmate

Gasmate SOHO BQ1096 manual

Burns & Barkles 010389 operating instructions

Burns & Barkles

Burns & Barkles 010389 operating instructions

Napoleon PRESTIGE II 308/450 Installation and operating instructions

Napoleon

Napoleon PRESTIGE II 308/450 Installation and operating instructions

Scarlett SC-EG350M02 instruction manual

Scarlett

Scarlett SC-EG350M02 instruction manual

manuals.online logo
manuals.online logoBrands
  • About & Mission
  • Contact us
  • Privacy Policy
  • Terms and Conditions

Copyright 2025 Manuals.Online. All Rights Reserved.