3
pusher.
16. The blade and discs are sharp. Handle carefully. Store out of reach of children.
17. If the power cord or the plug are damaged, do not use your appliance.
18. For your own safety, please use only the original accessories and spare parts which are suitable for your
appliance.
19. Never remove the lid until the knife has stopped completely.
20. This appliance is designed to process small quantities. Do not exceed the quantities indicated in these
instructions for use.
21. Do not use this appliance to mix glutinous food or substance.
22. Do not use appliance for other than intended use.
23. For your safety, this appliance conforms to the appliance standards, regulations and directives of Low
Voltage, Electromagnetic Compatibility, Environment, etc.
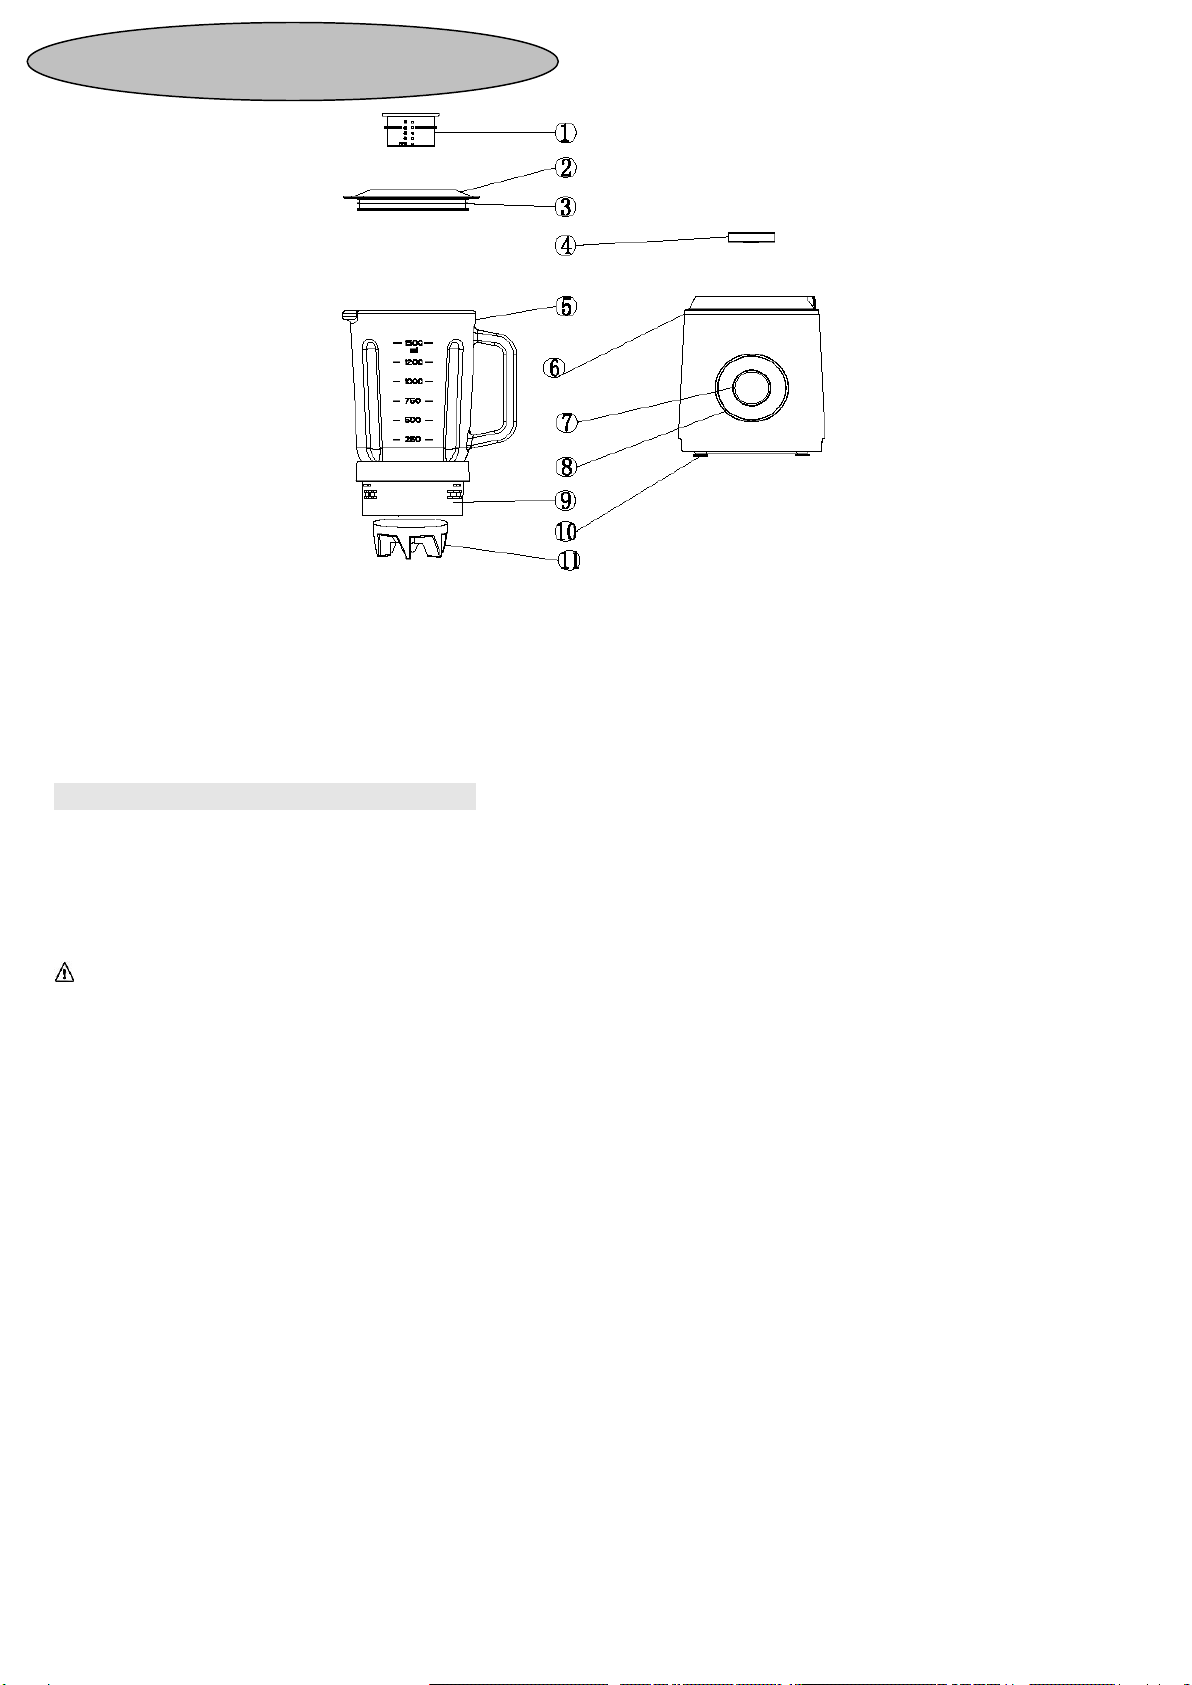
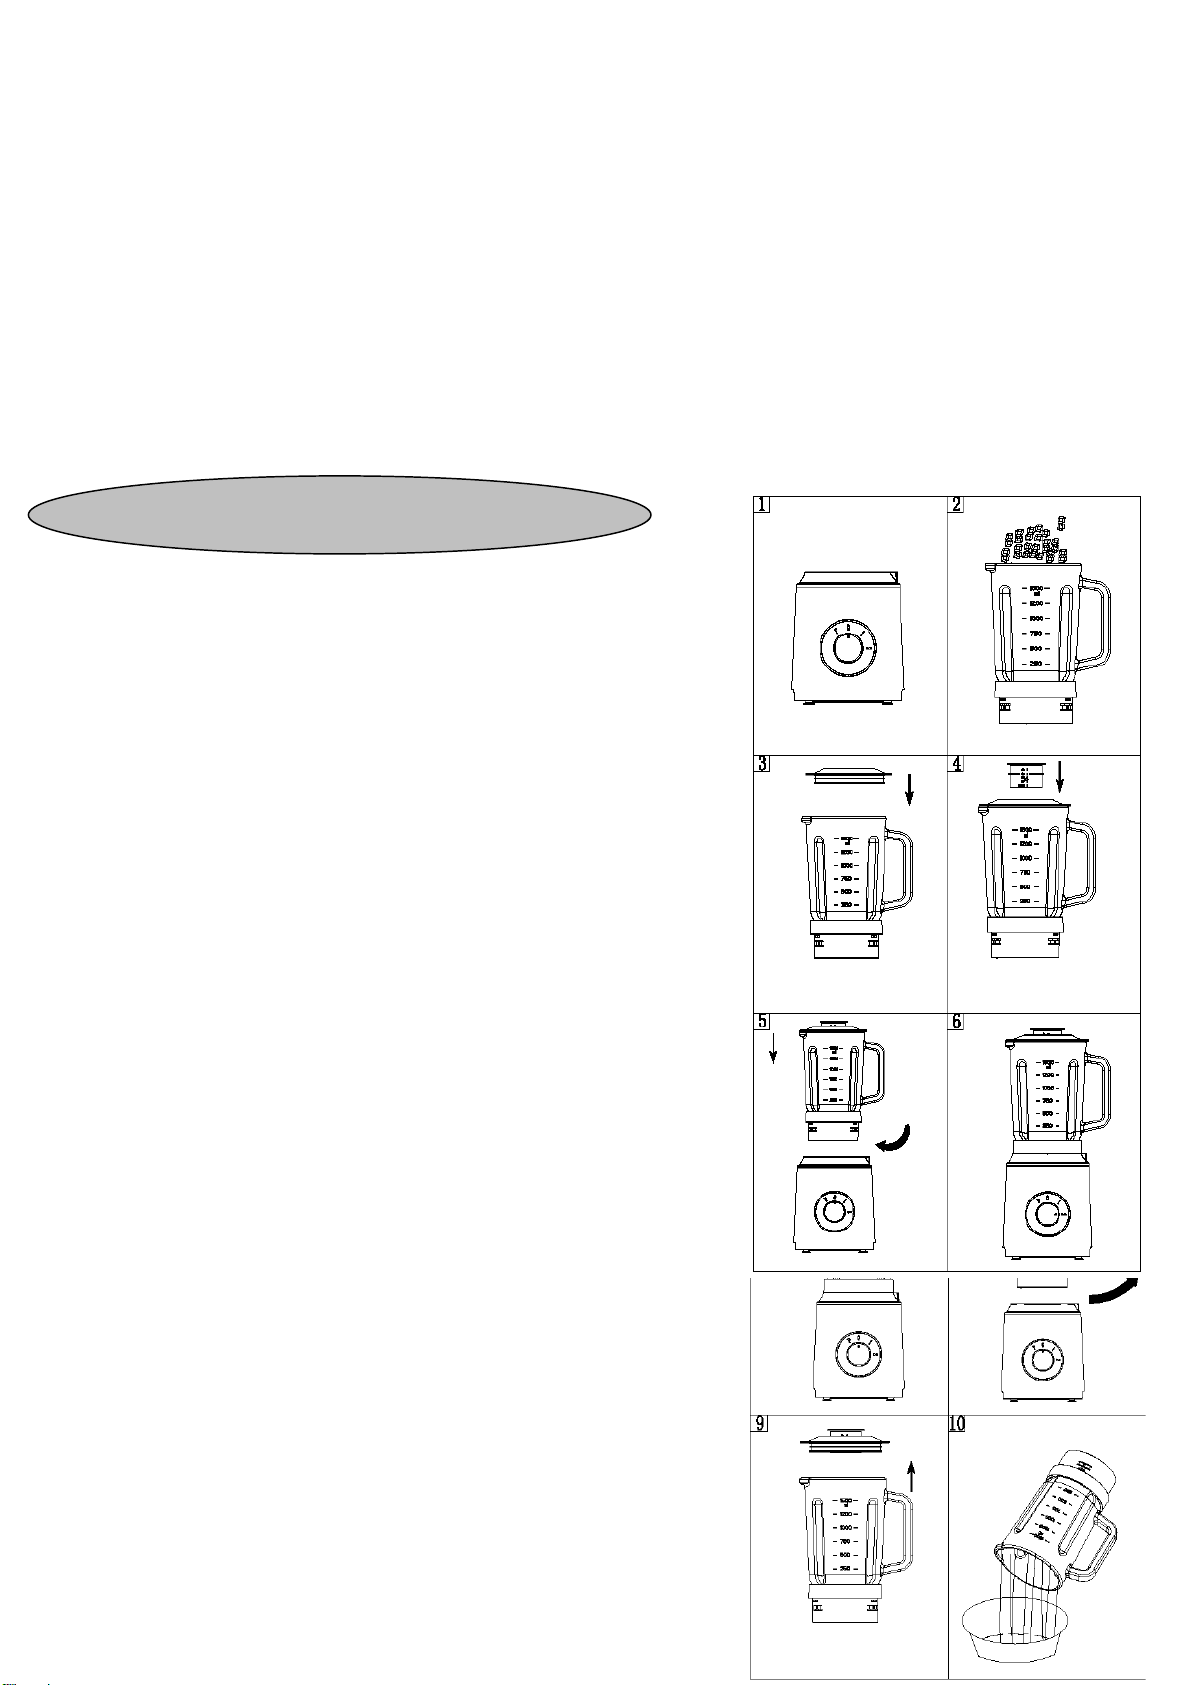
1. 1. Place the main unit on a flat, dry workbench, make sure that
the switch knob is set to "0" before turning on the power (see
Figure 1), and plug in a power source that meets the
requirements on the main unit's nameplate.
2. 2. Wash the mixing cup to ensure that there are no other debris
in the mixing cup. Cut the vegetables or fruits to be processed
into small pieces, put them into the cup (see Figure 2), add an
appropriate amount of water, and then cover the cup lid and
cup. Cap (see Figure 3/4). Note that the amount of water added
must not exceed the maximum capacity of the beaker. (Food is
2/5 of the cup capacity and water is 3/5)
3. 3. After inserting the drive connector of the lower end of the
mixing cup vertically aligned with the output shaft of the motor
base, hold the handle of the cup to rotate the cup clockwise,
and snap the cup into the lock on the main unit to confirm the
installation When the stirring cup holder presses the safety
ejector lever on the host, the safety switch in the host is
touched) (see Figure 5).
4. 4. When processing, first turn the knob counterclockwise to
“P” for several times, and then turn the knob to the
corresponding “Gear” to process. Position, if higher speed is
needed, turn the switch knob to the "2nd gear" position. Figure
6
5. Depending on the volume and variety of processed foods, users
can choose 2 gears from low to high, that is, low gear with small
capacity and easy processing; otherwise, high gear.
6. If you want to see the stirring effect halfway, you can rotate to
open the small transparent cover, or you can add fruits,
vegetables or water from the small halfway.
7. After use, turn the switch knob to “0 stop” (as shown in Figure