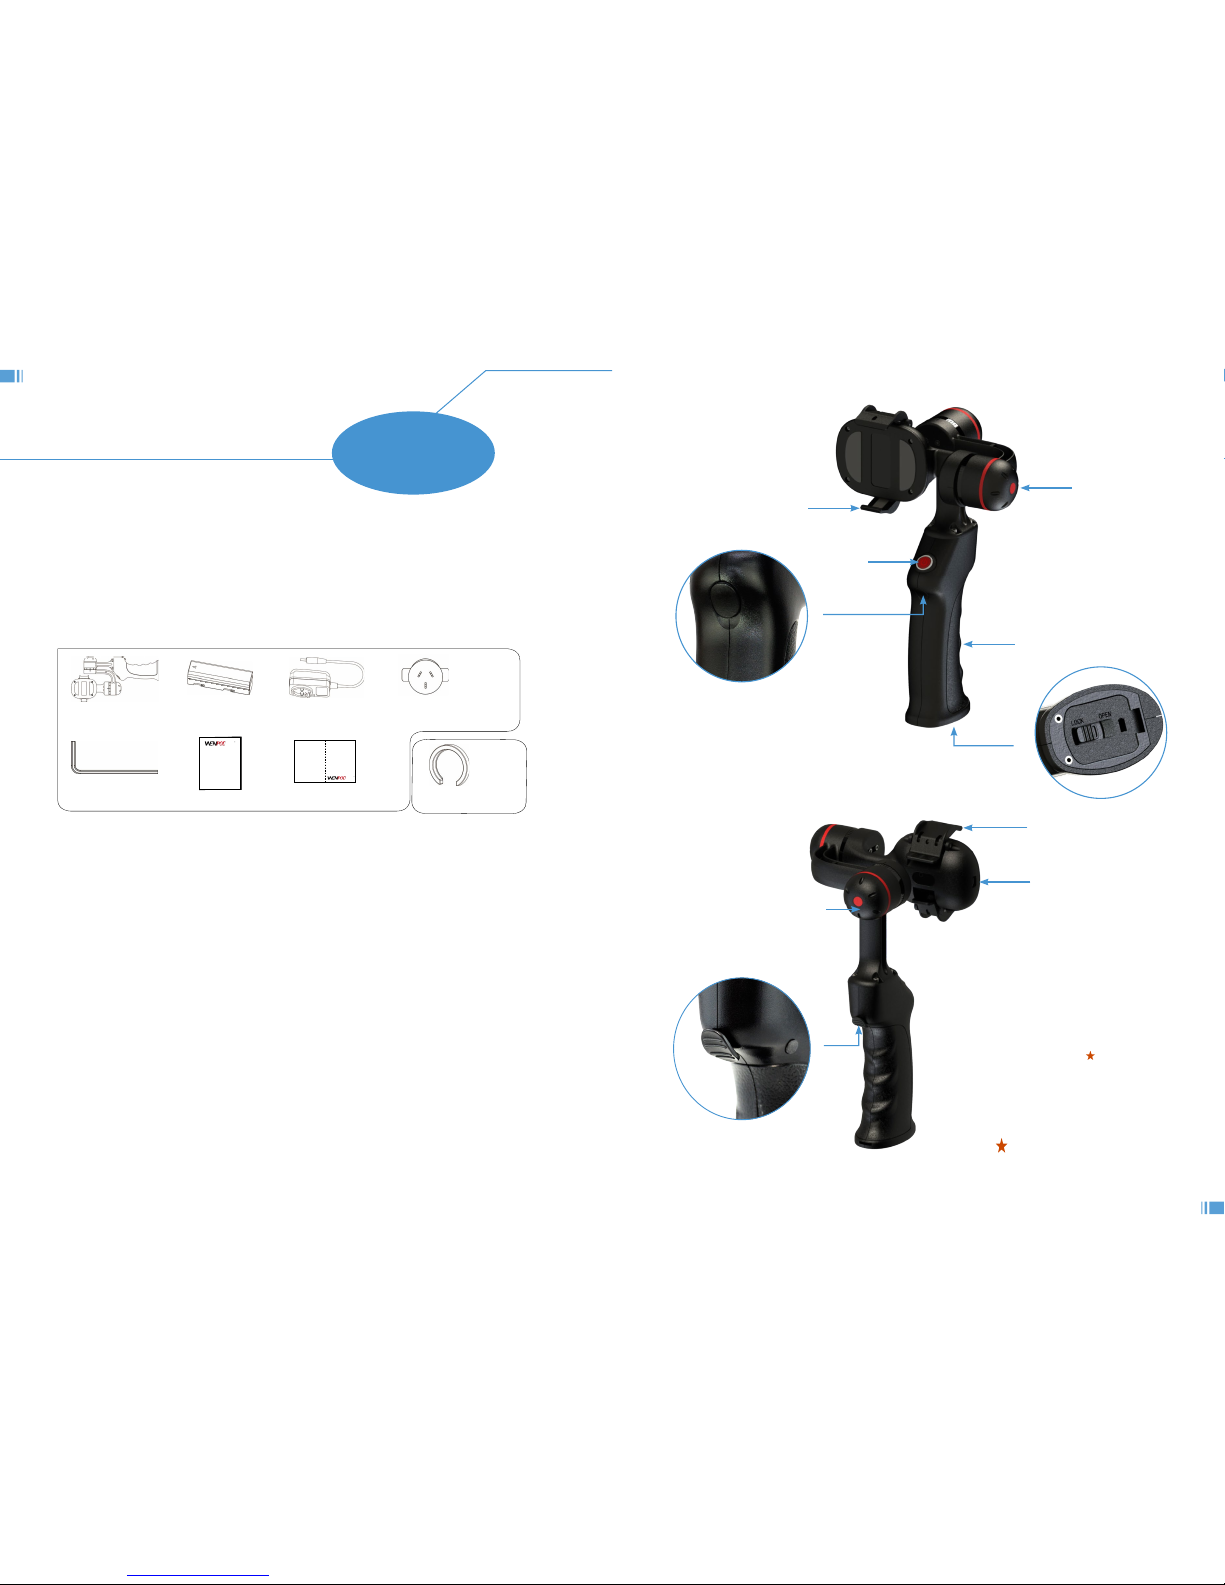
Fig. 4-3
Fig. 4-4
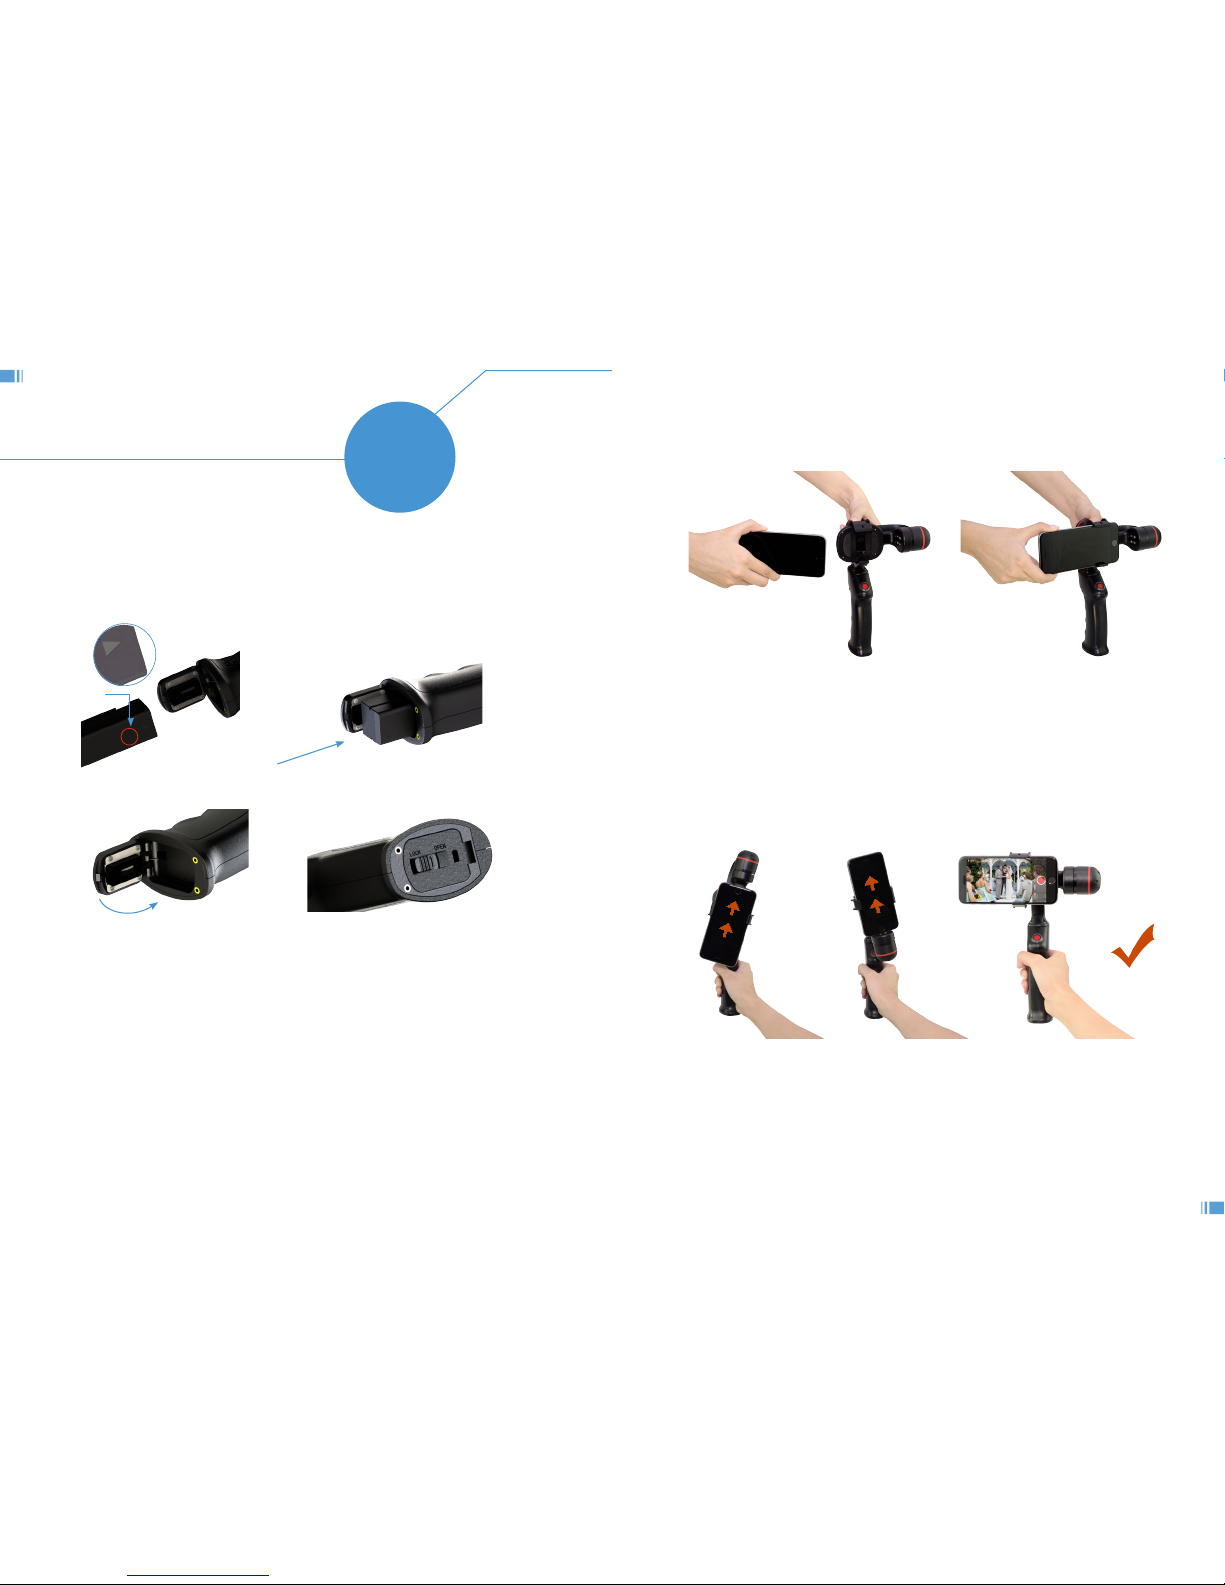
Fig. 4-5
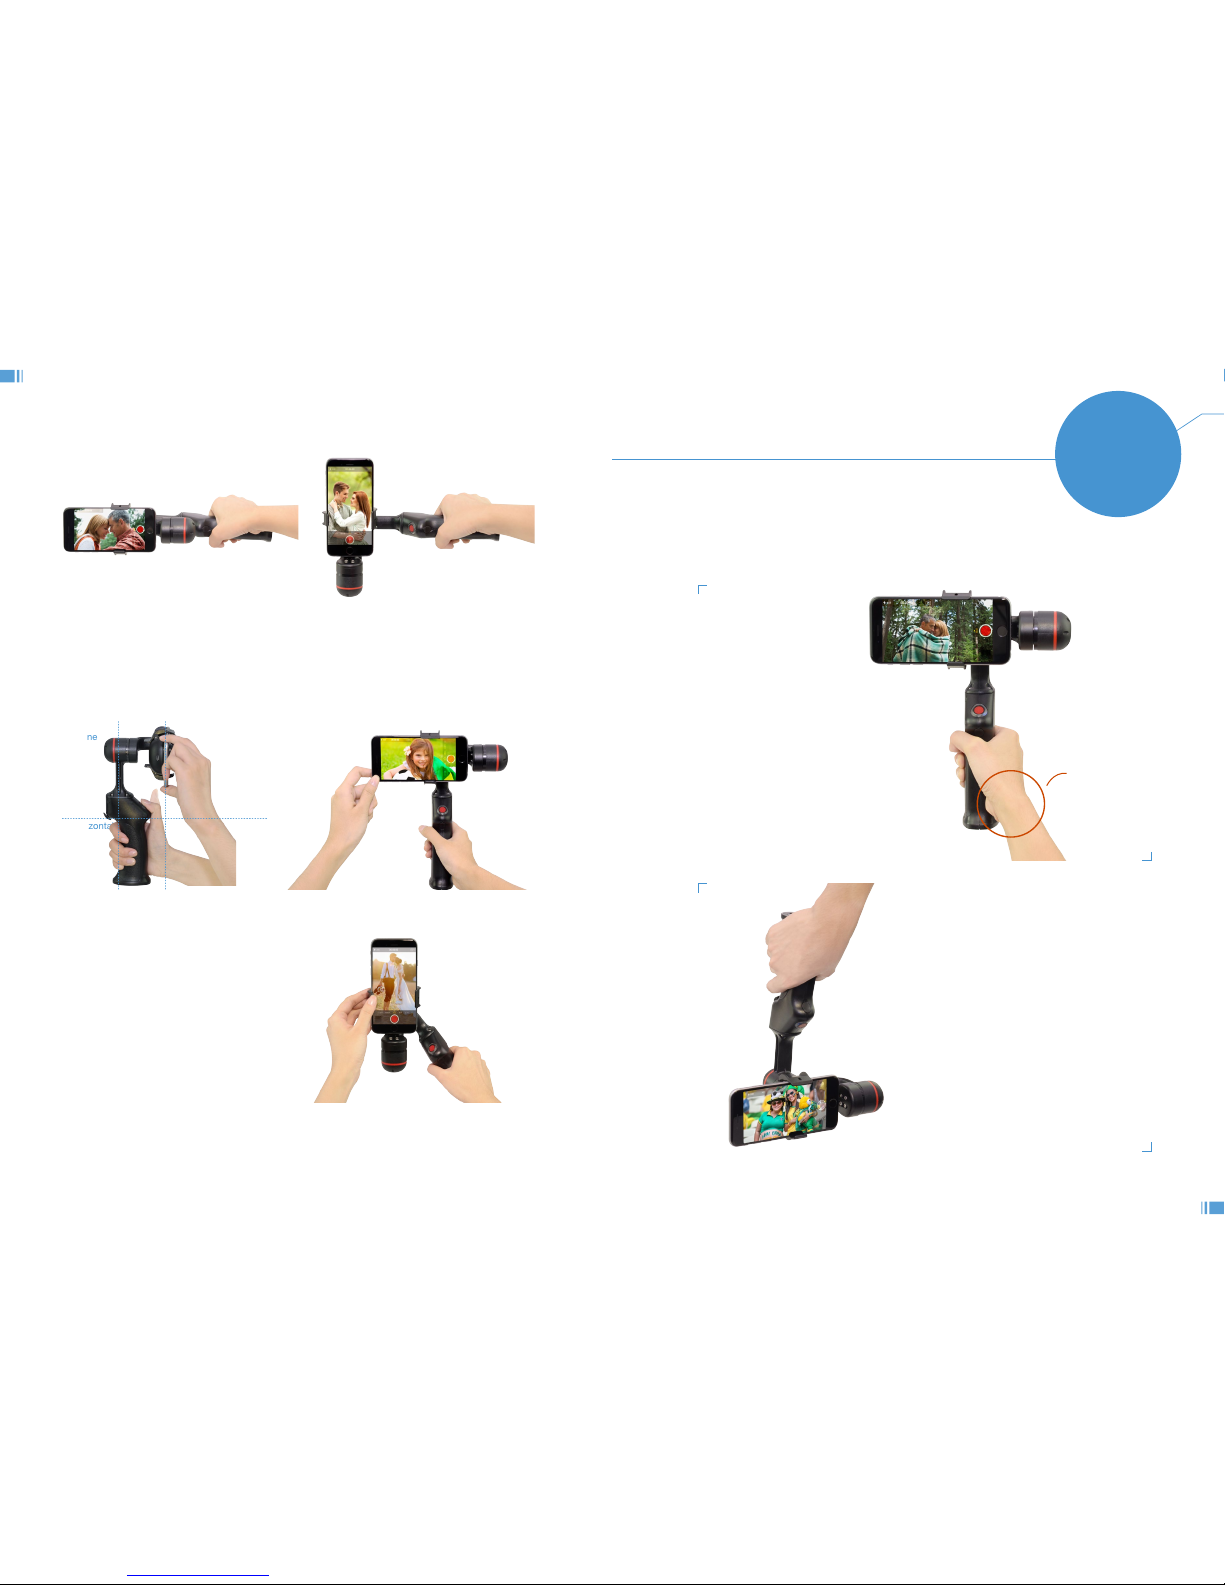
Fig. 4-6
Fig. 4-8
Fig. 4-7
011
010
Strongly
Suggest
Strongly
Suggest
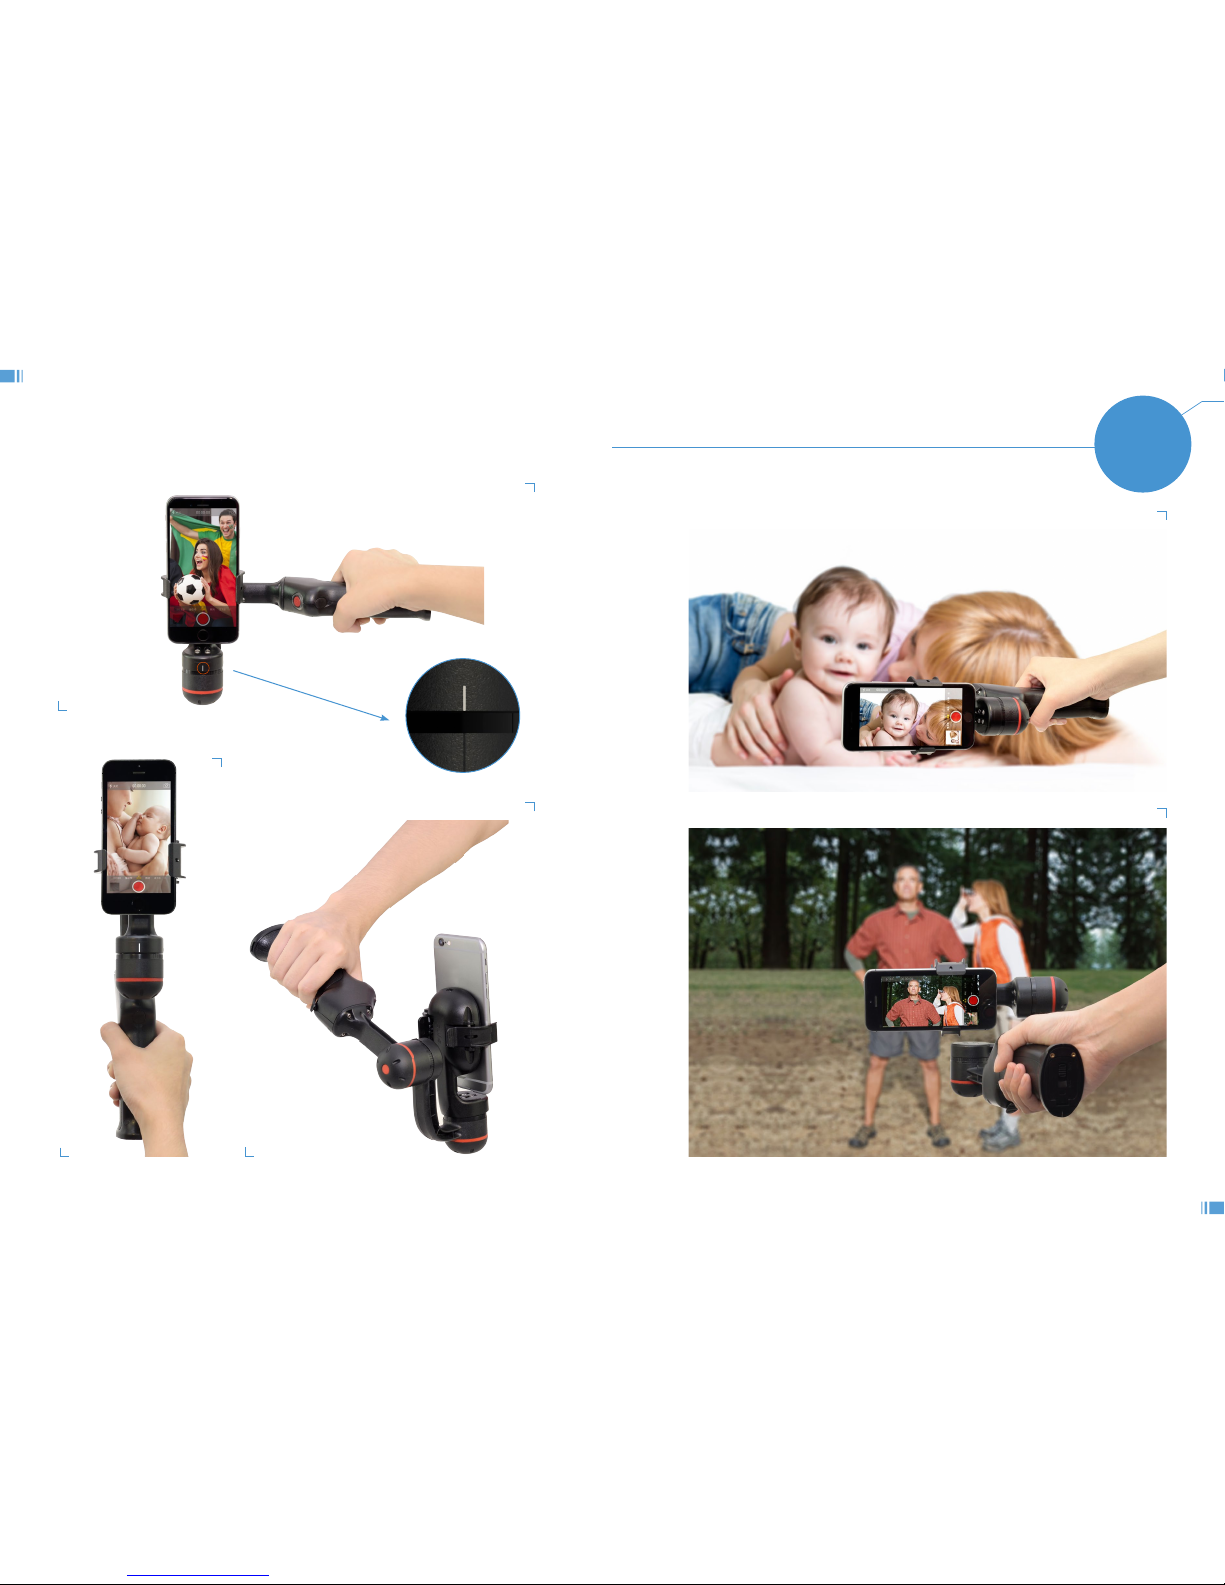
Hold handle horizontally (single handedly, for advance users)
This position is best suitable for shots as you move, also applicable for moving your
camera shots. In this ergonomic position, your wrist movement will be actively cancelled
by both the horizontal-axis and tilt-axis motors. This will enhance the stability of shots
when you move.
Hold handle in Pan-Locked Mode (single handedly, for advance users)
When holding the handle as the follow picture, flipping the horizontal-axis motor facing upward,
the horizontal-axis will seamlessly change to pan-axis, and the Pan-Lock Mode will be
activated using this gesture. In this mode, the direction of smartphone will remain locked,
however, it is up to the operator to maintain the horizontal leveling manually. This position is
best suitable for slow motion straight line shots.
Hold handle in Follow-me Mode (Single handedly, for advance users)
When holding the handle as the follow picture, flipping the horizontal-axis motor facing
downward, the horizontal-axis will seamlessly change to pan-axis, and the Follow-me Mode
will be activated using this gesture. In this mode, the direction of smartphone will follow you
wherever you turn your handle, however, it is up to the operator to maintain the horizontal
leveling manually. This position is best suitable for slow motion non-directional shots.
Hold handle horizontally with both hands - Normal Mode ①
Flipping the handle as the following picture shown (the horizontal-axis motor located in front of
the phone screen), at the same time hold the horizontal-axis motor gently with the other hand.
This position is best suitable for long shots, as well as shots in normal pacing speed.
Hold handle horizontally with both hands - Pan-Locked Mode ② For advance users
Flipping the handle as the following picture shown (the horizontal-axis motor located above
the phone and facing upward), at the same time hold the horizontal-axis motor gently with the
other hand. This enable the directional lock in you smartphone, while handle can still be freely
moved. However, due to the change of axis, it requires the operator to maintain the horizontal
leveling manually. This position is best suitable for long shots, as well as shots in normal
pacing speed at a fixed shooting direction.
Hold handle horizontally with both hands - Follow-me Mode ③ For advance users
Flipping the handle as the following picture shown (the horizontal-axis motor located below the
phone and facing downward), at the same time hold the horizontal-axis motor gently with the
other hand. This enables the follow-me function, which allows the smartphone to follow
whatever direction when you move your handle. However, due to the change of axis, it
requires the operator to maintain the horizontal leveling manually. This position is best suitable
for following object shots in slow pacing speed.