ASSEMBLY INSTRUCTIONS MODEL 33047 10’ X 10’
IMPORTANT: Two adults are required when assembling this canopy. The canopy
may be damaged if unbalanced forces act on the frame or roof fabric during
assembly of the canopy,
NOTE: Choose a level surface to set up your canopy.
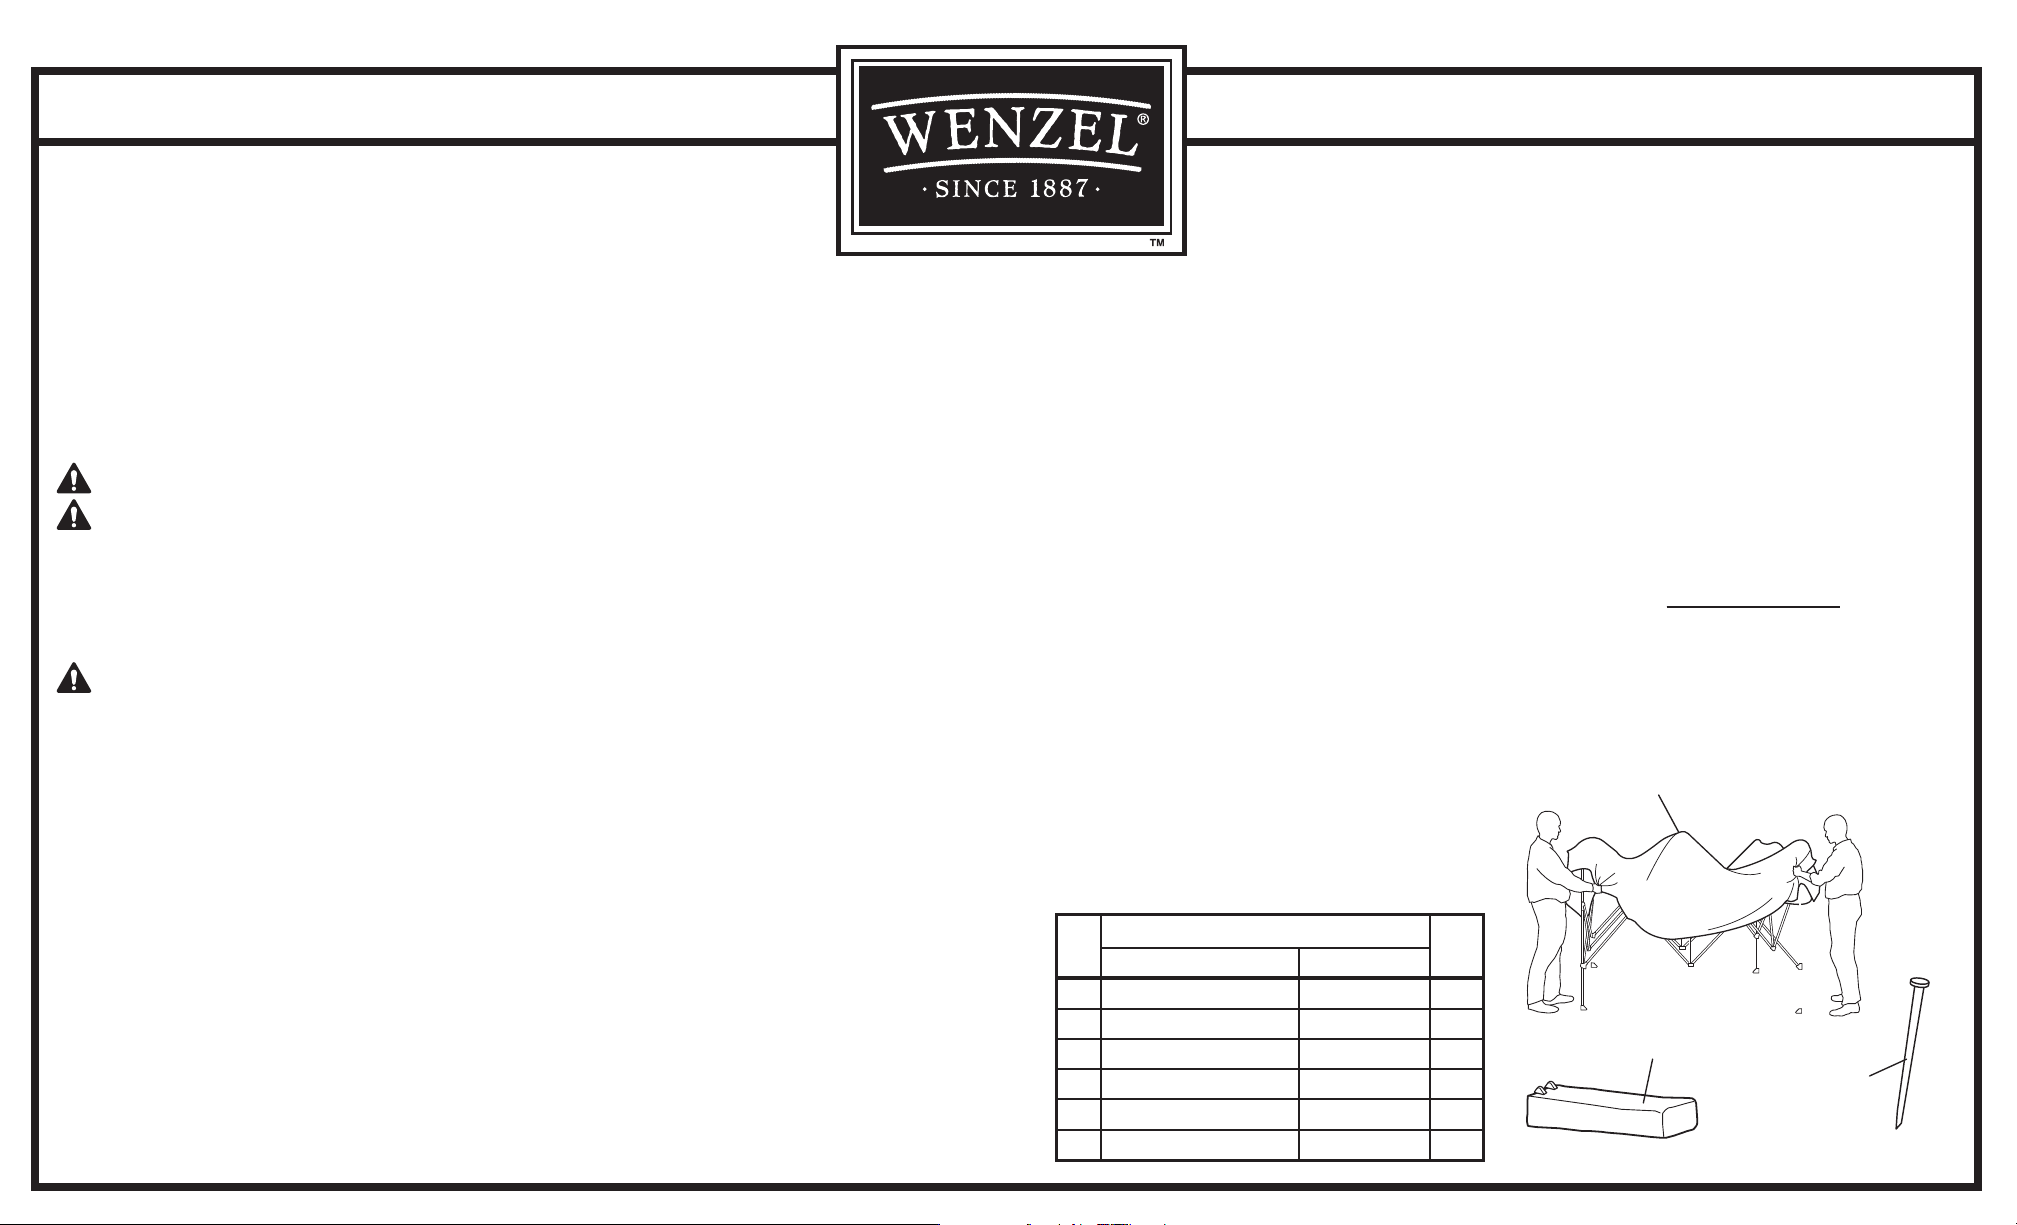
STEP 1: Remove canopy from carry bag.
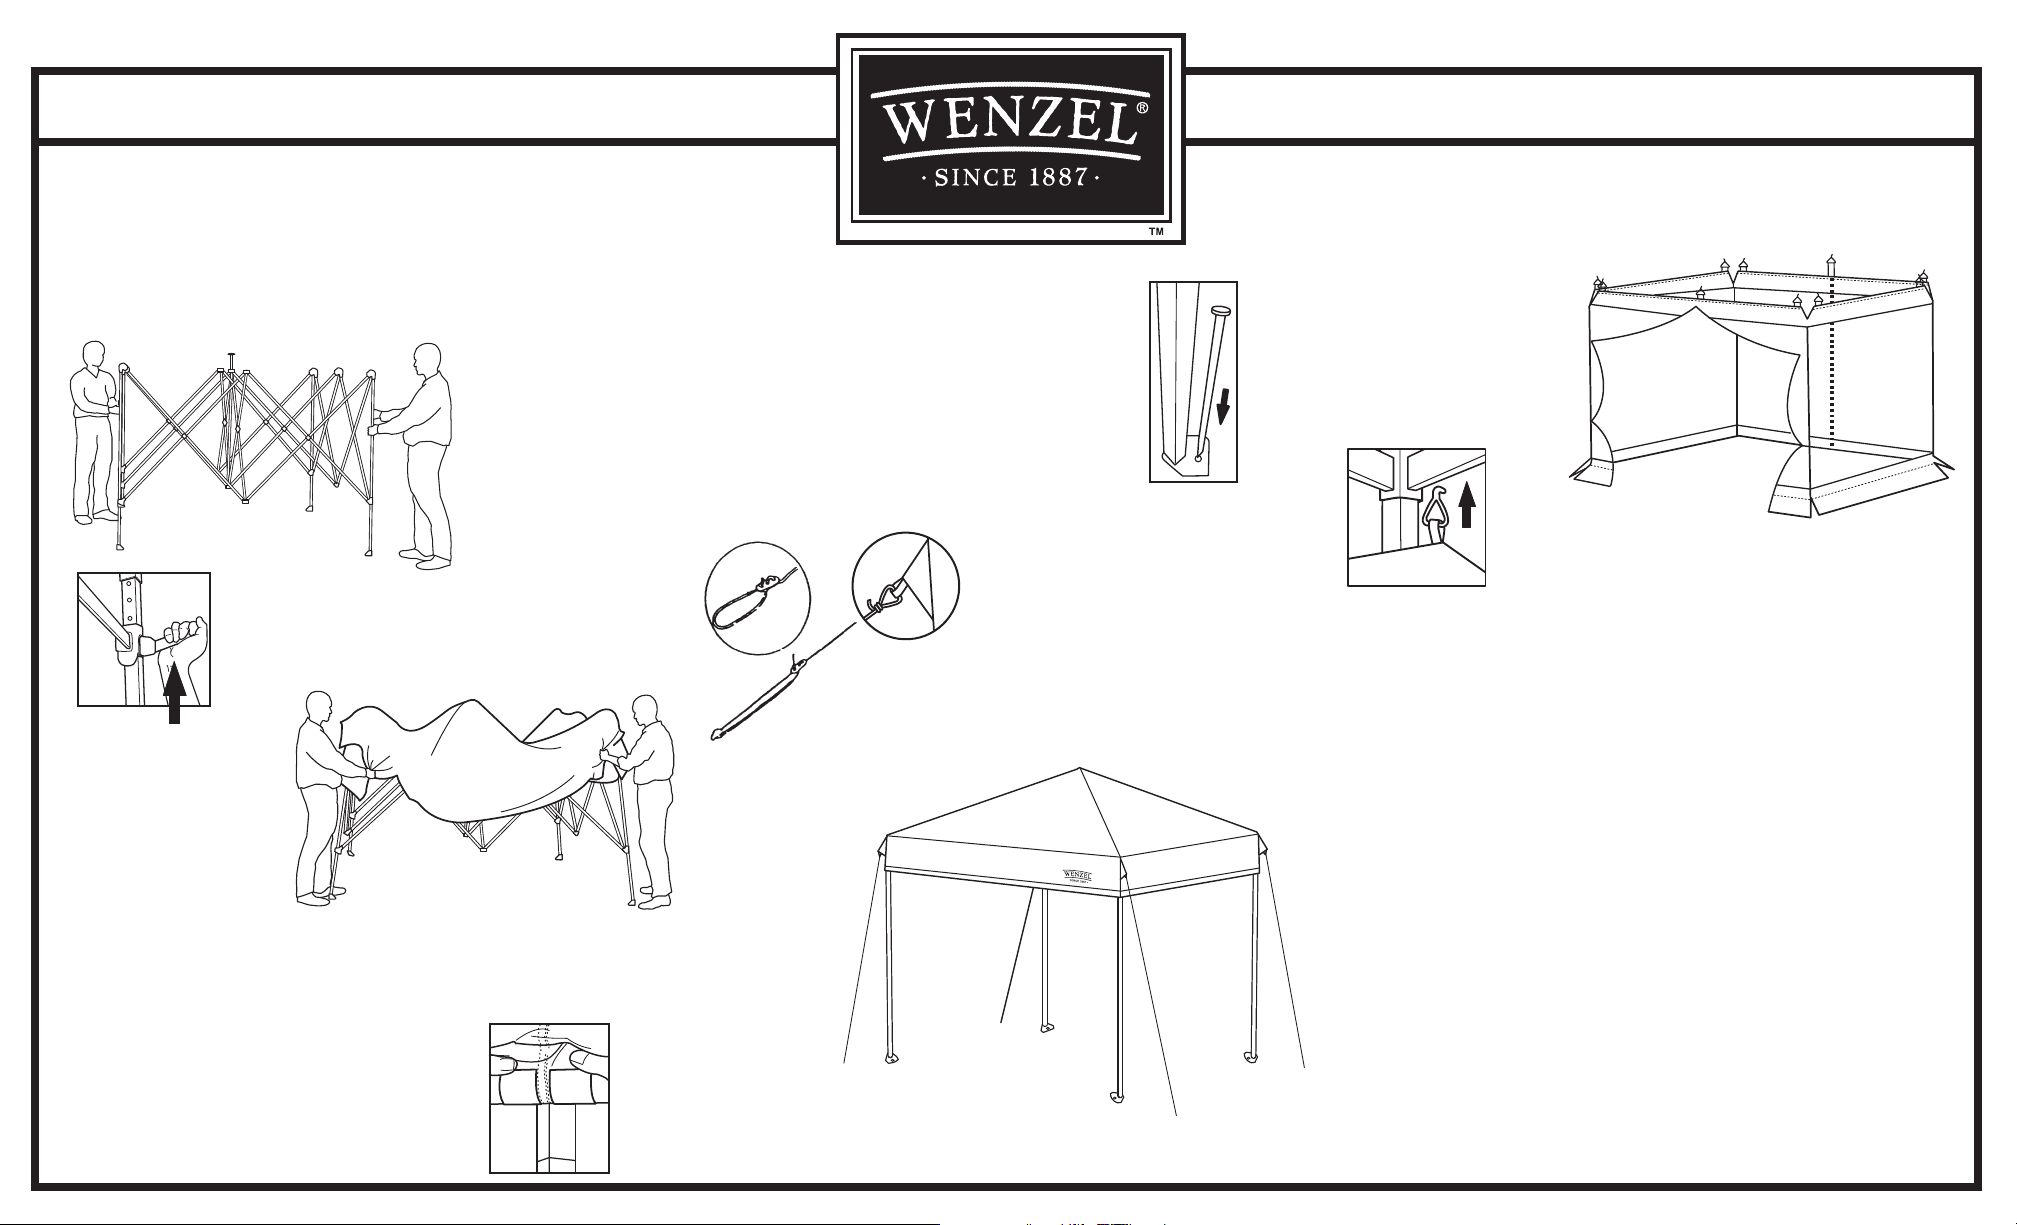
STEP 2: Place the frame on
its feet. With an adult on
opposite corners of the
canopy frame, lift the frame
slightly off the ground and
expand it by walking
backwards until the frame
is completely extended.
STEP 3: Push up on each frame corner till the clip locks “click”
into place. Make certain each frame corner is locked
into place.
STEP 4: Unfold the canopy
skin and cover the frame
with the canopy fabric.
Fit the canopy skin corners
over the frame corners.
Attach the Velcro patches
on the underneath side
of the canopy corners to the Velcro patches at each frame corner.
STEP 5: Now raise the canopy to the desired height by extending the telescoping
legs until the safety clip lock snaps into place. Extend each leg one notch at a
time, making sure all four legs are level, before
proceeding to the next notch.
STEP 6: Secure the canopy skin to the frame by wrapping
the Velcro tape around the frame poles, on the
underneath side of the canopy.
STEP 7: There are holes in the metal plates at the lower ends
of the canopy legs. Insert the nail stakes into the holes on
the plate and hammer stakes into the ground.
NOTE: Canopy can also be attached to wooden deck
with nails or bolts.
STEP 8: For extra stability, attach ropes to the loops at the four corners of the
canopy roof. Extend the guy ropes and make
a loop at the opposite end of the guy rope
by using the slider (as shown) and place loop
over one of the smaller pin stakes. Adjust slider
to make guy rope tight and hammer stake into
the ground at a 45° angle to hold securely. Repeat
with each of the guy ropes and all four canopy corners.
NOTE: In extremely windy conditions, the guy ropes and pegs
may not be sufficient to support the canopy. Dismantle
canopy immediately in adverse weather conditions.
Assembled canopy should
appear as shown.
NOTE: A storage pocket is included which can
be attached to any corner of the canopy to hold
small camping items within easy reach and up, off of the ground.
FOR SCREEN WALL ATTACHMENT
STEP 1: To attach the removable screen walls to the canopy, unfold the screen wall
and let fabric hang vertically, as shown.
STEP 2: Wrap the screen walls
around the outside of the
canopy poles.
STEP 3: Attach the hooks at the
corners of the screen walls to
the upper corners of the canopy frame.
STEP 4: Press the Velcro patches, which are sewn to the upper end of the screen
walls to the Velcro patches, attached to the inside of the canopy.
STEP 5: Tie the screen walls to the frame, with the fabric ties sewn to the screen walls.
STEP 6: The lower corners of the screen walls have hooks, which can be attached
to the metal feet at each of the four canopy corners.
NOTE: To dismantle screen house, follow the above steps in reverse order.
• Remove screen house walls and fold into rectangular shape to fit carry bag.
• Unfasten the Velcro tab fasteners along the eaves and corners of the canopy.
• Lower the canopy by pushing the release button on the canopy leg poles. Lower
canopy one notch at a time so all four legs are level, before proceeding to next
notch.
• Remove canopy skin from frame and fold skin into equal parts to distribute the bulk.
• Fold canopy skin to match the length of the carry bag.
• Release the clip locks at each of the frame legs and compress frame. One person
should be on each corner on the canopy frame, lifting the frame legs off the ground
and walking the frame slowly and evenly till the frame is completely compressed.
• Place frame, stakes, screen walls and canopy skin back into the carry bag and
zip carry bag closed, by using the expandable zipper.
MAKE SURE THE SCREEN HOUSE IS CLEAN AND DRY BEFORE STORING.
SCREEN HOUSE NOT INTENDED FOR PERMANENT OUTDOOR USE.