ASSEMBLY INSTRUCTIONS
IMPORTANT: WE ADVISE YOU TO ASSEMBLE THE SCREEN HOUSE
ONCE BEFORE USE TO BECOME FAMILIAR WITH THE ASSEMBLY.
NOTE: Please look at the replacement parts diagram to see how your
frame is assembled.
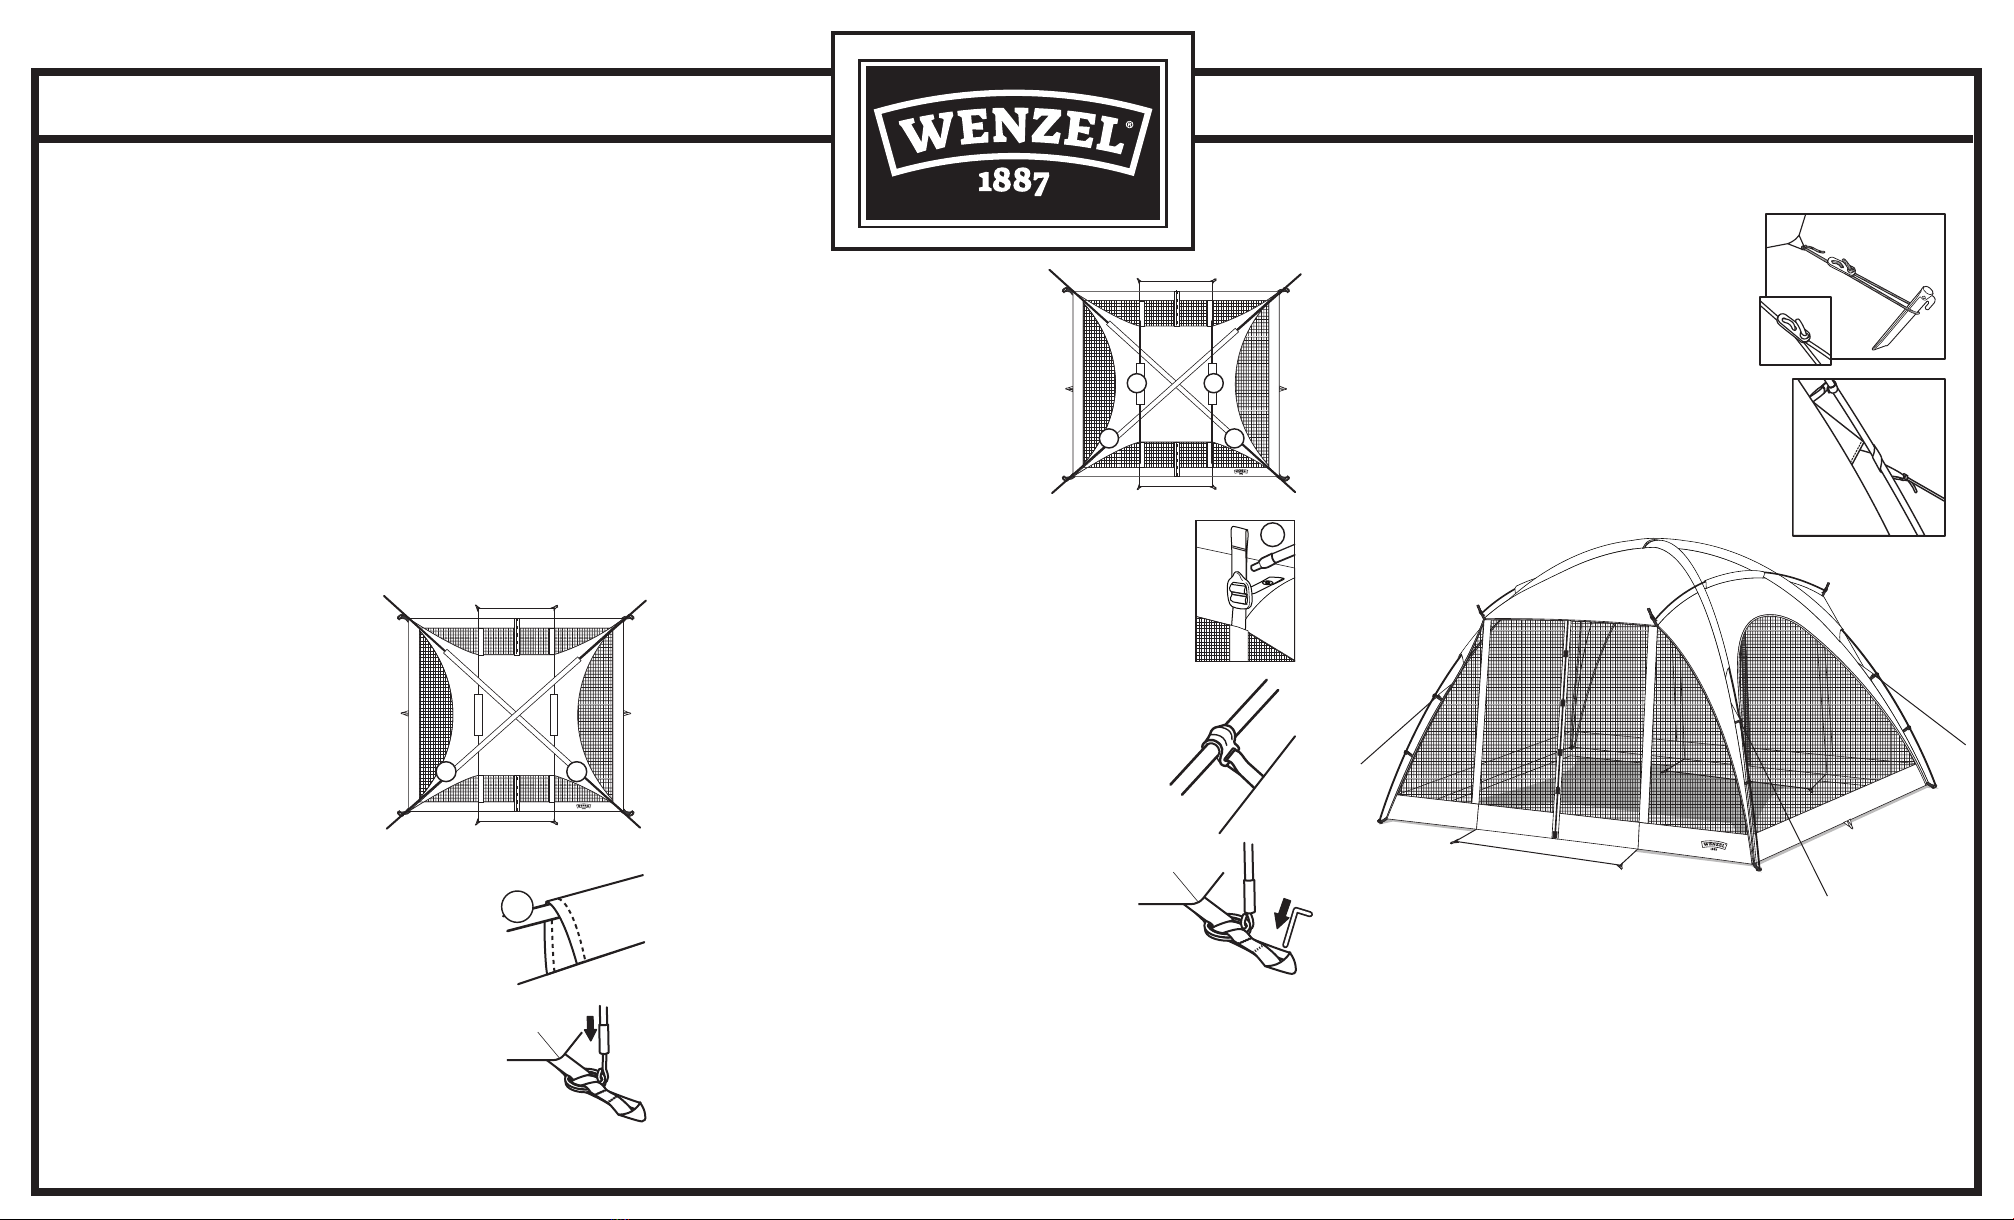
STEP 1:
Spread the screen house out flat with the pole sleeves facing up.
STEP 2:
Extend the poles by pulling out each section and placing the
ends into the metal ferrule connectors. You will have four poles. The two
longer poles are the main poles (A). The two shorter poles (B) are the
roof ridge poles.
STEP 3:
While making sure the sleeves
are in line with each other, slide each
main pole (A) through the brown sleeves
on the roof of the screen house. Position
poles so that they form an “X” across the
screen house.
STEP 4:
Slide the ridge poles (B) through the light
tan sleeves across the roof of the screen house.
STEP 5:
Go to the back corners of the screen house and
place the ends of the poles onto the pins located on the
rings at each corner.
STEP 7:
Locate the grommets on the webbing that are
attached to the screen house above the two doors. Place
one end of the ridge pole (B) into one grommet. Go to
the other side of the screen house and flex the pole.Place
the end into the grommet. Repeat this step for the second
ridge pole. The tension of the webbing can be adjusted
to optimize the magnetic door function once the screen
house is set up.
STEP 8:
Clip the plastic hooks to the fiberglass frame
poles.
STEP 9: Stake down the screen house by inserting
metal stakes through the stake loops at each corner
of the canopy. Hammer the stakes into the ground
at a 45°angle, making sure the canopy is pulled out
even and snug.
STEP 11: Guy ropes have been provided for
the screen house. Extend the guy ropes and
make a loop at the opposite end by using the
slider (as shown). Stake the guy rope to the
ground and adjust the slider to make guy rope
tight. For additional stability wrap the webbing
around the pole prior to extending the guy rope.
NOTE: To take down screen house, follow steps above in the reverse
order. Place stakes into stake bag and poles into pole bag, which are
provided. The screen house should be folded into equal parts toward
the center of the screen house to distribute the bulk. Place frame on
folded screen house and start a small tight roll, the width of your carry
bag. Once rolled, tie a string around screen house to hold it in place.
Place screen house and stake bag into carry bag. Make sure screen
house is clean and dry before storing.
Screen house should
appear as shown.
MODEL 73652520FN Durango Magnetic Screen House 12’ X 10’
B
STEP 6: To raise the screen house, one
person should go to each of the front
corners. Flex the fiberglass poles into an
upward position forming two arches and
place the ends of the poles
onto the pins
at the corners.
B
STEP 10:
Stake down the door mats through the loops at all four corners
and the metal grommets under each side of the door.
NOTE:
For the magnetic doors to open and close properly it is important
to stake down the door mats.
AA
BB
AA


