Setting Up Your Weret Watch
Activate your watch
The watch arrives in “shipping mode” and is inactive. It is activated by placing it on top of the
accompanying Weret induction charger, letting it sit a few seconds and then taking it off the
charger. When the watch is removed from the charger it exits shipping mode, and the
second hand will start moving. If the battery level is below 25%, it will charge up to 25% before
exiting shipping mode.
When placing the watch on the charger, the LED will light up green, followed by a solid blue
light that indicates the watch is being charged. When the LED starts blinking with a blue
light, the battery is fully charged.
Download and install the Weret app
To configure the watch and enable it to show other data than the current time, it has to be
“paired” with a smartphone running the Weret smartphone app.
1. Make sure the Weret app is compatible with your mobile device by checking
www.devices.weret.com
2. Find the Weret app in one of these locations, depending on your device:
• The Apple® App Store® for iOS devices such as an iPhone® or iPad®.
• The Google PlayTM Store for Android devices such as the Samsung®
Galaxy® S5 and Motorola Droid Turbo.
3. Install the app.
Turn Bluetooth on and follow the app instructions
When the app is installed, open it and get started. You’ll be guided through the process of
connecting (pairing) your Weret Watch to your mobile device.
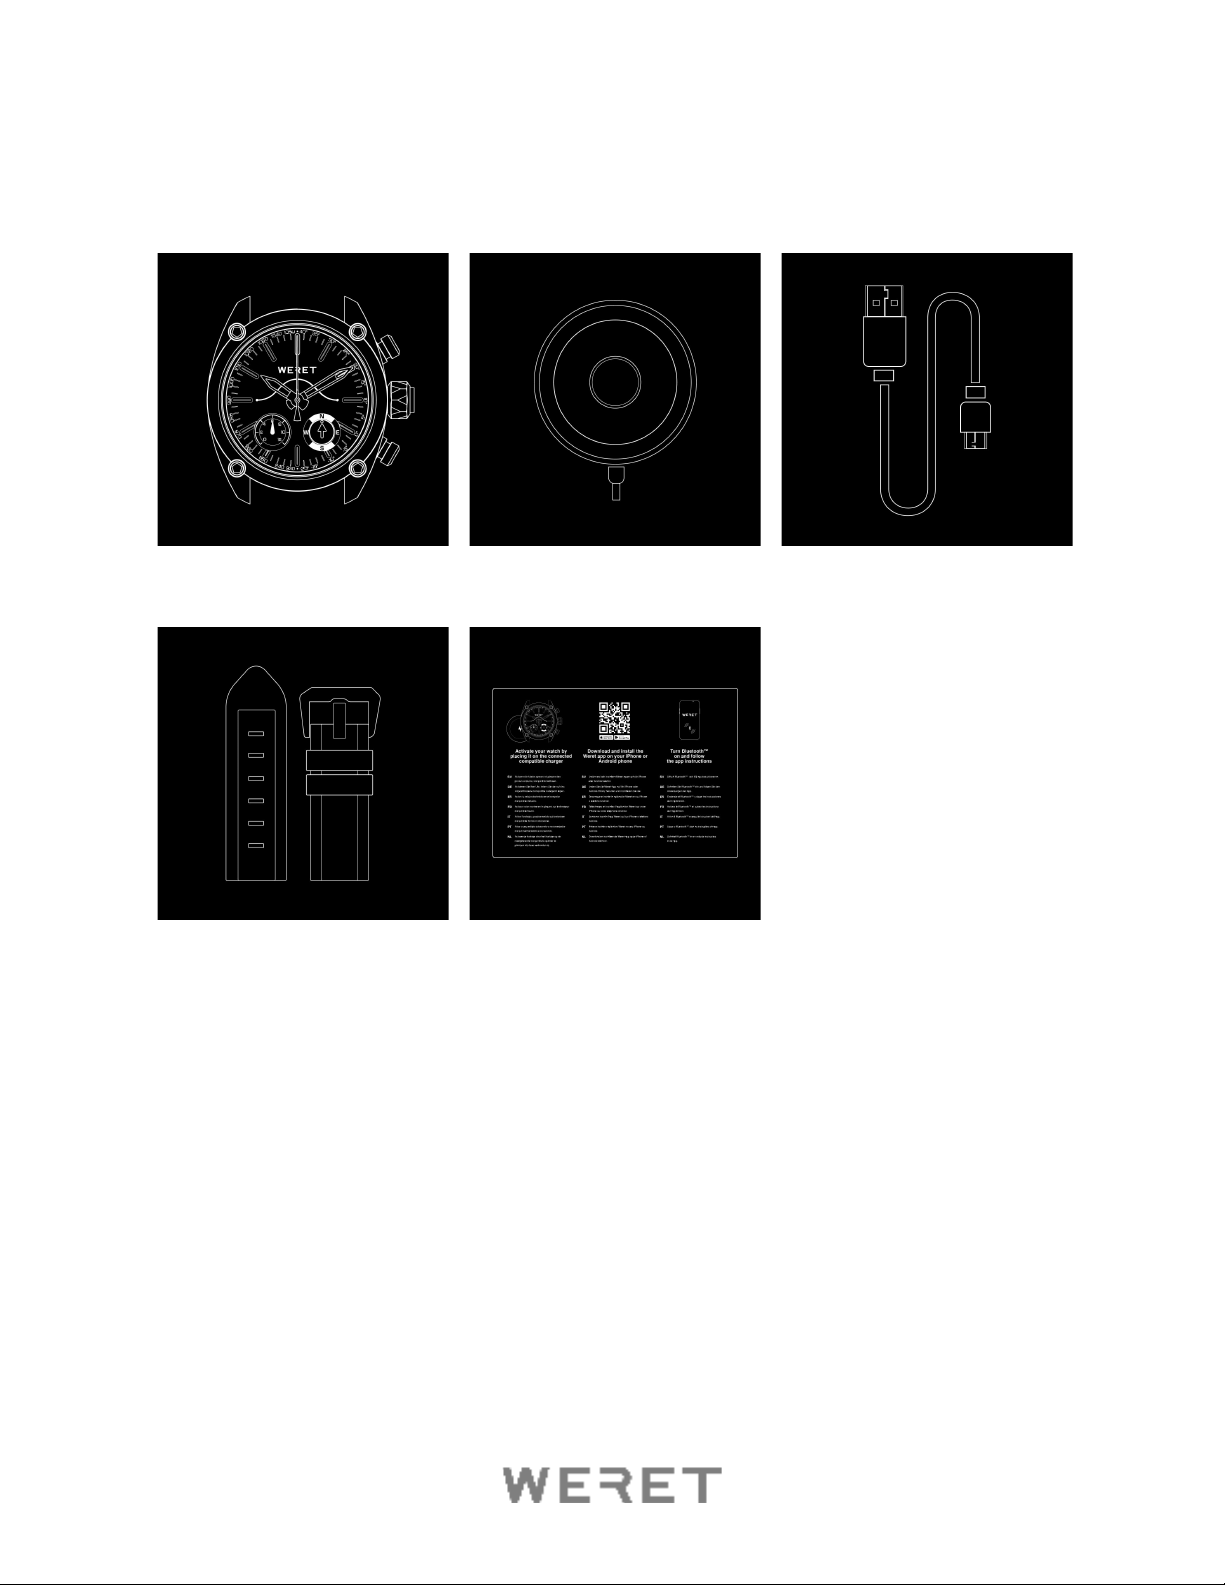
Putting on your Weret Watch
The watch straps have built-in quick release pins for a speedy attachment to your watch. If
the knobs on the tiny steel bars are pulled back, the spring in the bars will be loosened,
allowing you to attach the strap to the watch face. Repeat the same procedure if you want to
change straps.