Wesco WES3 User manual

RAMTECHGLOBAL.COM/WES-NA/
WES3 BASE STATION
QUICK START GUIDE
SCAN QR CODE FOR MORE
TECHNICAL INFORMATION

INTRODUCTION
This guide is designed to help you get your WES3 system up and running
as soon as possible.
This guide covers how to easily setup your system using the WES3 Base Station,
which is the central control for your whole system. There is also a Trouble
Shooting section which outlines some basic issues that could be encountered.
Signing up to the ‘VIP’ area of the ramtechglobal.com website will allow you
access to various ‘How To’ videos related to the system in addition to other
literature, such as a complete User Guide and Operation Manual.
2
WES3 Base Station | RAMTECHGLOBAL.COM/WES/
DO NOT OPEN ANY UNIT AS THIS WILL INVALIDATE THE WARRANTY.

3
WES3 Base Station
The full User Manual and Operation Manual is available
by signing up to the Ramtech VIP Area - visit
vip.ramtechglobal.com today.
RAMTECHGLOBAL.COM/WES-NA/

4
SETTING UP WES3
Installing WES3 on your site is easy. You will need to start by activate / powering
on each unit and add the units to the group so that they can communicate
with each other.
1INITIAL SETUP
STEP 1 Activate and power on
To activate/power on the WES3 Base Station unit, hold down ‘A’ and press
‘B’ three times in quick succession. All three LEDs will illuminate and then the
amber LED will ash.
Initial setup of the WES3 Base Station is through a series of on-screen options.
Language, Inspection Delay and Pre-Alarm mode options can be congured
STEP 2 Language selection
Select language - the available options are English, German, French, Spanish,
Italian and Swedish. Language settings can be changed at any time.
STEP 3 Set inspection delay
The Inspection Delay setting allows an optional delay period between
triggering a Call Point and the site wide alarm being raised.
The default setting is 00 minutes (i.e. no delay), but can be set in 1 minute
increments up to a maximum 10 minutes.
A conrmation screen will be displayed to validate the settings. The Inspection
Delay can only be set during the initial activation process.
WES3 Base Station | RAMTECHGLOBAL.COM/WES/

5
STEP 4 Pre-alarm function
The Pre Alarm function denes site-wide behaviour of the network during an
Inspection Delay period.
With Pre Alarm mode enabled, the entire network will emit a site-wide,
intermittent sound and (on strobe-equipped call points) an intermittent ash.
With Pre Alarm mode disabled, only the local call point which has been
triggered will sound. All other call points around site will remain in non-alarm
mode.
Pre Alarm can only be set during the initial activation process. Once set, the
Pre Alarm can only be changed by turning o and reactivating the WES3 Base
Station.
On completion of initial set up, settings for Inspection Delay and Pre Alarm
mode are displayed on the Base Station home screen.
Check the settings displayed on screen are the desired settings, and if not,
repeat the Initial Setup process before proceeding. The display is shown for the
WES3 Base Station is shown below.
WES3 Base Station | RAMTECHGLOBAL.COM/WES/
Base Station Display

6
2ACTIVATE UNITS
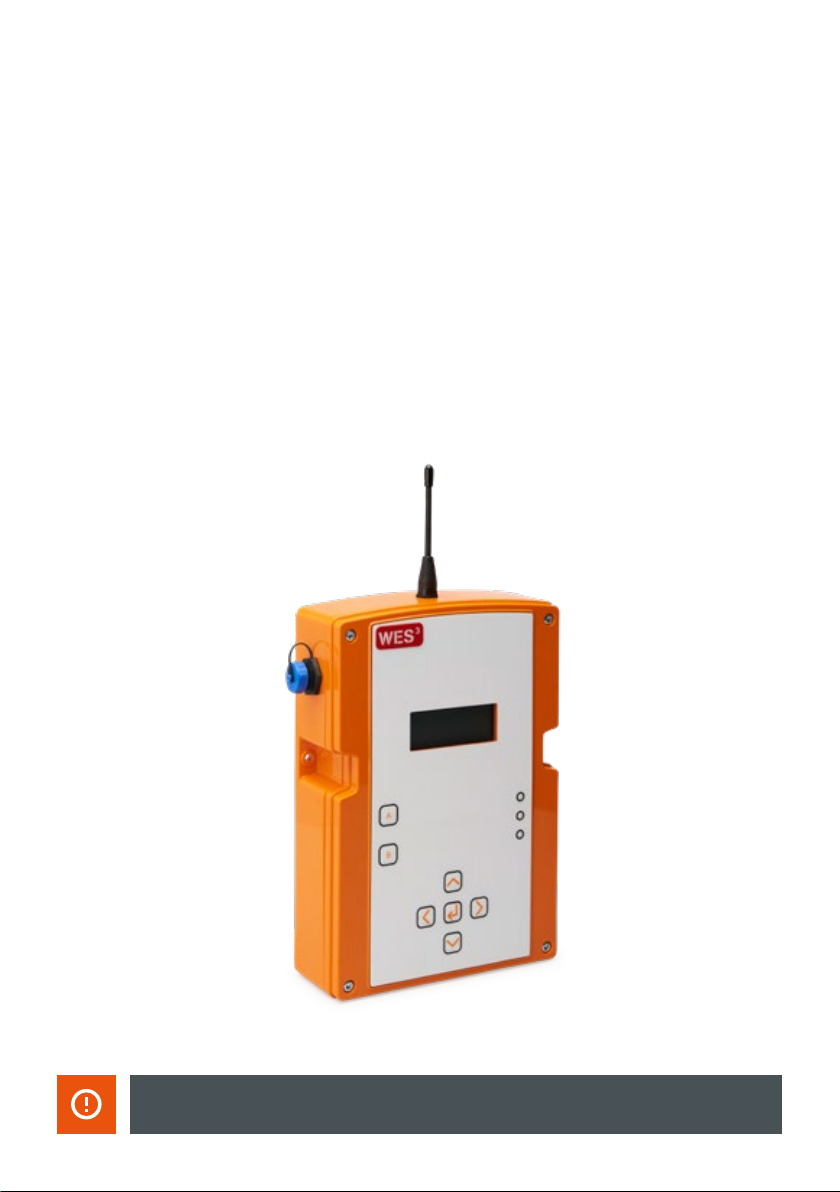
To activate any WES3 unit, hold down ‘A’ and press ‘B’ three times in quick succession.
All three LEDs will briey illuminate and then the amber LED will ash.
This operation activates the unit – no radio connection is established at this point.
3UNIT NUMBERING
Activated Call points, Detectors, and other WES3 units can be added to create a WES3
network using the Unit Numbering process.
During Unit numbering, WES3 devices receive details of network conguration from the
WES3 Base Station, including Inspection Delay and Pre Alarm settings. This is the only
way of creating and adding to a WES3 network.
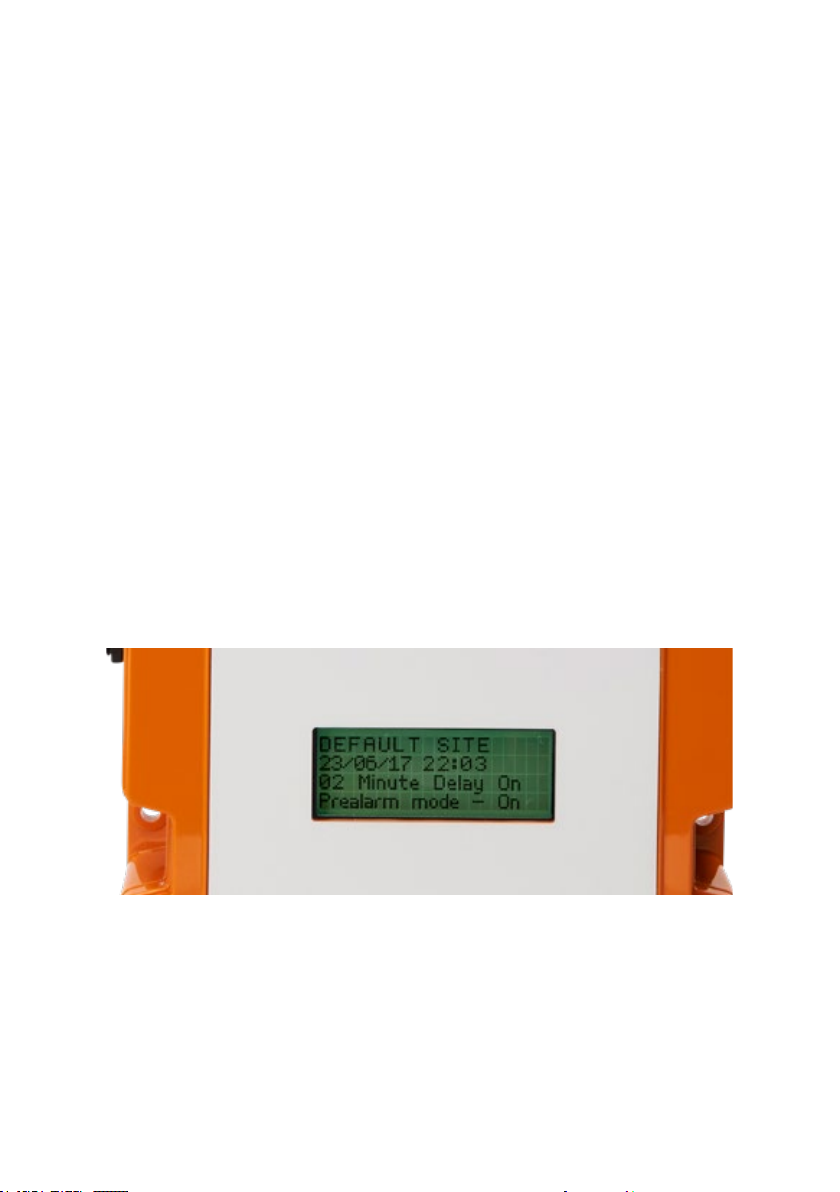
Access the Settings Menu on the WES3 Base Station home screen. The Settings menu
can be accessed from the Main Menu by selecting Settings with the directional pad
then pressing Enter.
You’ll be required to enter the PIN code before proceeding. This is set as default to
1234, but can be changed (refer to WES3 Installation and Operation Manual).
From the Settings menu select the rst option, Unit Numbering: Ensure that any WES3
devices to be paired are activated and has an amber ashing LED. This indicates the
unit is ready to pair.
Units can be numbered with any three of four digit number (depending on rmware
version) from 001 to 9999 in accordance with your site plan. Numbering allows
messages and alerts during operation to be referenced to a specic unit location on
site, using the construction project site plan.
From the Unit Numbering screen, use the up and down arrows to select the desired
number for your rst unit.
Press and hold ‘A’ on both units. The amber LEDs will illuminate followed by the
green LEDs to indicate that the units have been successfully paired and a site group
created. Release the ‘A’ buttons.
After successfully numbering a unit, change the number displayed on the WES3 Base
Station and repeat the process above for all required units.
If the red LED illuminates, pairing has failed. Ensure the unit to be numbered is
activated, and repeat the Unit Numbering process.
WES3 Base Station | RAMTECHGLOBAL.COM/WES/

7
4ADD UNITS TO AN EXISTING SITE GROUP
Repeat sections 2 and 3.
5POSITION UNITS
Once activated and paired, WES3 units can be installed on site. Ensure any
applicable local guidelines or standards regarding locating units on site are adhered
to, such as BS 5839-1 in the UK.
Wherever possible, avoid positioning the unit directly adjacent to metal frames,
electric cables and similar equipment that may interfere with the signal strength.
6SECURELY FIX THE UNITS IN PLACE
Each WES3 unit must be securely xed in place and the tamper switch on the rear of
the unit must be in contact with the wall or ceiling.
Detector units are ceiling mounted and intended for indoor use only. Ensure a risk
assessment has been carried out and all reasonable safety precautions are in place
before commencing work.
Call Points must be securely xed, with the antenna upright, to a robust vertical
surface such as a wall or trolley. Where the existing surface is unsuitable for direct
xing, use backing board such as plywood or similar sheet material.
Each unit should be securely mounted using its two integrated mounting points
with M4 x 50mm pan head screws and wall plugs or other xings selected for the
particular wall or ceiling type.
WES3 Base Station | RAMTECHGLOBAL.COM/WES/

For more information on System Test, refer to the full WES3
User Guide and Operation Manual available in the VIP area of
ramtechglobal.com.
Note: Following initial installation, wait for a minimum of 60
minutes before starting the rst system test. During this time,
the WES3 units will self-calibrate to adjust for background radio
noise which may impact the accuracy of the system test.
Note: Powering o the WES3 CONNECT unit will reset the entire
system as a ‘factory reset’, so avoid powering o
unless necessary.
8
WES3 Base Station
RAMTECHGLOBAL.COM/WES-NA/

9
7TEST THE SYSTEM
After installation of the units, it is essential to perform a system alarm test to
conrm proper operation of the system. Following initial installation, wait for a
minimum of 60 minutes before starting the rst system test.
The System Test is started from the WES3 Base Station Settings Menu. The
access code is required to access the Settings Menu. The default PIN number is
1234. From the Settings Menu, select System Test to start test mode.
The WES3 Base Station will display a conrmation message that the test has
started. Walk the site to check all units in the network.
During System Test mode, the WES3 network isolates all devices in the network,
allowing full physical test of each unit, without activating the site-wide alarm.
Once the System Test is complete, return to the WES3 Base Station and press
the button to complete the test and exit System Test mode.
The test result is indicated as follows:
Pass Green LED solid illumination
Radio OK, other fault
detected
Red LED ashes followed by Amber
LED group ashes to indicate fault
(see ‘Amber LED Indication’).
No Radio Signal
Amber LED group ashes to
indicate fault (see ‘Amber LED
indication’).
WES3 Base Station | RAMTECHGLOBAL.COM/WES/
It is important to be aware that, whilst in System Test mode, the WES3 network is
inactive and a site-wide alarm cannot be triggered from any unit. System Test mode
must be exited from the Base Station in order to reactivate the network.

WES3
IN ACTION

RAMTECHGLOBAL.COM/WES-NA/

12
TROUBLE SHOOTING
1LED CODES
Description Flash Type
Group Flash 1 - Low Battery
Group Flash 2 - Low signal
Group Flash 3 - Unpaired
Group Flash 4 - Tamper
Group Flash 5 - Re-arm or Unit latched (potentially
input latched on Interface unit only)
Green LED Active units with no faults will ash their green LEDs once every
4 seconds to indicate that the unit is operational.
Amber LED Each WES3 unit monitors itself for a number of faults. These are
indicated via the amber LED, which will ash in grouped patterns with longer
than usual gaps in between them.
Units displaying one of these patterns require further investigation and should
not be relied upon as part of the evacuation alarm and detection system
until the fault has been corrected. Use the chart on page 13 to determine the
nature of the issue.
Red LED If a Sensor triggers the alarm, its red LED indicator will ash during
an alarm. If a sensor has raised the alarm, its red LED indicator will ash during
an alarm.
WES3 Base Station | RAMTECHGLOBAL.COM/WES/
It is recommended that the system is tested weekly or whenever a signicant change
has been made to the installation or the building under construction.

13
2WARNING CODES
The WES3 Base Station will alert you to various system faults using the codes
below:
Warning Codes Warning Description Self-Clearing
‘MED’ or ‘MD’ Medical Alert Medical assistance required at
Unit NNN
No
‘BAT’ or ‘BT’ Low Battery Unit NNN has a low battery No
'DET' or 'DT' Detector Tamper Unit NNN has had sensor head
removed
Yes
‘EXT’ or ‘EX’ External Tamper Unit NNN has been removed from
wall/ceiling
Yes
‘FLT’ or ‘BF’ Flat Battery Unit NNN has turned o, its
battery is at
No
‘INT’ or ‘IN’ Internal Tamper Unit NNN has been opened No
‘LAT’ or ‘LT’ Latched Call point button on unit NNN is
still depressed
Yes
'REM' or 'RM' Removed Unit NNN has been deactivated
and removed
No
'SIG' or 'SG' Low Signal Unit NNN has a low radio signal Yes
'TST' or 'ST' System Test Unit NNN initiated a System test Yes
'NEW' or 'NW' Unexpected Unit Unit NNN added since last
system poll
No
'GON' or 'GN' Unit Missing Unit NNN removed since last
system poll
No
It is important to be aware that, whilst in System Test mode, the WES3 network
is inactive and a site-wide alarm cannot be triggered from any unit. System
Test mode must be exited from the WES3 Base Station in order to reactivate the
network.
WES3 Base Station | RAMTECHGLOBAL.COM/WES/
Note: Alerts will appear as either a 2-character or 3-character code, depending on
rmware version.

14
4UNIT SOUNDS
Sound Issue: Call Point unit periodically beeping after an alarm has
been reset
The Call Point is latched and needs to be manually reset using the key
provided.
Sound Issue: WES3 Base Station beeps frequently
System warning. If alarm has been raised, LCD screen will display ‘ALARM
ALARM ALARM’ together with details of which unit has raised the alarm.
If another warning is given, check the warning code against the warning code
table on page 13.
5SILENCING THE ALARM
The alarm must be silenced either by using the reset key or on the WES3 Base
Station unit.
The alarm will automatically silence 30 minutes after activation. The
evacuation alarm can be manually cancelled from a Call Point that has been
pressed using the reset key provided. If necessary, a Call Point on a nearby call
point can be pressed and then reset to cancel the alarm.
Please wait for 5 seconds between pressing and resetting a Call Point. After the
alarm has cleared the system has a short (2 minute) re-arm period during which
the sirens will sound intermittently, and the amber warning LEDs ash in groups
of 5, following which the system is re-armed and ready for use.
During the re-arm period, the alarm cannot be reactivated. It is therefore vital
to conrm that there is no hazard before silencing the alarm.
WES3 Base Station | RAMTECHGLOBAL.COM/WES/
Note: It is vital to conrm that there is no hazard before silencing the alarm. Do not
attempt to open the unit or deactivate by removing the battery.

15
WES3 Base Station | RAMTECHGLOBAL.COM/WES/
6RESETTING THE CALL POINT
All Call Points which have been activated must be manually reset using the key.
Any Call Point units with activated call points will periodically beep after
the re-arm period has ended as a reminder that the Call Points need to be
mechanically reset using the key before they can be used to raise a alarm.
Ensure the Call Point is fully reset before removing the key. Partially resetting
a latched Call Point after the alarm has been cancelled can re-trigger the
evacuation alarm.
STEP 1 Insert reset key with tab to the right as shown
below.
STEP 2 Push key in as far as possible
STEP 3 Turn key anti-clockwise until a loud mechanical
click is heard. Remove key.

16
RADIO EQUIPMENT STATEMENT
Model Name Model Number FCC ID of radio module Radio module
Emergency
Control Unit
W3-SCU-STD-U-9X 2AHNO2-RD0-9X Ramtech radio module
Interface W3-INF-I2O-N-9X,
W3-INF-MNT-N-9X
2AHNO2-RD0-9X Ramtech radio module
CONNECT W3-CON-U-9X 2AHNOW2CTRLMK2 Ramtech MK2 radio
module
XPY1EIQ24NN Ublox R202-02B-02
4G modem
All other WES3 models contain: 2AHNOW2CTRLMK2 Ramtech MK2 radio
module
The following should be present on all products that are subject to radio
approval under Part 15 of the FCC Rules.
FCC warning statement:
This device complies with Part 15 of the FCC Rules Operation is subject to the
following two conditions:
• This device may not cause harmful interference, and
• This device must accept any interference received, including interference
that may cause undesired operation.
This equipment complies with FCC radiation exposure limits set forth for an
uncontrolled environment.
RAMTECHGLOBAL.COM/WES-NA/

17
RAMTECHGLOBAL.COM/WES-NA/
End users must follow the specic operating instructions for satisfying RF
exposure compliance.
Changes or modications not expressly approved by the party responsible for
compliance could void the use’s authority to operate the equipment.
WES3 products contain the following ISED radio modules:
Model Name Model Number FCC ID of radio module Radio module
Emergency
Control Unit
W3-SCU-STD-U-9X 21246-W2RDO9X Ramtech radio module
Interface W3-INF-I2O-N-9X,
W3-INF-MNT-N-9X
21246-W2RDO9X Ramtech radio module
CONNECT W3-CON-U-9X 21246-W2CTRLMK2 Ramtech MK2 radio
module
8595A-1EIQ24NN Ublox R202-02B-02
4G modem
All other WES3 models contain: 21246-W2CTRLMK2 Ramtech MK2 radio
module
Under Industry Canada regulations, this radio transmitter may only operate
using an antenna of a type and maximum (or lesser) gain approved for the
transmitter by Industry Canada.
To reduce potential radio interference to other users, the antenna type and
its gain should be so chosen that the equivalent isotropically radiated power
(e.i.r.p.) is not more than that necessary for successful communication.

18
RAMTECHGLOBAL.COM/WES-NA/
This device complies with Industry Canada licence-exempt RSS standard(s).
Operation is subject to the following two conditions:
1. This device may not cause interference, and
2. This device must accept any interference, including interference that may
cause undesired operation of the device.
Conformément à la réglementation d’Industrie Canada, le présent émetteur
radio peut fonctionner avec une antenne d’un type et d’un gain maximal (ou
inférieur) approuvé pour l’émetteur par Industrie Canada.
Dans le but de réduire les risques de brouillage radioélectrique à l’intention
des autres utilisateurs, il faut choisir le type d’antenne et son gain de sorte que
la puissance isotrope rayonnée équivalente (p.i.r.e.) ne dépasse pas l’intensité
nécessaire à l’établissement d’une communication satisfaisante.
Le présent appareil est conforme aux CNR d’Industrie Canada applicables
aux appareils radio exempts de licence. L’exploitation est autorisée aux deux
conditions suivantes:
1. l’appareil ne doit pas produire de brouillage, et
2. l’utilisateur de l’appareil doit accepter tout brouillage radioélectrique subi,
même si le brouillage est susceptible d’en compromettre le fonctionnement.

19
RAMTECHGLOBAL.COM/WES-NA/
WES3 Base Station | RAMTECHGLOBAL.COM/WES/

The WES range of products is manufactured by:
Ramtech Electronics Limited, Ramtech House, Nottingham, NG7 1TN, UK
For more information, refer to the full WES3 User Guide and Operation Manual.
To access, visit the VIP area at
vip.ramtechglobal.com
v.1.2 June 2021
RAMTECHGLOBAL.COM/WES-NA/
Table of contents
Popular Accessories manuals by other brands

ZMODO
ZMODO ZM-CJAED quick start guide

HYDAC International
HYDAC International CS1000 Series instruction manual

PCB Piezotronics
PCB Piezotronics CS64XB9Y Series manual

PCB Piezotronics
PCB Piezotronics 137B25 Installation and operating manual

SICK
SICK WTB4F operating instructions

Volante
Volante PAC-310 manual