Wessex Country SAK 100 Installation and maintenance instructions

ROTARY
CULTIVATOR
OPERATOR'S MANUAL
AND PARTS
LIST

SAK Tillers
Page 1 of 23
Operator's Manual
TILLERS
SAK 100. SAK 120.

SAK Tillers
Page 2 of 23
No part of this manual shall be reproduced, copied or disseminated by any means, without Wessex
Machinery Sales prior authorization in writing.
Wessex Machinery Sales reserves the right to make any necessary changes without giving prior
notice, in order to optimize the quality and safety features and does not commit itself to updating
this manual every time a change is made.
This booklet provides a thorough and accurate description of the instruction and maintenance
activities to be carried out on the tiller you purchased. We congratulate you on your choice and
urge you to thoroughly familiarize yourself with and follow the instructions contained in this manual.
This will assure you a long, safe and trouble free working life for your tiller.
The Wessex Machinery Sales shall not assume any responsibility should problems arise as a
result of lack of compliance with the instructions and/or operator's negligence.
The manual is divided in chapters and paragraphs and the pages are numbered, thus offering
accurate and precise information.
The requested information can be easily found by searching the key words or referring to the index.
Dealer’s Stamp

SAK Tillers
Page 3 of 23
INDEX
GENERAL INFORMATION
Symbols Page 5
Safety Labels Page 6
Technical date Page 7
Main Parts terminology Page 7
Identification Plates Page 8
Recommended Use Page 8
Inappropriate Use Page 8
Torque Specification Page 8
SAFETY
Safety in the workplace Page 9
User’s requirements Page 9
Work Clothing Page 9
General Safety norms Page 9
SET UP
Attachment to the tractor Page 11
Connection of the PTO Shaft Page 12
Working depth adjustment Page 13
Drag board adjustment Page 13
Chain adjuster Page 14
Start up Page 14
Road transport Page 14
Shut down Page 14
MAINTENANCE
First check Page 16
Every 8 working hours Page 16
Every 50 working hours Page 16
Every 500 working hours Page 16
Blades replacement Page 17
How to order spare parts Parts 18

SAK Tillers
Page 4 of 23

SAK Tillers
Page 5 of 23
SAFETY LABELS
The safety labels and information on the machine (picture 1, 2 and 3), must be complied with.
Failure to comply with these warnings may result in severe injuries or even death. Make sure that
the labels are always present and legible; should this not be the case, contact your nearest dealer to
request replacements.

SAK Tillers
Page 6 of 23
TECHNICAL DATA
MAIN PARTS TERMINOLOGY

SAK Tillers
Page 7 of 23
IDENTIFICATION PLATES
The identification plates are placed on all the tillers and are structured as follows:
RECOMMENDED USE
The tillers described in this instruction and maintenance manual, have been designed explicitly to
till the land. Any other use jeopardizes the operator's safety and the machine integrity.
INAPPROPRIATE USE
The tillers shall not be used as follows:
Connected to vehicles which do not have a suitable power or weight.
Without being properly installed by securing the hitch blocks to all three points of the
tractor lift unit.
Tilling of extremely stony or unsuitable ground.
Raising or lifting of the equipment when the power take-off is engaged.
In close proximity to person/s when power is engaged.
Do not stand or step on the equipment when it is being operated or transported.
Do not operate the machinery while wearing unsuitable (loose fitting) clothing.
TORQUE SPECIFICATIONS
For correct hardware tightening on the tiller, we suggest the use of suitable torque wrench and
the applicable torque as listed in the table below:
M-THREADED SCREW/BOLTS
Bolt grade
Thread
8.8
10.9
Nm
Lb-ft
Nm
Lb-ft
M6
11
8.5
17
12
M8
28
20
40
30
M10
55
40
80
60
M12
95
70
140
105
M14
150
110
225
165
M16
240
175
305
225
M18
330
250
475
350
MODEL: 8833048
YEAR OF MANUFACTURE: 2007 WEIGHT: 286 lbs
SERIAL NUMBER: 0000000000001
Broadwood International
Trading Estate, Oakhanger Road, Bordon
Hampshire GU35 9HH

SAK Tillers
Page 8 of 23
SAFETY
SAFETY IN THE WORKPLACE
Most of the accidents, which occur while the operator is using the machine or the equipment or
carrying out maintenance and repair activities, are caused by the non-compliance with the main
safety requirements.
Therefore the potential risks must be fully understood and special attention must be paid to the
activity which is being executed.
If potentially dangerous situations are known,
accidents can be prevented!
USER'S REQUIREMENTS
The equipment user must have the following:
Physical: good sight, co-ordination and capability to execute all instructions in a safe manner.
Mental: the users must understand and follow the prescribed norms, rules and safety measures.
They must be careful, pay attention to their own safety and the safety of other people and act
properly and in a responsible way.
Training: the users must read and understand this manual, its pictures and charts, and the
identification and hazard plates. They must be specialised, trained and qualified on any use and
maintenance activities.
WORK CLOTHING
The following clothing and personal protective equipment must be used when working and
executing maintenance and repair activities:
•Overalls or any other comfortable outfit; make sure that they are
not too loose since they might be caught by moving parts.
•Protective gloves.
•Goggles or mask to protect the eyes and face.
•Safety helmet
•Safety shoes.
Make Sure that personal protective equipment is
properly stored and complies with the laws in force.
GENERAL SAFETY NORMS
The features of the area where work is taking place must always be taken into consideration:
Do not stand in the working radius of the operating machinery or any other machine
accessories when the equipment is running.

SAK Tillers
Page 9 of 23
Prepare the work:
•Do not drink alcohol; take drugs, or any other substances which may affect your ability to use the
equipment before or when working.
•Make sure that there is sufficient fuel in the tractor to prevent the machine from stopping during work.
•Do not use the equipment under unsafe conditions, e.g. do not make temporary repairs just to start
or keep working; do not work at night if the area is not well illuminated.
When working or executing maintenance activities, remember:
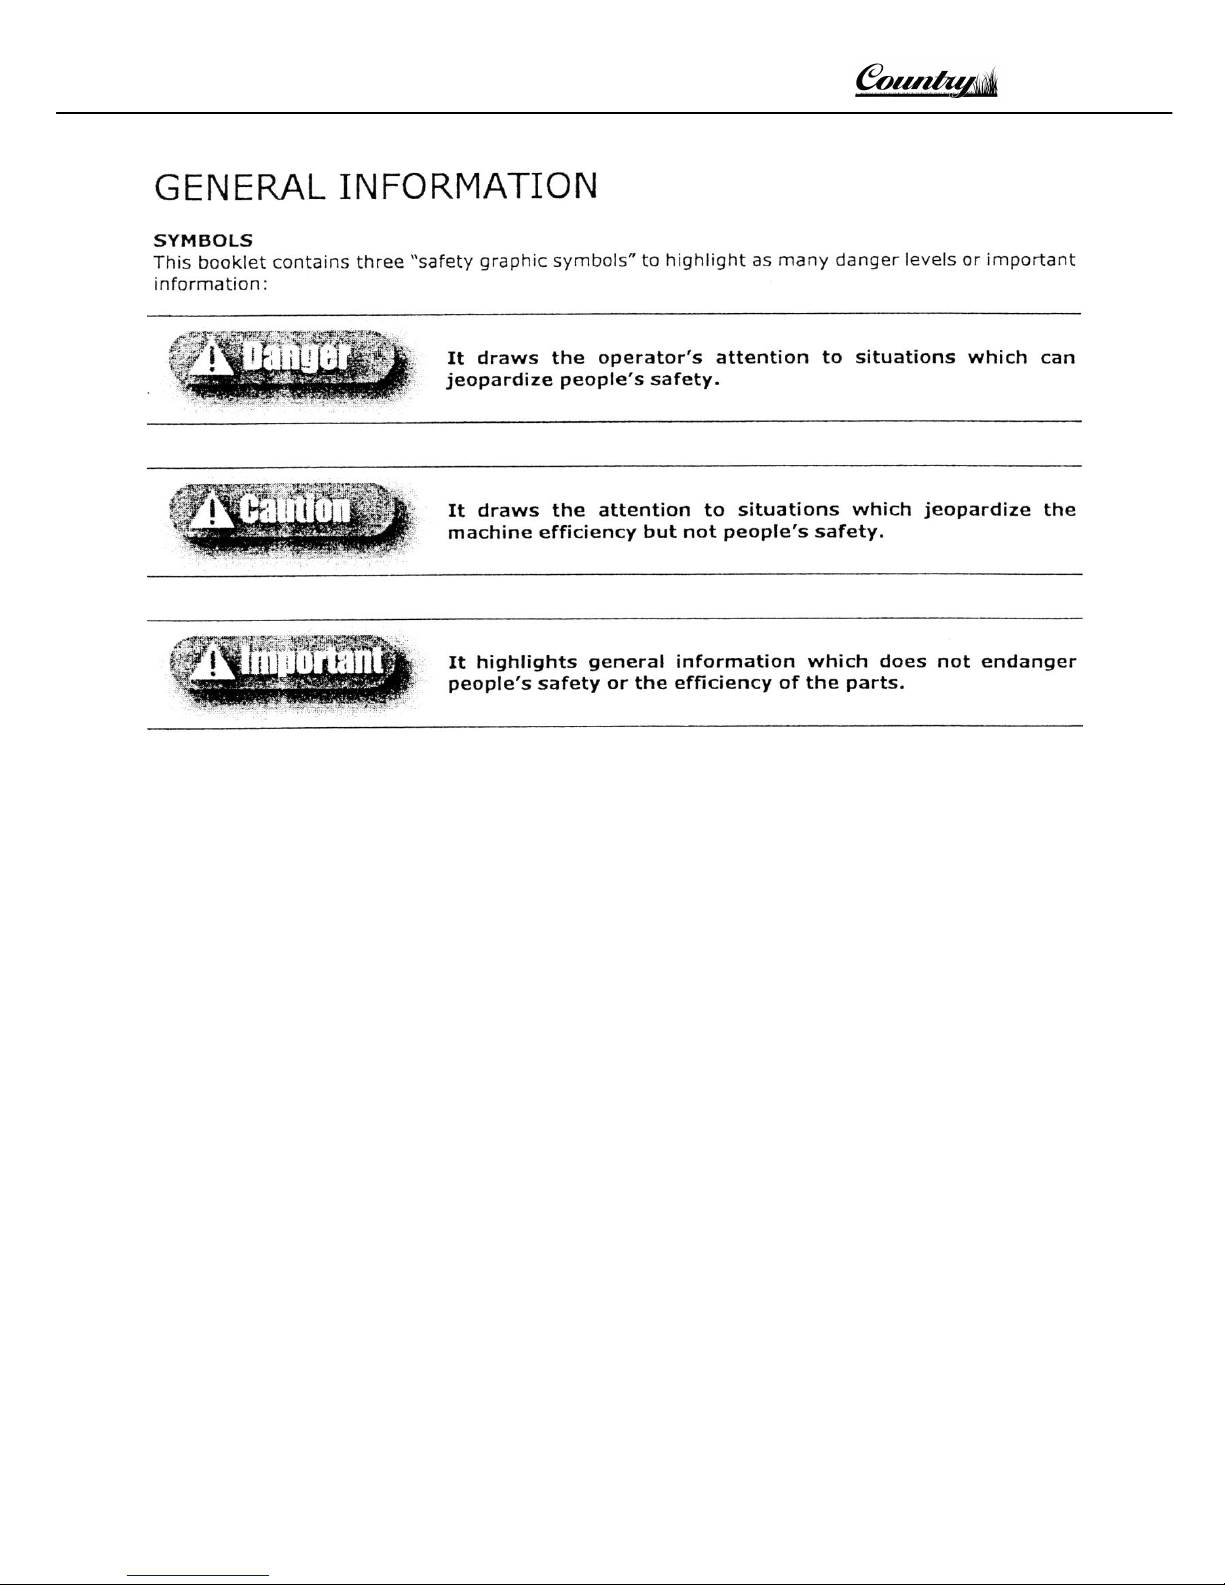
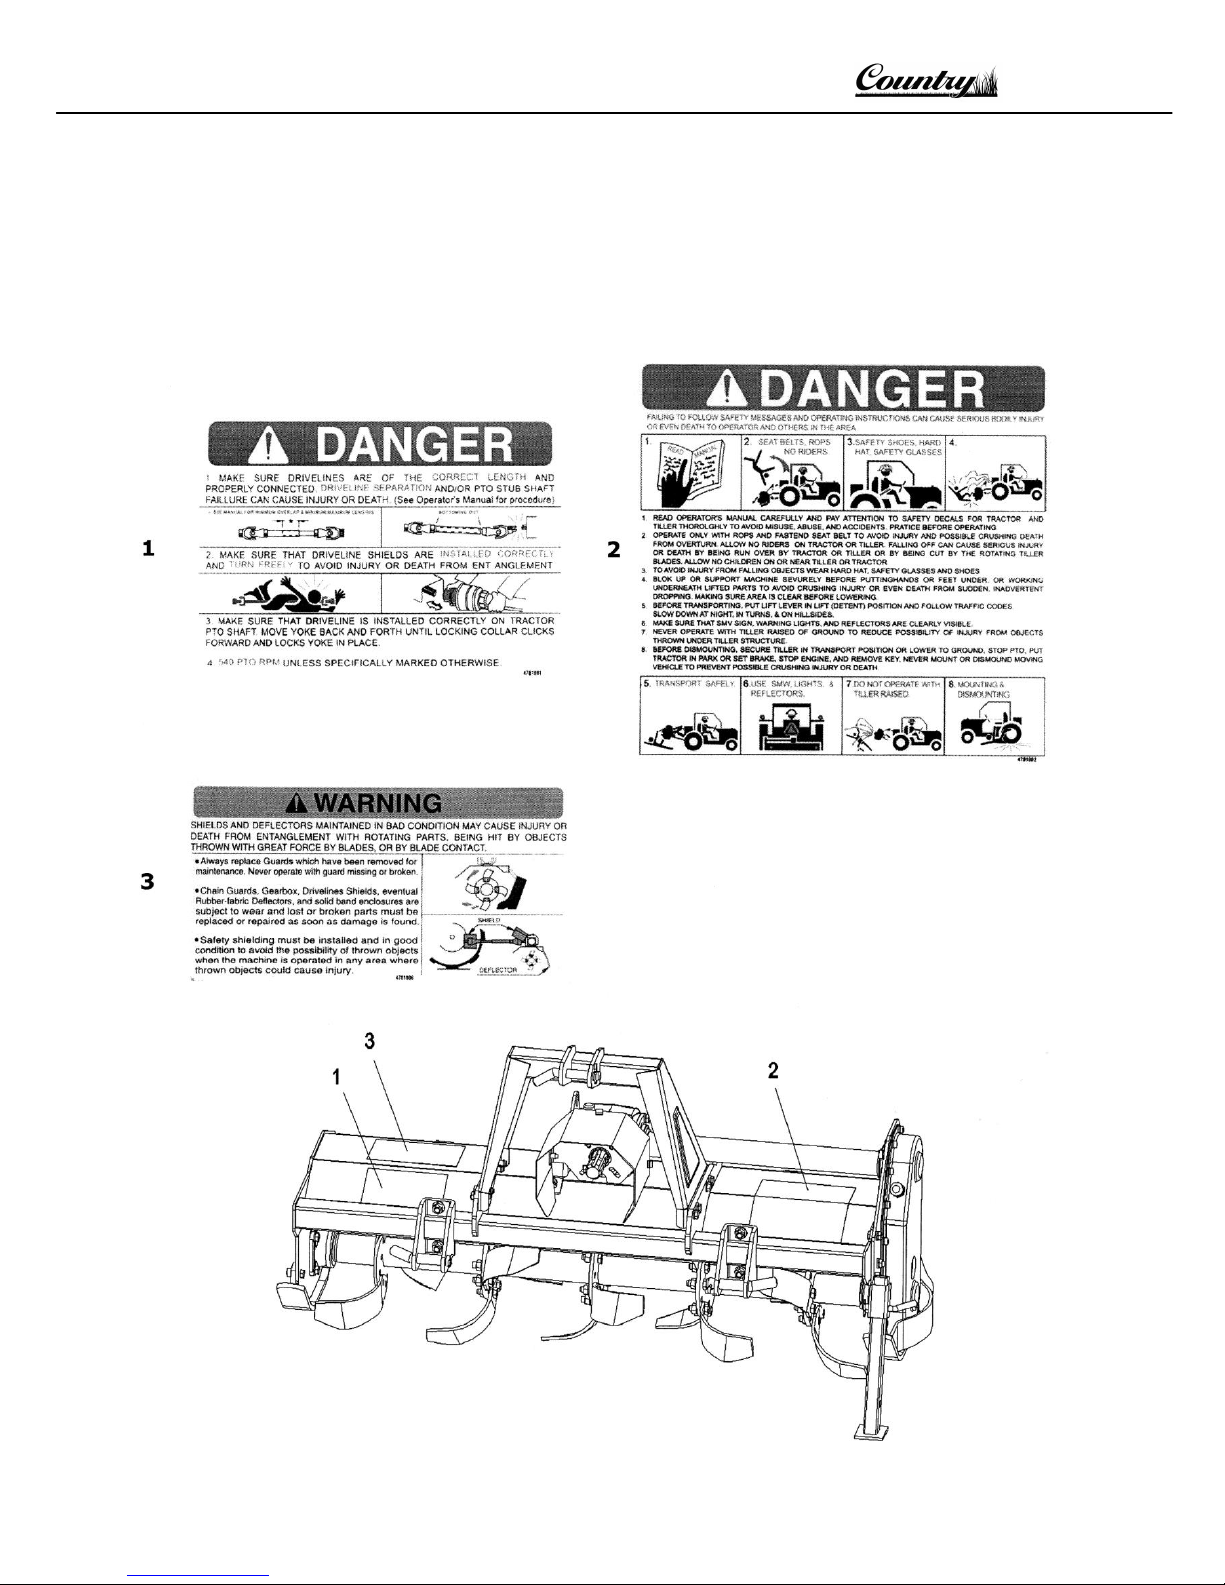
•The labels and stickers providing instructions on the use of the equipment or information on
dangers must not be removed or hidden, and must be legible.
•Do not remove the safety devices, covers and safety guards, unless maintenance activities are
being carried out. If the safety devices must be removed, turn the engine off, remove them
correctly and re-install them before turning the tractor on.
•Do not lubricate, clean or adjust moving parts.
•Use the appropriate tools to execute maintenance or adjustment activities on the equipment.
•Do not use damaged or unsuitable tools, e.g. pliers rather than wrenches etc.
•Prior to carrying out activities on hydraulic lines under pressure, or disconnecting their components,
make sure that the line is no longer under pressure and that it does not contain any hot fluids.
•Check all the fittings and make sure that they are well connected before supplying pressure to the
hydraulic lines.
•Make sure that no tools, clothes or any other materials are left in areas where moving parts are
present when the maintenance and repair activities are completed.
•Do not give directions and make signals at the same time during a manoeuvre. Manoeuvre
directions and signals must be given from one person only.
•Do not unexpectedly call an operator, if not necessary. Do not startle the operator, e.g. by
throwing objects.
•Pay attention to people in the vicinity of the work area, especially children!
•Make sure that nobody is standing in the working range of the equipment.
•Do not use the equipment to lift people.
•When the equipment is not needed, turn the engine off; leave the vehicle on a flat surface, with the
first gear and the parking brake engaged. Disengage the power take off.
•Do not execute any cleaning, lubrication, repair or adjustments when the engine is running and the
equipment is in the raised position.
•Do not work on steep slopes, if the stability of the vehicle can be jeopardised.

SAK Tillers
Page 10 of 23
Wessex Machinery Sales shall not assume any responsibilities if these instructions are not strictly
followed.
SETUP
ATTACHMENT TO THE TRACTOR
Carefully read this instruction manual and the manuals of the tractor and PTO shaft
manufacturer. All tillers are built to be attached to any tractor equipped with a three point lift
of the correct category and with suitable ball ends.
Before attaching the equipment to the tractor, make
sure that the ground is smooth and flat and that
nobody is standing between the tractor and the tiller;
slowly move the tractor towards the tiller by
aligning the tractor lifter arms with the two tiller
coupling side pins; turn the engine off and pull the
brake.
It is possible to adjust the attachment position
releasing the bolts B (picture 1) and modifying the
position of the plates A. Tighten the bolts after
making any adjustment.
picture 1
After adjusting the couplers, connect the lower arms by removing the catch pins from the pins
located on the hitch blocks, inserting the lift arm pins through the hitch block and ball ends and
secure them by means of the pins which were previously removed.
Connect the tractor top link to the third
upper point by removing the pin located
between the two plates, inserting the top
link and securing it by means of the pin.
Adjust the top link so that the upper part of
the frame is parallel to the ground. Block all
the linking parts by means of the sway chains
or arms.
Make sure that the central unit axis (case/bevel
gear pair) is parallel to the ground, thus
minimising the stresses on the power take off
and increasing the working life of the
equipment.
picture 2
After executing all of the above activities, make sure that all
the nuts and bolts are tightened.

SAK Tillers
Page 11 of 23
CONNECTION OF THE PTO SHAFT
Before installing the PTO shaft make sure that the RPM rating and the direction of rotation
match
those of the tractor. Carefully read the PTO shaft and tractor instructions.
Furthermore, accurately read the instructions of the manufacturer of the PTO shaft and
of the
tractor.
Before starting any activity, make sure that the guards are installed on the power take off
of the
tractor and PTO shaft. Make sure that they cover the PTO shaft throughout its length.
When fully extended, the plastic pipes must overlap by at least
1/3 of the length of the pipes (LT). When retracted, the min
acceptance clearance is 5cm (picture 3).
Check that the PTO shaft min. and max.
lengths
are within the parameters of the
machine-tractor coupling. Should problems
arise, contact your dealer. After the
installation, anchor the PTO shield to the
tractor and machine using the special chains;
make sure that it turns smoothly. If the PTO
shaft is equipped with safety devices, e.g.
torque limiters or free-wheel devices, install
them on the operative machine side. For the
use and maintenance of the PTO shaft,
please refer to the relevant manual.

SAK Tillers
Page 12 of 23
WORKING DEPTH ADJUSTMENT
The working depth of the equipment depends on the position of the lateral skids.
If the skids are raised, the working depth increases; if the skids are lowered, the working depth
decreases.
Make sure that the skids are set at the same height on both sides.
To adjust the working depth on the SAK tillers loosen
and remove nut A (picture 4) and adjust the skid height
according to the holes B. When the adjustment is
completed, tighten the screws.
DRAG BOARD ADJUSTMENT
The height of the rear drag board can be
adjusted, making the ground more compact
and smooth. Release the chain A (picture 5)
and reengage it at the desired height B.
These activities must be carried out with the engine off, the power take
off disengaged and the hand brake applied. If needed, lift the equipment
and place it on supports, thus preventing any injuries that might be
caused by a sudden fall of the equipment.

SAK Tillers
Page 13 of 23
CHAIN ADJUSTER
The SAK tillers are equipped with a chain drive (picture 6).
The chain adjustment is made during assembly; any adjustments when using the machines, must be
carried out by an authorised dealer or work shop.
START UP
After carrying out these adjustments, the equipment is ready for use. When at the working area, do
not start the power take off with the tiller in working position in the ground. Be sure to lift it by a
few centimetres using the tractor lift. Start the engine, engage the power take off, and lower the
equipment to its working position and start.
ROAD TRANSPORT
With reference to road transport, follow local traffic regulations.
SHUT DOWN
The following activities are recommended if the tiller will not be used for a long period of time:
1 Clean and dry the equipment.
2 Inspect the equipment and replace the damaged or worn parts if necessary.
3 Tighten all the screws and nuts.
Lubricate and cover the machine with a tarpaulin and store it in a dry place.

SAK Tillers
Page 14 of 23
MAINTENANCE
Maintenance is crucial for the working life and efficiency of any agricultural equipment. If the
equipment is properly maintained and operated, a long working life and operator safety are
assured.
The maintenance intervals indicated in this booklet are provided as a mere reference and are
related to normal working conditions; changes may occur depending on the type of activities,
environmental dust, seasonal factors, etc.
Before injection lubricating grease into the grease fittings, clean
the fittings to prevent mud, dust, or any other foreign matter
from contaminating the grease and reducing the lubrication
effect.
When adding or changing the oil, use the same type of oil to
prevent mixing oils with different features.
All maintenance activities must be carried out with the tiller
resting horizontally on the ground.
After using the equipment for a few hours

SAK Tillers
Page 15 of 23
FIRST CHECK
•After 50 working hours, change the oil in the gearbox and make sure that all the screws and
bolts are tightened.
EVERY 8 WORKING HOURS
•Grease the rotor support through the grease nipple A (picture 7).
•Grease the PTO shaft crosses.
EVERY 50 WORKING HOURS
•Check the oil level in the gearbox (A - picture 8) and in the side transmission (A - picture 9). If
needed add SAE EP 80W90 oil.
•Make sure that all the screws and bolts, especially on the blades, are tightened.
EVERY 500 WORKING HOURS
•Change the oil of the case/bevel gear pair, side transmission and rotor support; use SAE EP
80W90 oil. Contact the closest dealer for this maintenance activity.
The old oil must be disposed of in compliance with the local laws
where these activities are carried out; do not spill or dispose of
waste oil on the ground.
The maintenance of activities must be carried out with the engine off,
the power take off disengaged, the parking brake engaged, and the
equipment placed on the ground.

SAK Tillers
Page 16 of 23
BLADE REPLACEMENT
To assure the optimum efficiency of the machine, make sure that the tiller blades are in a good
working condition and that their bolts are tightened; replace them if they are broken or bent.
The new parts must be installed in the original position.
Before replacing the blades, turn the tractor engine off, pull the
parking brake, disengage the power take off, raise the tiller using the
tractor lift, and install supports to prevent accidental dropping of the
machine.
Pay special attention to the bolts A on the blades (picture 10): the screw head must be placed on
the blade side, with the washer and the nut on the flange side, so that the bolts cannot loosen
while the equipment is being used.
When several blades must be replaced, replace one blade at a time, so that the initial helical
layout is maintained (picture 11).

SAK Tillers
Page 17 of 23
HOW TO ORDER SPARE PARTS
For spare parts requests please refer to our spare parts catalogue.
The spare parts can be ordered from the dealer or service centre. The following data must always be
specified:
•Equipment type and width.
•Part number of the requested component. If the code number is missing, indicate the table
number in which it is shown and the relevant reference.
•Description of the part and requested quantity.
•Requested type of transport. Should this information not be provided, the dealer or service
centre shall not be responsible for delays caused by circumstances beyond their control. The
addressee shall be responsible for any transport charges.

SAK Tillers
Page 18 of 23
Type: ROTARY TILLER
Mod: SAK 100 (Offset Model) –SAK 120
Rev: 00/2005
Tab: 1/1

SAK Tillers
Page 19 of 23
ITEM
SIGMA P/N
QTY
POS.
COD. SICMA
DESCRIZIONE
DESCRIPTION
Q.TA
1
1
6351004
COPIGLIAAD"R"D.4
COTTER PIN $4
3
2
4301589
PERNO 3° PUNTO SUPERIORS
PIN
1
3
4002816
CASTELLO 3° PUNTO SUPERIORS
BRACKET
1
4
31510035
VITE UNI 5739 M10x35 8.8 ZO
SCREW UNI 5739 M10X35 8.8
8
5
4232801
PERNO COPERCHIO SAK 100 DEC.
ROD SAK 100 OFFSET MOD.
1
5
4232802
PERNO COPERCHIO SAK 120
ROD SAK 120
1
6
4002811
COPERCHIO POSTERIORE SAK 100 DEC.
REAR BOARD SAK 100 OFFSET MOD.
1
6
4002812
COPERCHIO POSTERIORE SAK 120
REAR BOARD SAK 120
1
7
4236115
PERNO BLOCCAGGIO PIEDINO
PIN
1
8
6351003
COPIGLIAAD"R"D.3
COTTERPIN<|>3
1
9
34129010
DADO AUTOB. M10 DIN 6927 8 ZO
STOP NUT M10 DIN 6927 8
29
10
6330620
SPINA UNI 6873 6x20
ELASTIC PIN UNI 6873 6x20
2
11
4001682
SUPPORTO PIEDINO
STAND LEG SUPPORT
1
12
4301590
PERNO 3° PUNTO INFERIORS
PIN
2
13
34129012
DADO AUTOB. M12X1.75 DIN 6927 8 ZO
STOP NUT M12X1.75 DIN 6927 8
5
14
4132814
ATTACCO 3° PUNTO INFERIORS
LOWER HITCH CLEVIS
2
15
4202801
CRAVATTA FISSAGGIO 3° P. INFERIORE M12
U-BOLT M12
2
16
31508016
VITE UNI 5739 M8x16 8.8 ZO
SCREW UNI 5739 M8x16 8.8
7
17
34026008
ROSETTA SCHNORR M8
"SCHNORR" WASHER M8
3
18
4131294
FASCIA PROTEZIONE GIUNTO
PTO GUARD
1
19
4131295
SUPPORTO FASCIA PROT. GIUNTO
PTO GUARD SUPPORT
1
20
6203562
PARAOLIO 35x62x10 PP
OIL SEAL 35x62x10 PP
1
21
6310062
SEEGER PER FORI D62 DIN 472
CIRCLIP INTERNAL $62 DIN 472
2
22
2106007
CUSCINETTO 6007
BEARING 6007
1
23
12164-00
ALBERO PRESA Dl FORZA Z6
INPUT SHAFT
1
24
6320030
SEEGER PER ALBERI D30 DIN 471
CIRCLIP EXTERNAL $30 DIN 471
2
25
12264-00
PIGNONECONICOZ13
BEVEL PINION Z13
1
26
65316-01
TAPPO CON VALVOLA E LIVELLO M16
OIL PLUG
1
27
6470116
RONDELLA Dl TENUTA M16 (AI/Cu)
WASHER M16
1
28
16564-00
CARTER COPPIA CONICA
GEARBOX
1
29
2730305
CUSCINETTO 30305
BEARING 30305
1
30
6100062
CAPPELLOTTO CHIUSURA 62x7
COVER $62
1
31
4002821
PROTEZIONE
SIDE GUARD PROTECTION
1
32
4002820
PROT. LATO TRASMISSIONE SAK 100
TRANSMISSION SIDE PROTECTION SAK 100
1
32
4002821
PROTEZIONE
SIDE GUARD PROTECTION
1
33
4132815
SUPPORTO GRUPPO
GEARBOX SUPPORT
1
34
31510025
VITE UNI 5739 M10x25 8.8 ZO
SCREW UNI 5739 M10X25 8.8
21
35
34026010
ROSETTA SCHNORR M10
"SCHNORR" WASHER M10
12
36
4508702
CATENA COPERCHIO
COVER CHAIN
1
37
3680010
GRILLO D10ZO
HOOK(jl10
1
38
3441014
TAPPO Dl SCARICO M14X1.5
OIL SEAL PLUG M14x1,5
1
39
6320035
SEEGER PER ALBERI D35 DIN 471
CIRCLIP EXTERNAL $35 DIN 471
3
40
17264-01
CORONA CONICA Z19
BEVEL GEAR Z19
1
41
2226207
CUSCINETTO 6207 2RS
BEARING 6207 2RS
1
42
17864-00
GUARNIZIONE SUPPORTO ALBERO TRASMISS.
GASKET
2
43
10064-11
SUPPORTO ALBERO TRASMISSIONE SAK 100 DEC.
SHAFT SUPPORT SAK 100 OFFSET MOD.
1
43
10064-12
SUPPORTO ALBERO TRASMISSIONE SAK 120
SHAFT SUPPORT SAK 120
1
44
12064-11
ALBERO TRASMISSIONE SAK 100 DEC.
TRANSMISSION SHAFT SAK 100 OFFSET MOD.
1
44
12064-12
ALBERO TRASMISSIONE SAK 120
TRANSMISSION SHAFT SAK 120
1
45
2106207
CUSCINETTO 6207
BEARING 6207
3
46
4701705
RUOTA DENTATA CONDUTTRICE Z13
DRIVING GEAR Z13
1
47
4001234
PIEDINO Dl APPOGGIO
STAND LEG
1
48
4002817
SLITTA SX
LEFT SKID
1
49
3444014
TAPPO CON OBLO' M14
OIL PLUG M14
1
50
31510030
VITE UNI 5739 M10X30 8.8 ZO
SCREW UNI 5739 M10x30 8.8
12
51
4141103
CARTER TRASMISSIONE
DRIVE COVER
1
52
34129008
DADO AUTOB. MB DIN 6927 8 ZO
STOP NUT MS DIN 6927 8
13
53
6013010
RASAMENTO 30x40x1.5
SHIM
1
54
3442022
TAPPO CON VALVOLA M22X1.5
OILPLUGM22X1.5
1
55
6470118
RONDELLA Dl TENUTA M22 (AI/Cu)
WASHER M22
1
56
4781621
GUARNIZIONE CARTER TRASMISSIONE
GASKET
1
57
4211263
MOLLATENDICATENA
CHAIN ADJUSTER SPRING
1
58
6700019
CATENA ASA 60HE 46 MG
CHAIN ASA 60HE 46 MG
1
59
4001606
PATTINO PER CATENA
CHAIN ADJUSTER
1
60
33512025
VITE FLANG. M12x25 DIN 6921 8.8 ZO
SCREW DIN 6921 M12X25 8.8
2
61
4001124
PIASTRA LATO TRASMISS.
TRANSMISSION SIDE PLATE
1
62
31508020
VITE UNI 5739 M8x20 8.8 ZO
SCREW UNI 5739 M8x20 8.8
13
63
4002801
TELAIO SAK 100 DECENTRATA (OFFSET=100 mm)
FRAME SAK 100 OFFSET MOD. (OFFSET=4")
1
63
4002802
TELAIO SAK 120
FRAME SAK 120
1
64
4931115
PIASTRA LATO ESTERNO
EXTERNAL PLATE
1
fin
riPPACP MIDDI C Mfi I IM1 7RRT A
^
This manual suits for next models
1
Table of contents