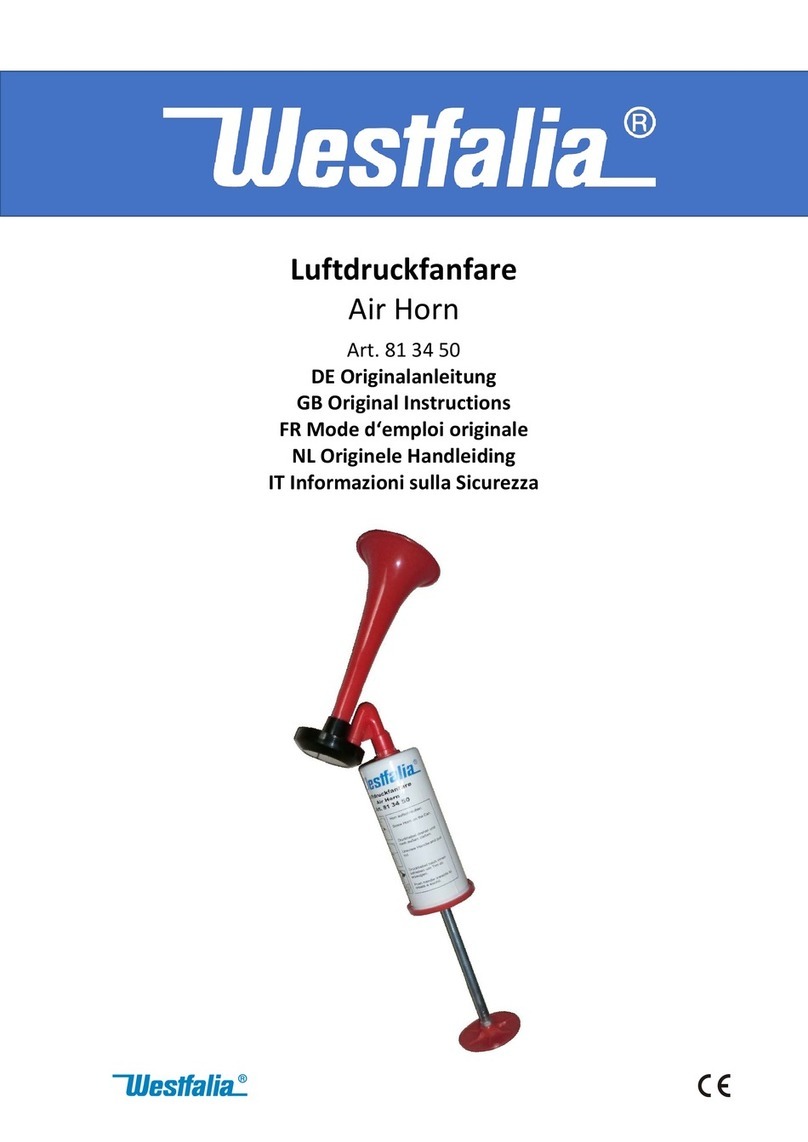
Westfalia DL1138 User manual

Zweiklang Kompressor Fanfare
DL1138
A
rtikel Nr. 14 88 17
Two Tone Air Horn
DL1138
A
rticle No. 14 88 17
Bedienungsanleitung
Instruction Manual

II
This Two Tone Air Horn system offers an effective sound with high acoustic
performance.
It features impact and weather resistant plastic funnels, easy assembly,
maximum reliability, top size-/output ratio.
The Two Tone Air Horn is suitable for all vehicles with a 12 V power supply
system.
Before first use please familiarize yourself with the proper usage of the device.
Keep these operating instructions for future reference.
This operating instruction contains important details for handling the device.
Please pass it on along with the unit if it is handed over to a third party!
Please read the safety instructions most carefully!
These instructions will make it easier for you to handle the device
appropriately and help prevent misunderstandings and possible damage.
Die Zweiklang-Kompressor-Fanfare bietet einen wirkungsvollen Klang mit
hoher akustischer Leistung.
Die Fanfare zeichnet sich aus durch schlagfeste und witterungsbeständige
Kunststofftrichter, eine einfache Montage, maximale Funktionssicherheit, und
ein optimales Größen-/Leistungsverhältnis.
Die Zweiklang-Kompressor-Fanfare ist für alle Fahrzeuge mit 12 V Netz
geeignet.
Bitte machen Sie sich vor der Inbetriebnahme mit dem Gerät vertraut und
bewahren Sie diese Bedienungsanleitung gut auf.
Diese Bedienungsanleitung enthält wichtige Hinweise zur Inbetriebnahme und
Handhabung. Legen Sie die Anleitung dem Produkt bei, wenn Sie es an Dritte
weitergeben!
Bitte beachten Sie unbedingt die Sicherheitshinweise!
Diese sollen Ihnen den sachgemäßen Umgang erleichtern und Ihnen helfen,
Missverständnissen und Schäden vorzubeugen.
Sehr
g
eehrte Damen und Herren
Dear Customers

III
Übersicht
|
Overvie
w
4
3
10
1
8
5
2
7 11
6
9
7
8

IV
1 Fanfare klein Air Horn small
2 Fanfare groß Air Horn large
3 Kompressor Compressor
4 Relais Relay
5 Luftverteilerstück Air Y – Connector
6 Druckluftschlauch Air Hose
7 Druckluftanschluss Air Connection
8 Befestigung Mount
9 Stromanschluss Power Connection
10 Druckluftanschluss Air Connection
11 Befestigung Mount
12 Abstandshalter Spacer
Übersicht
|
Overvie
w
12

1
Safety Notes...........................................................................................Page 8
Intended Use..........................................................................................Page 9
Included..................................................................................................Page 9
General Notes........................................................................................Page 9
Installing the Compressor.......................................................................Page 10
Installing the Air Horns...........................................................................Page 10
Installing as a Replacement for an existing Horn...................................Page 11
Maintenance and Care...........................................................................Page 11
Installing as an additional Horn / Negative Connection .........................Page 12
Installing as an additional Horn / Positive Connection...........................Page 13
Technical Data .......................................................................................Page V
Sicherheitshinweise................................................................................Seite 2
Bestimmungsgemäße Verwendung.......................................................Seite 3
Lieferumfang ..........................................................................................Seite 3
Allgemeine Hinweise..............................................................................Seite 3
Installation des Kompressors.................................................................Seite 3
Installation der Fanfaren.........................................................................Seite 4
Anschluss als Ersatz einer vorhandenen Hupe .....................................Seite 5
Wartung und Pflege................................................................................Seite 5
Anschluss als zusätzliche Hupe / Negative Ansteuerung......................Seite 6
Anschluss als zusätzliche Hupe / Positive Ansteuerung........................Seite 7
Technische Daten ..................................................................................Seite V
Table of Contents
Inhaltsverzeichnis

2
Sicherheitshinweise
Beachten Sie bitte zur Vermeidung von Fehlfunktionen, Schäden
und gesundheitlichen Beeinträchtigungen folgende Hinweise:
Diese Bedienungsanleitung gehört zu diesem Produkt. Sie enthält wichtige
Hinweise zur Inbetriebnahme und Handhabung. Bitte legen Sie die
Bedienungsanleitung dem Produkt bei, wenn Sie es an Dritte weitergeben!
Lassen Sie Verpackungsmaterial nicht achtlos herumliegen. Plastiktüten etc.
können zu einem gefährlichen Spielzeug für Kinder werden.
Arbeiten an elektrischen Systemen in Fahrzeugen dürfen nur durch
geeignetes Fachpersonal ausgeführt werden. Für die Installation der
Zweiklang Kompressor Fanfare beachten Sie bitte alle Sicherheits-
vorschriften. Ihre Sicherheit und die Sicherheit anderer Verkehrsteilnehmer
hängt von der ordnungsgemäßen Installation dieses Gerätes ab.
Die Zweiklang Kompressor Fanfare erzeugt einen sehr lauten Ton, der unter
Umständen zu dauerndem Hörverlust führen kann. Tragen Sie
entsprechenden Gehörschutz beim Ausprobieren der Fanfare.
Nur für Fahrzeuge, Boote usw. mit 12 V Bordspannung geeignet. Versuchen
Sie niemals das Gerät an einer anderen Spannung zu betreiben.
Nehmen Sie niemals Veränderungen an dem Gerät vor.
Wenn Sie zur Montage der Zweiklang Kompressor Fanfare Löcher in die
Fahrzeugstruktur bohren, stellen Sie sicher, dass die Oberfläche am Fahrzeug
nicht beschädigt wird (z.B. Korrosion). Achten Sie beim Bohren darauf, dass
Sie keine Kabel, tragende Teile oder den Benzintank anbohren.
Falls Sie einen zusätzlichen Schalter anbringen möchten, achten Sie darauf,
den Schalter so anzubringen, dass das Fahrzeug während der Fahrt sicher zu
bedienen ist.
Überprüfen Sie alle Montagepunkte des Gerätes regelmäßig, um einen
einwandfreien Betrieb und einen festen Sitz im Fahrzeug zu gewährleisten.
Setzen Sie das Gerät keiner Feuchtigkeit, Öl, Staub, Schmutz, keinen hohen
Temperaturen und zu hoher Vibration aus.
Bei Beschädigungen darf das Gerät auf keinen Fall weiter benutzt werden und
muss von einer Fachkraft repariert werden.
Zerlegen Sie das Gerät nicht und unternehmen Sie keine Reparaturversuche.
Das Gerät enthält keine durch Sie auswechselbaren oder zu reparierenden
Teile. Wenden Sie sich bei Problemen an unseren Kundenservice.

3
Installation
Bestimmungsgemäße Verwendung
Die Zweiklang-Kompressor-Fanfare ist eine Hupe für Kraftfahrzeuge mit 12 V
Betriebsspannung.
Diese Fanfare ist bauartgeprüft nach ECE-Regelung 28 und muss nach deren
Vorschrift eingebaut werden, die besagt, dass ein Mindestschalldruck von 93
dB(A) in 7 m Abstand vor dem Fahrzeug vorhanden sein muss.
Eine andere Verwendung als zuvor beschrieben kann zur Beschädigung des
Produktes führen. Darüber hinaus ist dies mit Gefahren wie z.B. Kurzschluss,
Brand, elektrischer Schlag, etc. verbunden.
Verwenden Sie nur die mitgelieferten Komponenten des Fanfarensets.
Installieren Sie keine anderen Teile und benutzen Sie kein anderes Zubehör.
Bitte beachten Sie unbedingt die Sicherheitshinweise und die technischen
Daten.
Lieferumfang
Zwei Fanfaren in unterschiedlicher Länge (1) + (2)
Kompressor (3)
Relais (4)
Luftverteilerstück (5)
Druckluftschlauch (6)
Allgemeine Hinweise
Vor dem elektrischen Anschluss der Zweiklang Fanfare überprüfen Sie die
Polarität der werkseitig eingebauten Hupe in Ihrem Fahrzeug.
Benutzen Sie beim Einbau nur Kabel mit ausreichendem Querschnitt (mind. 4
mm2) und zulässiger Isolierung.
Beachten Sie die vom Fahrzeughersteller vorgegebenen Vorschriften zum
nachträglichen Einbau elektrischer Teile.
Vergewissern Sie sich regelmäßig, dass alle Schrauben und Muttern
festgeschraubt sind, damit diese sich nicht während der Fahrt lösen können.
Installation des Kompressors
1. Installieren Sie den Kompressor (3) im Motorraum des Fahrzeugs an festen
Karosserieteilen an einem trockenen Platz mit einem Sicherheitsabstand zu
sich erhitzenden Teilen (Motor, Auspuff, etc.).

4
Installation
2. Die Bohrung für die Befestigungsschraube des
Kompressors muss einen Durchmesser von 8 mm
aufweisen.
3. Befestigen Sie den Kompressor senkrecht. Der
Druckluftanschluss (10) befindet sich oben.
4. Setzen Sie, wie abgebildet, den Kopf der
Montageschraube in die Öffnung der Befestigung
(11) am Kompressor.
5. Führen Sie die Montageschraube durch das
Bohrloch am Kfz und befestigen Sie den
Kompressor, indem Sie die Mutter mit einem
Schraubenschlüssel fest anziehen.
Installation der Fanfaren
1. Finden Sie für die Montage der Fanfaren einen geeigneten Platz an einem
festen Karosserieteil in der Nähe des Kompressors.
2. Die Bohrungen für die Montageschrauben der Fanfaren müssen einen
Durchmesser von 6 mm aufweisen.
3. Befestigen Sie die Fanfaren möglichst nah nebeneinander mit der Öffnung
nach vorn und leicht nach unten geneigt damit kein Wasser durch die Öffnung
eintreten kann.
4. Stellen Sie sicher, dass keine Gegenstände die
Öffnungen der Fanfaren blockieren.
5. Setzen Sie, wie abgebildet, den Kopf der
Montageschraube in die Öffnung der
Befestigung (8) an den Fanfaren.
6. Setzen Sie den Abstandshalter (12) auf die
Schraube.
7. Führen Sie die Befestigungsschrauben durch
die Bohrlöcher am Kfz und befestigen Sie die
Fanfaren, indem Sie die Muttern mit einem
Schraubenschlüssel fest anziehen.
8. Zerschneiden Sie den mitgelieferten Luft-
schlauch (6) in drei Teile und verbinden Sie den
Kompressor über das Luftverteilerstück (5) mit
den Fanfaren (wie abgebildet).

5
Installation
9. Achten Sie darauf, dass die Schläuche möglichst kurz sind, gerade verlaufen
und nicht geknickt werden.
10.Es dürfen keine Schmutzpartikel in den Schläuchen stecken, wenn Sie diese
mit dem Kompressor verbinden.
Anschluss als Ersatz einer vorhandenen Hupe
Hinweis: Wird die vorhandene Hupe ersetzt, wird das mitgelieferte Relais (4) nicht
benötigt, da das vorhandene Relais im Fahrzeug zur Ansteuerung des
Kompressors der Zweiklang-Fanfare genutzt werden kann.
Erkundigen Sie sich ggf. beim Hersteller Ihres Fahrzeugs bezüglich der
technischen Details und Voraussetzungen beim Anschluss einer neuen Hupe.
Überprüfen Sie vor dem elektrischen Anschluss der Zweiklang Fanfare die
Polarität der werkseitig eingebauten Hupe in Ihrem Fahrzeug.
A) Zweidrahtsystem
Verfügt das Fahrzeug über eine Hupe mit zwei Anschlussklemmen, entfernen Sie
die Drähte von der Hupe und verbinden Sie diese einfach mit dem Kompressor.
Wichtig: Wechseln Sie die Polung der Drähte an der Unterseite des Kompressors
falls der Kompressor beim Testen der Hupe anläuft, aber die Fanfaren nicht zu
hören sind.
B) Eindrahtsystem
Verfügt das Fahrzeug über eine Hupe mit nur einer Anschlussklemme, so
entfernen Sie den Draht von der Hupe und verbinden Sie diesen mit dem Pluspol
des Kompressors.
Verbinden Sie den negativen Pol (Masseanschluss) des Kompressors mit einem
Metallbolzen an der Karosserie des Fahrzeugs. Achten Sie darauf, dass der
Kontakt frei von Rost und Farbe ist.
Der Anschluss als zusätzliche Hupe ist in den Ländern der EU nicht
zulässig. Dadurch erlischt die Betriebserlaubnis Ihres Fahrzeugs.
Wartung und Pflege
Die Zweiklang Kompressor Fanfare ist grundsätzlich wartungsfrei.
Überprüfen und reinigen Sie die Öffnungen der Fanfaren und die Luft-
einlassöffnung des Kompressors von Zeit zu Zeit.
Zur äußeren Reinigung benutzen Sie nur ein leicht befeuchtetes Tuch. Benutzen
Sie keine aggressiven Chemikalien oder Scheuermittel, um die Überflächen nicht
zu beschädigen.

6
Installation
Anschluss als zusätzliche Hupe / Negative Ansteuerung
Wählen Sie mit dem Umschalter (nicht im Lieferumfang enthalten) zwischen
der werkseitig eingebauten Hupe und den Zweiklang-Fanfaren. Wird der
Hupenschalter am Lenkrad betätigt, so wird entweder die werkseitig
eingebaute Hupe oder die Zweiklang-Fanfare ertönen.
Diese Umschaltung darf nicht zur Abgabe einer Folge von Klängen
verschiedener Grundfrequenzen verwendet werden. Informieren Sie sich ggf.
über die jeweiligen Bestimmungen des Landes, in dem das Kraftfahrzeug
betrieben wird.
85 86
30 87
+
+
Original Hupe
Sicherung
20 A
Relais
+-
Kompressor
Umschalter mit
30 A Schaltleistung
4 mm
2
4 mm
2
4 mm
2
Lenkrad mit
Hupenschalter

7
Installation
Anschluss als zusätzliche Hupe / Positive Ansteuerung
Wählen Sie mit dem Umschalter (nicht im Lieferumfang enthalten) zwischen
der werkseitig eingebauten Hupe und den Zweiklang-Fanfaren. Wird der
Hupenschalter am Lenkrad betätigt, so wird entweder die werkseitig
eingebaute Hupe oder die Zweiklang-Fanfare ertönen.
Diese Umschaltung darf nicht zur Abgabe einer Folge von Klängen
verschiedener Grundfrequenzen verwendet werden. Informieren Sie sich ggf.
über die jeweiligen Bestimmungen des Landes, in dem das Kraftfahrzeug
betrieben wird.
85 86
30 87
+
+
Original Hupe
Sicherung
20 A
Relais
+-
Kompressor
Umschalter mit
30 A Schaltleistung
4 mm
2
4 mm
2
4 mm
2
Lenkrad mit
Hupenschalter

8
Safet
y
Notes
This manual belongs to the product. It contains important notes on operating
the unit. Please pass it on along with the unit if it is handed over to a third
party!
Dispose of the packaging materials carefully; the plastic bags may become a
deadly toy for children.
Only qualified personnel are allowed to work on electrical systems in vehicles.
For installing the dual air horn compressor please observe the regulations and
safety instructions. Your safety and the safety of other traffic participants
depend on the safe installation of this unit.
The two tone air horn compressor produces loud sound which may cause
permanent hearing loss in certain situations. Wear appropriate hearing
protection when testing the horn.
Only for vehicles, boats etc. with 12 V DC on board. Never try to connect the
unit to other voltage.
Do not alter the unit in any way.
If you have to drill holes into the vehicle structure for mounting the two tone air
horn compressor, make sure not to damage the surface of the vehicle
(e.g. corrosion). Make sure not to damage cables, supporting parts or the fuel
tank.
In case you want to install an additional switch, make sure the switch is
installed so that it can be operated safely under all driving conditions.
Frequently inspect all mountings to make sure that the unit works properly and
is securely attached.
Do not expose the unit to water, moisture, oil, grease, dust, dirt, high
temperatures or strong vibration.
Do not continue to use the unit if the unit is damaged. Repair work must be
done by a qualified service technician.
Do not disassemble the unit or attempt to repair it yourself. It does not contain
parts serviceable by you. In the case of questions or problems, turn to our
customer support.
Please note the following safety notes to avoid malfunctions,
damage or physical injury:

9
Installation
Intended Use
The two tone air horn is a horn for motor vehicles with 12 V power supply.
This two tone air horn has been design-certification tested according to ECE-
Regulation 28. This Regulation specifies a minimum sound pressure of 93
dB(A) at a distance of 7 m in front of the vehicle.
Any use different than described above may result in damage to the product.
In addition it also can lead to threats such as short circuit, fire, electric shock,
etc.
Only use the included components of the air horn set. Do not install any other
components and do not use any other accessory.
Please follow carefully the safety instructions and the technical data.
Included
Two air horns in different sizes (1) + (2)
Compressor (3)
Relay (4)
Air Y – connector (5)
Air hose (6)
General Notes
Before carrying out the electrical connection of the two tone air horn check the
polarity of the factory-installed horn in your car.
When installing only use cables with sufficient cross section (at least 4 mm2)
and permitted isolation.
Please note the rules specified by the vehicle’s manufacturer for additional
installation of electric parts.
Regularly check that all bolts and nuts are tightened so that they can not
loosen while driving.

10
Installation
Installing the Compressor
1. Install the compressor to the bodywork in the
engine compartment in a sturdy dry location with a
safety distance to components that can become
hot (e.g. engine, exhaust system, etc.).
2. The drilling for the mounting screw of the
compressor must have a diameter of 8 mm.
3. Mount the compressor vertically. The air
connection (10) is located on the top.
4. Install the head of the bolt (as shown) into the slot
of the mount (11) of the compressor housing.
5. Lead the bolt through the drilling hole of the vehicle
and tighten the nut by means of a wrench to
secure the air compressor.
Installing the Air Horns
1. Find a suitable place at the bodywork in the vicinity of the compressor for
attaching the fanfare.
2. The drilling holes for the mounting screws of the air horns must have a
diameter of 6 mm.
3. Attach the air horns as close as possible
together with the opening pointing forwards and
tilted downwards so that no water can pass
through the openings.
4. Make sure that no obstacles can block the
openings of the air horns.
5. Install the head of the bolt (as shown) into the
slot of the mount (8) of the air horns.
6. Put the spacer (12) on the bolt.
7. Lead the bolt through the drilling holes of the
vehicle and tighten the nuts by means of a
wrench to secure the air horns.
8. Cut the supplied air hose (6) into three pieces
in order to connect the compressor via the y –
connector (5) with the air horns (as shown).
9. Make sure that the air hoses run as straight as
possible. Do not bend them.

11
Installation
10.There must be no dirt particles inside the air hoses when you connect them
with the compressor.
Installing as a Replacement for an existing Horn
Note: In case you are replacing the existing horn, the supplied relay is not
required because you can make use of the vehicle’s relay to drive the compressor
of the air horn set.
Ask the manufacturer of your vehicle for further information concerning the
technical specifications and requirements for installing a new horn.
Before carrying out the electrical connection of the two tone air horn check the
polarity of the factory-installed horn in your car.
A) Two wire system
If the vehicle’s horn has two terminals, remove the wires from the horn and simply
connect them with the compressor.
Important: Reverse the wires connected at the bottom of the compressor if the
compressor turns on when testing the horn and you do not hear a sound from the
air horns.
B) One wire system
If the vehicle’s horn only has one terminal, remove the wire from the horn and
connect it to the plus pole of the compressor.
Connect the negative pole (ground) of the compressor to any metal bolt of the
car’s body. Make sure the ground connection is free from rust and paint.
Installation as an additional horn is not permitted in the countries that
belong to the EU. The operating licence of you vehicle will expire.
Maintenance and Care
Generally the two tone air horn system is maintenance free.
Clean the openings of the air horns and the air inlet of the compressor from
time to time.
For cleaning the housing only use a lightly moistened cloth. Do not use
aggressive chemicals or abrasive in order not to damage the surface.

12
Installation
Installing as an additional Horn / Negative Connection
Choose between the factory-installed horn and the two tone air horn by means
of the switch (not included). When the horn button is pressed on the steering
wheel, either the factory-installed horn, or the two tone air horn will sound.
This switch must not be used in order to produce a sequence of sounds of
different frequencies. Gather information concerning the relevant regulations in
the country where the vehicle is operated.
85 86
30 87
+
+
Original horn
Fuse
20 A
Relay
+-
Compressor
Switch with 30 A
switching capacity
4 mm
2
4 mm
2
4 mm
2
Steering wheel with
horn button

13
Installation
Installing as an additional Horn / Positive Connection
Choose between the factory-installed horn and the two tone air horn by means
of the switch (not included). When the horn button is pressed on the steering
wheel, either the factory-installed horn, or the two tone air horn will sound.
This switch must not be used in order to produce a sequence of sounds of
different frequencies. Gather information concerning the relevant regulations in
the country where the vehicle is operated.
85 86
30 87
+
+
Original horn
Fuse
20 A
Relay
+-
Compressor
Switch with 30 A
switching capacity
4 mm
2
4 mm
2
4 mm
2
Steering wheel with
horn button

14
Notizen
|
Notes

15
Ce manuel appartient à ce produit. Il contient des informations importantes
pour la gestion et l'utilisation de l'appareil. S'il vous plaît joindre ce manuel au
produit quand il est passé à un tiers!
Ne laissez pas le matériel d'emballage autour de désinvolture. Les sacs en
plastique, etc .. peuvent devenir un jouet dangereux pour les enfants.
Les travaux sur les systèmes électriques des véhicules doivent être effectués
par des techniciens qualifiés. Pour l'installation de cornes deux tons avec
compresseur respecter toutes les règles de sécurité. Votre sécurité et celle
des autres usagers de la route dépend de la bonne installation de cet appareil.
Les trompettes produisent un bruit très fort qui peut parfois conduire à une
perte auditive perma-nent. Vous devez porter une protection auditive
appropriée lors de l'essai des trompettes.
Uniquement pour les véhicules, les bateaux, etc. avec 12 V de bord de
tension. Ne jamais tâtonné d’utiliser l'appareil avec une tension différente.
Ne pas apporter des modifications à l'appareil.
Si vous devez percer la structure du véhicule pour le montage des trompettes,
veiller à ce que la surface du véhicule n'est pas endommagé (par exemple
pour la corrosion). Faites attention à ne pas percer des trous dans les câbles,
pièces porteuses ou le réservoir de carburant.
Si vous souhaitez installer un interrupteur supplémentaire, assurez-vous que
le commutateur est installé de façon à ce que le véhicule peut être conduit en
toute sécurité.
Inspecter régulièrement tous les points de montage sur l'appareil pour assurer
un bon fonctionnement et un siège fixe dans le véhicule.
Ne pas exposer l'appareil à l'humidité, l'huile, la saleté, la poussière, à haute
température et de vibrations extrêmes.
En cas de dommages, l'appareil ne doit plus être utilisé et doit être réparé par
un technicien qualifié.
Ne pas démonter l'appareil et ne pas effectuer des réparations. L'unité ne
contient aucune pièce réparable ou remplaçable par l'utilisateur. En cas de
problèmes contactez notre service à la clientèle.
S'il vous plaît noter, afin d'éviter un mauvais fonctionnement, des
dommages ou des problèmes de santé les informations suivantes:
Consi
g
nes de sécurité

16
Il presente manuale appartiene a questo prodotto. Esso contiene informazioni
importanti per la gestione e l’utilizzo dell'unità. Si prega di allegare questo
manuale al prodotto quando questo viene passato a terzi!
Non lasciare in giro con noncuranza materiale di imballaggio. I sacchetti di
plastica, ecc. possono diventare un giocattolo pericoloso per i bambini.
I lavori sugli impianti elettrici nei veicoli devono essere eseguiti solo da tecnici
qualificati. Per l’installazione delle trombette con compressore a doppia
tonalità rispettare tutte le norme di sicurezza. La vostra sicurezza e la
sicurezza degli altri utenti della strada dipende dalla corretta installazione di
questo apparecchio.
Le trombette producono un suono molto forte che a volte può portare alla
perdita di udito permanente. Indossare un'adeguata protezione dell'udito
quando si provano le trombette.
Adatto solo per veicoli, barche, ecc. con 12 V di tensione di bordo. Non tentare
mai di utilizzare l'apparecchio con una tensione diversa.
Non appartare alcuna modifica al dispositivo.
Se si deve forare la struttura del veicolo per il montaggio delle trombette,
assicurarsi che la superficie del veicolo non venga danneggiata (ad esempio
per corrosione). Prestare attenzione durante la forature a non forare cavi, parti
portanti o il serbatoio del carburante.
Se si desidera installare un interruttore aggiuntivo, assicurarsi che l'interruttore
venga installato in modo che il veicolo possa essere guidato con sicurezza.
Controllare regolarmente tutti i punti di fissaggio sul dispositivo per garantire
un corretto funzionamento e una seduta fissa nel veicolo.
Non esporre l'unità all'umidità, olio, polvere, sporcizia, ad alte temperature e
vibrazioni eccessive.
In caso di danni, l'apparecchio non deve più essere usato e deve essere
riparato da un tecnico qualificato.
Non smontare il dispositivo e non effettuare alcuna riparazione. L'unità non
contiene parti sostituibili o riparabili da parte dell’utente. In caso di problemi
contattare il nostro servizio clienti.
Si prega di notare, al fine di evitare malfunzionamenti, danni o
problemi alla salute le seguenti informazioni:
Informazioni sulla sicurezza
Table of contents
Languages:
Other Westfalia Horn manuals
Popular Horn manuals by other brands

System Sensor
System Sensor SpectrAlert SC2415W Installation and maintenance instructions

Toa
Toa TC-154S Specifications

Valcom
Valcom VIP-9831AL quick start guide

WERMA Signaltechnik
WERMA Signaltechnik 761 Instructions for use

Vixen Horns
Vixen Horns VXO8325B/3114B installation guide

Electro-Voice
Electro-Voice HPT94 specification