manuals.online logo
Brands
  1. Home
  2. •
  3. Brands
  4. •
  5. Westinghouse
  6. •
  7. Range
  8. •
  9. Westinghouse WDE143 Series User manual

Westinghouse WDE143 Series User manual

Quick Start Guide
WDE143 series
Ready
Set...
Before you start, please make sure:
Your cooker has been correctly installed by a qualified person.
Your cooker has power and is switched on.
You’ve removed all relevant packaging.
Get to know the control panel:
To access your detailed user manual online, simply scan the QR code on your smart phone.
For more detailed information and installation guide refer to user manuals
at westinghouse.com.au/manuals
Quick Start Guide
WDE143 series
and WESTINGHOUSE are trademarks of Westinghouse Electric Corporation. Used under license by Electrolux Home Products Pty Ltd. All Rights Reserved.
© 2021 Electrolux Home Products Pty Ltd. ABN 51 004 762 341 W_QSG_WDE143_A4_Jun21 A21711802 RevA (Assy ANC A21711902 RevA)
This is a Quick Start Guide. Please refer to user manual
online for detailed information and installation
Most of the packaging
materials can be recycled.
Please dispose of them at
your local recycling centre
or in your own recycling bin.
Dear Customer,
Thank you for purchasing a Westinghouse appliance. You have chosen a product that
comes from a history of durable and reliable products loved by many families. We look
to help you make the most of your time at home, so you can spend your time doing
what you really love, with the ones you love.
Welcome to Westinghouse.
1Ceramic cooktop
control knob
2Grill indicator light
3Grill temperature
control knob
4Oven indicator light
5Oven temperature
control knob
6Programmable clock
6
Magenta Guides - DO NOT PRINT
Print Black 7802
1
2
BRAND
CREATED BY
APPROVED
DATE
© Electrolux Home Products Pty Ltd. This drawing contains confidential information and is the property ofAktiebolaget Electrolux, Sydney, Australia without whose
permission it may not be copied, shown or handed to a third party or otherwise used, and it is to be returned promptly upon request toAktiebolaget Electrolux.
ART11432
Westinghouse Aspire FSC
Control Panel - WDE 143 WC, WDE 132 WC
D
Westinghouse
Robert Jurgens
Genevieve Rossi
23.09.2020 100%
Adjusted Low and high for better readability, added WDE132WC to Artwork
Adjusted Dial and timer positions to make concentric with corrected knob position
Removed “Auto Off” from timer. Added “Light” to Oven Dial
Added timer to artwork.
D 15.02.21
C 11.02.21
B 09.02.21
A 01.11.20
AJG
AJG
AJG
GLR
1 32 4 5
Electrolux Home Products Australia
telephone: 13 13 49
email: customercare@electrolux.com.au
web: electrolux.com.au
Electrolux Home Products New Zealand
telephone: 0800 436 245
email: customercare@electrolux.co.nz
web: electrolux.co.nz
Contact us if you need more help
Customer Care Centre
Need more help?
To access your detailed user manual online, simply scan the
QR code on your smart phone. If you prefer a printed manual,
please contact our Customer Care Centre using details below.
Enjoy peace of mind.
Register your appliance today.
Stay updated on better living services, safety notices and shop for accessories.
1. Open the camera app on your smartphone and point at the QR code to scan
Product Registration QR code is located on the front of your appliance or
inside the door rim*.
2. Tap the notification or link to open the registration form
3. Complete your details and enjoy peace of mind
*Exact location of QR code may vary depending on oven model
Go!
You’re ready to use your new Westinghouse appliance. A few tips from us:
Remember to pre-heat each time.
For best cooking results pre-heat the oven. Pre-heating allows the oven to reach the required
temperature quickly and eciently as well as cook food at the correct temperature for the entire
cook time. Recommended pre-heat time is 30 minutes for baking and 3 minutes for grilling.
Set...
Choose the right program for the best result:
CERAMIC
COOKTOP
Our range of ceramic cooktops combine stylish good looks with practical
features to help you prepare delicious meals with ease and confidence.
While the durable ceramic surface is tough enough to handle the everyday
knocks of the busiest family kitchen, it must be remembered that the
surface is made of glass and should not be treated as unbreakable.
OVEN
In a fan forced electric oven the heat comes from the rear oven element.
Hot air is distributed by a fan behind the rear wall of the compartment,
providing an even temperature on all shelf levels – perfect for multi-level
cooking or reheating entire meals for your family.
GRILL
When it comes to cooking tender cuts of meat, steak, chops, sausages, fish,
cheese toasties and other quick cooking foods, the grill setting will give you
the best results. Pre-heating your grill for 3 minutes will help in sealing in the
natural juices of the food for better flavour. For separate grill models, grill
with the grill door open.
Refer to your full user manual for more details on oven functions.
Condition the oven
(to burn o any residue)
New appliances can have oil or residue left
from manufacturing. You will need to heat
your oven for 30 minutes before using it for
the first time.
1. Using the oven control knob, set the oven
at 180°C for approximately 30 minutes.
Later, run the grill on maximum for 15
minutes with the grill door open. Please
ensure that the room is well ventilated
during this process.
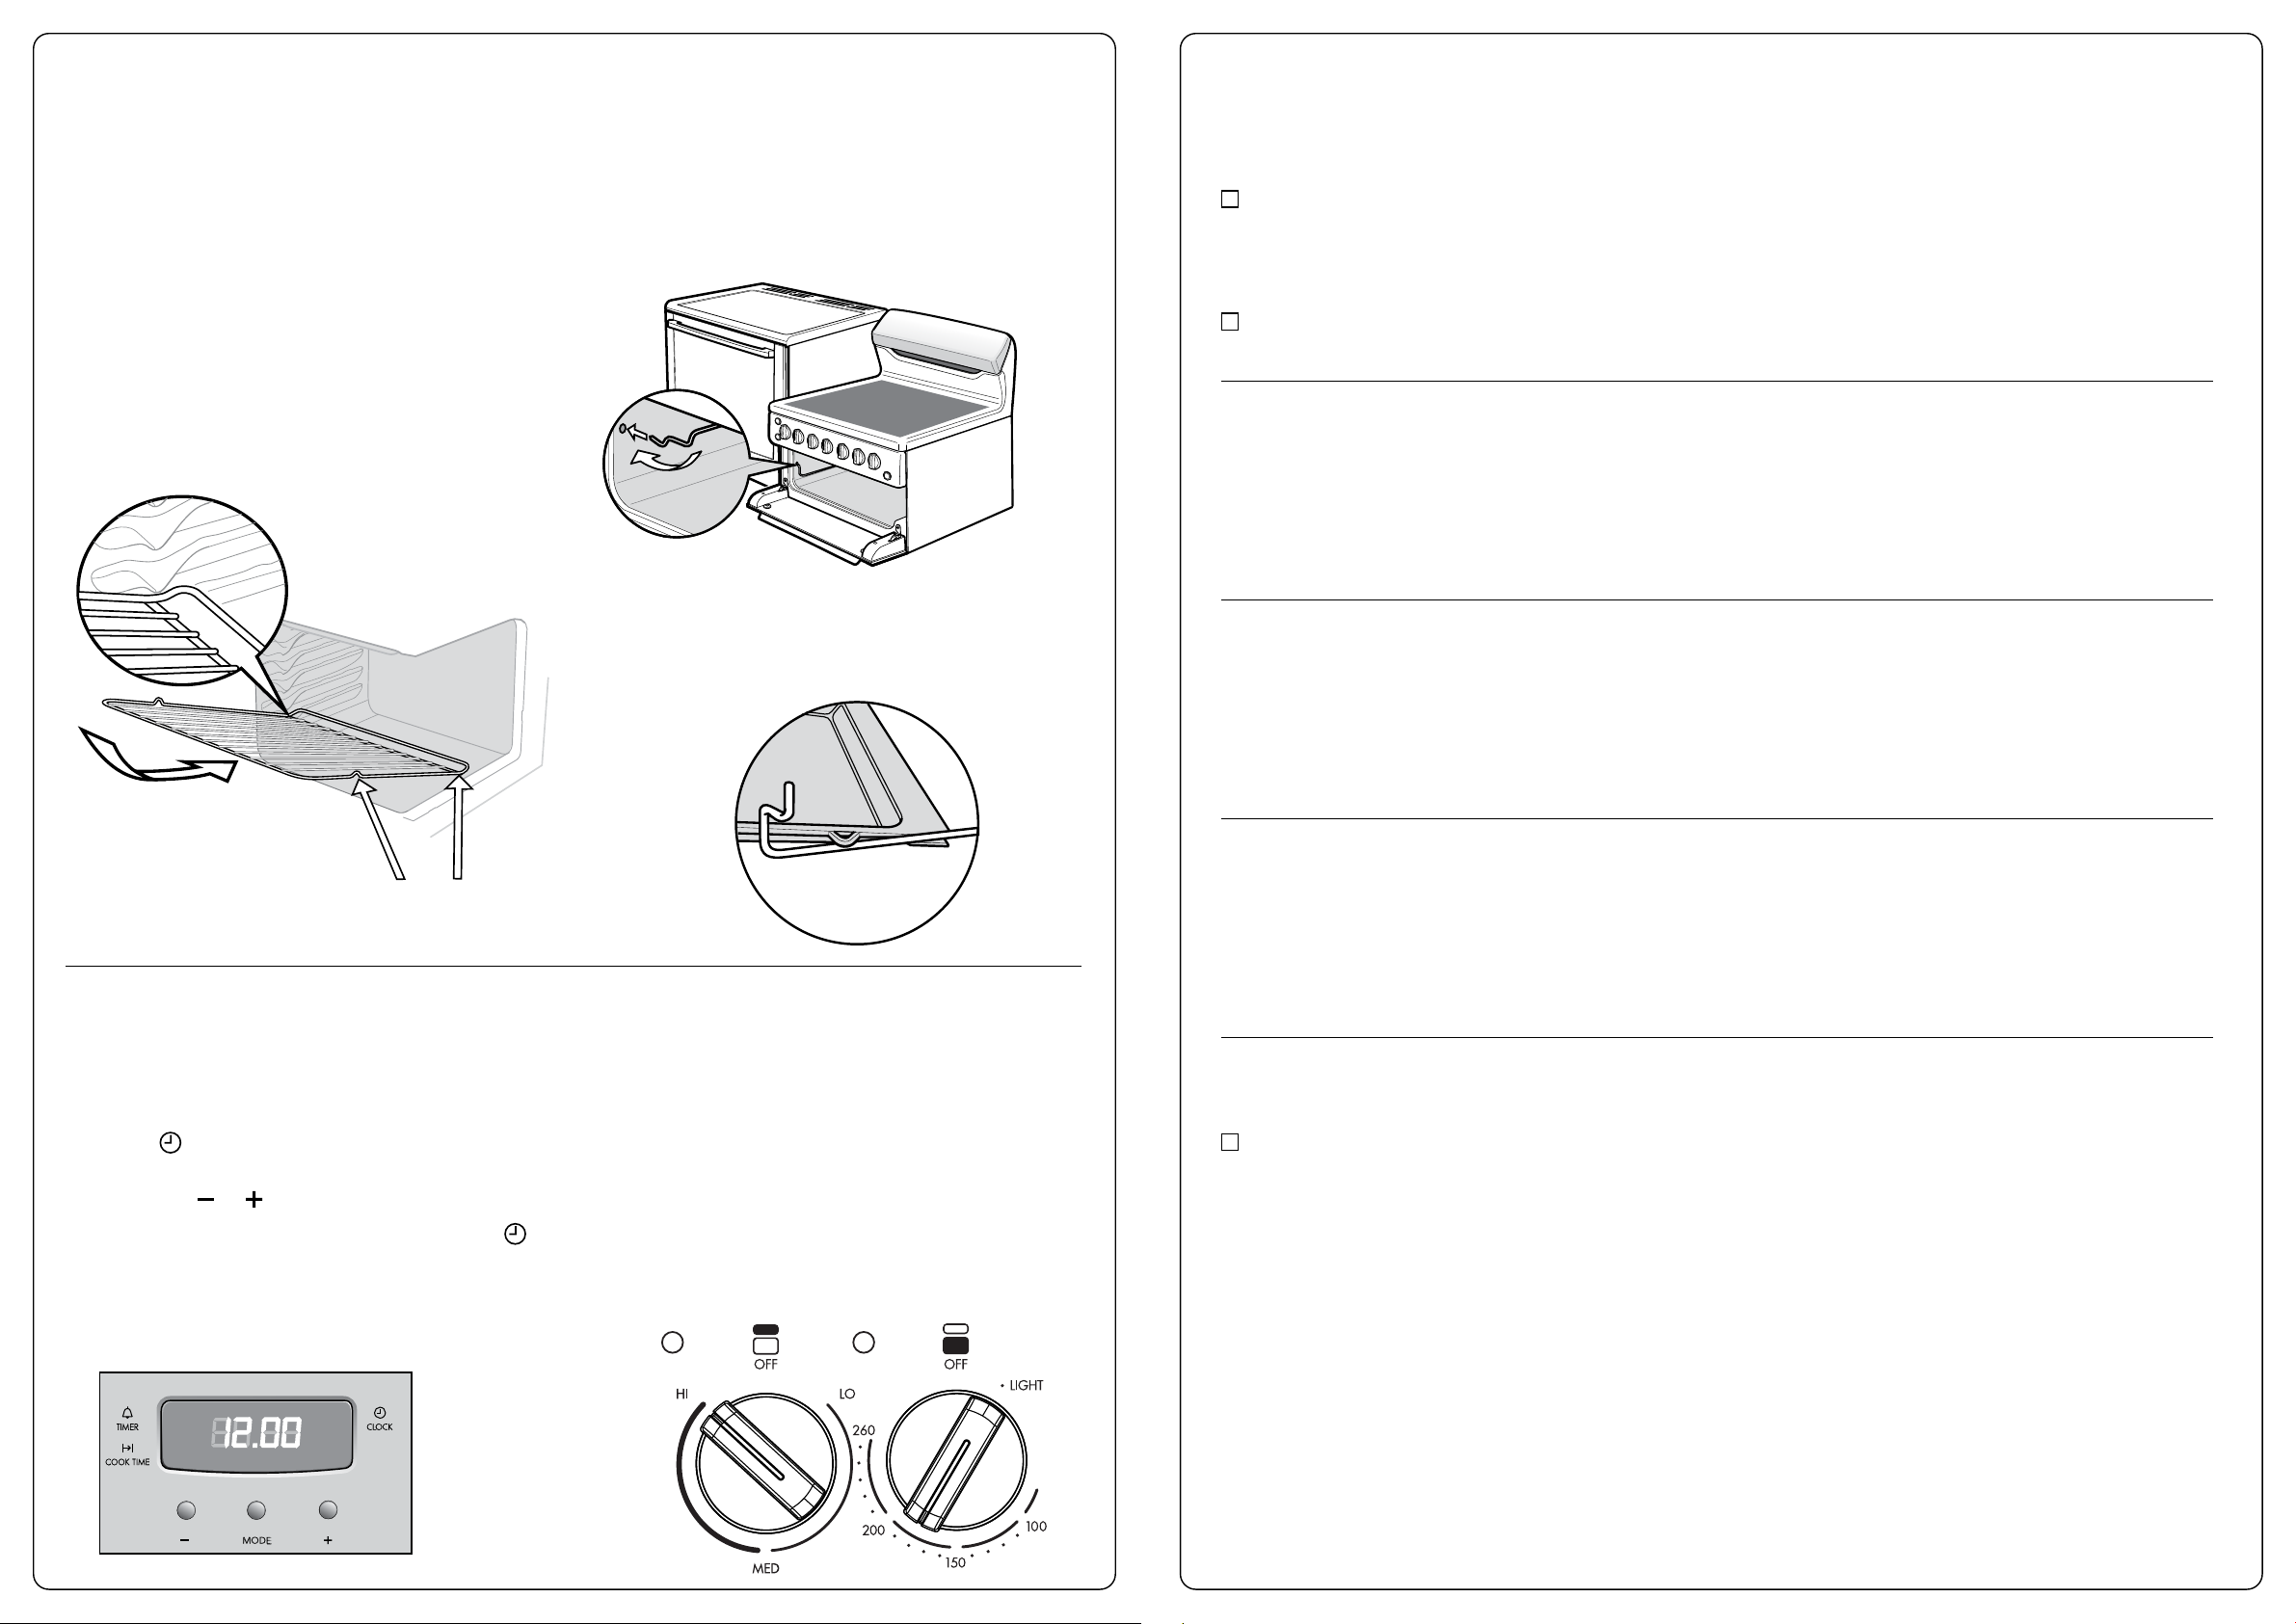
Installing the accessories
Fitting the oven shelves
1. Ensure shelf orientation is correct
(refer to diagram below).
2. Slide oven shelves onto oven supports
(side runners) at an angle until raised back
of shelf is past the stop on oven supports
(side runners).
3. Lower front of shelf and push in until stop
is reached.
4. To remove oven shelves, withdraw to the stop
and raise the front of shelf to clear the stop.
Note the orientation of the
side and rear features
Fitting the grill dish supports
Insert the ends of the supports into the holes and
swing downwards.
Fitting the grill dish
Ensure rear of the dish is engaged with the side
support before sliding backwards. To remove
simply pull forwards and upwards.
Engagement of
rear of dish
Set your temperature
• To set the temperature, turn the grill/oven knob in a clockwise direction to the desired setting.
• An indicator light in the display will turn on and the grill/oven will begin to heat.
• Once the food is cooked, turn the temperature selector back in an anti-clockwise direction.
Note: The oven indicator light cycles on and o when the temperature is reached.
Set the time
After electrically connecting the appliance, you must
set the time of day before you can operate your oven.
• After the appliance has been electrically
connected, “12:00” will be displayed and the
clock indicator will flash.
• To set the time of day in hours and minutes
press the or buttons.
• 5 seconds after the last change, the clock
indicator will disappear, confirming the time has
been set. Once the time has been entered, the
clock advances minute by minute.
Note: The clock has a 24 hour display.

Other Westinghouse Range manuals

Westinghouse WLE543WC User manual

Westinghouse

Westinghouse WLE543WC User manual

Westinghouse OAB30 Guide

Westinghouse

Westinghouse OAB30 Guide

Westinghouse WWEF3006KW - 30 Inch Electric Smoothtop... User manual

Westinghouse

Westinghouse WWEF3006KW - 30 Inch Electric Smoothtop... User manual

Westinghouse WFE517 User manual

Westinghouse

Westinghouse WFE517 User manual

Popular Range manuals by other brands

FUST NOVAMATIC FH67-412K user manual

FUST

FUST NOVAMATIC FH67-412K user manual

DCS RG series Part list manual

DCS

DCS RG series Part list manual

Bestron AHP1800Z instruction manual

Bestron

Bestron AHP1800Z instruction manual

Frigidaire FGEF3032MB Wiring diagram

Frigidaire

Frigidaire FGEF3032MB Wiring diagram

GE PCB987 owner's manual

GE

GE PCB987 owner's manual

Crosley CRE3880HSSA Use & care manual

Crosley

Crosley CRE3880HSSA Use & care manual

Vulcan-Hart EV12 Series Service manual

Vulcan-Hart

Vulcan-Hart EV12 Series Service manual

Whirlpool WFG505M0MS user manual

Whirlpool

Whirlpool WFG505M0MS user manual

Smeg CS150-6 manual

Smeg

Smeg CS150-6 manual

GE PCB915 quick guide

GE

GE PCB915 quick guide

LG LRG3021ST user guide

LG

LG LRG3021ST user guide

GE C2S980S - Cafe 30 in. Dual-Fuel Range Dimensions and installation information

GE

GE C2S980S - Cafe 30 in. Dual-Fuel Range Dimensions and installation information

LG LRG3193ST Service manual

LG

LG LRG3193ST Service manual

Frigidaire FFEF3000MW Service data sheet

Frigidaire

Frigidaire FFEF3000MW Service data sheet

GE XL Use and care & installation guide

GE

GE XL Use and care & installation guide

Frigidaire FLF337AWD installation instructions

Frigidaire

Frigidaire FLF337AWD installation instructions

Elmira Stove Works NORTHSTAR 1954 Installation and operating instructions

Elmira Stove Works

Elmira Stove Works NORTHSTAR 1954 Installation and operating instructions

GE PB900YVFS installation instructions

GE

GE PB900YVFS installation instructions

manuals.online logo
manuals.online logoBrands
  • About & Mission
  • Contact us
  • Privacy Policy
  • Terms and Conditions

Copyright 2025 Manuals.Online. All Rights Reserved.