AKZ 475/02 PRODUCT DESCRIPTION SHEET
GB PL RU SE DK FI NO CZ SK HU RO GR
5019 310 56624
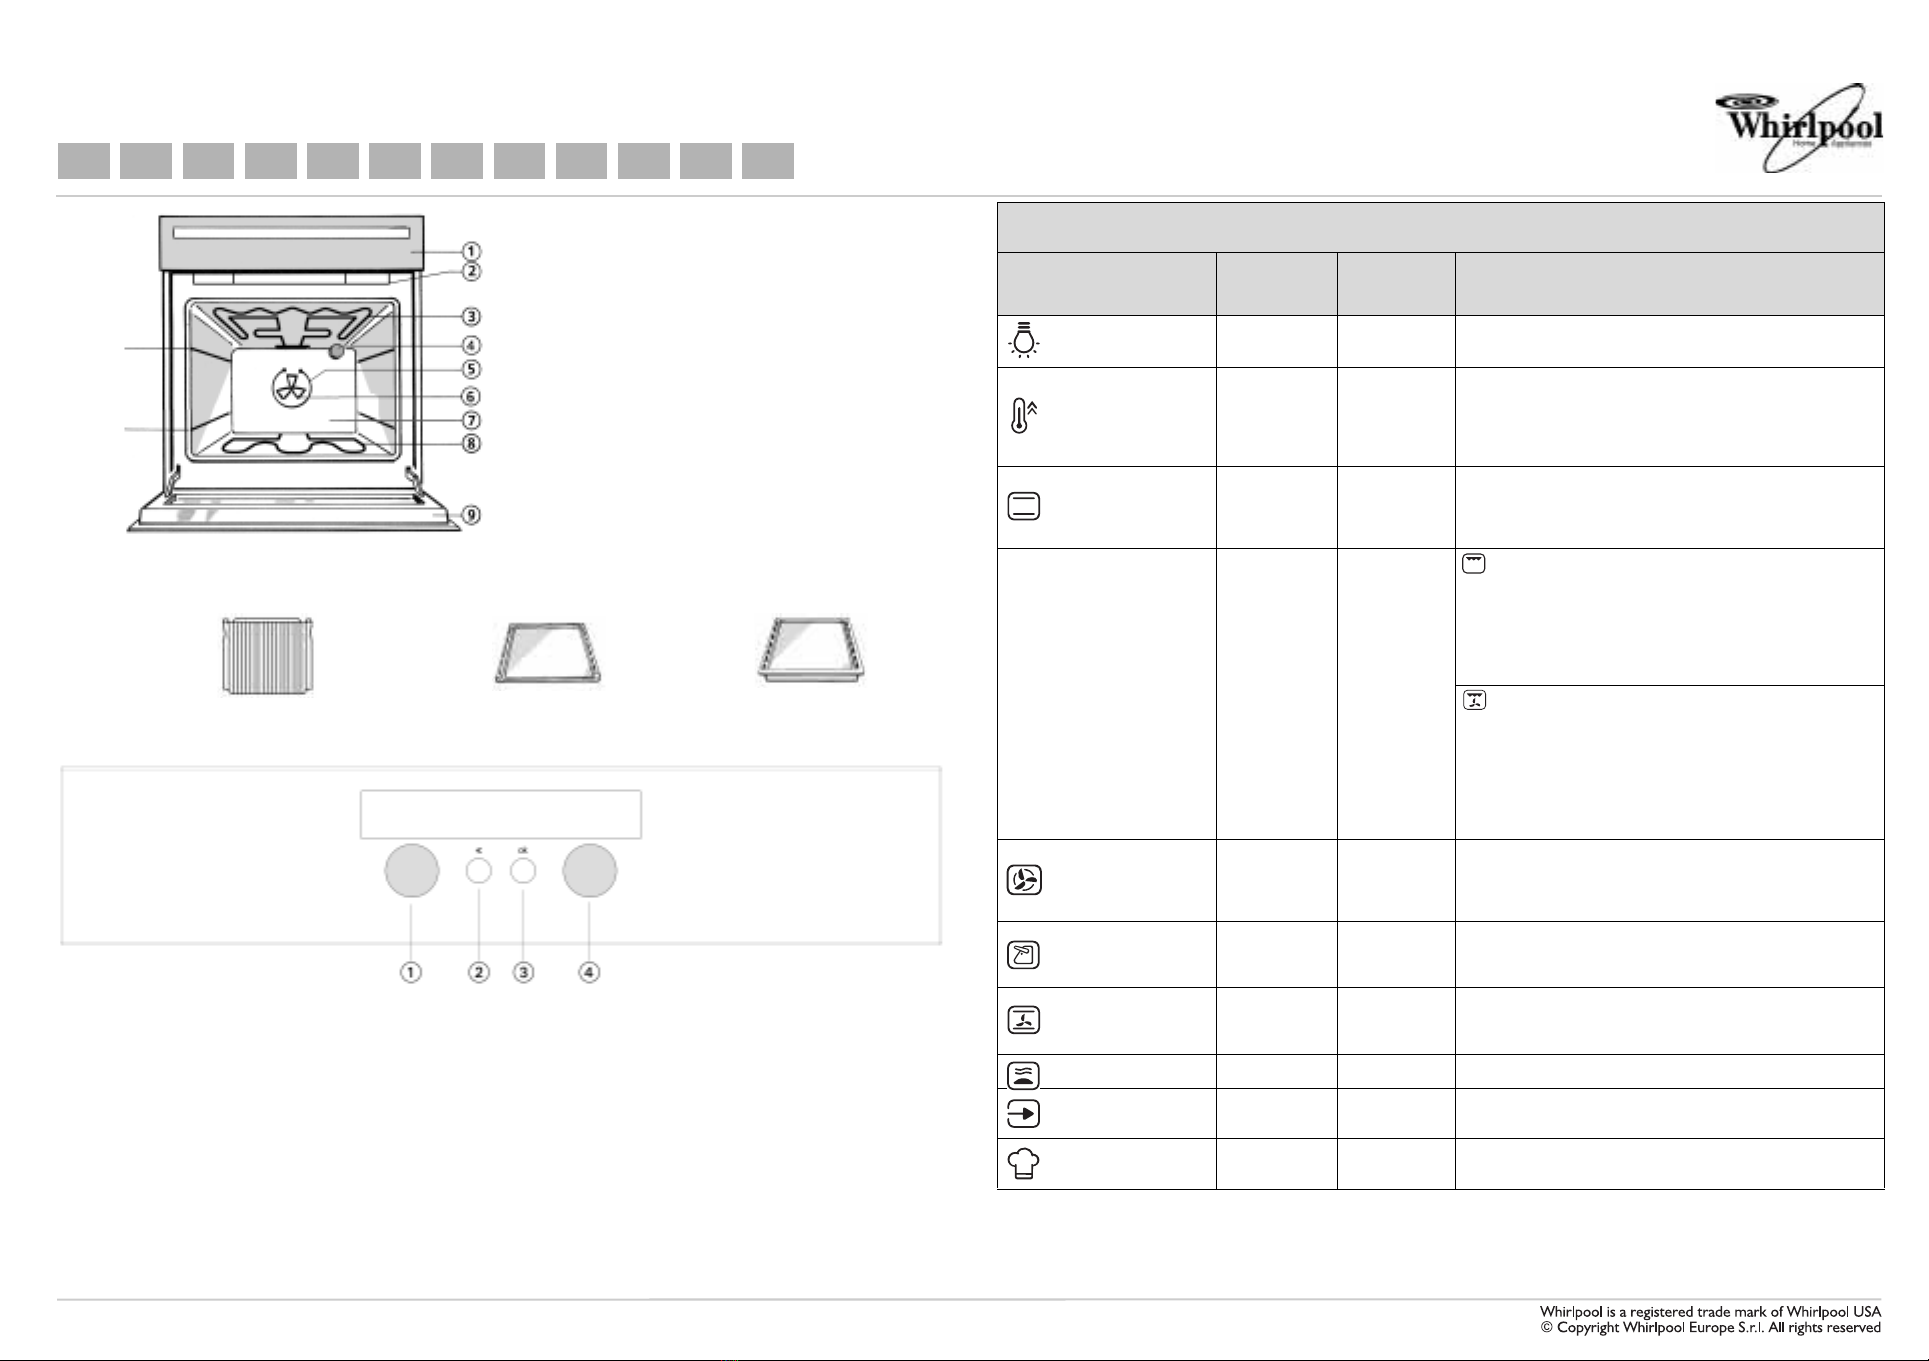
1. Control panel
2. Cooling fan (not visible)
Fan operation switches on only when the oven has
reached a certain temperature, and may continue
even after the appliance has been turned off, for a
few minutes.
3. Grill element (can be lowered)
4. Rear oven lamp
5. Circular heating element (not visible)
6. Fan
7. Catalytic rear wall
8. Lower heating element (hidden)
9. Oven cool door
ACCESSORIES
CONTROL PANEL
1. ON/OFF - Function Selector Knob
2. Selection cancellation or back button.
3. Confirmation button
4. Pre-set values modification knob
(temperature, time, levels). For browsing through
the functions.
Retractable knobs
• To use this type of knob, press it in the middle.
• The knob comes out.
• Turn it to the required position.
Once cooking is over, turn the knob to 0and press it
again to restore it to its original position.
Bottom
To p
shelf
shelf
Wire Shelf: Baking tray: Drip tray:
Oven function chart
Function Preset
temperature Te m p e r a t u r e
range Description of function
Light - - To switch on the oven light
RAPID
PRE-HEAT 200°C 50°C - 250°C
• To preheat the oven rapidly.
• The booster function cuts out automatically when the
programmed temperature is reached. The acoustic signal will
sound and the appliance switches to the CONVENTIONAL
cooking function.
CONVENTIONAL 200°C 50°C - 250°C
• To cook meat, fish and poultry on the middle shelf.
• Preheat the oven to the required cooking temperature and
place the food in the oven when the acoustic signal indicates
the oven has reached the preset temperature.
GRILL/TURBOGRILL 31-5
To grill steak, kebabs and sausages, to cook vegetables au
gratin and to toast bread.
The Grill function can be set to different power levels,.
The oven door must be kept closed during the cooking cycle.
When cooking meat, pour a little water into the drip tray to
reduce smoke and fat spatters.
Ideally the meat should be turned during cooking
To grill large joints of meat (roast beef and other roast
meats).
This function can be set to different power levels.
Preheat the oven for 3 - 5 min.
The oven door must be kept closed during the cooking cycle.
When cooking meat, pour a little water into the drip tray (on the
bottom shelf) to reduce smoke and fat spatters.
Ideally the meat should be turned during cooking.
FORCED AIR 160°C 50°C - 250°C
• To cook (without preheating) foods that require the same
cooking temperature on one or more levels
(e.g.: fish, vegetables, sweets), without transferring odours
from one foodstuff to the other.
MAXI COOKING 180°C 50°C - 250°C • To cook mostly large joints of meat (large roasts, turkey),
ideally on one shelf only, preferably the first or second shelf
from the bottom
PASTRY 175°C 50°C - 250°C • To cook on up to two different shelf levels.
• If necessary, switch the positions of the dishes to cook food
more evenly.
SPECIAL • Consult the programmer description sheet
SETTING • Consult the programmer description sheet
AUTO RECIPES • Consult the programmer description sheet


