manuals.online logo
Brands
  1. Home
  2. •
  3. Brands
  4. •
  5. Whirlpool
  6. •
  7. Washer
  8. •
  9. Whirlpool LA6700XK User manual

Whirlpool LA6700XK User manual

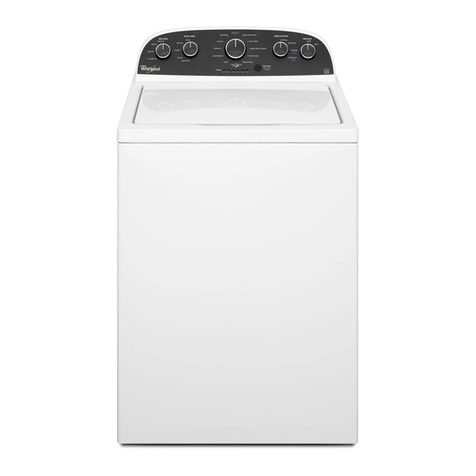
Models kA67OOXK;
Regutar Capacity
Whirlpool
AUTOMATIC WASHER
Use&
Care
Guide
LAUNDRY INFORMATION CENTER
CYCLE CONTROI. KNOB
h\ LiQUID FABRIC SOFTENER
Copy Your Model and Serial Numbers Here
When you need service, or call
with a question, have this informotlon
ready
1 Complete Model and Serial Numbers
(from the plate under the lid near the
hinge).
2 Purchase date from sales slip [or date
installed)
Copy this information in these
spaces. Keep this book in the Laundry
Information Center with your laundry
Gujde, sales slip and warranty
Before using
your Washer
Please read t’lls booklet to be
sure your washer ,s rAalled and used
properly It WI// help vou get the best
results and longest 1fe your washer was
designed to give
You are personally responsi-
ble for making sure that your
washer...
l
Is installed by a quaIlfled installer
l
Is properly instolled and leveled on a
floor that can support the weight.
l
Is connected to the right kind of outlet
electric
supply.
water supply and drain
l
Is properly electrically grounded
l
Is used only for lobs normally
expected of home automatic washers
l
Is properly maintained
l
Is protected from the weather
l
Is not run by children or anyone
unable to operate it properly
Remove
the Consumer Buy
Guide label It will be easier to remove
before the washer ISused
You may want to wipe out the
basket with a damp cloth before using
to remove dust from storing or shipping
SPECIAL INSTRUCTIONS: See the
laundry Guide for tips on deter-
gents, other laundry aids and
instructions for washing special
items.
.See the Installation Instructions for
complete Information
CAUTION: Store
gent and additives in a
place where children can’t
reach them.
Contents
2. Measure Detergent; Add to
Washer Basket.
l
See detergent information on
page 7 and In Section IV of the Laun-
dry Guide.
3. load the Washer.
l
Load without packing so items can
move freely for best cleaning and
least wrinkling.
l
Spread the load evenly. [Don’t put
all the towels on one side and a few
wash cloths on the other.] An unbal-
anced load can cause the washer to
shake during spinning.
4. Pour liquid Bleach into the
Dispenser.
l
See Page 6 and the “Laundry Aids”
section of the Laundry Guide for more
information.
5. Add Diluted Fabric Softener to
the Dispenser.
l
DO NOT ADD FABRIC SOFTENER TO
THE WASH. Fabric softeners can com-
bine with soap or detergent to form
greasy stains on fabrics.
Before Using Your Washer 2
Loading Your Washer 3
MAGIC CLEAN Lint Filter 3
Using Your Washer
Water Levels and Load Sizes 2
Using the Dispensers
6
LlCliJ’? %br~c kftener Dlsperxer 6
L rJ<>': 3leacr 3spenser 6
Important Detergent Information 7
Cycle Operation
a
PERMANEFJT [‘FESS
a
KT\rlTS ;FNTLb 8
RESJ 4R tiE,~v’~
a
SOAK ,YCLF 10
PRE VVASH ‘0
For Rinsing Only 10
For Spinning Only 10
If You Need Service or Assistance 11
1 Before Calling for AssIstonce 11
2 If Vou Need Assistance 12
3 If You Need Service 12
4 1’vou HaLe a Problem 12
loading
your Washer
I
For best washing results and
energy savings, sort the laundry
carefully.
I. Sort the Laundry into loads.
l
Group the laundry into loads that
can be washed and dried together.
See the Laundry Guide for informa-
tion and samples of typical loads.
l
Try to mix large and small items for
best movement in the washer.
MAGIC CLEAbP
lint Filter
The IInt filter ISself-cleaning. It
fM+ers dater used in both the wash and
tile rinse When the washer drains, lint
collected ISflushed away
If your washer drains Into a tub,
watch the drain strainer for the lint. A
llnty ioad can plug the tub drain and
cause an overflow
Using your Washer
Start your u:xher lfter you put II
detergent. the loat and any other
laundry ads according 10 Information
on pages 3,5 6 a?d 7
1.
Set the LOAD SIZE SELECTOR.
l
Select the water level that matches
the size of the Iox See txge 5 for
more ~nformotion
l
To c hange the setting )rl the
LOAD
SIZE SELECTOR,
first move It to RESET
Then move it back to the setting you
want
IMPORTANT For tne best cleonlng
results with the least wrinkling. make
sure the load has enough water for
2. Set the TEMPERATURE SELECTOR.
l
Mcxch the wash and rlxe water tem-
peratures to the type of fobrlcs and SOIIS
being washed [See the Instructions
under the washer IId and on page 14 in
your ioundry GUI&~
l
Be sure to use a cold rinse for PERMA-
NENT PRESS and KNITS GENTLE Cycles
a
3. Select a Cycle and Start the
Washer.
l
Push the Cycle Control Knob In and
turn It to the right (clockwlse)
l
Stop when the pointer ISon the nurn
Ser of minutes of washing you want
in the cycle you want
l
Instructions for which cycles to use for
each fobrlc type are under the Ild
l
To start the washer, pull the Cycle
Control Knob out When the cycle IS
over, the washer WIII stop
l
To stop the washer at any time
durlng a cycle, push the Control
Knob in.
Pull it out to restart the washer
l
To change a setting,
push the Con-
trol Knob In to stop the washer Then turn
the Control Knob to the right (clockwlse)
to the setting you want Pull the knob
out to start the washer
l
Pages 8-11 show what happens In
each cycle
Water levels and
load Sizes
The LOAD SIZE SELECTOR lets
you control the amount of water that fills
the washer. The selector can be set at
any water level between HANDWASHA-
BLE and LARGE.
WATER LEVELS
Setting Gallons/Liters
HANDWASHABLE 91 345
MEDIUM 130 492
LARGE 169 643
Approximate fill &ith load
To change tne water level setting,
move the LOAD SIZE SELECTOR to
RESET Then move It to the setting you
want
To save water and energy,
match the water level to the load
size.
For the best cleaning results, the
load should move freely In the water
Watch for rollover, an Item (like a sock)
should sink in the middle and come
up later on the outside
Be sure to read pages 11 13 In
your Laundry Guide You will find more
information on loading and load sizes
liquid Bleach Dispenser
Using the
Dispensers
You ncv r%jnt to use liqurd
Meal ?Iarc fabr softeners in some
load, Your wash+r hos dispensers
deslc4ned to autor~attcally odd these
II~UIC laurdry aid at the correct time
Follc~, ihe : ‘roduct package
recJf,~lmendattorl carefully Use the drs-
penst rs for best results
liquid Fabric Softener
Dispenser
The drspenser for lrqurd fabric
softerler fits over tF,e top of the agrtator
The clspenser WIII nold enough
diluted
fabric softener for one deep rinse
l
After addrng the detergent and the
load. frt the drspenser over the top of the
agitator cop
l
Follnwrng directIons on the bottle,
odd the correct omount of fabric soft-
ener Use a cup with Q pouring spout
to avord dripping any on the load
l
IMPORTANT: Add enough hot or
warm water to fill the dispenser to
the FULL mark.
l
Diluted fabric softener will be added
just before the washer starts fillrng for the
rinse
NOTE:
Do not stop the washer
during
the first spin [when the wash
water ISspinnrng out] If you do, the fab-
rrc softener ~111be added to the wet,
soapy load This con cause stains
l
Clean the dispenser after each use
with worm
water only.
Detergent con
make softeners sticky and lumpy
The bleach dispenser ISunder the
ild of the washer in the front corner If
WIS the words, LIQUID BLEACH, on It
0 Before starting the washer, but after
loading it, odd the bleach
l
Use o measurrng cup with a pouring
spout to help avord spilling or spattering
the bleach
l
Follow the drrectrons on the bottle for
the amount to use.
Never use more
than 1 cup (250 ml) for a full load.
Use less with lower water level
settings.
Use a standard
measuring cup
with a pouring
spout to fill
dispensers.
l
Do not let any bleach run down
into the washer basket. Concen-
trated bleach will damage any
fabric.
Important
Detergent
Information
Detergents and soaps clean
by loosening solI, and by holding it In
the water so it drains away If not
enough detergent ISused, soil and
lint can settle back on the items In
the load
SOAP
works best In soft water
(O-4 grains hardness). In harder water,
both the wash and rinse water should
be softened Use enough soap to
make about I!2 to 2 Inches (3.8 to 5 5
cm] of suds
DETERGENT
works In hard or
soft water Package directtons are
usually based on soft water and
washers with normal-size tubs
Use
more detergent..
1. for hard water
2 for heavy greasy or
oily SOIIS
3 If the detergent ISlow
phosphate.
4. for cold-water washes
DETERGENT SUDS.
There are
high, normal and low sudsing pow-
dered detergents If the recom-
mended amount of detergent makes
too much suds. switch to a lower
sudsing brand
DO NOT REDUCE THE
AMOUNT
of detergent
Use the followlng chart as
beginning suggestions for powdered
and llquld detergent amounts See
your
laundry Guide
for more infor-
mation (pages 14-22).
WATER HARDNESS IN GRAINS
O-4 Grains 4-10 Grains IO-20 Grains
Powdered Detergents
Low Suds 34 cup (175 mL) 1’4 cups(250-300 11#4-1”2cups
ml1 (300-350
ml]
Normal Suds 1’~ cups (300 mL) 1’4 cups (425 mL) 2-2’14 cups
(475-525 ml)
High Suds 1’4-1’2 cups 2 cups (475 ml) 2’12
cups (600 mL)
(300-350 mL)
No phosphate - Follow package recommendattons -
Liquid Detergents lq to 1cup (60 to 250 mL), depending on the brand and
amount ofsoil. Follow package recommendations
These recommendations do not apply...
l
In areas where phosphates
are banned
l
In areas with laws limiting (by weight or
percentage) the amount of detergent
used in a wash load.
Cycle Operation
Ye numbers In each cycle are
for the number of minutes you tiant the
Your washer has five cycles on washer to agitate before It drains and
the Cycle Control Dial Each cycle IS fills for the rinse You PJIIIwant longer
deslgned to match the fabric type with agitation times for heavily soiled loads
pre-set agitation and spin speeds You choose tt)e bYash and rixe
WHAT HAPPENS IN EACH CYCLE:
. SET LOAD SIZE
l
SET WATER TEMPERATURES
l
PUSH IN KNOB, TURN TO
CYCLE AND TIME
,H,R,F]
l
PULL OUT TO START v
REFILL
rl COOL
DOWN b
l
SET LOAD SIZE
. SET WATER TEMPERATURES
. PUSH IN KNOB, TURN TO
CYCLE AND TIME
. PULL OUT TO START
. SET LOAD SIZE
. SET WATER TEMPERATURES
. PUSH IN KNOB, TURN TO
CYCLE AND TIME
. PULL OUT TO START
I
KNITS GENTLE CYCLE
Use for delicate items and washable
synthetic knits such as polyester nylorI
acr&c \Nash nylon hose or pant1 hose
In a net laundv bag
REGULAR HEAVY CYCLE
Use for sturdy tihtte and colorfast cot
tons and for heavy work clothes High
agitation and spin speeds are pre-
set for best cleaning results
8
water temperatures you want with the spinning load to help rinse and remove
TEMPERATURE SELECTOR.
detergent residue
You set the amount of water that If 1/01Jft,rr1 to G iyc‘ie c>r;c! C’Uif ihe
IIIIs the tub with the
LOAD SIZE
LV:JSII~I DL:~ mange yo~,r ,rlf:l,:! uush 0’
SELECTOR.
(117 the (:)‘c@ C:?ntrc/ n’,)Ot, (111:: t(li:)
NOTE: You
may notice that some ‘0 Wp r gilf ,c-/ockw/<el +;>the ~e+t’rxf ynb
of the
SPIN cycles
have
SPRAY RIN- Ivg”? ‘Per) y[//: ,f L>C,tt<\s:3r+
SES
Cold ‘water ISsprayed on the
DRAIN
No
0
Agltatlon
&
LOW
SPEED
SPIN
4 Spray
Rinses
VOTE Al+ays use COLD 1
INSE WATER for K- s and Dellcote Items
. SET LOAD SIZE
. SET WATER TEMPERATURE
. PUSH IN KNOB, TURN TO
CYCLE AND TIME
. PULL OUT TO START
. SET LOAD SIZE
l
SETWATER TEMPERATURE
l
PUSH IN KNOB, TURN TO
CYCLE AND TIME
l
PULL OUT TO START
1
I
st2ps add
cle -
DRAIN
No
Agitation
For Rinsing Only
MANENT PRESS If your Lvant high
agltotlon and a lo\+speed spin
Your washer can be set to rinse
only Use the setting for on extra rinse. or
for loundrv that only needs a rinse and
spin There ISo dot just after the num-
bers In PERMANENT PRESS. REGULAR
HEAVY and KNITS GENTLE If you push in
on the Cycle Control Knob. turn the
pointer to one of those dots and pull the
Control Knob out, the washer will fill.
agitate, drain and spin
If you want high agitation and
spin. use the dot In REGULAR HEAVY If
you want low agitation and spin, use the
dot In KNITS GENTLE Use the dot in PERU
10
For Spinning Only
To set the washer so it drains and
spins water out of the load. push in on
the Control Knob, turn the dial to the
right (clockwise) so the pointer IStouch-
ing the bar just before OFF in any cycle
The washer WI/I drain. splr out
water and stop If you want a low-speed
spin use the bar on PERMANENT PRESS
or KNITS GENTLE All the other cycle
settllgs have a high-speed spin
Before addIng detergent for Lyashlng dissolve In quart of warm water [or
Lose l~q~,~c deterger’
If you need service
or help, we suggest
you
follow these
four steps:
1. Before calling for assistance...
Problems are sometimes caused
by Me things you cari correct without
tools.
IF YOUR WASHER DOES NOT FILL:
l
Is the power supply cord plugged in7
l
Are both water faucets open7
l
Is a fuse blown or clrcult-breaker
trlpped7
l
Are the water supply hoses kInked
l
Is the Cycle Control Knob set and
pulled out3
IF YOUR WASHER DOES NOT SPIN:
l
Is the lid closet:’
l
Is the power
supply
xx 3 plugged in7
l
Is a fuse blow’ cx cI’cul+ breaker
trlppedv
IF WASHER FILLS AND DRAINS WITHOUT
RUNNING:
l
Make sure tha’ t7e :I( 19 Car t,3l
Knob ISpointl?g to a rll,r’i,er
ir
t-re
cycle
IF YOUR WASHER STOPS DURING THE
PERMANENT PRESS CYCLE.
l
Remember, the washer &III stop for
about 112 minutes after the partial drain
during the cool dzwrl period lr ‘his
cycle
MAKE SURE THE DRAIN HOSE IS HIGHER
THAN THE WATER LEVEL IN THE WASHER.
IF IT ISN’T...
l
The washer may seem to be draining
during wash and rinse cycles
l
Water can siphon out :See lnstallatlon
lnstructlons )
2. If you need assistance ...
Call the WhIrlpool COOL-LINE’ service
assistance telephone number Dial
free from
Continental U.S. . . . (BOO) 253-1301
Michigan . . . . . . . . . . (BOO) 632-2243
Alaska &
Hawaii . . . . . . . . . . . . (800) 253-1121
and talk with one of our trained
Consultants The Consultant can Instruct
you In how to obtain satisfactory
operation from your appliance or, if
service ISnecessary, recommend a
quaIlfled service company in your area.
3.
It you need service. ...
WhIrlpool has a nationwide network of
franchised TECH-CARE ’ Service
Companies. TECH-CARE service
technIcIons are trained to fulfill the
product warranty and provide after-
warranty service. anywhere In the
United States. To locate TECH-CARE
service In your area, call our COOL-LINE
service assistance telephone number
[see Step 2) or look in your telephone
directory Yellow Pages under
Part No. 383161
WASHING MACHINES, DRYERS
B IRONERS-SERVICING
ELECTRICALAPPLIANCES-
MAJOR-REWIRING 8 PARTS
APPLIANCES-HOUSEHOLD-
MAJOR-SERVICE 8 REPAIR
.‘.Y RLW. APP, 2NCEj
F9ANTHISEDTC’ H (Aflt iFRVlCF
4. If you have a problem. ...
Call our COOL-LINE service assistance
telephone number [see Step 2) and talk
with one of our Consultants, 01 if you
prefer, write to
Mr Guy Turner, Vice President
Whirlpool Corporation
AdmInIstrative Center
2000 US-33 North
Benton Harbor, Ml 49022
If you must call or write, please
provide model number, serial number,
date of purchase, and a complete
description of the problem. This
information
IS
needed in order to better
respond to your request for assistance.

Other manuals for LA6700XK

1

Other Whirlpool Washer manuals

Whirlpool LB5300XK User manual

Whirlpool

Whirlpool LB5300XK User manual

Whirlpool AWM 1111 User manual

Whirlpool

Whirlpool AWM 1111 User manual

Whirlpool AWE7101N Installation guide

Whirlpool

Whirlpool AWE7101N Installation guide

Whirlpool WFW6620HW User manual

Whirlpool

Whirlpool WFW6620HW User manual

Whirlpool LSR5121JQ0 User manual

Whirlpool

Whirlpool LSR5121JQ0 User manual

Whirlpool Cabrio,- WED7300X User manual

Whirlpool

Whirlpool Cabrio,- WED7300X User manual

Whirlpool WFW8300SW - Duet Sport Washer User manual

Whirlpool

Whirlpool WFW8300SW - Duet Sport Washer User manual

Whirlpool GVW9959KT0 User manual

Whirlpool

Whirlpool GVW9959KT0 User manual

Whirlpool LBR5432PQ2 User manual

Whirlpool

Whirlpool LBR5432PQ2 User manual

Whirlpool LA858OXW User manual

Whirlpool

Whirlpool LA858OXW User manual

Whirlpool LSB6000LQ0 User manual

Whirlpool

Whirlpool LSB6000LQ0 User manual

Whirlpool W10133484A User manual

Whirlpool

Whirlpool W10133484A User manual

Whirlpool WFW94HEX Series Parts list manual

Whirlpool

Whirlpool WFW94HEX Series Parts list manual

Whirlpool AWOA6122 User manual

Whirlpool

Whirlpool AWOA6122 User manual

Whirlpool LA9800XM User manual

Whirlpool

Whirlpool LA9800XM User manual

Whirlpool LSQ9110KQ0 User manual

Whirlpool

Whirlpool LSQ9110KQ0 User manual

Whirlpool LBR5432JQ1 User manual

Whirlpool

Whirlpool LBR5432JQ1 User manual

Whirlpool AWZ 9678 User manual

Whirlpool

Whirlpool AWZ 9678 User manual

Whirlpool LA7800XP User manual

Whirlpool

Whirlpool LA7800XP User manual

Whirlpool SUDS-MISER WTW4950XW0 User manual

Whirlpool

Whirlpool SUDS-MISER WTW4950XW0 User manual

Whirlpool AWM 243 User manual

Whirlpool

Whirlpool AWM 243 User manual

Whirlpool Easy-Yo-Use Automatic Washer User manual

Whirlpool

Whirlpool Easy-Yo-Use Automatic Washer User manual

Whirlpool 3955155A User manual

Whirlpool

Whirlpool 3955155A User manual

Whirlpool FL 141 User manual

Whirlpool

Whirlpool FL 141 User manual

Popular Washer manuals by other brands

LG F2720RVTV owner's manual

LG

LG F2720RVTV owner's manual

Samsung SW80SP user manual

Samsung

Samsung SW80SP user manual

Haier HWT80AW1 user manual

Haier

Haier HWT80AW1 user manual

HERKULES G550 owner's manual

HERKULES

HERKULES G550 owner's manual

Miele PW 5105 Vario Operating and installation instructions

Miele

Miele PW 5105 Vario Operating and installation instructions

Hisense HWFV8012 Quick user manual

Hisense

Hisense HWFV8012 Quick user manual

Defy ELECTROLOGIC 720 owner's manual

Defy

Defy ELECTROLOGIC 720 owner's manual

Simpson SWT8542A user manual

Simpson

Simpson SWT8542A user manual

Electrolux WA GL4 E 201 user manual

Electrolux

Electrolux WA GL4 E 201 user manual

Haier HWM90-0713P user manual

Haier

Haier HWM90-0713P user manual

Siemens WM12N272HK User manual and installation instructions

Siemens

Siemens WM12N272HK User manual and installation instructions

Samsung WA456 Series Fast track troubleshooting

Samsung

Samsung WA456 Series Fast track troubleshooting

Hotpoint BHWM129 Instructions for use

Hotpoint

Hotpoint BHWM129 Instructions for use

Electrolux EW6F6268N5 user manual

Electrolux

Electrolux EW6F6268N5 user manual

Miele PWM511 Operating and installation instructions

Miele

Miele PWM511 Operating and installation instructions

montpellier MW5101W Installation and operating instructions

montpellier

montpellier MW5101W Installation and operating instructions

Miele PW 6 7 Series technical information

Miele

Miele PW 6 7 Series technical information

GRANULDISK Granule Gastro user manual

GRANULDISK

GRANULDISK Granule Gastro user manual

manuals.online logo
manuals.online logoBrands
  • About & Mission
  • Contact us
  • Privacy Policy
  • Terms and Conditions

Copyright 2025 Manuals.Online. All Rights Reserved.