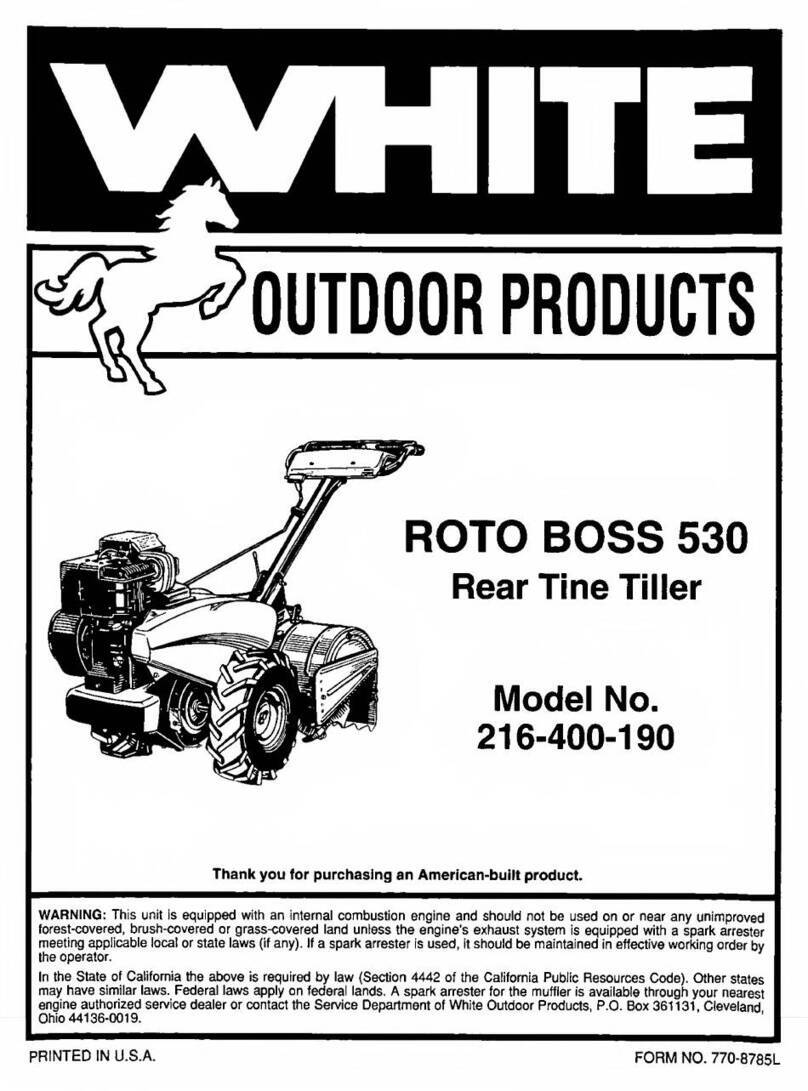
White Outdoor Products ROTO BOSS 310 User manual

OUTDOOR
PRODUCTS
i
PARTS
CATALOG
AND
INSTRUCTION
MANUAL
ROTO
BOSS
310
Chain
Drive
Tiller
Model
No.
216
-
0
3
1
-
1
9
0
Thank
you
for
purchasing
an
American-built
product
FORM
NO.
770-5523A

INDEX
Safe
Operation
Practices.3
Assembly
Instructions.
4
Operation.
7
Adjustments.
8
Lubrication.
1
0
Maintenance.
1
0
Off-Season
Storage.
.
.
Trouble
Shooting
Chart
Parts
for
Chain
Case
.
Illustrated
Parts.
Parts
List.
Parts
Information.
Instructions
given
with
this
symbol
are
for
personal
safety.
Be
sure
to
follow
them.
.11
.12
.13
.14
.15
Sack
Cover
f
♦
♦
♦
♦
♦
♦
♦
♦
♦
♦
♦
♦
♦
♦
LIMITED
WARRANTY
For
one
year
from
the
date
of
original
retail
purchase,
WHITE
OUTDOOR
PRODUCTS
will
either
repair
or
replace,
at
its
option,
free
of
charge,
F.O.B.
factory
or
authorized
service
firm,
any
part
or
parts
found
to
be
defective
in
material
or
workmanship.
Transportation
charges
for
the
movement
of
any
power
equipment
unit
or
attachment
are
the
responsibil¬
ity
of
the
purchaser.
Transportation
charges
for
any
parts
submitted
for
replacement
under
this
warranty
must
be
paid
by
the
purchaser
unless
such
return
is
requested
by
WHITE
OUTDOOR
PRODUCTS.
This
warranty
will
not
apply
to
any
part
which
has
become
inoperative
due
to
misuse,
ex¬
cessive
use,
accident,
neglect,
improper
maintenance,
alterations,
or
unless
the
unit
has
been
operated
and
maintained
in
accordance
with
the
instructions
furnished.
This
war¬
ranty
does
not
apply
to
the
engine,
motor,
battery,
battery
charger
or
component
parts
thereof.
Please
refer
to
the
applicable
manufacturer’s
warranty
on
these
items.
This
warranty
will
not
apply
where
the
unit
has
been
used
commercially.
Warranty
service
is
available
through
your
local
authorized
service
dealer
or
distributor.
If
you
do
not
know
the
dealer
or
distributor
in
your
area,
please
write
to
the
Customer
Service
Department
of
WHITE
OUTDOOR
PRODUCTS.
The
return
of
a
complete
unit
will
not
be
accepted
by
the
factory
unless
prior
written
per¬
mission
has
been
extended
by
WHITE
OUTDOOR
PRODUCTS.
This
warranty
gives
you
specific
legal
rights.
You
may
also
have
other
rights
which
vary
from
state
to
state.
♦
♦
♦
♦
♦
♦
♦
t
♦
♦
♦
♦
♦
♦
J
WARNING
l
This
unit
is
equipped
with
an
internal
combustion
engine
and
should
not
be
used
on
or
near
any
unim¬
proved
forest-covered,
brush-covered
or
grass-covered
land
unless
the
engine's
exhaust
system
is
equipped
with
a
spark
arrester
meeting
applicable
local
or
state
laws
{if
any).
If
a
spark
arrester
is
used,
it
should
be
maintained
in
effective
working
order
by
the
operator.
In
the
State
of
California
the
above
is
required
by
law
(Section
4442
of
the
California
Public
Resources
Code).
Other
states
may
have
similar
laws.
Federal
laws
apply
on
federal
lands.
A
spark
arrester
muffler
is
available
at
your
nearest
engine
authorized
service
center.
2

WARNING
▲
>
:
^°iu
e
fl
UC
^
P°
t
ent
'
a
*
*
o
r
any
injury,
comply
with
the
following
safety
instructions.
Failure
to
comply
with
the
instructions
may
result
in
personal
injury.
SAFE
OPERATION
PRACTICES
FOR
TILLERS
1.
It
is
suggested
that
this
manual
be
read
in
its
entirety
before
attempting
to
assemble
or
operate
this
unit.
Keep
this
manual
in
a
safe
place
for
future
and
regular
reference
and
for
ordering
replacement
parts.
2
.
Your
tiller
is
a
precision
piece
ot
power
equip¬
ment,
not
a
plaything,
Therefore,
exercise
ex¬
treme
caution
at
all
times.
.
3.
Read
th«s
Owner’s
Manual
carefully.
Be
thoroughly
familiar
with
the
controls
and
the
proper
use
of
the
equipment.
4.
Never
allow
children
to
operate
a
power
tiller.
Only
persons
well
acquainted
with
these
rules
of
safe
'operation
should
be
allowed
to
use
your
tiller.
5.
No
one
should
operate
this
unit
wnile
intoxi¬
cated
or
while
taking
medication
that
impairs
the
senses
or
reactions.
6
.
Keep
the
area
of
operation
clear
of
all
per¬
sons,
particularly
small
children
and
pets.
7.
Do
not
operate
equipment
when
barefoot
or
wearing
open
sandals.
Always
wear
substan¬
tial
footwear.
8
Do
not
wear
loose
fitting
clothing
that
could
get
caught
on
the
tiller.
9.
D
o
not
start
the
engine
unless
the
shift
lever
is
in
the
neutral
(N)
position.
10.
Do
not
stand
in
front
of
the
filler
while
starting
the
engine.
11.
Do
not
place
feet
and
hands
on
or
near
the
tines
when
starting
the
engine
or
while
the
engine
is
running.
12.
Never
atlempt
to
make
a
wheel
or
depth
bar
adjustment
while
the
engine
is
running.
13.
Do
not
leave
the
tiller
unattended
with
the
engine
running.
14.
Do
not
walk
in
front
of
the
tiller
while
the
engine
is
running.
15.
Check
the
fuel
before
starting
the
engine.
Gasoline
is
an
extremely
flammable
fuel.
Do
not
fill
gasoline
tank
indoors,
while
the
engine
is
running,
or
while
the
engine
is
still
hot.
Replace
gasoline
cap
securely,
and
wipe
off
any
spilled
gasoline
before
starting
the
engine
as
it
may
cause
a
fire
or
explosion.
16.
Do
not
run
the
engine
while
indoors.
Exhaust
gases
are
deadly
poisonous.
17.
Be
careful
not
to
touch
the
muffler
after
the
engine
has
been
running.
It
is
hot.
18.
Do
not
change
the
engine
governor
settings
or
overspeed
the
engine.
Excessive
engine
speeds
are
dangerous.
19.
B
efore
any
maintenance
work
is
performed
or
adjustments
are
made,
remove
the
spark
plug
wire
and
ground
it
on
the
engine
block
for
added
safety,
20.
U
s
e
caution
when
tilling
near
buildings
and
fences.
Rotating
tines
can
cause
damage
or
injury.
21
.
Before
attempting
to
remove
rocks,
bricks
and
other
objects
from
tines,
stop
the
engine
and
be
sure
the
tines
have
stopped
completely.
Disconnect
the
spark
plug
wire
and
ground
to
prevent
accidental
starting.
22.
Check
the
tine
and
engine
mounting
bolts
at
frequent
intervals
*'or
proper
tightness.
23.
Keep
all
nuts,
bolts
and
screws
tight
to
be
sure
the
equipment
is
in
safe
working
condi¬
tion.
24.
N
e
v
er
store
the
equipment
with
gasoline
in
the
tank
inside
of
a
building
where
fumes
may
reach
an
open
flame
or
spark.
Allow
tne
engine
to
cool
before
storing
in
any
enclosure.
3

NOTE
Reference
to
left
or
right
side
of
the
tiller
is
determined
from
behind
the
unit
in
the
operating
position.
ASSEMBLY
This
unit
is
shipped
WITHOUT
GAS¬
OLINE
or
OIL.
After
assembly,
see
separate
engine
manual
for
proper
fuel
and
engine
oil
recommenda¬
tions.
Contents
of
Hardware
Pack
(See
Figure
1):
-A
(4)
Carriage
Bolts
5/16-18
x
IV
2
"
Long
B
(4)
Lock
Washers
5/16"
l.D.
C
(4)
Hex
Nuts
5/16-18
Thread
D
(2)
Cable
Ties
E
(2)
Curved
Head
Bolts
F
(2)
Belleville
Washers
5/16"
l.D.
G
(2)
Hand
Knobs
FIGURE
1.
Loose
Parts
in
Carton:
-(1)
Upper
Handle—R.H.
(1)
Upper
Handle—L.H.
(1)
Handle
Panel
Tools
Required
(2)
V
2
"
open
end
or
box
wrenches
1
.
Remove
the
tiller
from
the
carton.
Make
certain
all
parts
and
literature
have
been
removed
before
the
carton
is
discarded.
2
.
Extend
the
control
cables
and
place
on
the
floor.
Be
careful
not
to
bend
or
kink
the
cables.
3.
T
h
ere
are
two
height
positions
for
the
upper
handles.
Place
left
hand
upper
handle
(with
clutch
grip
and
cable
support
bracket
already
assembled)
in
position
on
lower
handle,
selecting
hole
for
either
high
or
low
position.
Secure
with
curved
head
bolt
(E),
belleville
washer
(F)
(cupped
side
against
the
—handle)
and
hand
knob
(G).
See
figure
3.
Do
not
tighten
at
this
time.
Assemble
right
hand
upper
handle
in
the
same
manner.
FIGURE
3.
4

FIGURE
5.
4.
P
l
ace
the
handle
panel
in
position
on
the
upper
handles.
Secure
in
position
with
lour
carriage
bolts
—(A),
lock
washers
(B)
and
hex
nuts
(C).
See
figure
4
.
Carriage
bolt
on
the
upper
left
hand
side
of
handle
panel
also
secures
the
cable
support
bracket.
5.
T
ighten
securely
all
nuts
and
bolts
used
in
handle
assembly.
6
.
A
s
s
emble
the
throttle
control
to
the
handle
panel
as
follows.
A.
Hold
the
throttle
control
assembly
beneath
the
handle
panel.
Turn
the
control
sideways
and
insert
the
lever
up
through
the
wide
portion
of
the
slot
on
the
handle
panel.
See
figure
5A.
B.
After
the
end
of
the
lever
is
through
the
slot,
turn
and
then
tip
the
control
forward
as
shown
—
in
figure
SB
to
slide
it
through
the
slot.
NOTE
The
lever
must
be
all
the
way
to
the
back
of
the
control
housing
as
shown
in
figure
5B.
C
Push
the
control
oack
into
the
slot
in
the
han¬
dle
panel
and
press
in
place.
Be
certain
the
control
is
locked
securely
into
the
slot.
See
figure
5C.
D
Secure
the
throttle
control
to
the
handle
panel
using
self-tapping
screw
provided.
See
figure
50.
7.
R
emove
one
hex
nut
and
lock
washer
from
end
of
clutch
cable.
Slip
the
wire
up
through
slot
on
cable
support
bracket.
Start
hex
nut
and
lock
washer
—
back
on
end
of
clutch
cable.
See
figure
6
.
FIGURE
6.
5

8
.
Hook
the
“Z”
end
of
clutch
cable
wire
into
bottom
—
hole
of
clutch
grip.
See
figure
7.
9.
Hold
the
clutch
grip
so
that
the
grip
is
down
against
the
handle.
Adjust
the
clutch
control
cable
so
that
the
slack
is
taken
out
of
the
control
wire.
Tighten
the
two
hex
nuts
at
the
cable
support
bracket.
Con¬
trol
wire
should
now
be
straight.
NOTE
Do
not
overtighten
control
wire.
Too
much
tension
may
cause
it
to
break.
FIGURE
7.
10
.
T
o
check
the
adjustment,
disconnect
the
spark
plug
wire
from
spark
plug
to
prevent
accidental
starting.
Secure
end
of
spark
plug
wire
in
the
“V”
—
Slot
on
the
engine.
See
figure
8.
With
the
clutch
grip
released
(neutral
position),
pull
starter
cord
several
times.
The
tines
should
not
turn.
If
they
do,
adjust
the
hex
nuts
at
the
clutch
cable
bracket.
Check
again
for
correct
adjustment.
FIGURE
8.
11
.
-Secure
the
clutch
cable
and
throttle
cable
to
the
upper
handles
with
cable
ties
(D)
provided
in
hard-
-ware
pack.
See
figure
9.
Cut
off
excess
end.
FIGURE
9.
6

OPERATION
Clutch
Grip
BEFORE
STARTING
ENGINE
1
Check
clutch
adjustment
before
starting
tiller.
Refer
to
step
number
9
of
Assembly
Instructions.
2.
F
i
l
l
crankcase
with
1
Va
pints
of
oil
or
to
top
of
filler
neck.
Be
sure
that
the
engine
is
level
See
figure
10
.
Use
SAE
No.
30
MS.
SC.
SD
or
SE
oil.
If
not
available,
use
SAE
10W-30.
FIGURE
11.
3.
P
ull
choke
knob
out
to
choke
engine.
See
figure
12
.
4.
Move
the
throttle
control
lever
forward
to
FAST
POSITION.
See
figure
11.
5.
Standing
at
side
of
the
tiller,
grasp
the
starter
han¬
dle
and
pull
out
rapidly.
Return
it
slowly
to
the
engine.
Repeat
if
necessary.
6.
After
engine
starts,
push
choke
knoD
gradually
in
to
"OFF”
position.
NOTE
Warm
engine
should
not
need
chok¬
ing.
FIGURE
10.
3.
Fill
fuel
tank
using
a
good
grade
of
fresh,
clean,
regular
gasoline.
Do
not
use
gasoline
that
has
been
sitting
for
a
long
period
of
time
TO
START
ENGINE
A
J
WARNING
\
BE
SURE
NO
ONE
IS
STANDING
IN
FRONT
OF
THE
TILLER
WHILE
THE
ENGINE
IS
RUNNING
OR
BEING
STARTED
1
Attach
spark
plug
wire
to
spark
slug
2
Be
certain
the
clutch
grip
is
m
the
r
eutral
ueleased)
position.
See
figure
11
TO
STOP
ENGINE
1,
Move
throttle
contrcl
lever
to
‘
STOP”
position.
2
Disconnect
spark
piug
wire
from
spark
plug
to
pre¬
vent
accidental
starting
while
equipment
is
unat¬
tended
7

CONTROLLING
SPEED
AND
TILLING
DEPTH
The
tiller
has
eight
10-mch
diameter,
spring
steel
tines.
Tine
speed
is
160
RPM
The
normal
tilling
depth
is4V2
inches
deep.
It
may
be
changed
by
adjusting
the
depth
bar
and
pressure
exerted
on
the
handles.
The
tilling
width
may
also
be
varied.
See
adjustment
section.
Throttle
Control
The
throttle
control
lever
is
located
on
the
right
hand
side
of
handle.
ADJUSTMENTS
WARNING
Disconnect
the
spark
plug
wire
from
spark
plug
and
ground
against
the
engine
block
{secure
in
“V"
slot)
before
making
any
adjustments
or
performing
maintenance.
See
fig¬
ure
8.
NOTE
Right
hand
side
is
determined
from
the
operator's
position
standing
be¬
hind
the
tiller.
The
throttle
control
lever
adjusts
the
engine
speed.
It
also
gives
finger
tip
control
of
the
carburetor
and
magneto
stop
switch.
With
the
throttle
control
knob
pushed
completely
forward,
the
carburetor
is
in
FAST
position.
Pulling
the
throttle
control
back
slightly
adjusts
the
engine
speed
to
START.
Pulling
the
throttle
back
further
reduces
the
engine
speed
to
SLOW.
When
the
throttle
is
pulled
completely
back,
the
magneto
stop
switch
grounds
out
the
spark
and
stops
the
engine.
Move
the
throttle
control
to
slow
when
transporting
the
tiller.
When
the
tiller
is
being
moved
to
or
from
the
garden,
the
depth
bar
should
be
raised
up
until
it
clears
the
ground.
The
machine
may
be
moved
under
its
own
power,
without
damaging
grass
areas
as
long
as
it
is
allowed
to
move
freely.
If
the
operator
holds
back,
it
will
start
to
dig.
Depth
Bar
The
depth
bar
acts
as
a
brake
for
the
tiller
and
con¬
trols
the
depth
and
speed
at
which
the
machine
will
operate.
You
may
till
deeper
by
moving
the
depth
bar
all
the
way
down.
See
adjustment
section.
Handle
Pressure
Further
control
of
tilling
depth
and
travel
speed
can
be
obtained
by
variation
of
pressure
on
the
handle.
A
downward
pressure
on
the
handle
will
reduce
the
work¬
ing
depth
and
increase
the
forward
speed.
An
upward
pressure
on
the
handle
will
increase
the
working
depth
and
reduce
the
forward
speed.
The
type
of
soil
and
working
conditions
will
determine
the
actual
setting
of
the
depth
bar
and
the
handle
pressure
required.
HANDLE
POSITION
The
upper
handle
can
be
adjusted
to
two
different
heights.
The
operator
of
the
tiller
can
easily
adjust
the
handle
position
by
unscrewing
the
two
knobs,
remov¬
ing
the
two
bolts
and
reassembling
in
another
position.
No
tools
are
necessary
to
make
this
adjustment.
See
figure
13.
FIGURE
13.
DEPTH
BAR
ADJUSTMENT
The
working
depth
of
the
tiller
is
determined
by
the
posi¬
tion
of
the
depth
bar.
Remove
the
clevis
pin
and
inter¬
nal
cotter
pin
to
raise
or
lower
depth
bar.
See
figure
14.
FIGURE
14.
8

TILLING
WIDTH
There
are
three
tilling
widths
available.
Remove
the
spark
plug
wire
from
spark
plug
and
ground
before
making
any
adjustments
to
tine
width
1.
S
tandard
tilling
width
is
18
inches
See
figure
15
FIGURE
15.
2.
A
narrower
width
(14
inches)
can
be
obtained
by
removing
Doth
outer
tines.
Use
a
3/8"
wrench
to
remove
the
two
self-tapping
screws
on
the
outside
of
the
tines.
See
figure
16.
Replace
the
first
tine
removed
as
shown
in
figure
*7.
FIGURE
17.
3.
T
he
minimum
tiller
width
that
can
be
obtained
is
10
inches.
Remove
the
outer
tines
by
removing
the
two
self-tapping
screws
on
the
outside
of
the
tines,
See
figure
18.
FIGURE
18.
CLUTCH
ADJUSTMENT
Refer
to
step
numbers
8
and
9
of
Assembly
Instructions
for
clutch
adjustment
information.
CARBURETOR
ADJUSTMENT
AC
WARNING
\
If
any
adjustments
are
made
to
the
engine
while
the
engine
is
running
(eg.
carburetor),
disengage
all
clutches
and
tines.
Keep
dear
of
all
moving
parts.
Be
careful
of
heated
surfaces
and
muffler.
9

Never
make
unnecessary
adjustments.
The
factory
recommended
settings
are
correct
for
most
ap¬
plications.
If
adjustments
are
needed,
refer
to
the
engine
manual
packed
with
the
tiller.
LUBRICATION
Chain
Case
The
chain
case
is
pre-lubricated
and
sealed
at
the
fac¬
tory.
It
requires
no
checking
unless
the
chain
case
is
disassembled.
To
fill
with
grease,
lay
the
right
half
of
the
chain
case
on
its
side.
Add
10
ounces
of
Plastilube
#0
grease
and
assemble
the
left
half
to
the
right
half.
The
grease
can
be
obtained
at
your
nearest
authorized
dealer
listed
on
the
back
of
this
manuat.
Order
part
no.
737-0133.
MAINTENANCE
A
Disconnect
the
spark
plug
wire
from
spark
plug
and
ground
against
the
engine
block
(secure
in
“V”
slot)
before
performing
any
maintenance.
See
figure
8.
CLEAN
ENGINE
Wipe
off
all
spilled
fuel
and
oil.
Keep
the
engine
clean
of
foreign
matter
and
be
sure
the
cooling
fins
on
the
cylinder
are
kept
clean
to
permit
proper
air
circulation.
This
is
an
air
cooled
engine
and
free
flow
of
air
is
essen¬
tial
to
proper
engine
performance
and
life.
ENGINE
OIL
Check
oil
level
before
each
use.
Be
sure
oil
level
is
maintained
full
to
point
of
overflowing.
See
figure
19.
FIGURE
19.
Change
the
oil
in
the
crankcase
after
the
first
two
hours
of
operation
of
your
new
engine
and
after
each
25
hours
of
use
thereafter.
This
will
ensure
proper
lubrication
of
internal
parts
to
prevent
excessive
wear.
To
change
the
oil,
remove
drain
plug
and
tip
the
tiller
forward
while
engine
is
warm.
See
figure
19.
Replace
drain
plug.
Remove
oil
filler
cap,
taking
care
to
remove
dirt
around
filler
plug.
Refill
with
new
oil
of
proper
grade.
Replace
filler
cap.
AIR
CLEANER
Service
the
air
cleaner
every
25
hours
of
operation.
The
air
cleaner
prevents
damaging
dirt,
dust,
etc.
from
•
entering
the
carburetor
and
being
forced
into
the
engine.
It
is
important
to
engine
life
and
performance.
To
service
air
cleaner,
refer
to
the
engine
manual
packed
with
the
tiller.
Never
run
your
engine
without
air
cleaner
com¬
pletely
assembled.
SPARK
PLUG
The
spark
plug
should
be
cleaned
and
the
gap
reset
at
least
once
a
season
or
when
oil
is
changed.
Spark
plug
replacement
is
recommended
at
the
start
of
each
season;
check
engine
manual
for
correct
plug
type
and
gap
specification.
BELT
REPLACEMENT
1.
Remove
belt
cover
assembly
by
removing
one
hex
nut
and
lock
washer,
one
self-tapping
screw,
one
hex
bolt,
flat
washer
and
hex
nut
and
one
hex
bolt
and
external
lock
washer.
See
figure
20.
2.
Lift
the
belt
cover
assembly
off
the
tiller.
Be
careful
not
to
bend
or
kink
the
clutch
cable.
See
figure
20.
3.
Remove
the
belt
and
position
the
new
belt
on
engine
pulley
and
chain
case
pulley.
NOTE
Upon
reassembly
of
belt
cover,
place
the
belt
over
top
of
the
idler
pulley
and
between
engine
pulley
and
weld
pin
on
belt
cover
assembly.
See
figure
20.
4.
Fasten
belt
cover
assembly
in
position.
Secure
with
the
hardware
removed
in
step
1.
10

Hex
Bolt
OFF-SEASON
STORAGE
If
the
tiller
is
not
to
be
used
for
a
while
the
following
procedure
should
be
followed.
The
tines,
depth
bar,
chain
case
and
wheels
should
be
cleaned
of
all
dirt.
It
is
very
important
that
the
unit
be
stored
in
a
level
posi¬
tion
to
prevent
engine
oil
from
draining
into
the
cylinder
head
cavity.
Engines
on
tillers
to
be
stored
between
seasons
should
be
completely
drained
of
fuel
to
prevent
gum
deposits
forming
on
essentia!
carburetor
parts
and
fuel
tank.
1.
A
l
l
fuel
should
be
removed
from
fuel
tank.
Run
the
engine
untl
it
stops
from
lack
of
fuel.
The
small
amount
of
fuel
that
remains
in
the
sump
of
the
tank
should
then
be
removed
by
absorbing
it
with
a
clean
dry
cloth.
2.
Clean
dirt
and
chaff
from
cylinder,
cylinder
head
fins
and
blower
housing.
3.
Remove
spark
plug,
pour
2
or
3
tablespoons
ot
SAE-30
oil
into
cylinder
and
pull
crank
cord
out
slowly
to
distribute
oil.
Replace
spark
plug.
When
storing
any
type
of
power
equipment
in
an
unventilated
or
metal
storage
shed,
care
should
be
taken
to
rustproof
the
equipment.
Using
a
light
oil
or
silicone,
coat
the
equipment,
especially
any
chains,
springs,
bearings
or
cables.
11

TROUBLE
SHOOTING
CHART
SYMPTOM
POSSIBLE
CAUSE(S)
SOLUTION
Engine
fails
to
start
1.
Check
fuel
tank
for
gas.
2.
Spark
plug
lead
wire
disconnected.
3.
Faulty
spark
plug.
1.
Fill
tank
if
empty.
2.
Connect
lead
wire.
3.
Spark
should
jump
gap
between
control
electrode
and
side
elec¬
trode.
If
spark
does
not
jump,
replace
the
spark
plug.
Hard
starting
or
loss
of
power
1.
Spark
plug
wire
loose.
2.
Dirty
air
cleaner.
1.
Connect
and
tighten
spark
plug
wire.
2.
Clean
air
cleaner
as
described
in
engine
manual.
Engine
overheats
1.
Carburetor
not
adjusted
properly.
2.
Air
flow
restricted.
3.
Engine
oil
level
low.
1.
Adjust
carburetor.
See
engine
manual.
2.
Remove
blower
housing
and
clean
as
described
in
the
engine
manual.
3.
Fill
crankcase
with
the
proper
oil.
Tine
control
does
not
engage
Belt
worn
and/or
stretched.
Make
control
cable
adjustment
(see
Assembly
Instructions)
or
replace
belt.
NOTE:
For
repairs
beyond
the
minor
adjustments
listed
above,
please
contact
your
local
service
dealer.
12

Chain
Case
Assembly
04924
Model
031
*?5
,
*
REF.
NO.
PART
|
COIOR
NO.
|
CODE
1
04926
—463
2
04756
3
04757
4
750-0351
5
741-0155
6
15863
—463
7
756-028?
8
710-0369
10
721-0157
i
11
710-0195
12
721-0156
13
741-0227
14
736-0265
|
15
04920
!
16
750-C354
I
f
17
736-0329
18
712-0138
19
1
712-0116
20
I
736-0169
PARTS
U$T
FOR
CHAIN
CASE
ASSEMBLY
04924
DESCRIPTION
Chain
Case
Ass'y.
—R.H.
Input
Shaft
Ass'y.
Hub
and
Sprocket
Ass
y.
Bearing
Inner
Race
Ball
Bearing
Cham
Case
Ass'y.
—L.H.
Pulley
—Chain
Case
I
5v?
X
V2ff
Hex
Bolt
3/8-24
x
2
50"
Lg
Seal
ft
Hex
Bolt
''4-28
x
.625"
Lg.‘
Gasket
Flange
Brg.
.879
1.0,
FI-Wash.
.88
I.D.
x
1.50
O.D.
x
.030
Tme
Shaft
Ass
y.
Spacer
7/8"
I.D.
x
2.0"
O.D
x
.68"
Lg.
L-Wash.
'-'4"
Scr.*
Hex
Nut
Va
-28
Thd.*
Hex
Ins.
L-Nut
3/8-24
Thd
L-Wasn.
3/8"
I.D.*
NEW
PART
REF.
NO
PART
COLOR
NO.
j
CODE
21
736-0219
22
713-0215
23
713-0216
24
748-0154
25
05034
26
726-0164
27
741-0228
28
731-0486
29
710-0599
30
750-0471
31
715
0114
32
750-0550
i
33
710-0653
Li
DESCRIPTION
Bell-Wash.
.406
I.D
x
1.130
O.D.
Chain
#420—.50"
Pitch
:<
38
Links
Chain
#35
—.375"
Pitch
;<
50
Links
Bearing
.62"
I.D.
x
.813
O.D.
x
1.31
Bearing
Housing
Expansion
Plug
13/16"
Dia.
Bearing
Dust
Captt
Hex
Wash.
Hd.
Self-Tap
Scr.
V4-20
x
.50"
Lg.
Spacer
.630
I.D.
x
.77
O.D.
x
.38"
Lg.
Spring
Pin
Spiral
V4"
Dia.
x
1v?"Lg.tt
Spacer
.647
x
1.25"
tt
Hex
Wash
Hd.
Self
Tap
Scr
V4-20
x
.38"
Lg.
ttNot
part
of
chain
case
assembly.
13


Model
031
iREp"
_NO.
!
PART
•
NO.
1
720-0204
2
831-0692
3
784-0036
4
730-0561
5
784-0007
6
738-0572
7
710-0262
8
15093
9
710-0599
10
712-0267
11
736-0119
12
712-0256
13
736-0119
14
725-0157
15
746-0509
16
749-0631
17
749-0630
18
746-0419
19
710-0252
20
784
0018
22
736-0329
23
710-0405
24
711-0653
25
734-0840
26
738-0126
27
1
04764
28
!
711-0702
29
j
714-0145
30
|
34918
31
i
710-0599
32
,
34923
33
-04922
[
PARTS
LIST
FOR
MODEL
031
TILLER
;COLOR
:
CODE
DESCRIPTION
Grip
Throttle
Control
Box
Ass
y.
'
Handle
Panel
■
Shoulder
Nut
Clutch
Grip
Ass’y.
!
Shoulder
Boll
3/8
x
1.160"
1
Lg-
Carriage
Bolt
5/16-18
x
1.5"
Lg-*
Cable
Support
Bracket
Hex
Wash.
Hd.
Self-Tap
Scr.
1
/
4
-
20
x
.50"
Lg
Hex
Nut
5/16-18
Thd,*
L-Wash.
5/16"
I.D
*
Hex
Jam
Nut
5/16-24
Thd.
L-Wash.
5/16"
I.D
*
Cable
Tie
Clutch
Control
Cable
Upper
Handle—L.H.
Upper
Handle—R.H.
Throttle
Control
Wire
26"
Lg.
Hex
Bolt
Vi-20
x
,'
7
5"
Lg.*
Belt
Cover
Ass’y.
L-Wash
Va
"
I.D.
*
Curved
Hd.
Bolt
5/16-18
x
1.75"
Lg.
Clevis
Pin
Wheel
Assy.
Como,
7
0"
x
1.5
Shoulder
Bolt
Depth
Bar
Clevis
Pin
.31"
Dia.
x
1.50"
Lg-
Hairpin
Cotter
Tine
Adapter
Ass’y.
Hex
Wash.
Hd.
Self-Tap
Scr
V
4-20
x
.50"
Lg.
Tine
Blade—L.H.
Tine
Blade—R
H.
REF
r
j
NO.
i
PART
NO.
!34~’
04921
j
35
04924
)
36
712-0267
27
736-0119
f
38
736-0217
i
39
712-0375
40
710-0600
41
04762
42
712-0287
43
714-0104
44
09966
46
784-0016
47
754-0216
48
756-0287
49
756-0199
50
736-0119
51
712-0116
53
04765
54
736-0169
55
710-0442
56
756-0286
57
736-0258
58
710-0152
59
712-0267
60
736-0289
63
731-0511
64
736-0142
65
712-0107
67
—
68
736-0219
69
714-0122
70
736-0242
71
736-0190
72
710-0121
73
710-0779
COLOR
CODE
483
DESCRIPTION
NEW
;
jPART
!
Tine
Ass'y.
Comp.
Chain
Case
Ass
y.
Comp.
Hex
Nut
5/16-18
Thd.*
L-Wash.
5/16"
I.D
*
L-Wash.
3/8"
I
D.
(Heavy
Duty)
Hex
Cent.
L-Nut
3/8-16
Thd.
Hex
Wash.
Hd
Self-Tap
Scr.
5/16-18
x
.50"
Lg.
Support
Brkt.
Ass'y.
Hex
Nut
1/4*20
Thd.*
Internal
Cotter
Pin
Hand
Knob
Idler
Arm
Ass’y.
Belt
3/8"
x
29"
Lg.
Chain
Case
Pulley
5V2
x
v
z
"
Fl-ldler
2"
L-Wash.
5/16"
I.D.*
Hex
Nut
3/8-24
Thd.*
Tine
Shield
L-Wash.
3/8"
I.D.*
Hex
Bolt
5/16-18
x
1.50"
Lg.
Engine
Pulley
3/8
V
x
.75
I
D.
x
2"
O.D.
FI-Wash.
.385"
I.D.
x
1.00"
O.D,
Hex
Bolt
3/8-24
x
1.00"
Lg.*
Hex
Nut
5/16-18
Thd.*
Shld.
Spacer
.50"
Dia.
x
.133
Trim
Strip—4"
FI-Wash.
.281"
I.D.
x
.500"
O.D.
Hex
Cent.
L-Nut
V4-20
Thd.
Engine
Bell-Wash.
Square
Key
3/16
x
Va"
Lg.
Bell-Wash.
Ext.
L-Wash.
Vfe"
I.D.
Hex
Bolt
’/
2
-
2
O
x
.75"
Lg.
Self-Tap
Scr.
#10
x
.5"
Lg.
‘
For
faster
service
ootam
standard
nuts,
bolls
and
washers
locally
II
these
terns
cannot
be
obtained
locally
oraer
by
Dart
number
and
size
as
shown
on
oads
list
(483—Charcoal
Grey)
'1
co,or
or
finish
is
important
when
ordering
parts,
use
the
ap¬
propriate
color
code
shown
above
[i
e.
(part
no
)-483
for
Charcoal
Grey
Finish).
NOTE
Specifications
subject
to
change
witnoul
notice
or
obligation
Part
No.
Description
777-4553
777-4541
777-3774
‘WHITE”
Plastic
Logo
“ROTO
BOSS
310”
Label
Throttle
Label
J
NO
r
E
Tne
engine
is
not
under
warranty
by
the
filler
manufacturer
If
repairs
or
service
is
needed
on
the
engine
please
contact
your
nea-est
authorized
engine
ser-
a
—-——-—<
vice
outlet
Check
the
"Yellow
Find
If
Fast
Pages"
o'
your
telephone
book
In
The
under
■
Engines—Gasoline
"
Yellow
Pages
15

WHITE
OUTDOOR
PRODUCTS
P.0.
Box
8875
•
Cleveland,
Ohio
•
44136
97
Kent
Avenue
•
Kitchener,
Ontario
•
N2G
4J1
This manual suits for next models
1
Table of contents
Other White Outdoor Products Tiller manuals