Wildlife Acoustics sm3bat User manual

Song Meter SM3 Bioacoustics Recorder User Manual DRAFT 005 Feb 3, 2014
Wildlife Acoustics, Inc. 970 Sudbury Road Concord, MA 01742-4939 (978) 369-5225 (888) 733-0200
www.wildlifeacoustics.com
Song Meter SM3BAT
BIOACOUSTICS RECORDER
User Guide
See Page 1 for
Quick Start Guide.

page ii
BIOACOUSTIC MONITORING SYSTEMS
Copyright ©2014-2015 Wildlife Acoustics, Inc. All Rights Reserved.
This documentation may not be reproduced or distributed in any form or by any means,
graphic, electronic, or mechanical, including but not limited to photocopying, scanning,
recording, taping, e-mailing, or storing in information storage and retrieval systems without
the written permission of Wildlife Acoustics. Products that are referenced in this document
such as Microsoft Windows® may be trademarks and/or registered trademarks of their
respective owners. Wildlife Acoustics makes no claim to these trademarks. While every
precaution has been taken in the preparation of this document, individually, as a series, in
whole, or in part, Wildlife Acoustics, the publisher, and the author assume no responsibility
for errors or omissions, including any damages resulting from the express or implied
application of information contained in this document or from the use of products, services,
or programs that may accompany it. In no event shall Wildlife Acoustics, publishers, authors,
or editors of this guide be liable for any loss of profit or any other commercial damage caused
or alleged to have been caused directly or indirectly by this document.
Wildlife Acoustics, Song Meter, Echo Meter, and Kaleidoscope are registered with the U.S.
Patent and Trademark Office. SM1, SM2, SM2BAT, SM3, SM3BAT and WAC are trademarks of
Wildlife Acoustics, Inc. All other trademarks are the property of their respective owners. The
Song Meter is patented (U.S. Pat. No. 7,454,334 and 7,782,195). Additional U.S. and
international patents and trademarks are pending.
Updated July 21, 2015 for firmware version 1.2.7

page iii
BIOACOUSTIC MONITORING SYSTEMS
Contents
1Quick Start Guide 1
2SM3BAT Overview 2
2.1
Introduction ................................................................ 2
2.2
What's New in the SM3BAT ....................................... 2
2.3
Updates and Support ................................................. 5
2.4
SM3BAT Visual Tour.................................................... 6
2.5
The LCD Main Menu................................................... 9
2.6
Basic Operation.........................................................10
3SM3BAT Setup 11
3.1
Required Items..........................................................11
3.2
How to Connect Optional Microphones.................11
3.3
How to Turn Power ON and OFF .............................14
3.4
How to Install Internal Batteries..............................15
3.5
How to Use the SM3BAT with External Power....... 16
3.6
How to Insert and Remove SD Memory Cards.......17
3.7
How to Set the Date and Time.................................19
3.8
How to Set the Location and Time Zone................. 20
3.9
How to Set the Solar Calculation Method .............. 21
3.10
How to set the Minimum Battery Voltage.............. 21
3.11
How to set the Microphone Sensitivity ..................22
3.12
How to Change the Prefix for Recorded Files .........22
3.13
How to Verify the Device and Audio Settings.........22
3.14
How to Mount the Recorder....................................23
3.15
How to Check the Status of the Recorder............... 23
3.16
Temperature Sensor .................................................24
3.17
The Backup Clock Battery ........................................24
3.18
How to Connect the GPS Time-Synch Option ........24

page iv
BIOACOUSTIC MONITORING SYSTEMS
4Programs 28
4.1
Introduction ..............................................................28
4.2
Recording File Basics.................................................28
4.3
How to Load a Built-In Program .............................. 29
4.4
How to Edit a Program .............................................29
4.5
How to Create a Program On the Recorder ............30
4.6
How to Export a Program.........................................31
4.7
How to Import a Program ........................................31
4.8
How to Start a Program............................................32
4.9
How to Stop a Program ............................................33
5SM3 Configurator Software 34
5.1
Introduction ..............................................................34
5.2
How to Install the SM3 Configurator.......................34
5.3
How to Open the SM3 Configurator .......................34
5.4
SM3 Configurator User Interface.............................35
5.5
How to Create a Program (SM3 Configurator) .......36
5.6
How to Adjust Configuration Settings.....................36
5.7
How to Adjust Deployment Scenario Settings .......37
5.8
How to Use the Scrollable Calendar View ..............38
6Developing Custom Programs 39
6.1
Loops .........................................................................39
6.2
AUTO Values..............................................................39
6.3
Program Commands.................................................40
6.4
How to Work With the Program Checker ...............48
6.5
How to Resolve Program Checker Errors ................48
7Managing Deployments 52
7.1
How to Estimate Battery Life ...................................52
7.2
How to Estimate Memory Requirements...............52
8Audio Recordings 54
8.1
Filenames for Recordings.........................................54
8.2
Recording Metadata.................................................55

page v
BIOACOUSTIC MONITORING SYSTEMS
8.3
Summary Text Files...................................................56
8.4
How to Install the Kaleidoscope Software..............57
9Utilities 58
9.1
How to Erase and Format SD Memory Cards.........58
9.2
How to Reset Factory Default Settings.................... 58
9.3
How to Measure Microphone Sensitivity............... 59
9.4
How to Update the Firmware..................................62
9.5
How to Generate Diagnostics ..................................63
10 SM3BAT Specifications 64
10.1
Physical ......................................................................64
10.2
Power.........................................................................66
10.3
Memory Cards ..........................................................66
10.4
Acoustic Audio ..........................................................67
10.5
Ultrasonic Audio .......................................................67
10.6
Microphones.............................................................68
11 Firmware Release Notes 73
12 Warranty and Disclosures 76
12.1
Wildlife Acoustics, Inc. Limited Warranty ...............76
12.2
Declaration of Conformity (EN 45014)....................78
12.3
Prohibition Against Eavesdropping .........................79
12.4
Electromagnetic Interference ..................................79


Quick Start Recording Checklist SM3BAT User Guide
page 1
BIOACOUSTIC MONITORING SYSTEMS
1
Quick Start Guide
Complete the following checklist to start recording with the SM3BAT.
□Optionally, check for firmware updates for the SM3. See Section 9.4 for
instructions.
□Install four (4) new high-quality D size alkaline or NiMH batteries in the two
battery bays. See 3.4 How to Install Batteries.
□Loosen the thumb-screws and remove the memory bay cover. Insert at least
one (1) and up to four (4) memory cards. See 3.6 How to Insert and Remove
SD Memory Cards.
□Slide the power switch down to turn ON internal battery power.
□Replace the memory bay cover and hand-tighten the four (4) thumb-screws.
□The device powers on and reports its status. After scanning the memory
cards, the Song Meter Main Menu appears.
□Set the date and time. See 3.7 How to Set the Date and Time.
□For programs based on sunrise or sunset, set the recorder location and time
zone. See 3.8 How to Set the Location and Time Zone.
□Load a built-in program. See 4.3 How to Load a Built-In Program.
■Use Sunset to Sunrise to record triggered .wav files.
■Use Sunset - Sunrise ZC to record triggered zero crossing.
□You may modify a built-in program on the recorder, but it is recommended
to use the SM3 Configurator software on your computer. See Chapter 5.
□Mount the recorder in a suitable location for unattended recording.
□Connect one or two SMM-U1 ultrasonic microphones. The recorder
automatically detects the microphones and records on those channels.
□Press the PROGRAM START button to start the active program on the
recorder. The SM3BAT knows when to enter sleep mode to save power and
is smart enough to wake itself to record for the duration of your deployment.
□(Optional) During deployment, press CHECK STATUS to check battery
voltage or remaining memory card capacity.
□Hours, days, or weeks later, press and hold PROGRAM STOP for two
seconds to finish recording. Remove the memory cards and review the
recordings on your analysis workstation or another computer.

SM3BAT Overview SM3BAT User Guide
page 2
BIOACOUSTIC MONITORING SYSTEMS
2
SM3BAT Overview
2.1 Introduction
The Song Meter SM3BAT is an advanced next-generation, professional, cost-
effective, and reliable solution for the periodic, seasonal, or long-term acoustic
monitoring of bats, birds, frogs, and other wildlife in any field conditions.
You can program the device to record when you want for as long as you need.
The SM3BAT has the battery life and memory capacity to record for hundreds of
hours and can be used outdoors for extended durations lasting days, weeks, or
even months at a time. Take the rugged heavy-duty portable device with you
anywhere or mount it in a fixed outdoor location.
The SM3BAT combines a two-channel full spectrum recorder and a two-channel
zero-crossing recorder in one box. Record full spectrum up to 384 kHz sample
rate on one channel and up to 256 kHz on two channels (192 kHz in WAC mode)
simultaneously. You can also record zero crossing on one or two channels and at
the same time as recording full spectrum.
Use the available Kaleidoscope™ software, sold separately, to view and analyze
your recordings and automatically identify recorded species. For more
information, visit our website at www.wildlifeacoustics.com.
2.2 What's New in the SM3BAT
The latest generation in the Song Meter series, the SM3BAT is completely
redesigned to be the most reliable, easy-to-use, and most technologically
advanced bioacoustics recorder on the market. An all new enclosure, circuitry,
programming language, and microphone incorporate lessons learned from
designing bioacoustics recorders for over a decade.
Unparalleled Reliability
■The new custom die-cast aluminum enclosure is built like a tank. It is
even more rugged and weatherproof than the SM2BAT.
■Subjected to an extensive array of laboratory tests including
temperature cycles, dropping, shaking, vibrating, water spray, and
submersion, the SM3BAT can handle a wide range of environmental
conditions.
■Foolproof battery bays mean you always know you have good battery
contact and they will stay in place for the duration of your deployment.

SM3BAT User Guide SM3BAT Overview
page 3
BIOACOUSTIC MONITORING SYSTEMS
■The weatherproof hatch allows for memory card access without
exposing the circuit board to the elements.
■Top and bottom mounting flanges are integrated with the enclosure
and are designed to work with radiator clamps, screws, or bungee cords.
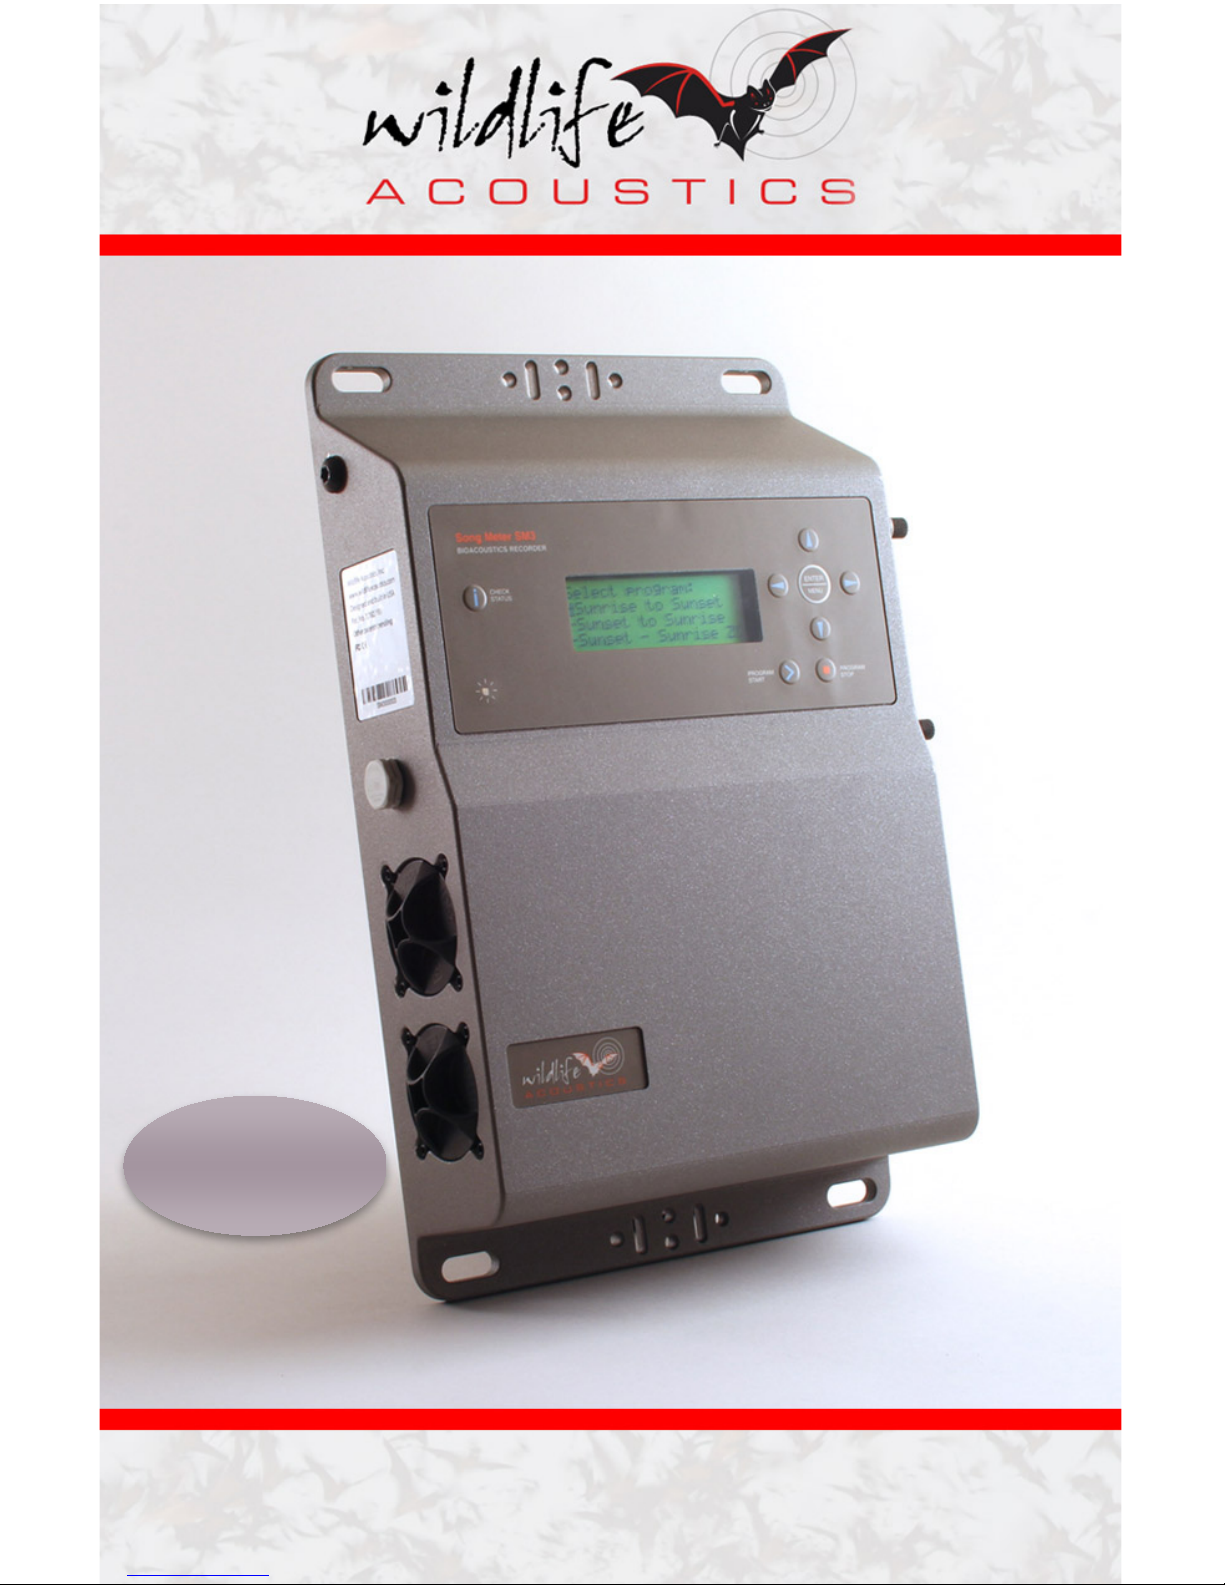
■All-in-one control panel features a weatherproof keypad for easy entry
and feedback with a dual-color LED status lamp and a backlit LCD
display.
■No more nuts to tighten. All cable connection points are on a custom
molded module.
■To showcase our confidence in the new design, your investment in the
SM3BAT is protected by a 3-year limited warranty. This is the longest
warranty in the industry and is backed by our legendary Wildlife
Acoustics support. If you experience an issue in or out of warranty, we
can help.
Improved Usability
■The SM3BAT alerts you about any warnings or errors when you load,
edit, or run a program.
■The new programming language is powerful, flexible, and easy to use.
■No more audio settings. You can control all parameters in the program.
■No more switches or jumpers. Control gain and filters programmatically.
■Automatic setup allows you to begin recording right out of the box.
Attach microphones and press PROGRAM START. You can edit the
program later.
■Recognizes microphone types to provide auto setup, warnings, or errors.
■Complete control over all internal parameters means much finer control
of trigger and scrubber settings for advanced users.
■The CHECK STATUS button lets you see the state of the unit without
interrupting recording. Check card usage, battery voltage, and more.
■Metadata is embedded in recordings and self-diagnostics to enhance
customer support. The metadata contains all information about a
recording including its source program, gain settings, and microphone
type.
New Microphone Design
■Ultrasonic SMM-U1 and Acoustic SMM-A1 microphones are available.
■The Ultrasonic SMM-U1 uses a high quality FG microphone element:
■Distributes noise more evenly and offers a superior signal-to-noise
ratio and a flat frequency response.
■Extremely resistant to water damage. The element has been used on
bat detectors for decades and has a reputation for an extended life.
■Gain is applied at the microphone to increase signal in the cables to
significantly improve resistance to electrical noise interference. This
results in much higher quality recordings when the microphone cables
are run near other cables on MET towers or in wind turbines.

SM3BAT Overview SM3BAT User Guide
page 4
BIOACOUSTIC MONITORING SYSTEMS
■A differential output cancels out EMI noise to further reduce
interference.
■Includes a 3-meter cable with 10-meter and 50-meter extensions
available.
■An available adapter helps you use the new microphones with SM2
systems.
Advanced Technology
■All new circuit design.
■Longer battery life:
■New design is extremely efficient at all voltages.
■Can handle 5 - 17 V inputs with reverse voltage protection and will
operate efficiently at the full voltage range.
■Power adapter replaced by cable with battery attachment points.
■Battery voltage is detected and can be used to shut down the recorder
at a minimum voltage to save external lead-acid batteries.
■Built-in serial communication. Plug a GPS right in for time
synchronization or location logging.
■A temperature-controlled crystal maintains clock accuracy at extreme
temperatures and reduces clock drift.
■Native SDXC support – no reformatting needed.
■Better compatibility with all SDHC and SDXC cards. All class 4 or faster
cards are supported at any sample rate.
■A nap mode allows for the recorder to enter a low-power state in
between triggers to further conserve battery life when recording full
spectrum. Nap mode can improve the already improved battery life by
up to 50%.
■Record on two channels at sample rates up to 256 kHz or on one
channel at up to 384 kHz.
■Record zero crossing (ZC) on two channels.
■Record on two channels at 256 kHz sample rate AND zero crossing on
two channels. Simultaneously!
■Better auto-leveling on the zero crossing means that the threshold can
be more optimally set to allow recording more bats. This is set
automatically for every recording period.
■ZC division ratios of 4, 8, or 16 are now available.

SM3BAT User Guide SM3BAT Overview
page 5
BIOACOUSTIC MONITORING SYSTEMS
2.3 Updates and Support
SM3BAT is field-upgradeable. New features, fixes, and improvements are available
in firmware updates from our website. The SM3 Configurator software notifies you
when new firmware is available. See 9.4 How to Update the Firmware on page 62.
2.3.1 How to Join Our Mailing List
Join our mailing list to receive important news and information about your Song
Meter and related products, features, and events.
1. Open a web browser on your computer or mobile device.
2. Navigate to www.wildlifeacoustics.com.
3. Click Contact Us.
4. Click Join Our Mailing List.
5. Complete the online form and click Add to Mailing List.
2.3.2 How to Contact Support
We have full-time support staff ready to assist you.
■Email: support2015@wildlifeacoustics.com
■In the United States (toll-free): 1-888-733-0200
■Outside the United States: +1 978-369-5225
We have partnered with Baker Consultants, Ltd. to provide free local phone
support services in the U.K.
■Telephone: 0114 360 9977

SM3BAT Overview SM3BAT User Guide
page 6
BIOACOUSTIC MONITORING SYSTEMS
2.4 SM3BAT Visual Tour
Song Meter SM3BAT Product Diagram
Mounting Options (Top and Bottom): Constructed of rugged die-cast aluminum
and ready for outdoor adventure, use these cutouts to mount your SM3BAT in
almost any land environment for a wide range of applications.
Keypad: Press the buttons on this panel and view the menu options on the
LCD screen and control the unit.
Pressure Vent: This temperature, UV, and water-resistant vent protects the
enclosure against condensation, moisture, and heat exposure.
Battery Bays: Each bay holds two D batteries. Spring-loaded ergonomic caps
turn left to open and right to close.
Memory Bay: Insert up to four SDHC or SDXC memory cards. Supports cards up
to 2 TB (currently 256 GB is the maximum capacity being manufactured).
Sturdy cover and four easy-grip thumb-screws offer superior protection.
Remove the cover to access the SD card slots and power switch.

SM3BAT User Guide SM3BAT Overview
page 7
BIOACOUSTIC MONITORING SYSTEMS
Channel 0 Microphone Connector: Connect an SMM-U1 ultrasonic microphone,
SMM-A1 acoustic microphone, or SM3-H1 hydrophone.
Channel 1 Microphone Connector: Connect an SMM-U1 ultrasonic microphone,
SMM-A1 acoustic microphone, or SM3-H1 hydrophone.
Serial Communication Connector: For the optional GPS time-synch receiver or
the available Song Stream remote access hardware.
External Power Cable and Audio Output Connector: Use for external batteries
(with or without solar panels).
All batteries, memory cards, LCD display, and electronic controls are mounted
inside the weather-resistant enclosure to protect them from the elements.
NOTE: Do not remove the back cover of your recorder. There are no user-serviceable
parts and removing the cover will void your warranty. When necessary, only remove
the thumb-screw cover for the memory bay, the two twist-off battery bay covers, and
the four connector module caps.
Each of the four connectors provides a weatherproof seal when mated with a
microphone cable or with the watertight connector caps. Connector caps protect
the connector port from moisture and debris. Always cap unused connectors.
Push a cap over each exposed connector until fully seated and secure.
CAUTION: Gently, but firmly, hand-tighten all covers, caps, and connectors to
completely secure the device against the environment before use. Do not use tools or
apply too much pressure since over-tightening could damage the recorder.

SM3BAT Overview SM3BAT User Guide
page 8
BIOACOUSTIC MONITORING SYSTEMS
SM3BAT LCD Display and Buttons
Check Status: Displays the status of the device and illuminates the LCD
screen backlight for visibility in dark or low-light environments. Remains
lit while you continue pressing buttons to operate the device. Turns off
after 5 seconds of inactivity.
LCD Screen: Displays the main menu, status information, and other details
when the recorder is awake. Blank when the unit is sleeping to save power.
Main Navigation Buttons: Press the directional arrow buttons on this panel
and view the menu options on the LCD screen to control the unit.
Press
▲
Up or
▼
Down to navigate lists of options. Press
►
Right to
advance to the next submenu or value. Press
►
Right to save your changes.
Press
◄
Left to cancel or go back to the last menu item. Press ENTER/MENU
to navigate menus, select options, and to confirm entries.
LED Indicator: Flashes
☼
green once per second when recording. Flashes
☼
red once per second when triggers are enabled and the recorder is awake and
armed, but not currently recording. To disable see Section 6.3.
Program Start: Closes any open menus and starts your current program.
Depending on the schedule, the device may begin recording immediately or
go
to sleep until a scheduled recording event. If a program is already
running, pressing this button does nothing.
Program Stop: Stops the active program and returns to the main menu. You
may need to hold the button for a couple seconds to register in some modes.
In an open menu, pressing this button does nothing.

SM3BAT User Guide SM3BAT Overview
page 9
BIOACOUSTIC MONITORING SYSTEMS
2.5 The LCD Main Menu
Refer to the following table when navigating the main menu using the LCD screen
and directional buttons.
Recorder Main Menu on the LCD Screen
Menu Item
Description
Program
Load Program
Choose a ready-to-run (and customizable) built-in program.
Edit Program
Edit, add, or delete command lines in a program.
Import Program
Import a program and associated settings from an SD card.
Export Program
Export a program and associated settings to an SD card.
Settings
(Optional) You can also use the SM3 Configurator software to
override the settings on any SM3BAT device.
Sunrise/Sunset Type
Specify one of four recognized methods for calculating the
sunrise and sunset.
Location
Specify the location using a prefix, Lat/Long, and time zone.
Prefix
Specify a short code to identify recordings from a specific
program, project, location, or SM3BAT device; useful
to project
teams with multiple recorders.
Latitude
Specify the latitude of the SM3BAT anywhere on the globe in
degrees north (N) or south (S) of the equator. Latitude is used
in sunrise and sunset time calculations.
Longitude
Specify the longitude of the SM3BAT anywhere on the globe in
degrees west (W) or east (E) of the Prime Meridian (Greenwich)
.
Longitude is used in sunrise and sunset time calculations.
Timezone UTC
Set the global time zone for your device.
Time and Date
Set the local date and time for your device.
Power Volt Cutoff
Specify a minimum voltage from 0.0 to 12.0 volts in 0.1 volt
increments. If voltage falls below this value in a 24-hour
period, the program is suspended. Use only with external
batteries to protect certain battery types from over-discharge.
Ch 0 Sensitivity
Specify channel 0 microphone sensitivity from 0.0 to -299.9 dB
in 0.1 dB increments. This value is saved in the recording
metadata and may be used in future features.
Ch 1 Sensitivity
Specify channel 1 microphone sensitivity from 0.0 to -299.9 dB
in 0.1 dB increments. This value is saved in the recording
metadata and may be used in future features.
Utilities
Export Diagnostics
Display useful status and troubleshooting information.
Set Factory Default
Reset the original device settings.
Calibrate Mics
Test the sensitivity levels of built-in and connected mics.
Format All Cards
Erase and reformat all SD cards. The original file system such
as exFAT or FAT32 is preserved.
CAUTION: All data on all memory cards is permanently lost and
cannot be recovered.
Firmware Update
Update the recorder with a new firmware file in memory slot A.

SM3BAT Overview SM3BAT User Guide
page 10
BIOACOUSTIC MONITORING SYSTEMS
2.6 Basic Operation
Typical operation of the recorder is represented in the following steps:
1. Configure the following key requirements of any deployment with your
specific recording goals in mind:
a. Power: Insert batteries or connect another power source.
b. Memory: Insert and format memory cards.
c. Location: Identify an appropriate recording location and establish
mounting requirements for the duration of the deployment.
TIP: Use the SM3 Configurator software to estimate memory card requirements and
power consumption for the program that you plan to run.
2. Load a program on the recorder. You can choose:
■a built-in program already on the recorder
■a program you edit on the recorder
■a custom program that you design using the SM3 Configurator
software and then import to the recorder on a memory card.
3. Mount and secure the recorder.
4. Press the PROGRAM START button. You can leave the recorder unattended
after this step.
5. The recorder sleeps until the next scheduled recording time.
6. The recorder wakes at the scheduled recording start time, records audio as
programmed, and saves recordings on one or more memory cards.
7. After a period of time has elapsed (it might be several days, weeks, or even
months), return and check on each recorder. To extend a deployment,
exchange memory cards and install fresh batteries out in the field.
8. At the end of the deployment, remove the device from its mounted location,
eject all memory cards, and examine the recorded output.
9. Clean, re-program, and prepare the recorder for its next assignment.

SM3BAT User Guide SM3BAT Setup
page 11
BIOACOUSTIC MONITORING SYSTEMS
3
SM3BAT Setup
3.1 Required Items
You need at least the following required items to operate the recorder:
■Memory Card for installing firmware updates and saving audio files.
Insert at least one (1) and up to four (4).
■Power Source to power the recorder. Choose four (4) D-size
batteries or an external power cable to an external power source.
■Program File to determine when to record and other settings.
Choose one of the built-in programs or your own custom program.
■Ultrasonic Microphone to capture bat recordings. Connect one (1)
or two (2) ultrasonic microphones.
NOTE: With an optional acoustic microphone, the SM3BAT recorder is also capable of
recording non-ultrasonic wildlife such as birds or frogs.
3.2 How to Connect Optional Microphones
You can connect one or two external microphones. The two microphone
connectors for channel 0 and channel 1 mate directly with the 3m cable included
with the ultrasonic (SMM-U1) or acoustic (SMM-A1) microphones available from
Wildlife Acoustics.
NOTE: Unauthorized devices may damage the recorder and will void the warranty.
Both microphones can be extended with available extension cables in 10m and
50m lengths. All connections are fully waterproof. The connector on the cable is
keyed and the cable should be seated into the connector when oriented correctly
and then locked into place by turning the locking ring on the microphone or cable
clockwise firmly until it stops.
NOTE: Each cable is shipped with a ferrite filter to reduce electromagnetic transmission
to nearby equipment. This is required to comply with FCC regulations but not installing
will not adversely affect the performance of the recorder. The ferrite should be installed
to the cable that attaches to the recorder. The cable is looped through and the ferrite
snapped shut. A zip tie is included for further securing the filter.

SM3BAT Setup SM3BAT User Guide
page 12
BIOACOUSTIC MONITORING SYSTEMS
NOTE: Mounting cabled microphones on ungrounded non-conductive masts
especially in dry and windy conditions, could result in damage to the microphones or
recorder due to electrostatic build up or lightning. Such damage is not covered under
warranty so please check with a professional/licensed electrician or installer of outdoor
antennas, weather instruments or the like for advice suitable to your specific situation.
3.2.1 SMM-U1 Ultrasonic Microphone
The SMM-U1 is a highly sensitive and low noise ultrasonic microphone designed
for recording ultrasound up to 190 kHz. One or two microphones can be attached
via the connector module.
NOTE: The discontinued SM3-U1 Ultrasonic Microphone is electronically identical to
the SMM-U1, but comes in a larger plastic microphone enclosure. All the information
in this section also applies to the SM3-U1.
The SMM-U1 is a powered microphone
and can be used with up to 100 meters
of cable with no attenuation or
degradation. The microphone has a
differential output, which significantly
reduces noise from electromagnetic
sources.
The omnidirectional SMM-U1 is ideal for
unattended monitoring where the
precise direction of bat activity is not known in advance. See the specifications
chapter for polar plots. For applications requiring directionality, the microphone
can be adapted for directional sensitivity with the available SM3 Horn Attachment.
The SMM-U1 microphone features a hydrophobic membrane transparent to
acoustic or ultrasound signals to prevent unpressurized water from entering the
microphone. In gusty windblown rain, water may pass the membrane and the
included windscreen should be installed so as to protect the internal ultrasonic
transducer from water damage. We also recommend positioning the microphone
so that they point parallel to the ground, or even slightly downward, so as to
minimize water entry.
3.2.2 How to Connect the SM3-Horn
Attachment
The available SM3 Horn Attachment turns our
SMM-U1 omnidirectional ultrasonic microphone
into a highly directional microphone, while

SM3BAT User Guide SM3BAT Setup
page 13
BIOACOUSTIC MONITORING SYSTEMS
preserving call quality. The attachment remains weatherproof at angles up to 45-
degrees.
3.2.3 Installing Microphone Windscreens
Windscreens should be installed on SMM-U1 microphones for long-term
deployments in all areas susceptible to heavy wind driven rain. This could result in
permanent damage to the microphone element due to water penetration. The
risk is greater when deployed with the ultrasonic horn attachment. For short-term
deployments with predictions of less severe weather and in dry climates, you can
avoid using windscreens.
The windscreens will attenuate ultrasound by only a few dB when dry. However,
they will block most ultrasound when soaked with water, until they dry. Drying
time can vary significantly based on temperature, humidity and wind.
Secure the windscreens for the SMM-U1 microphone with the included C-clip.
Make sure there is an air gap between the windscreen and the microphone as
shown below. (Do not pull the windscreen down tightly).
For the SMX-Horn directional attachment, secure the large windscreen with the
included zip-tie as shown below. Exact positioning is not important.
3.2.4 SMM-A1 Acoustic Microphone
A cabled SMM-A1 acoustic microphone is also
available (sold separately). This microphone
shares the same high-quality acoustic recording

SM3BAT Setup SM3BAT User Guide
page 14
BIOACOUSTIC MONITORING SYSTEMS
element as the SM3 recorder. It is completely weatherproof and can be deployed
away from the recorder with cables up to 100 meters in length. You can attach
one or two.
3.2.5 SM3-H1 Hydrophone
The SM3BAT recorder can also be used with an available hydrophone, the SM3-
H1, for making underwater recordings. The hydrophone ships on a 20 meter cable
and attaches to an adapter, which attaches to the same connectors as the cabled
microphones.
An ultrasonic hydrophone to record dolphin echolocations is also available.
3.3 How to Turn Power ON and OFF
You can set the power selection switch to use internal power from four (4) D-size
alkaline or NiMH batteries or external power through the connector port. The
power selection switch is located in the memory bay.
Set the power switch down to turn the unit ON using internal battery power.
When not in use, set the switch up to conserve battery power. The up position
also enables external power, if connected. When no external power exists,
consider the up position to be OFF.
NOTE: Do not turn the power OFF when a recording is in progress. To safely exit from
recording, press STOP PROGRAM,allow the recorder to return to the main menu, and
then power down the device.
NOTE: Avoid quickly switching power OFF and then ON again. The unit can interpret
this sudden loss and restoration of power as an error and may start diagnostics.
Other manuals for sm3bat
1
Table of contents
Other Wildlife Acoustics Voice Recorder manuals