Williams AV TFSM01SCC User manual

Handbook Contents
• Safety
• Introduction
• Overview of unit
• Operation of unit
• Signal cables
• AFILS Test / Commissioning
Procedure
1. Volume of use
2. Background Noise
3. Field Strength
4. Frequency Response
5. Field Strength
6. Overspill
7. System use
• Troubleshooting
• Technical Specifications
• Accessories
• Warranty & Calibration
• Declaration Of Conformity
• Basic Commissioning procedure
• Test signal track listing
Box Contents
1 x FSM
2 x Batteries
1 x Pouch
1 x ‘User Handbook’ inc AFILS Test /
Commissioning Procedure
1 x Certificate of conformity
This symbol is used to alert the user to important
operating or maintenance instructions.
The Lightning bolt triangle is used to alert the user
to the risk of electric shock.
SAFETY
1. It is important to read these instructions, and to follow them.
2. Keep this instruction manual in an accessible place.
3. Clean only with a dry cloth. Cleaning fluids may effect the equipment.
4. Refer all servicing to qualified personnel. Servicing is required when the apparatus has been
damaged in any way, such as a power supply cord or plug is damaged, liquid has been spilled
or objects have fallen into the apparatus, the apparatus has been exposed to any rain or
moisture, does not operate normally or has been dropped.
5. WARNING – To reduce the risk of fire or electric shock, do not expose this apparatus
to rain or moisture. The apparatus shall not be exposed to dripping or splashing and no
objects filled with liquids, such as vases, shall be placed on the apparatus.
TO PREVENT ELECTRIC SHOCK DO NOT REMOVE THE
COVER. THERE ARE NO USER SERVICABLE PARTS
INSIDE. REFER SERVICING TO QUALIFIED PERSONNEL.
1

INTRODUCTION
The Field Strength Meter (FSM) has been designed as a high quality piece of test
equipment incorporating true RMS detection for evaluating the performance of
Audio Frequency Induction Loop Systems (AFILS) to the international standard IEC
60118-4.
It is simple to use with all types of installation from simple counter loops through to
low spill designs.
Three modes are available to investigate the key parameters of AFILS:
Background noise to examine other magnetic noise
Field strength to test system magnetic field strength
Frequency response for measuring system bandwidth
The unit is designed to be used by holding it in the same position as the hearing aid
will be once the system is operational: i.e. hold the unit at head height to take
measurements: either seated, or standing depending on the venue.
A headphone socket and volume adjustment is provided to allow audible monitoring
and subjective testing of the system.
Details of use are given in the AFILS test and commissioning procedure.
All you will need is an installed AFILS and an audio source (such as mobile phone /
MP3 / CD player) capable of feeding test signals into the appropriate input, and a
clear idea of the coverage area and intended listening positions. The system
commissioning certificate has been designed to help you note all the key
parameters.
For detailed analysis of systems such as ultra low spill configurations, you may
need more complex audio analysis tools such as an NTI Minilyzer used in
conjunction with the CMR3 probe.
For further information on loop design principles request a ‘Designing Induction
Loops’ handbook from www.ampetronic.co/Request-Designing-Loops-Guide or
contact Ampetronic for advice.
SCC – Signal Connection Cables
These procedures require connecting an audio source to the audio inputs of a loop
system Ampetronic can provide a set of cables -SCC- to allow simple connection
from most audio systems to most loop systems. Contact us for details or search at
www.ampetronic.co .
2

OVERVIEW OF UNIT
Frequency
Band
Switch
Pick-up
coil
Meter
Mode
Switch
Power Volume Headphone
LED control socket
Power O / I
Switch
Overload
indication
Meter Mode Scales -
See table on right for details
Meter mode scales in
dB relative to 0.4A/m
Field
Background
strength noise
>+8
>
12
-
-
-
-
-
-
6
5
4
3
2
1
0
-
1
-
2
-
3
-
5
-
7
-
9
-
12
17
22
-
14
-
15
-
16
-
17
-
18
-
19
20
-
21
-
22
-
23
-
25
-
27
-
29
-
32
37
42
Freq
uency
Absolute level is
response not important,
only relative
levels between
frequency bands
OPERATION OF UNIT
3

Batteries and power-up
Remove battery cover the on back of the FSM. Unwrap and insert batteries
into the unit ensuring correct polarity is observed. Replace battery cover.
Set the power switch to the ON (I) position and check the green power LED next to
it is illuminated. Note: As the unit is switched on the front panel meter will briefly
illuminate before settling to a measurement.
Batteries should not be exposed to heat, sunshine or fire
Method of use
For most applications it is the vertical component of the magnetic field that is
received by the hearing aid, as a result the FSM is designed to be used while held
vertically as shown:
Standing or seated depending
on system use.
Typically:
1.2m for seated persons
1.7m for standing adults
Beyond this there is a range of
use that must be considered -
see Test commissioning
procedure part 1 ‘Volume of
Standing Seated
use’ for further details.
Mode selection
All modes measure Audio frequency magnetic fields using the internal pickup coil
Meter Mode Reference Filtering Signal
Frequency
response
Compare levels
between bands
1/3 Octave bands of
100Hz, 1kHz & 5kHz
Pink
noise
Field
strength 0dB or 400mA/m Flat 50Hz to 8kHz Any
Background
noise
-20dB or
40mA/m A-weighted System
off
Frequency Selection
Switch between one of the three 1/3 octave band filters when in Frequency
response mode. While running pink noise, use the 1dB increment range of the
scale to see how the 100Hz, and 5kHz levels compare with 1kHz.
Headphones and volume adjustment
Insert the headphones into the socket on the top panel of the unit, and adjust the
4

volume using the adjacent thumbwheel.
For maximum flexibility, the signal heard in the headphones is post filter. This
provides re-assurance that the correct measurement is being made, and can help
with diagnosis of any problems.
Note: Headphones will be muted when >+8dB / >-12dB LED illuminates.
SIGNAL CABLES
In order to test / commission an induction loop system using the recommended test
signals you will need to interface an audio source to an appropriate input of the
system.
Most portable audio source playback devices will have a headphone output which
can be used, and other equipment is likely to have a pair of phono outputs. Either
way, care must be taken when feeding into a mono (single channel) input that both
left and right stereo signals are summed / scaled correctly using appropriate
resistors. The table below should provide a solution to the majority of inputs, but if in
These connections can be made using Ampetronic SCC (Signal Connection
Cables) a kit of cables facilitating connection of most audio systems to most
induction loop systems. Please contact Ampetronic or consult www.ampetronic.co
for details.
Input type
Connector, pins & wiring
Connection requirements
Electrect
microphone
i/p
2-pole
jack
Tip Hot
Input
Stereo source
Left and Right channels summed through
two 10kW resistors using screened cable:
HOT
L
R
100Ω
COLD
Sleeve Cold
Balanced
microphone
i/p
(phantom
power off)
XLR
X pin 1 Cold
L pin 2 Hot
R pin 3 Cold
Unbalanced
line level i/p
(mono)
2-pole
jack
Tip Hot
Input
Stereo source
Left and Right channels summed through
two 1kW resistors using screened cable:
HOT
L
R
COLD
Sleeve Cold
Balanced
line level i/p
(mono)
3-pole
jack
Tip Hot
Ring Cold
Sleeve Cold
Low Z
speaker i/p
Bare wire
termination
Polarity is not
important for
floating inputs.
Unbalanced
line level i/p
(stereo)
Twin
phono
Left and Right
have a separate
cable each.
Direct connection through
standard cables.
100V
speaker i/p N/A
A CD player cannot produce
these levels, and the best
solution is to feed into the
speaker system itself.
Note: It is possible to test a system by connecting only one channel (left or right) of the audio
source to the equipment. This will not be a problem with the FSM test signals as both channels
(Left and Right) are identical.
5

1
AFILS TEST AND COMISSIONING PROCEDURE
This procedure is intended to be used in conjunction with an Ampetronic
Certificate of Conformity for AFILS according to IEC60118-4
Volume of use (3 dimensions not sound level)
PURPOSE - define and record the three dimensional useful magnetic field
volume for the loop system and determine a series of reference
measurement points.
• Define the area of use and all required listening positions. Determine the
height of use, i.e. the normal height of the hearing aid - typically 1.2m for
seated persons, with a possible range of 1.0m to 1.4m.
For standing adults a typical height of 1.7m, with a possible range of up
to 2.0m and down to 1.0m for children or wheelchair users.
• Confirm the expected orientation of users hearing aid telecoils.
This is usually vertical, but in some environments where the user may be
laying down the horizontal field strength may also need to be considered.
All subsequent measurements using the FSM must take this into
account.
The coil position inside the case, and orientation are indicated on the
FSM by an inductor symbol as shown below:
z
x
y y
The coil picks up signals parallel Signals on other axes
to the axis (y) of the symbol (x and z) are not measured
• Sketch the floor plan and useful magnetic field volume on the
Certificate of Conformity. Include any areas where overspill needs to be
examined.
• Select 4 to 6 measurement points (e.g. A to F on the Certificate of
Conformity) inside the loop where the system will be used.
These should be points that are representative of the whole volume of
use. Experience will suggest where best to choose in order to get a good
sample of the range of magnetic field strengths.
• Consideration should be given to the use of the room and furniture
layout. Some venues may have multiple room set-ups – e.g. movable
seating / tables.
6

2 Background Noise
PURPOSE – check that the level of background magnetic noise is
acceptable throughout the intended volume of use.
• Ensure the loop system is switched off, and all other building systems
and services (e.g. lights) are operational.
• On the FSM: Select ‘Background noise’ mode.
• Locate and note maximum reading levels / positions on the Certificate
ensuring the FSM pick-up coil is orientated the same as the hearing aid
telecoils (usually vertical).
If a noisy zone is found a minimum of 30 sec should be taken to
establish a maximum reading. Depending on the electrical environment
and systems in use the noise may be transient in nature and an
extended measurement period may be necessary (e.g. local electric
transport services).
• Evaluate these levels against the following recommendations:
oBelow -42dB (off scale) is excellent performance for any
installation.
oReport levels greater than -32dB. Above this level the interference
may be a problem for hearing-aid users. The character of the
noise needs to be assessed before a loop system can be
commissioned or ideally before is even installed.
oReport and investigate levels greater than -22dB: This is an
unacceptable level and remedial action will be required to provide
coverage in this area.
• Outline and shade any problematic areas on the floor plan sketch of the
Certificate of Conformity.
•
The useful magnetic field volume can be reduced if background noise
can not be controlled sufficiently in particular areas. If coverage of only a
small number of seats is considered to be unacceptable, then an
investigation of the noise source and possible remedial action may be
required.
7

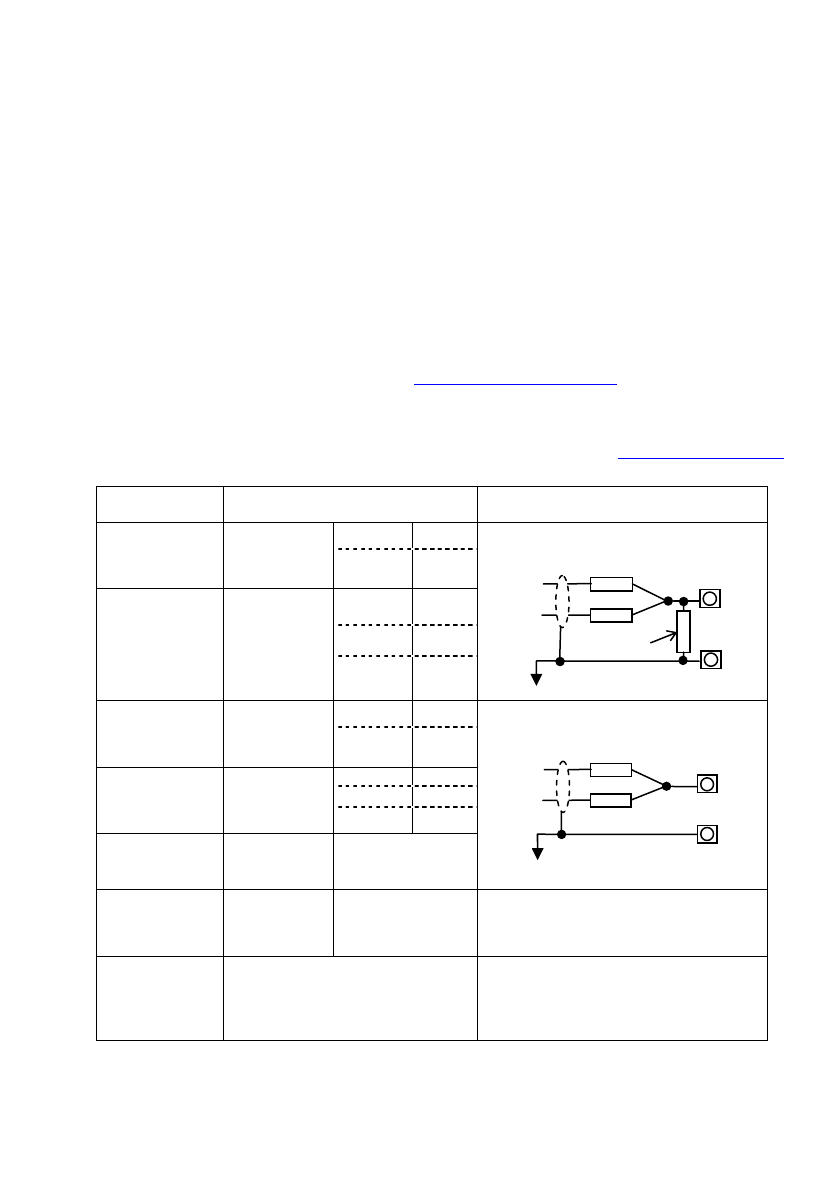
3 Field Strength (set-up)
PURPOSE – set the field strength to approximately the right operational
level
• On the FSM: Select ‘Field strength’ mode.
• Turn on loop system and set output current to zero (or low) to avoid
sudden unexpected signal affecting hearing aid users in the vicinity. Run
the combination noise test signal (Test Signal track 1) into the loop
system. Ensure any equalisation or filtering on the audio source such as
‘Bass boost’ is disabled.
• Increase the input gain to achieve compression (6dB / 12dB LED on the
loop driver front panel for Ampetronic amplifiers).
• Select a typical listening position, and increase drive current until FSM
reads approximately 0dB during the bursts of 1kHz sine wave. The
reading is the maximum LED illuminated over 60 seconds. Ensure the
pick up coil is orientated the same as the hearing aid telecoil – usually
vertical.
• Take and note a series of readings at each defined measurement point
(A-F), marking the positions and measured levels on a copy of the
certificate (‘initial’ values).
• Adjust drive current such that in the useful magnetic field volume:
oMaximum reading is no greater than +3dB
o0dB is achieved somewhere
oMinimum reading is no less than -3dB
• Record the ‘final’ levels on the certificate at each measurement position.
• Alternative method:
oThis test can also be performed using the ‘Pink noise’ signal (Test
Signal track 2). With this signal the peak readings must be
between -9dB and -3dB, with at least one point in the volume
reading -6dB. Note: This method is more likely to be affected by
any subsequent adjustments of the ‘Tone’ or ‘MLC’ control, and
different amplifiers AGC / compressor characteristics.
• Not advised:
oArtificial / simulated signals such as ITU speech are not
recommended as test signals for setting up systems - it is better to
use the real thing, and then only as a final check.
8

4 Frequency Response
PURPOSE – check the frequency response is acceptable and adjust if
necessary
• On the FSM: Select ‘Frequency response’ mode.
• Use pink noise (Test signal track 2) as an input to the loop system.
• At each measurement position (A-F), measure the readings with the
frequency filter set to 100Hz, 1kHz and 5kHz – record the readings as
‘initial’ values on the Certificate of Conformity.
oThe reading is the peak reading on the LED display
oReadings at 100Hz and 5kHz should be within ±3dB of the reading
at 1kHz
oIf required, adjust the tone or Metal Loss Compensation (MLC) of
the amplifier to boost high frequencies and achieve ±3dB across
the three frequency bands.
• When all points achieve ±3dB across the three frequency bands, record
the three readings at 100Hz, 1kHz and 5kHz at each measurement point
and record them as ‘final’ readings on the Certificate of Conformity.
• If it is not possible to achieve the required ±3dB across the 3 bands,
contact Ampetronic to discuss your application.
Note – Due to the nature of the noise signal, and the method of testing the
100Hz measurement can be erratic. If the reading is unstable, record the
peak reading.
9

5 Field strength (confirm)
PURPOSE – make a final check, and readjust the field strength if
necessary. Not required if there has been no adjustment in step 4.
• On the FSM: Select ‘Field strength’ mode.
• Select Combination signal (Test Signal track 1).
• Re-test the system at one or more measurement points. Re-adjust if
necessary to ensure the levels match the ‘final’ levels observed in step 3
and record these values on the Certificate of Conformity. Ensure the pick
up coil is orientated the same as the hearing aid telecoil – usually
vertical.
• Alternative methods:
oThis test can also be performed using the ‘Pink noise’ signal (Test
Signal track 2). With this signal the peak readings must be
between -9dB and -3dB, with at least one point in the volume
reading -6dB. Note: This method is more likely to be affected by
different amplifiers AGC / compressor characteristics.
o1kHz sine-wave (Test Signal track 3) can also be used for a short
duration, however use of this signal for long periods can cause
amplifiers to overheat. With this signal the peak readings must be
between -3dB and +3dB, with at least one point in the volume
reading 0dB.
• Not advised:
oArtificial / simulated signals such as ITU speech are not
recommended as test signals for setting up systems - it is better to
use the real thing, and then only as a final check.
10

6 Overspill
PURPOSE – check that no magnetic spill exists that could interfere with a
neighbouring loop system, above, below or to the side of this system, or
cause a potential breach of confidentiality. This step is only required if there
are neighbouring systems (within 4 x loop width distance) or there are
confidentiality requirements.
If Overspill analysis is not required - Go to step 7 System use.
• Determine areas in which the spill of the system needs to controlled –
either for compatible operation with another system, or for confidentiality.
Define points for measurement outside the room and mark them on the
system sketch on the Certificate of Conformity (e.g. points G-K).
Note: Detailed architects drawings may be required in order to define the
measuring positions for spill.
• Survey background noise in these positions with all loop systems turned
off. This needs to be done to ensure that the spill measurements are not
influenced by other factors.
• Switch on loop system, and using the combination signal (Test Signal
track 1) take a reading at each of the overspill measurement points (G-
K). Ensure areas in which spill needs to be controlled read less than -
40dB during the burst of the sine-wave signal. Ensure the pick up coil is
orientated the same as the hearing aid telecoil – usually vertical.
• Alternative method:
oThis test can also be performed in the frequency response mode
(set to 1kHz), using the combination signal. The measurements
should be taken outside the loop in the area where spill needs to
be controlled - during the sine bursts.
This method does provide better rejection of the background noise
signal due to the sharp filtering in this mode, but unfortunately the
levels shown by the meter do not tally with either scale.
In this mode the central green 0dB (-20dB) reference LED will
illuminate with a -15dB signal re: 400mA/m; i.e. to take a
measurement deduct 15dB from the white scale (Field strength
mode) reading.
oFor more detailed analysis of spill and noise issues, the use of
more comprehensive audio test kit may well be required such as
an NTI Minilyzer and Ampetronic CMR3 probe.
11

7 System use
PURPOSE – check that the system is delivering a useable, undistorted
comfortable sound when received through a hearing aid or listening device.
• Set up the loop system inputs as they will be used, with actual input
devices and actual programme signal from the venue e.g. audio feed
from PA, or microphone. System problems such as hum or HF oscillation
warrant a full investigation – see TROUBLESHOOTING.
• Ensure the programme signal activates the compression on the loop
driver. If not, adjust input gain until compression is achieved.
• Use the FSM in ‘Field strength’ mode to check the room for levels, and
signal quality. Ensure the pick up coil is orientated the same as the
hearing aid telecoil – usually vertical.
• Record levels at each measurement point. The reading is the maximum
LED illuminated over a 60 second period. Readings should be between -
9dB and 0dB throughout the volume depending on programme material,
and field pattern. It should not be necessary to make any adjustment to
the system for this test.
• Ideally, hearing aid users should be present to listen to the system. Care
must be taken to ensure that the hearing aids are set correctly for telecoil
use. Alternatively a loop listener can be used (such as the headphone
output of the FSM, or the Ampetronic ILR3). The system should be
observed for signal strength, intelligibility, distortion and overall quality.
It can be useful to mark the FSM thumbwheel in a position where a
comfortable listening level is achieved with a given set of headphones.
This provides an objective reference when evaluating systems and
background noise characteristics.
12

TROUBLESHOOTING
POWER LED not illuminated
Check that the power switch is toggled to the ON (I) position.
Check the batteries are inserted the right way round.
Try new batteries – the LED is designed to be extinguished when batteries are
low, and the unit is then un-calibrated.
No Headphone signal
Check the FSM switched ON
Check the headphones are plugged in, and the volume control is turned up.
Check the >+8dB / >-12dB LED is not illuminated – the headphones are
automatically disabled when this LED is illuminated to protect the user.
>+8dB / >-12dB, and +6dB / -14dB LED is illuminated
The last red >+8dB /-12dB LED indicates that the maximum level of signal in
the respective mode has been achieved. Normal testing should not illuminate
this LED; it should be seen as an overload condition.
Main LED meter is not illuminated.
Switch the unit OFF, and ON again. On power-up the meter should briefly light
a few LEDs. If there is no audio frequency magnetic field present when
switched on, there will be no meter LEDs illuminated.
Check AFILS is switched on and running current into the loop.
Check the power LED is illuminated
Low magnetic field strength
Check the loop system is running current.
Due to insufficient CURRENT or excessive metal loss. The application may
require a special loop design to achieve acceptable performance, contact
Ampetronic for advice.
AFILS loop driver not running current
Check the COMPRESSION LEDs are illuminating.
Check that the CURRENT control is turned up sufficiently.
Check that the LOOP ERROR, or OVERHEAT LEDs are not illuminated.
Switch the unit off and turn back on.
Consult the loop driver’s installation handbook.
13

Background noise
Check all loop systems are switched off / not running any current.
If the interference is still present with the loop system switched off, then you
need to locate and eliminate the source of the interference before switching the
loop system back on. Monitor with headphones whilst switching other electrical
systems such as power, lighting etc ON and OFF
Interference in other systems
Magnetic fields can induce currents into any low impedance electrical path or
loop. Audio or video systems with poorly designed or multiple earths may
experience pick up of the loop signal.
The loop signal may appear as jagged lines or hum bars on a CCTV picture.
This may be due to the CCTV (low impedance unbalanced 2-wire circuit)
cables running in close proximity to the loop cable.
Remote (and apparently unconnected) PA systems can sometimes pick up
loop signals. Always run long audio signal cables as 3-wire balanced circuits
and keep away from loop cables. If in doubt, contact Ampetronic for advice.
TECHNICAL SPECIFICATIONS
POWER
Internal batteries 2 x AA / LR6 / AM-3
Range of operation 1.8V to 3.2V overall DC
Power 0.15W
Battery Life Up to 100hrs depending on use, >40hrs typical
SIGNAL PROCESSING
Meter Mode Gain Measurement scale Frequency Response
Frequency Response 0.071A/m (-15dB) Measure difference
between bands
1/3 Octave at
100Hz, 1kHz or 5kHz
Field Strength 0.400 A/m (0dB) as
per IEC60118-4 -22dB to +8dB Flat / unweighted
50Hz to 8kHz ±0.25dB
Background Noise 0.040 A/m (-20dB)
reference -42dB to -12dB A-weighted
All measurement modes are true RMS 125ms detection. The FSM is defined as a Class 2, Type 2
meter according to IEC60118-4 and IEC61672-1 (where relevant). Overall gain change <0.5dB
OUTPUTS
Headphone socket 3.5mm stereo jack connector.
16Ωmin (32Ωper side - outputs parallel)
Maximum cable length 3m
Meter display Colour coded flying spot LED
Power LED Indicates unit is ON and calibrated
PHYSICAL
Weight 150 g (excluding batteries)
Dimensions 84 x 140 x 27 mm
ENVIRONMENTAL
Ingress Protection IP20
Operating temperature range -10 to 45°C
Relative humidity 10 to 85% Non condensing
14

ACCESSORIES
SCC - Signal Connection Cables – A kit of cables for interfacing audio sources to
inputs of induction loop systems
Details of all products and services provided by Ampetronic can be found at our
website: www.ampetronic.co
WARRANTY & CALIBRATION
This product carries a five year parts and labour warranty from date of shipment
from Ampetronic. To qualify for the five year warranty, the product must be
registered at www.ampetronic.co (products/warranty), without which the warranty
will be valid for two years only. The warranty could be invalidated if the instructions
in this handbook are not followed correctly, or if the unit is misused in any way.
The FSM is calibrated during manufacturing test, and is valid until one year from the
date the equipment leaves Ampetronic. Initial re-calibration is recommended one year
from this date. This period may be extended if no adjustments are necessary.
DECLARATION OF CONFORMITY
Manufacturer: Ampetronic Ltd.
Unit 2, Trentside Business Village
Farndon Road
Newark
NG24 4XB
Declares that the product:
Description: Field Strength Meter
Type name: FSM
Conforms to the following Directive(s) and Norm(s):
Directive 2004/108/EC
EMC: EN55103-1 : 2009 Emission
EN55103-2 : 2009 Immunity
Directive 2006/95/EC
Safety: EN 60065: 2002+A12:2011
Directive 2011/65/EU RoHS
Date: February 2014, J.R. Pieters, Managing Director, Ampetronic Ltd.
15

BASIC COMMISSIONING PROCEDURE
TEST SIGNAL TRACK LISTING
to download these signals go to www.ampetronic/signals
Track 1: COMBINATION (2 mins) Pink noise with 1s bursts of 1kHz Sine
Track 2: PINK NOISE (2 mins) Bandlimited as per IEC60118-4
Track 3: 1kHz SINE (1 min)
Ampetronic Contact Information
Website: www.ampetronic.co
Technical: support@ampetronic.co
Sales: sales@ampetronic.co
Tel: +44 (0) 1636 610062
Williams AV Contact Information
www.williamsav.com
USA: 800.328.6190
INTL: +1.952.943.2252
UP14301-11
16
This manual suits for next models
1
Table of contents
Popular Measuring Instrument manuals by other brands

C-lock
C-lock GreenFeed manual

LumaSense technologies
LumaSense technologies INNOVA 1316A-1 instruction manual

Vega
Vega FiberFlex LFXG-H operating instructions

PCE Instruments
PCE Instruments PCE-CT 5000 instruction manual

Sourcetronic
Sourcetronic ST2515 user manual

IET Labs
IET Labs PRS-370 SERIES Operation manual