WELS-2230 ENVY SERIES
SINGLE STATION SOLID SURFACE LAVATORY SYSTEM INSTALLATION & OPERATION MANUAL
PAGE 9
© Rev. 3/2021
1.800.428.4065 TOLL FREE
| www.willoughby-ind.com
INSTALLATION INSTRUCTIONS
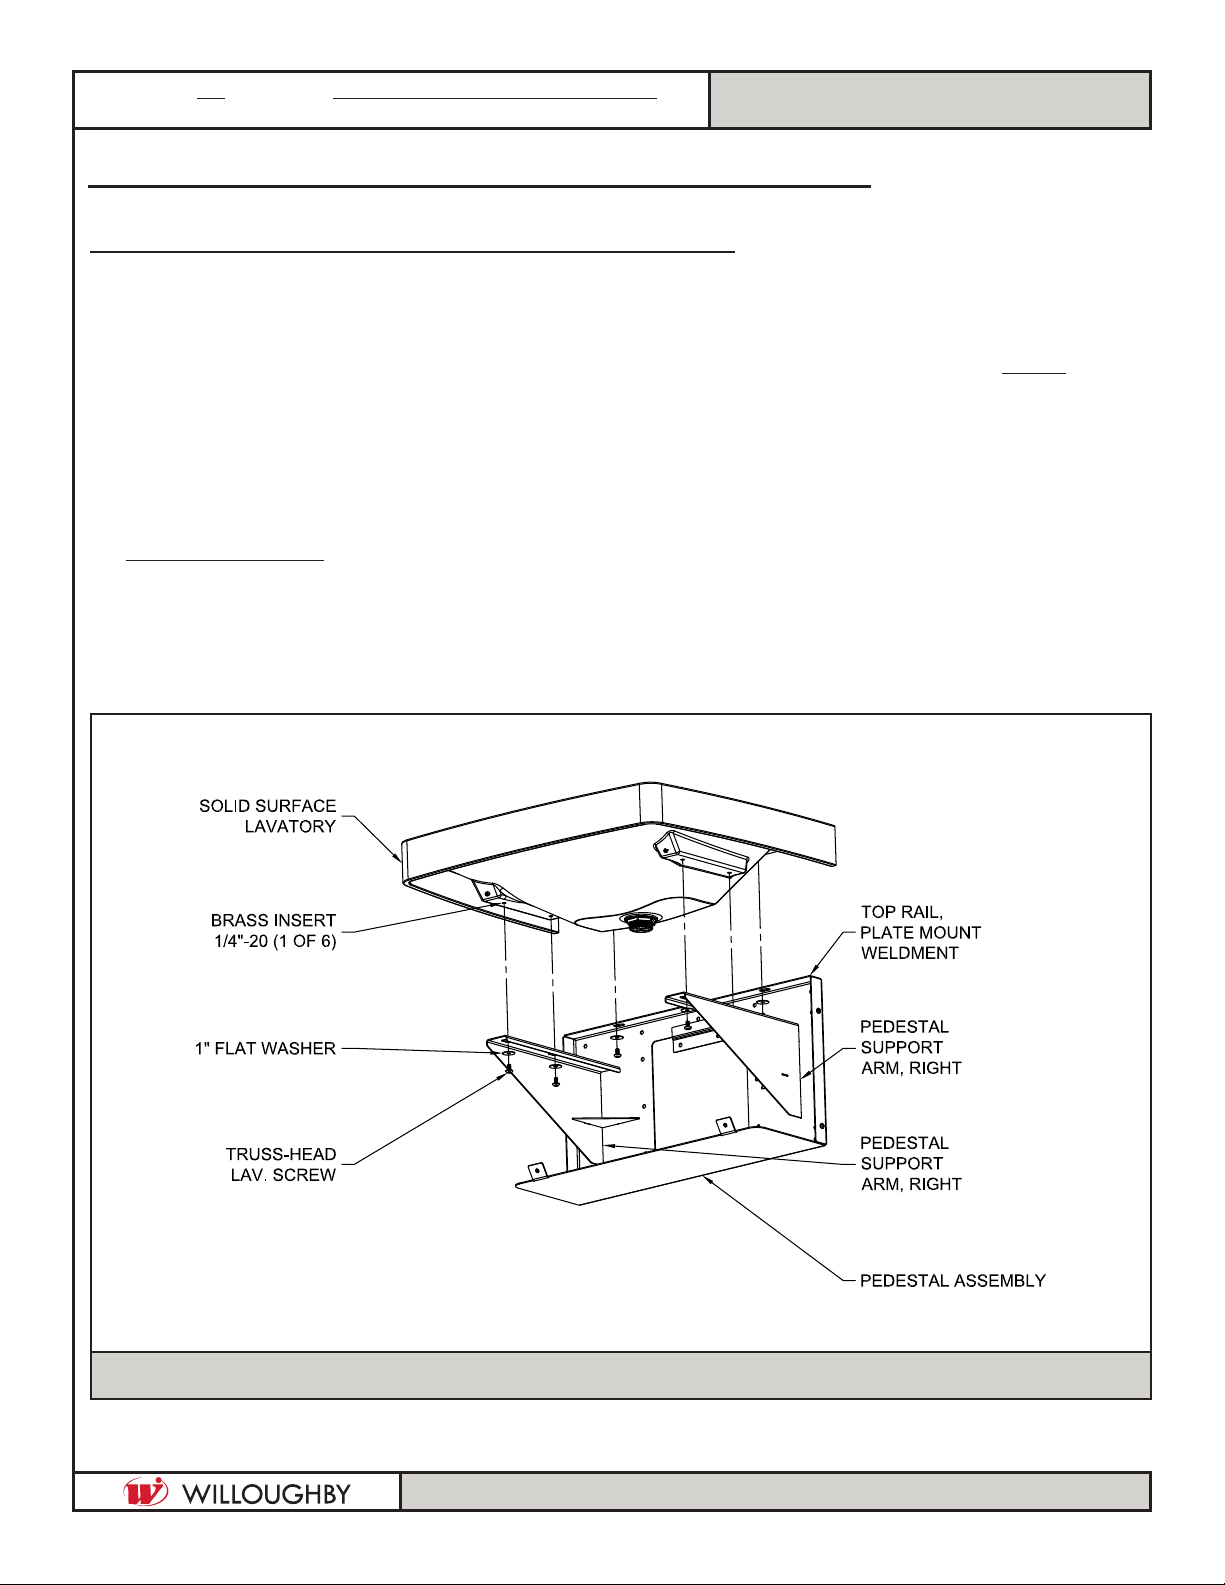
Step 1: Pedestal Mounting
Note: Wall anchoring hardware by others; use wall anchors appropriate for the wall type.
1. Unpack the Pedestal & remove the Security Screws holding the Shroud to Plate Mount Weldment.
2. Mount the 6” Z-clip to the wall as shown on the Rough-in Detail. Make sure adequate backing
exists to securely mount the Lavatory.
3. If not yet completed, install the supply and waste rough-ins appropriate to the installation.
Refer to the Rough-in Detail for backplate access hole measurements (all by others).
4. Lift the Plate Mount Weldment & place it into the Z-clip.
5. Level the Plate Mount Weldment, making sure that it remains ush to the wall, to mark and drill
holes for the wall anchors; the Plate Mount Weldment has (16) usable Ø3/8” mounting holes.
6. Re-check the Plate Mount Weldment is level front-to-back and side-to-side & secure the Pedestal
with anchors through the (16) mounting holes in the Plate Mount Weldment.
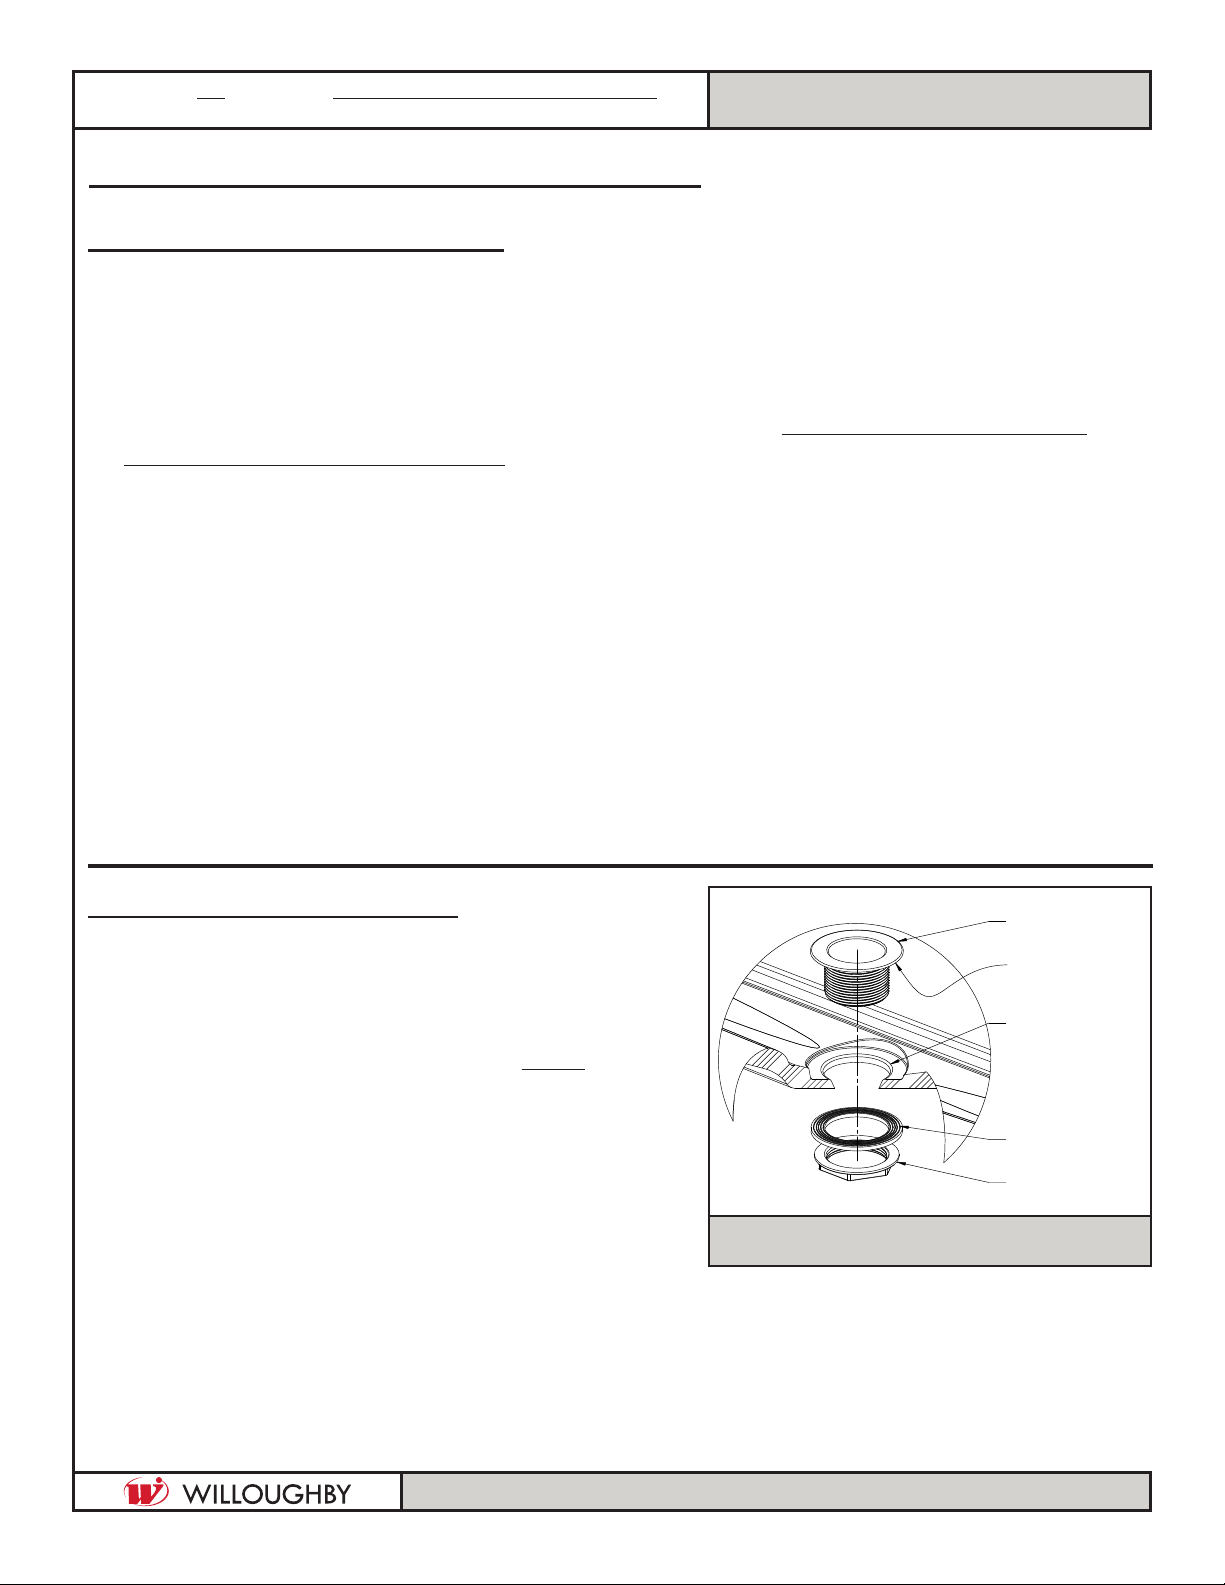
Step 2: Drain Assembly
1. Unpack the Solid Surface Lavatory, check condition.
2. Apply a small strand of plumbers putty on the
underside of the Drain Basket lip (SEE FIG. 1).
3. Insert the Drain Basket into the Lavatory drain hole.
4. Secure the Drain Basket in place:
Fit the Rubber Washer onto the Basket from the
underside of the Lavatory, then tighten the Locknut
onto the Basket, sandwiching the Washer against the
Lavatory.
Note: Over-tightening the Locknut can damage the
Lavatory and Drain Assembly.
APPLY PUTTY
DRAIN HOLE
DRAIN BASKET
LAVATORY
LOCKNUT
RUBBER
WASHER
FIG. 1- DRAIN INSTALLATION