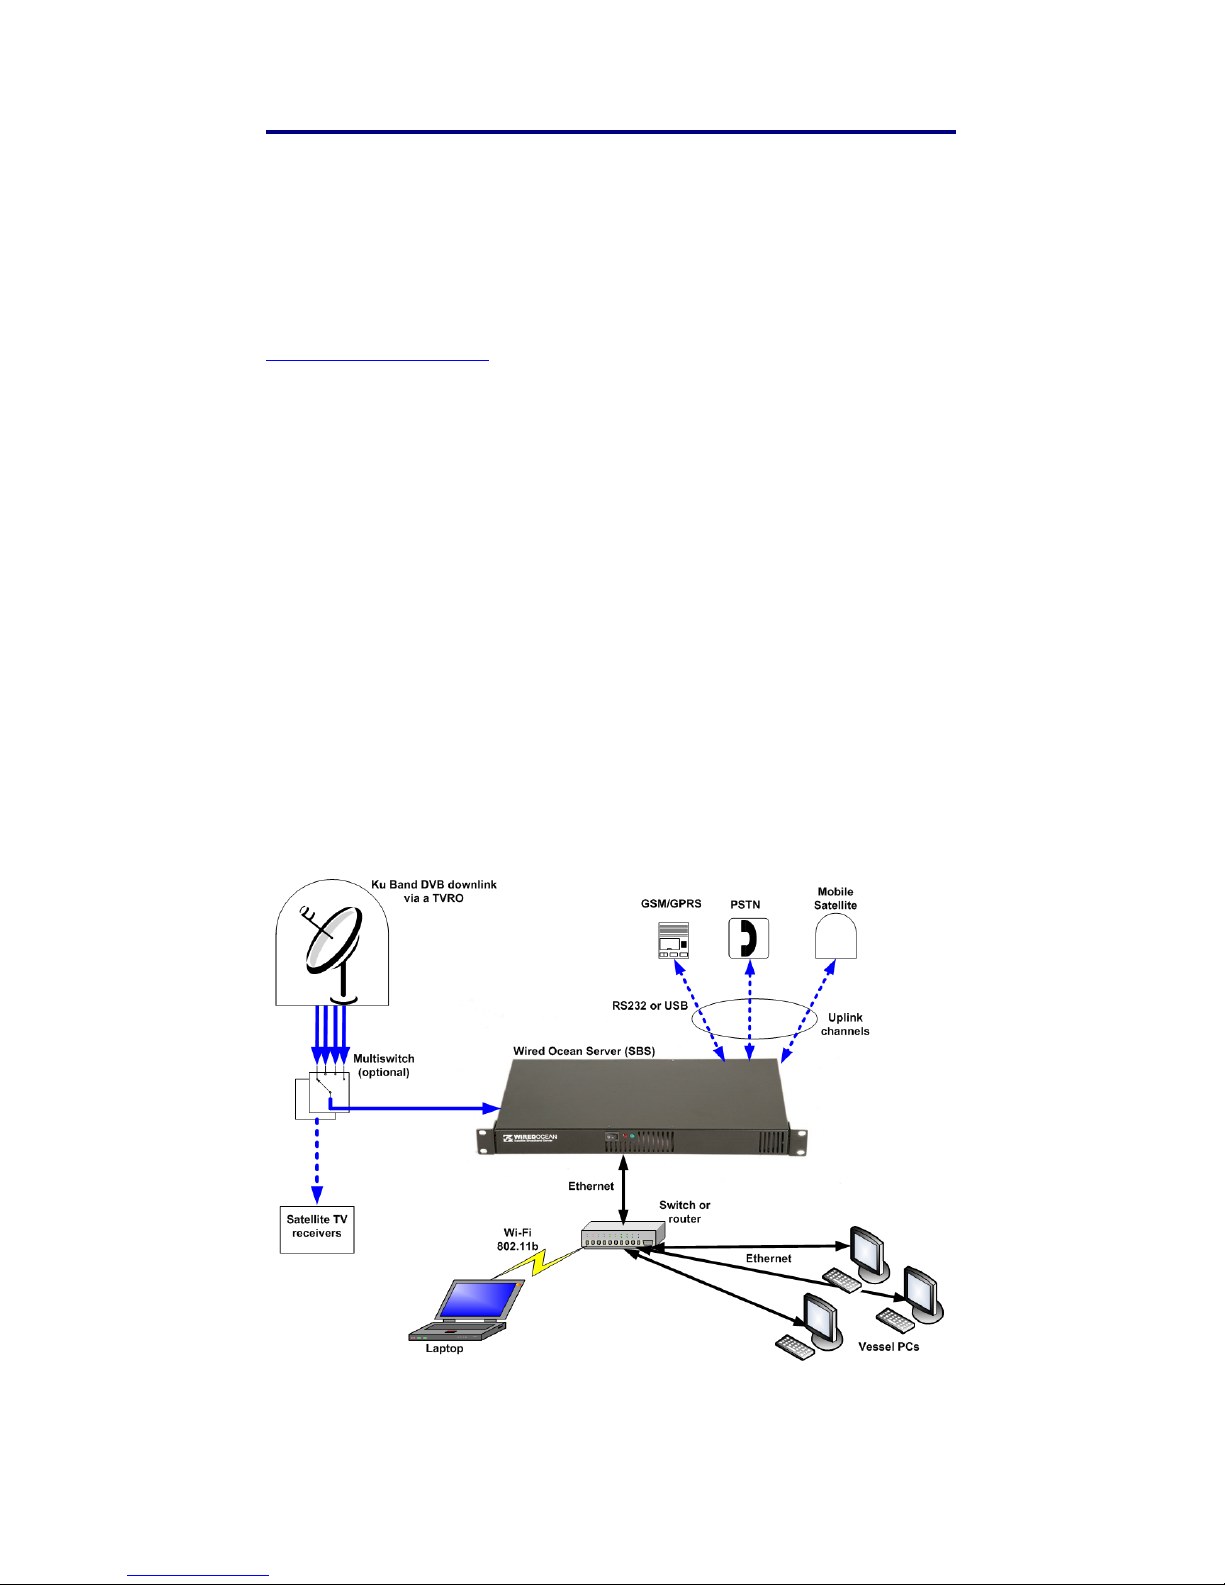
3. Using the Service
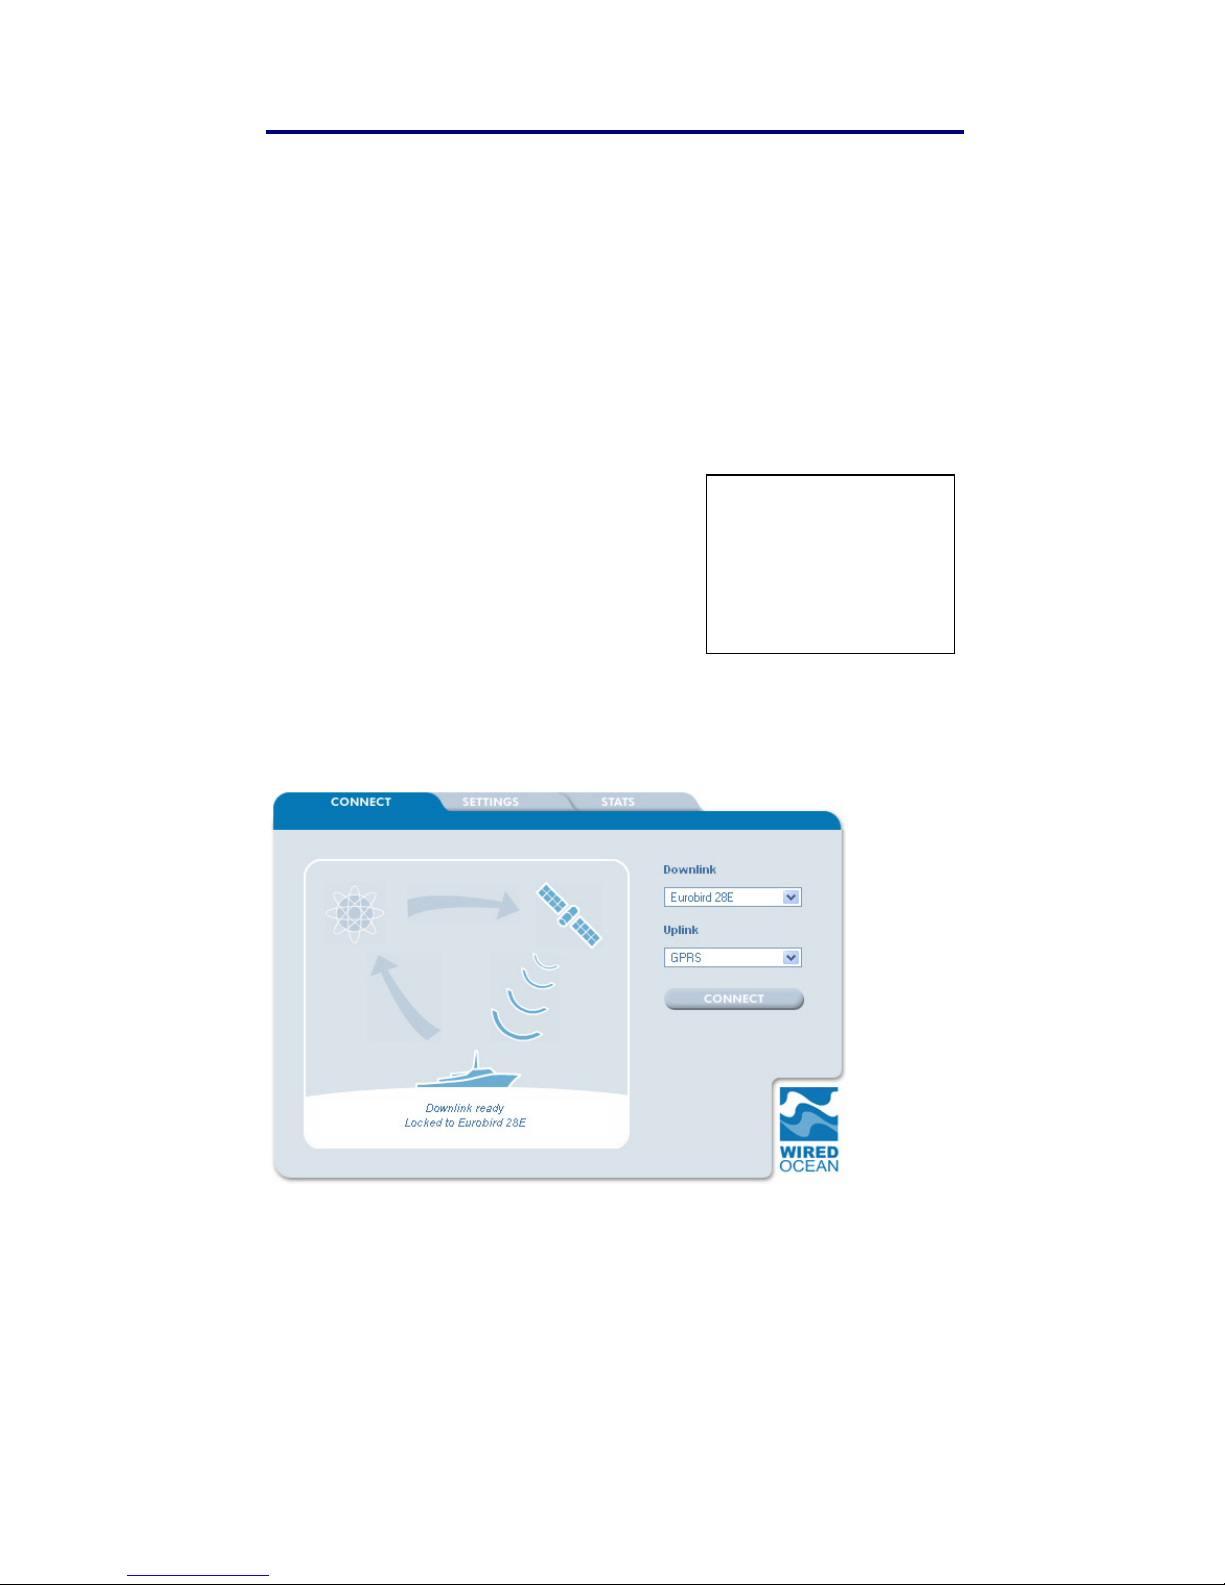
diagram and the “CONNECT” button changes to “DISCONNECT”,
ready for when you want to terminate the connection.
You can now access the internet by opening another browser
window and email by opening your email client or by using web mail.
It is recommended that the browser page showing the SBS User
Interface is kept open to allow you to monitor your internet session. If
you close the browser window that is displaying the SBS User
Interface you will remain connected to the service until you reload the
same page and click “DISCONNECT” or the connection times-out in
accordance with the uplink timeout settings.
Some router-based uplink devices such as Fleet Broadband, 3G,
VSAT and Wi-Fi/WiMAX, may have their own connection
management interfaces. If you need to access the connection
management interface of one of these routers, first click “connect” on
the SBS from a connected computer. You will then be able to access
the connection management interface of the uplink router. Use the
connection management interface of the uplink router to set the
router to automatic connection. Once this is done, use the
“CONNECT” button on the SBS User Interface to manage internet
connections.
If the SBS does not connect please refer to Sections 5.2 to 5.4 of this
handbook.
3.3 Sending and Receiving Email
The SBS supports email in the following three ways:
1. Via web mail access to an ISP’s mail servers. When the SBS
is connected to the internet, access the ISP’s web site as you
would normally.
2. Using a POP/SMTP email client (such as Outlook or Outlook
Express) to connect through the internet to your email
provider. Once the SBS is connected to the internet, open and
operate the email system as usual and incoming and outgoing
emails will pass transparently through the SBS. If your ISP
does not allow you to send email using authenticated SMTP,
they may block SMTP connections from outside their own
network. This does not affect the ability to receive emails. If
Page 8