Wired 4DVD User manual

Wired 4DVD
User’s Guide

2
COPYRIGHT 1999 By Wired Inc. All Rights Reserved
Information in this manual is subject to change without notice. The software described
in this manual is furnished under license and may be used or copied only in accordance
with the license agreement. It is unlawful to copy the software except as specified in the
license agreement. No part of this manual may be reproduced or transmitted in any
form or by any means, electronic or mechanical, including photocopying or scanning,
for any purpose, without the express written permission of Wired Inc.
Macrovision Copyright Notice
This product incorporates copyright protection technology that is protected by
method claims of certain U.S. patents and other intellectual property rights owned by
Macrovision Corporation and other rights owners. Use of this copyright protection
technology must be authorized by Macrovision Corporation, and is intended for home
and other limited viewing uses only, unless otherwise authorized by Macrovision
Corporation. Reverse engineering or disassembly is prohibited.
Other Acknowledgements
Wired Inc, Wired 4DVD, and Wired Stream are trademarks of Wired Inc.
REALmagic, REALmagic Hollywood Plus, REALmagic In it, REAL Overlay are trademarks
of Sigma Designs, Inc. Sigma Designs and the Sigma Designs logo are registered
trademarks of Sigma Designs, Inc. Dolby, AC-3, Pro Logic, and the double-D symbol are
trademarks of Dolby Laboratories.
REALmagic Hollywood Plus is manufactured under license from Dolby Laboratories.
Copyright 1992 Dolby Laboratories, Inc. All rights reserved.
All other product and brand names are the property of their respective holders.
4/16/99 - rev 8

3
Wired 4DVD
Introduction . . . . . . . . . . . . . . . . . . . . . . . . . . . . . . . . . . . . . . . . . . . . . . . 5
Technical Support . . . . . . . . . . . . . . . . . . . . . . . . . . . . . . . . . . . .5
System Requirements . . . . . . . . . . . . . . . . . . . . . . . . . . . . . . . . .6
Technology Overview . . . . . . . . . . . . . . . . . . . . . . . . . . . . . . . . . . . . . . . . 7
MPEG-1 and MPEG-2 . . . . . . . . . . . . . . . . . . . . . . . . . . . . . . . .7
DVD . . . . . . . . . . . . . . . . . . . . . . . . . . . . . . . . . . . . . . . . . . . . . .7
Dolby Digital Surround Sound (AC-3) . . . . . . . . . . . . . . . . . . . .7
Dolby Pro Logic Surround Sound . . . . . . . . . . . . . . . . . . . . . . .8
Supported File Formats . . . . . . . . . . . . . . . . . . . . . . . . . . . . . . . .8
Installation
In/Out Connectors . . . . . . . . . . . . . . . . . . . . . . . . . . . . . . . . . . .10
Monitor Connection . . . . . . . . . . . . . . . . . . . . . . . . . . . . . . . . .10
Audio Connections . . . . . . . . . . . . . . . . . . . . . . . . . . . . . . . . . .12
TV Monitor Connections . . . . . . . . . . . . . . . . . . . . . . . . . . . . .13
Software Installation . . . . . . . . . . . . . . . . . . . . . . . . . . . . . . . . . . . . . . . 14
What gets installed . . . . . . . . . . . . . . . . . . . . . . . . . . . . . . . . . .14
Using DVD Station
Running DVD Station for the First Time . . . . . . . . . . . . . . . . . . . . . . . . 15
Auto Calibration . . . . . . . . . . . . . . . . . . . . . . . . . . . . . . . . . . . .15
Selecting Your Geographic Region . . . . . . . . . . . . . . . . . . . . . .16
Playing Discs . . . . . . . . . . . . . . . . . . . . . . . . . . . . . . . . . . . . . . . . . . . . . . 18
The Basics . . . . . . . . . . . . . . . . . . . . . . . . . . . . . . . . . . . . . . . . .18
Playing MPEG Files . . . . . . . . . . . . . . . . . . . . . . . . . . . . . . . . . . . . . . . . . 19
Reference
The DVD Station Controller . . . . . . . . . . . . . . . . . . . . . . . . . . . . . . . . . . 21
Player Controls . . . . . . . . . . . . . . . . . . . . . . . . . . . . . . . . . . . . .21
Display Panel . . . . . . . . . . . . . . . . . . . . . . . . . . . . . . . . . . . . . .22
Volume Control . . . . . . . . . . . . . . . . . . . . . . . . . . . . . . . . . . . . .23
DVD Navigation Buttons . . . . . . . . . . . . . . . . . . . . . . . . . . . . .23
DVD Menu Controller . . . . . . . . . . . . . . . . . . . . . . . . . . . . . . .25
DVD Station Function Buttons . . . . . . . . . . . . . . . . . . . . . . . . .25
Secondary Controls . . . . . . . . . . . . . . . . . . . . . . . . . . . . . . . . . .26

4
The Number Pad . . . . . . . . . . . . . . . . . . . . . . . . . . . . . . . . . . . .27
The Compact Controller . . . . . . . . . . . . . . . . . . . . . . . . . . . . . .28
Sizes Menu . . . . . . . . . . . . . . . . . . . . . . . . . . . . . . . . . . . . . . . . . . . . . . . . 29
Preferences . . . . . . . . . . . . . . . . . . . . . . . . . . . . . . . . . . . . . . . . . . . . . . . 30
Play List Panel . . . . . . . . . . . . . . . . . . . . . . . . . . . . . . . . . . . . .30
Settings Panel . . . . . . . . . . . . . . . . . . . . . . . . . . . . . . . . . . . . . .32
DVD Options Panel . . . . . . . . . . . . . . . . . . . . . . . . . . . . . . . . .34
Setting the DVD Region Code . . . . . . . . . . . . . . . . . . . . . . . . .36
Configuration Options . . . . . . . . . . . . . . . . . . . . . . . . . . . . . . . . . . . . . . 36
Auto Calibration . . . . . . . . . . . . . . . . . . . . . . . . . . . . . . . . . . . .37
Adjust Borders . . . . . . . . . . . . . . . . . . . . . . . . . . . . . . . . . . . . .37
Advanced Color Adjustments . . . . . . . . . . . . . . . . . . . . . . . . . .39
Select Screen . . . . . . . . . . . . . . . . . . . . . . . . . . . . . . . . . . . . . . .42
Index . . . . . . . . . . . . . . . . . . . . . . . . . . . . . . . . . . . . . . . . . . . . . . . . . . . . 43

Introduction 5
Introduction
Congratulations on purchasing your new Wired 4DVD card. Your Wired 4DVD
transforms your computer into a full-function DVD player, and provides you with
uncompromising high performance hardware MPEG-2 digital video playback
capability.
The Wired 4DVD also has a digital audio output which can be connected to an
external decoder for Dolbyª Digital or DTSª surround sound.
Please refer to the Read Me First file on the installation disc for important
information not available when this manual was printed.
Technical Support
Support for Wired 4DVD is available online at
www.wiredinc.com
and via e-
mail at
.

6 Introduction
System Requirements
For proper operation, the Wired 4DVD card requires:
¥A Power Macintosh running at 100 MHz or higher
¥Mac OS version 8.0 or higher (8.5.1 recommended)
¥An available PCI expansion slot
¥10 MB of available RAM
¥DVD-ROM or DVD-RAM drive
¥An external amplifier and speakers is recommended for best sound.

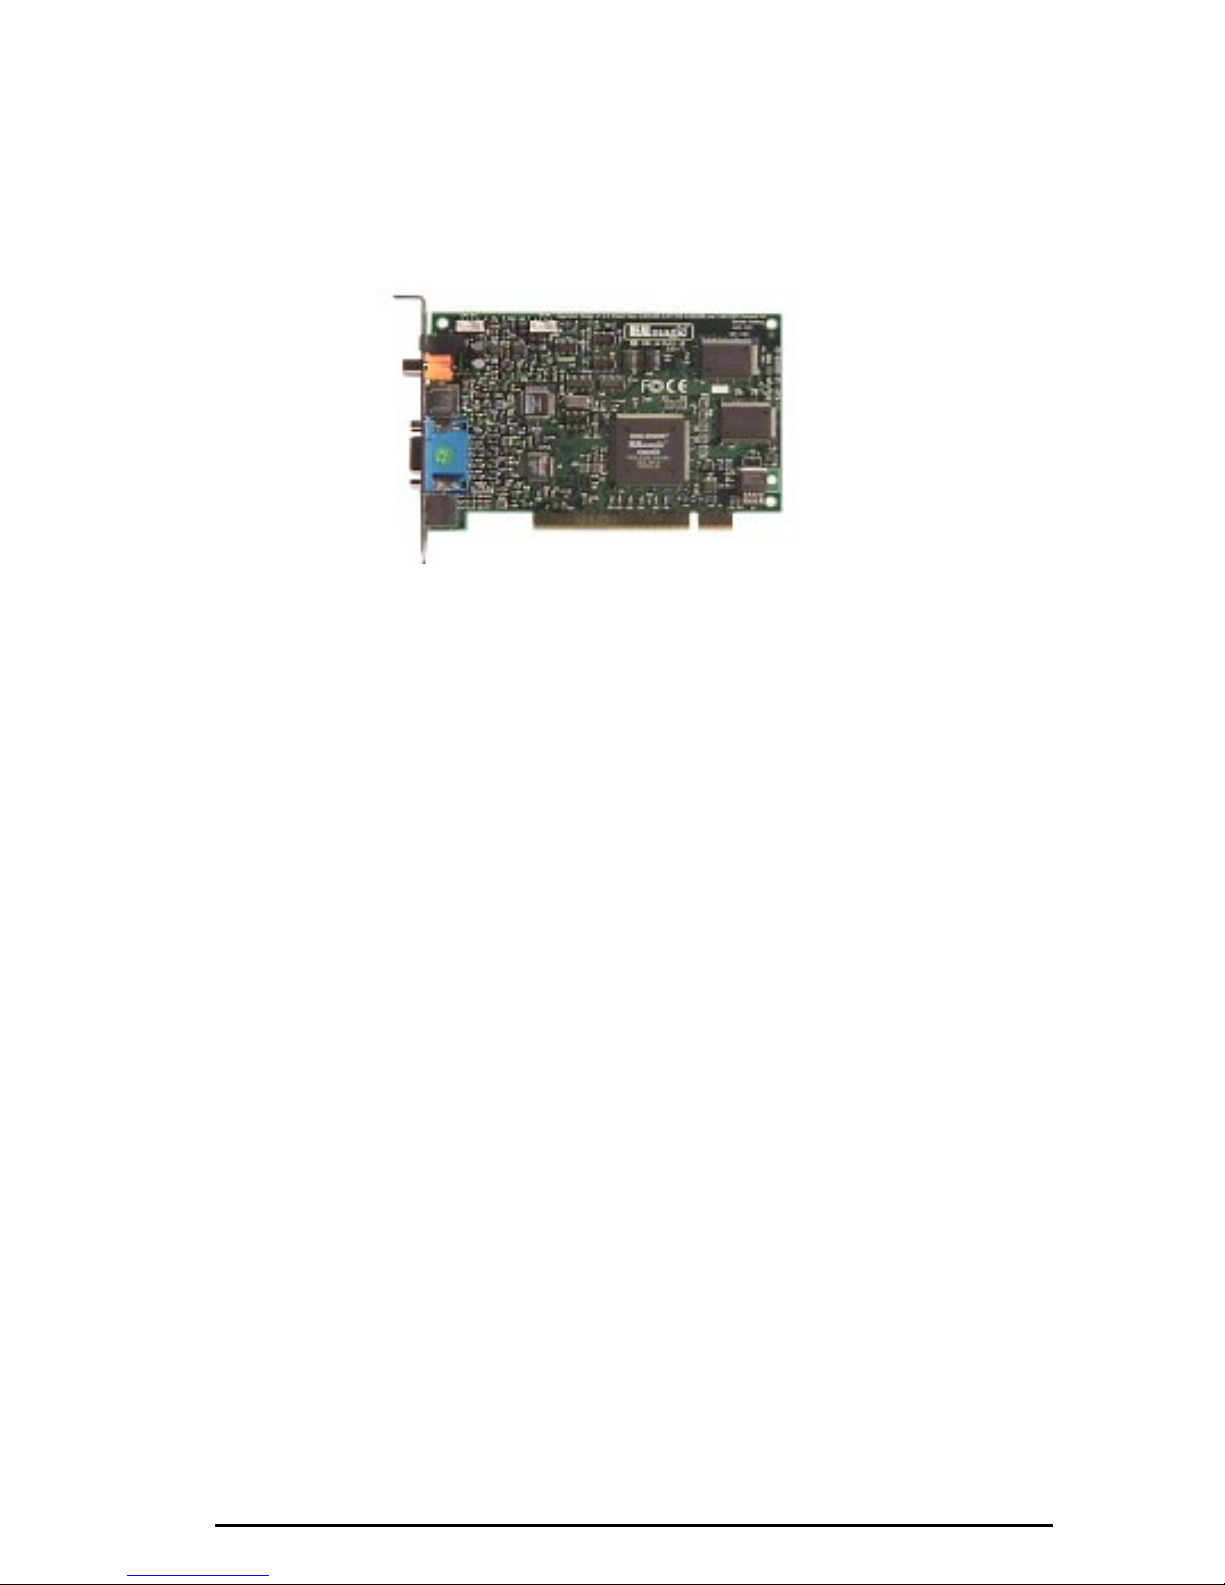
Technology Overview 7
Technology Overview
MPEG-1 and MPEG-2
MPEG stands for Moving Picture Experts Group. It refers to a method of data
compression optimized for video and audio data. By analyzing the changes
between video Òframes,Ó an MPEG ÒencoderÓ is able to reduce the file size of the
compressed video data significantly. This remarkably efficient compression
method allows full-screen and full-motion video, plus CD-quality audio to be
stored in a relatively small size file. Once the data has been compressed,
however, it must be ÒdeÓ-compressed before it can be used.
Your card incorporates specialized hardware to decompress MPEG data at a very
high speed, which allows MPEG ÒstreamsÓ to play back at a data transfer rate of
500 Kilobits to 15 Megabits per second. MPEG-2 video has a resolution of 720 x
480 in 24-bit (16.8 million) colors at 30 frames per second (fps) for NTSC, and 720
x 576 at 25 fps for PAL. MPEG-1 video has a resolution of 352 x 240 in 24-bit (16.8
million) colors at 30 fps for NTSC, and 352 x 288 at 25 fps for PAL. The MPEG
standard is a fully open standard and has been embraced by the computer and
entertainment communities as the current standard of digital video on both
television and personal computers.
DVD
DVD is a revolutionary storage medium that is currently capable of storing up to
18 gigabytes (GB) of data on a disc the size of a standard CD. This is enough to
store an entire movie encoded in the MPEG-2 format on a single disc. For video
the maximum bit rate is 10.8 Megabits per second.
Dolby Digital Surround Sound (AC-3)
Dolby Digital Surround sound is the audio compression standard for DVD in the
U.S. Also known as AC-3, Dolby Digital Surround sound is designed specifically to
code multi-channel digital audio. It incorporates six discrete digital audio
channels to provide a full immersion surround sound system that is similar to
that of a movie theatre. The six channels include left and right front, left and right
back, center, and subwoofer. The frequency range of the main channels is 20 Hz
to 20 kHz (+/- 0.5 dB). The subwoofer channel range is 20 Hz to 120 Hz (+/- 0.5
dB). The Dolby Digital Surround Sound requires a Dolby Digital receiver/
amplifier to decode the signal.
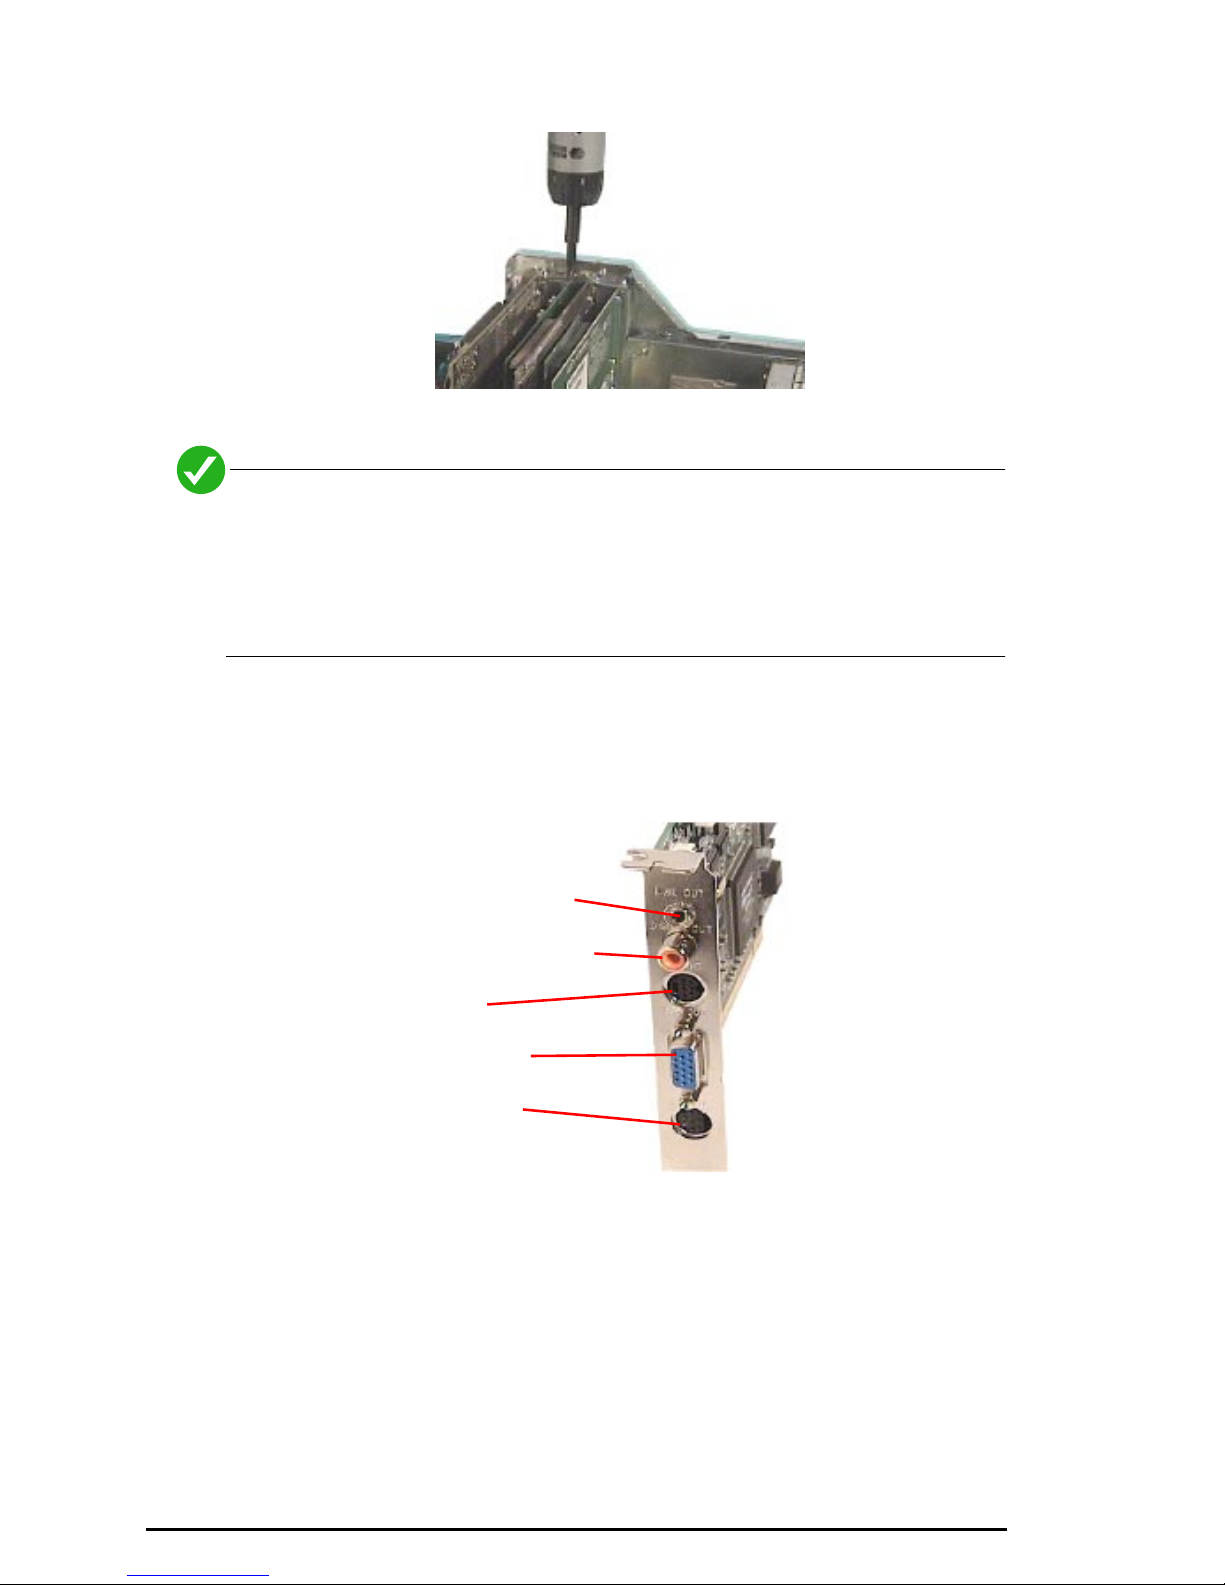
To achieve Dolby Digital sound, connect your card to a Dolby Digital amplifier
using the optional S/PDIF connector. Although this connector looks like a
standard RCA jack, it carries six channels of digital audio to your digital amplifier.

8 Technology Overview
Dolby Pro Logic Surround Sound
Dolby Pro Logic Surround Sound uses the standard analog stereo signal to
multiplex surround sound information, and requires a Dolby Pro Logic receiver/
amplifier to decode the signal. Pro Logic Surround Sound differs from Dolby
Digital Surround Sound by using the same audio signals for both the front and
back speakers on the left and right channels.
Supported File Formats
Besides playing standard DVD-Video discs inserted in a DVD-ROM drive, the
Wired 4DVD card can also play MPEG files in a variety of formats.
DVD
DVD files have various file extensions such as IFO and VOB. The VOB files
contain the actual video and/or audio data, whereas the IFO files contain
navigation information. DVD files are up to full CCIR601 resolution of 720 x 480
(576 for PAL) at 30 (25 for PAL) fps.
MPEG Files
MPG is the extension commonly used for files with MPEG-2 or MPEG-1
compressed full-motion video. System streams, Program streams, and Transport
streams are all supported, which are different ways of storing both audio and
video in one file. For MPEG-2 and MPEG-1 the video resolution is up to 720 x 480
(576 for PAL) at 30 (25 for PAL) frames per second with 16.8 million colors (full
CCIR601). These files may also include MPEG-compressed, AC-3 compressed, or
Linear PCM audio.
Elementary MPEG streams
The Wired 4DVD can also play MPEG encoded video-only bit stream and audio-
only bit stream files, as well as AC-3 elementary audio bit stream files. These are
typically files with the extensions .mpa, .mpv, .vbs, .abs, or .ac3.

Technology Overview 9
INSTALLATION
Follow the steps below to install the Wired 4DVD card into your computer.
!
Static electricity can damage your equipment. Do not take the board out of
its static protective bag until you are ready to work with it.
1)
Turn off the power to the computer and disconnect the power cord.
2)
Disconnect the monitor cable from your Macintosh.
3)
Open your computer so you have access to the PCI expansion slots. (Refer to
your MacÕs users manual for specific instructions.)
4)
Locate an available PCI slot.
5)
Remove the slot cover screw and slot cover, if applicable.
6)
Open the protective bag and remove the Wired 4DVD card
7)
Insert the card into the PCI slot. Press down gently on the top edges of the
board to seat it securely in the socket.
Insert the card into an
available PCI slot.

10 Technology Overview
8)
Secure the board using the screw removed earlier.
9)
Replace the cover of your Macintosh and reconnect the power cord.
If you install a DVD-ROM drive at the same time as the Wired 4DVD card,
remember to attach the CD-Audio cable from the motherboard of the
computer to the DVD-ROM drive. Otherwise, you will not be able to play
CD-Audio titles with the DVD-ROM drive. This will not affect the audio of
DVD-Video or DVD-ROM titles.
In/Out Connectors
This photo shows the various input and output connectors on the Wired 4DVD
card.
Monitor Connection
The Wired 4DVD card connects ÒbetweenÓ your monitor and the monitor port of
the Mac. This is accomplished by using a special Òpass thruÓ cable which
Stereo Line output
S/PDIF digital output
TV output
Monitor port
Monitor input

Technology Overview 11
connects the output of your Mac to the input of the Wired 4DVD card. Your
monitor then connects directly to the Wired 4DVD card.
The connectors on the pass-thru cable and the card are the newer ÒcompactÓ
VGA-style.
If your system uses the larger Òmac-styleÓ monitor connectors, you can use the
supplied adapters to convert them to the right size.
The MacÕs monitor
port (location and
appearance varies)
The video input of
the Wired 4DVD
The Òpass thruÓ cable
This end goes to the
Wired 4DVD card.
This end connects to your
MacÕs monitor port.
Connect this adapter
to your monitor cable.
And this one to the
pass-thru cable.

12 Technology Overview
To connect your monitor, follow these steps:
1)
Attach the larger end of the pass-thru cable to the monitor port of your Mac or
video card.
2)
Attach the other end of the pass-thru cable to the video input connector at the
back of the Wired 4DVD card.
3)
Connect the cable from your monitor to the monitor output of the card.
Audio Connections
In addition to being able to play its sound directly through the MacÕs built-in
speaker (and thereby any attached sound system) the Wired 4DVD features two
separate audio outputs for specialized configurations:
¥The Stereo mini-jack output
¥The S/PDIF digital audio connector.
The
stereo mini-jack
outputs a standard analog stereo signal that can be used
by virtually any stereo receivers or amplified speakers. It also contains the Pro
Logic Surround Sound encoding that allows you to achieve surround sound by
attaching this signal to a Pro Logic receiver.
The
S/PDIF connector
is used to send digital audio signals directly to an
external sound system which features a Dolby Digital and/or DTS decoding
system.
Connect the pass-
thru cable to the
MacÕs monitor port
and then to the
Wired 4DVD card.
Connect the cable
from your computer
monitor to the
4DVD card.

Technology Overview 13
TV Monitor Connections
The Wired 4DVD can be connected to an external TV monitor or video projector.
If your TV has an S-video connector, you can connect it directly to the S-video
output of the card.
If your TV uses the more common RCA-type connector, you will need to use the
supplied adapter to connect it.
Due to the copyright protection circuit in use by this product, please do not
connect any recording device, such as a VCR, to the Composite Video Out
or the S-Video Out connectors of the card. For best playback, make sure
the DVD title is played directly from the card onto a TV, not through a VCR.
S-video cables
plug directly in
to the Wired
4DVD card.
Use the adapter if your TV
has RCA inputs.

14 Software Installation
Software Installation
This chapter describes the software installation procedure for the Wired 4DVD
card.
1)
Insert the Wired 4DVD Software installer disc in your CD drive.
2)
Double-click the
Wired 4DVD Installer
application.
3)
Follow the on-screen instructions to complete the software installation.
What gets installed
The installer places the following files on your hard drive:
¥The DVD Station application, in the Wired 4DVDª folder
¥This user guide, in Adobe Acrobat format, in the Wired 4DVDª folder
¥The Wired4DVDLib file in your Extensions folder
Proceed to the next section for detailed information on the operation of the DVD
Station software.

Running DVD Station for the First Time 15
USING DVD STATION
DVD Station is a versatile application that allows you to play a variety of DVD,
MPEG, and CD formats. This section describes how to use DVD Station to play
full-length feature films recorded in the DVD format, and data CDs containing
MPEG files and also Audio CDs. DVD Station will automatically detect the format
of the disc in your DVD drive and identify the file type in the Display Panel. DVD
Station can also detect MPEG files in your CD-ROM and hard drives.
Running DVD Station for the First Time
The first time you run DVD Station you will be prompted to run the Auto
Calibration and Region Selection procedures. Each is described below.
Auto Calibration
In order to be able to display the signal from the Wired 4DVD card on your
computer monitor, the system must be ÒcalibratedÓ. This is an automatic process
that tests the signal from your computerÕs monitor port and adjusts the output of
the Wired 4DVD accordingly.
If the current resolution and color depth of your monitor has not been calibrated
before, this dialog will appear when you launch DVD Station.
Just click
Start
and the calibration will be done automatically. The screen will
flash and show various shapes during the calibration process.
The calibration is specific to one resolution and color depth setting of your
monitor; if you change either setting and then run DVD Station, you will
again be prompted to Auto Calibrate. DVD Station retains the calibration
data for each resolution/color combination, so if you switch back, you
wonÕt need to recalibrate.

16 Running DVD Station for the First Time
Selecting Your Geographic Region
The DVD standard includes a feature called
Region Coding
which allows the
publishers to specify in which parts of the world a particular disc can be played.
Before you can play a DVD, the Wired 4DVD card must be set to your geographic
region.
If the region code for the Wired 4DVD has not been previously set, this dialog
will appear when you run DVD Station.
1)
Click
Yes
and the DVD Region panel of the Preferences dialog will open.
2)
Click on your location on the map and click
Change
.
3)
A confirmation dialog will appear. If you want to proceed, click
OK
to set the
region.
4)
Click
OK
to close the Preferences dialog.
!
The region can only be set five (5) times. After the fifth time you will no
longer be able to change the region.
Click on your
region, and
click Change.
The currently
active region
is outlined in
white.
Be sure the Wired 4DVD card is
selected in the menu.

Running DVD Station for the First Time 17
Setting the Region For the DVD Drive
Some newer DVD drives also require setting the region code for the drive itself.
This can also be accomplished using the DVD Region panel of DVD Station.
!
If your drive supports region coding, it comes from the factory with no
region code set. If you attempt to insert a DVD-Video disc that is not
enabled for all regions, and you havenÕt selected a region, you will get an
error message saying the disc is unreadable and asking if you want to
initialize it. (the exact message will vary depending on the make of drive
and the driver software used.)
To set the initial region code of the drive:
1)
Open the DVD Region panel of the Preferences dialog
2)
Choose your DVD drive from the pop-up menu and click on the desired
region.
3)
Click
Change
and click OK in the confirmation dialog.
4)
Click
OK
again to close the Preferences dialog.
After the initial region selection for a drive, you will only be able to change
the driveÕs region code if you have a DVD from the new region inserted in
the drive when you attempt to change the region. For example, if your
drive is set to Region 1 (North America) and you want to change it to
Region 2 (Europe) you must have a Region 2 disc in the drive in order to
make the change. The limit of five (5) changes applies to drive also.
Select the
DVD drive
from this
menu, and
select the
desired
region on the
map.
Only devices which support region
setting will be enabled in the menu.

18 Playing Discs
Playing Discs
DVD Station is designed to be very easy to use, and has controls which are
probably already familiar (if youÕve ever used a VCR, CD player or DVD player).
Before we get into the details of DVD Stations many cool features, letÕs start with
the basics.
The Basics
If all you want to do is play a disc, hereÕs what you do:
1)
Load an AudioCD or DVD into your DVD-ROM drive.
2)
Start DVD Station by double-clicking its icon in the Finder.
DVD Station will detect which type of disc youÕve inserted and display the appropriate
controller. The two controllers have the same basic controls, but each adds special
controls as appropriate to their specific tasks.
3)
Click the
Play
button to start playing the disc.
If itÕs an AudioCD, the disc will start playing. If itÕs a DVD, the playback window will
appear on your monitor and the video will begin playing.
If the Autoplay feature is turned ON in the preferences dialog, an inserted
disc will start playing as soon as DVD Station is opened and anytime a
new DVD disc is inserted while DVD Station is running.
4)
Adjust the sound level as desired using the Volume Control slider.
5)
You can skip to other tracks or scan quickly forward or backwards using the
standard ÒVCR-typeÓ controls.
DVD
controller
AudioCD
controller
Playback controls
DVD navigation buttons
OK button
Program type
Position indicators
Volume control
Play mode

Playing MPEG Files 19
The DVD controller has additional buttons which allow you to navigate through a DVD-
Video title. When you are viewing a DVDÕs menu, you can use the up, down, left and
right arrow buttons on the controller to move the selection from one on-screen button
to the next. Click the center ÒOKÓ button to confirm you choice.
6)
Continue reading for complete explanations of all the features and functions of
DVD Station.
Playing MPEG Files
Besides playing audio and video discs, DVD Station can play MPEG files directly
from your hard drive. These can be individual MPEG audio or video streams,
multiplexed MPEG streams or ÒIFOÓ or ÒVOBÓ files from a DVD. It can even
assemble a Òplay listÓ of different files to be played in sequence (see ÒPlay List
PanelÓ on page 30 for details).
To play an individual MPEG file:
1)
Start DVD Station by double-clicking its icon in the Finder.
2)
Click the
File Open
button in the controller, or select the
Open
command
from the
File menu
.
3)
Using the standard file selection dialog which appears, select an MPEG file from
your drive, and click
Choose
.
File Open button

20 Playing MPEG Files
4)
If you selected an MPEG file, the controller will indicate
Data
as the program
type.
5)
Click the
Play
button to start playing the file.
All the normal control buttons work essentially the same as when you play a disc.
6)
To view a different file, simply repeat the process.
If you select a VIDEO_TS.IFO file from a Video_TS directory (either on a
hard disk or on a DVD), DVD Station will switch to DVD playback mode
and you can play it as if it were a DVD disc.
Switching Back to Playing DVDs
If you want to play an inserted DVD, instead of a currently selected file, just click
the Program Type indicator to toggle between DVD and DATA modes.
DATA indicates that you have
selected a Þle for playback.
Click Play to play the Þle.
Click here to switch between
DATA and DVD modes.
Table of contents
Popular Video Card manuals by other brands

ATI Technologies
ATI Technologies 100-436012 - Radeon 9250 256MB 128-bit DDR PCI Video... user guide

TerraTec
TerraTec Mystify 440 manual

GeoVision
GeoVision GV-SDI-204 manual

MSI
MSI RX1800GTO-VT2D256E Quick installation guide

Nvidia
Nvidia GeForce2 - MX 400 64MB AGP Video Card user guide

Avermedia
Avermedia Dark Crystal HD Capture SDK user manual