light will illuminate for 3 seconds and then the blue one will stay illuminated, indicating
the camera has entered into standby mode automatically.
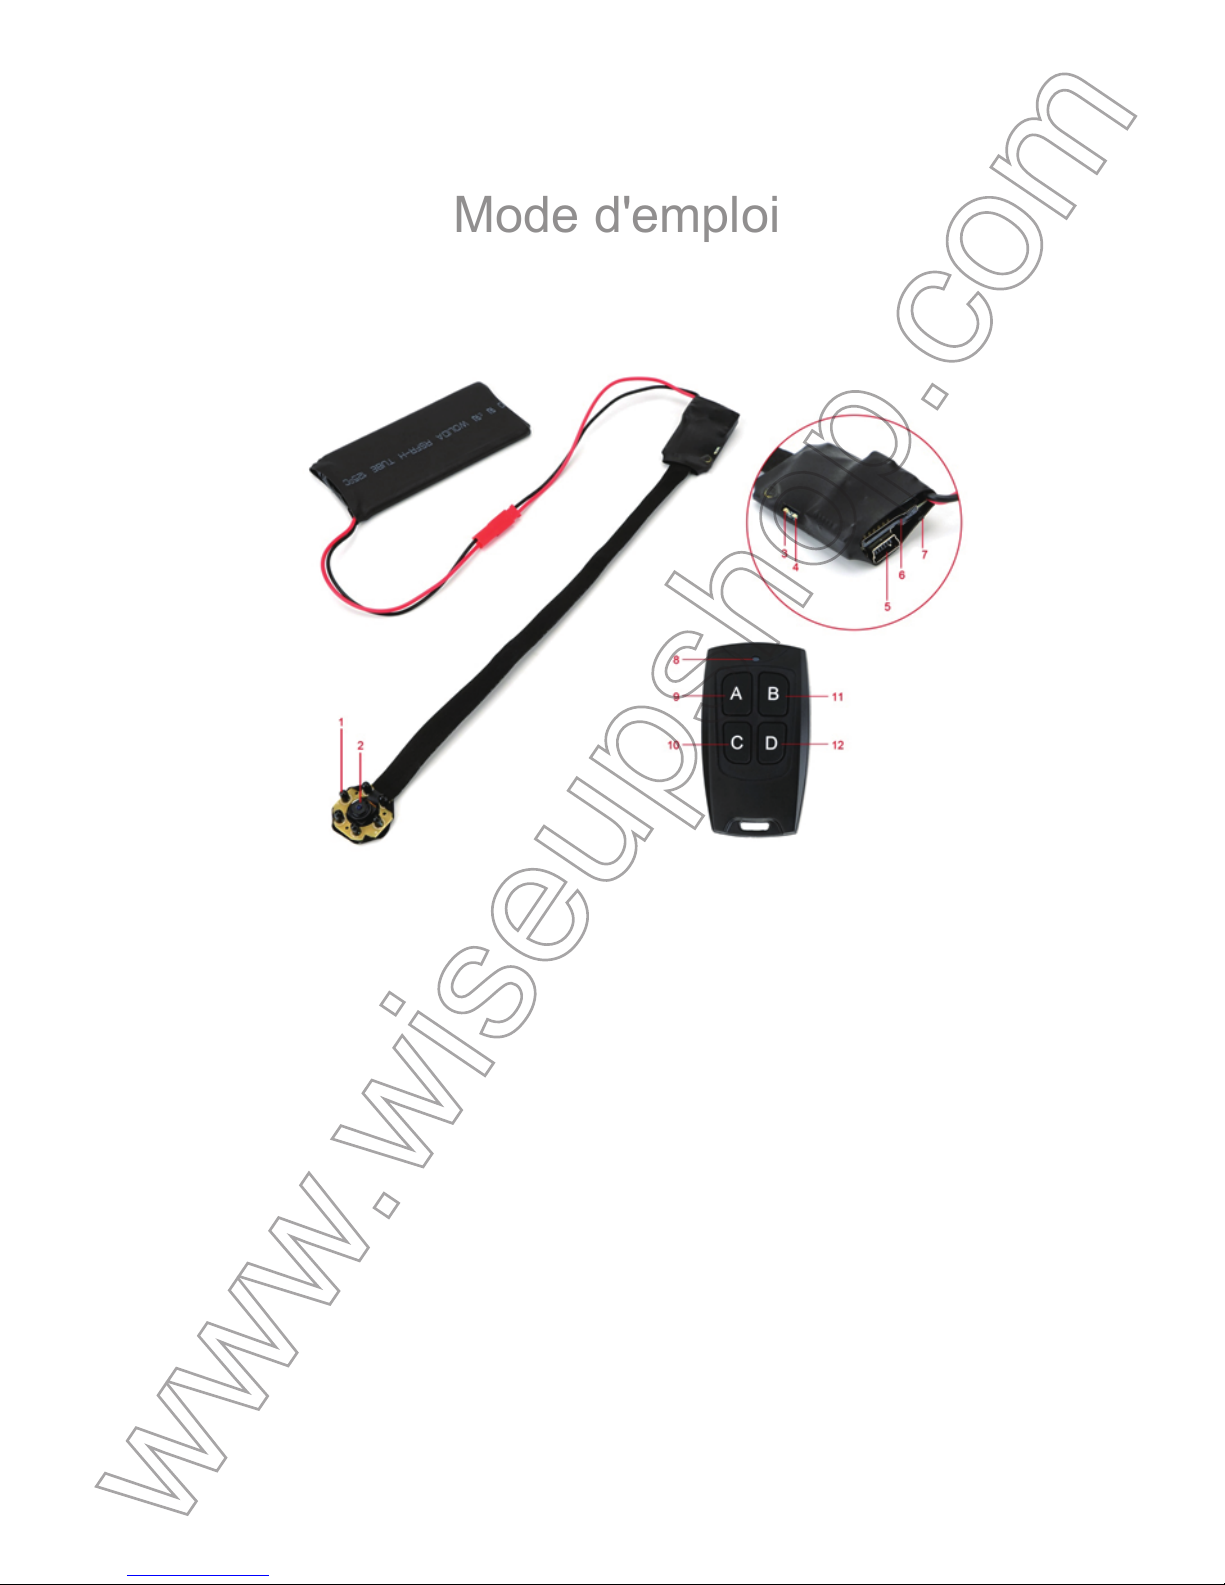
3.3.2. Press Button C once to enter into motion detection recording mode. The blue
indicator light will flash once and turn off.
3.3.3. The camera will record video automatically when a movement is detected.
3.3.4. Press Button C once again to exit motion detection recording mode. The blue
indicator light will stay illuminated, indicating the camera is back to standby mode.
3.4. IR NIGHT VISION RECORDING
3.4.1. Power on the camera by holding down Button A for 3 seconds. The red indicator
light will illuminate for 3 seconds and then the blue one will stay illuminated, indicating
the camera has entered into standby mode automatically.
3.4.2. Press Button D once to enter into night vision mode. The infrared LEDs will be
turned on and the camera will start recording video automatically. The red indicator
light will flash three times and then turn off.
3.4.3. Press Button D once again to exit night vision mode. The infrared LEDs will be
turned off and the camera will stop recording video. The blue indicator light will stay
illuminated, indicating the camera is back to standby mode.
[Note]: IR Distance: 1m
IV. Video/Image File Uploads
4.1. When the camera is powered off, remove the Micro SD card and insert it into a
card reader.
4.2. Insert the card reader into a PC computer.
4.3. The Micro SD card will be recognized as a removable disk drive.
4.4. All the files can be accessed in the “DCIM” folder.
V. Setting Time/Date Stamp
5.1. When the camera is powered off, remove the Micro SD card and insert it into a
card reader.
5.2. Insert the card reader into a PC computer.
5.3. Removable disk drive folder appears.
5.4. Click on the drive in the root directory and inside the root directory, create a file
named “time.txt”.
5.5. Write the current date and time in the “time.txt” file with the correct format:
Year-Month-Day Hour:Minute:Second. (For example: 2016-04-12 14:24:32). Save this
3.3. ZUR BEWEGUNGSERKENNUNG
3.3.1. Schalten Sie die Kamera durch die Taste A für 3 Sekunden gedrückt halten. Die
rote Kontrollleuchte für 3 Sekunden zu beleuchten und dann die blaue beleuchtet wird
bleiben, was auf die Kamera hat sich automatisch in den Standby-Modus.
3.3.2. Drücken Sie die Taste C einmal eingeben in die Bewegungserkennung
Aufnahmemodus . Die blaue Anzeigelampe blinkt einmal und auszuschalten.
3.3.3. Die Kamera wird Video automatisch aufzeichnen, wenn eine Bewegung erkannt
wird.
3.3.4. Drücken Sie die Taste C erneut zur Bewegungserkennung Modus zu verlassen.
Die blaue Anzeigelampe bleibt beleuchtet, was die Kamera in den Standby-Modus ist
zurück.
3.4. IR-NACHTSICHT -AUFNAHME
3.4.1. Schalten Sie die Kamera durch die Taste A für 3 Sekunden gedrückt halten. Die
rote Kontrollleuchte für 3 Sekunden zu beleuchten und dann die blaue beleuchtet wird
bleiben, was auf die Kamera hat sich automatisch in den Standby-Modus.
3.4.2. Drücken Sie die Taste D einmal eingeben in Nachtsichtmodus . Die Infrarot-LEDs
wird eingeschaltet , und die Kamera wird die Aufnahme von Video automatisch
gestartet. Die rote Kontrollleuchte blinkt dreimal und dann auszuschalten.
3.4.3. Drücken Sie die Taste D erneut zu verlassen Nachtsichtmodus . Die Infrarot-LEDs
wird ausgeschaltet und die Kamera wird die Aufnahme von Video stoppen. Die blaue
Anzeigelampe bleibt beleuchtet, was die Kamera in den Standby-Modus ist wieder da.
[Hinweis]: IR-Abstand: 1m
IV. Video- / Bilddateiuploads
4.1. Wenn die Kamera ausgeschaltet ist, entfernen Sie die Micro SD-Karte und in einen
Kartenleser ein.
4.2. Setzen Sie den Kartenleser in einen PC-Computer.
4.3. Die SD-Micro-Karte wird als Wechsellaufwerk erkannt werden.
4.4. Alle Dateien können im Ordner "DCIM" zugegriffen werden.
V. Einstellen von Datum / Uhrzeit
5.1. Wenn die Kamera ausgeschaltet ist, entfernen Sie die Micro SD-Karte und in einen
Kartenleser ein.
5.2. Setzen Sie den Kartenleser in einen PC-Computer.
5.3. Wechselplattenlaufwerk Ordner angezeigt wird.