Wiznet WizFi360-EVB-Pico User manual

Copyright 2022 WIZnet Co., Ltd. All rights reserved.
Table of Contents
1Document Information.......................................................................................................... 3
2Overview................................................................................................................................. 4
3Hardware Description............................................................................................................ 4
4Set up your Development Environment ................................................................................ 6
5Set up your hardware........................................................................................................... 16
6Setup your AWS account and Permissions......................................................................... 18
7Create Resources in AWS IoT............................................................................................. 18
8Provision the Device with credentials ................................................................................. 19
9Build the demo ..................................................................................................................... 20
10 Run the demo ....................................................................................................................... 20
11 Debugging ............................................................................................................................ 25
12 Troubleshooting................................................................................................................... 29

Copyright 2022 WIZnet Co., Ltd. All rights reserved.
1Document Information
1.1 Revision History (Version, Date, Description of change)
Version
Date
Description of change
V1.0.0
2022-06-24
Initial Release

Copyright 2022 WIZnet Co., Ltd. All rights reserved.
2Overview
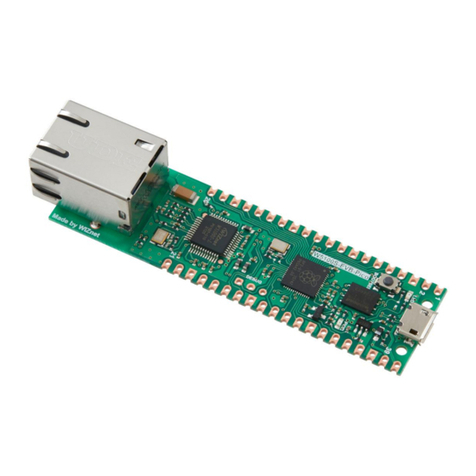
The WizFi360-EVB-Pico is a microcontroller evaluation board based on the Raspberry Pi
RP2040 microcontroller chip and adds Wi-Fi connectivity using WizFi360. The WizFi360-EVB-
Pico has the same role as the Raspberry Pi Pico platform and includes WizFi360, so the Wi-Fi
function is basically included.
∙Raspberry Pi Pico Clone
∙Wi-Fi (WizFi360 Wi-Fi Module)
Figure 1. WizFi360-EVB-Pico
3Hardware Description
3.1 DataSheet
https://docs.wiznet.io/assets/images/WizFi360-EVB-Pico_SCH_V100-1-
44628336cfa4d71657c04fbf4bf9b8c4.png

Copyright 2022 WIZnet Co., Ltd. All rights reserved.
Figure 2. WizFi360-EVB-Pico schematic
3.2 Standard Kit Contents
∙WizFi360-EVB-Pico : 1EA
∙1 x 20 2.54mm pitch pin header : 2EA
Figure 3. WizFi360-EVB-Pico package

Copyright 2022 WIZnet Co., Ltd. All rights reserved.
3.3 User Provided items
∙USB type A to USB micro B cable
Figure 4. USB type A to USB micro B cable
∙Desktop or laptop
3.4 3rd Party purchasable items
None
3.5 Additional Hardware References
https://docs.wiznet.io/Product/Open-Source-Hardware/wizfi360-evb-pico
4Set up your Development Environment
4.1 Tools Installation (IDEs, Toolchains, SDKs)
Windows 10 was used during preparation of this guide document. Linux and MacOS user should
use compatible software, hardware-wise there is no difference. Please refer to the guide in
section 4.4 to find instructions for installing toolchain on Linux and MacOS.
1) Install the Toolchain
To build you will need to install extra tools below.
∙ARM GCC compiler

Copyright 2022 WIZnet Co., Ltd. All rights reserved.
∙CMake
∙Build Tools for Visual Studio
∙Python 3.9
∙Git
∙Visual Studio Code
Download the executable installer for each of these from the links above, and then carefully
follow the instructions in the following sections to install all six packages on to your Windows
computer.
①Install ARM GCC compiler
Figure 5. Install ARM GCC compiler
During installation you should check the box to register the path to the ARM compiler as
an environment variable in the Windows shell when prompted to do so.
②Install CMake

Copyright 2022 WIZnet Co., Ltd. All rights reserved.
Figure 6. Install CMake
During the installation add CMake to the system PATH for all users when prompted by
the installer.
③Install Build Tools for Visual Studio
Figure 7. Install Build Tools for Visual Studio
When prompted by the Build Tools for Visual Studio installer you need to install the
C++ build tools only.
④Install Python 3.9

Copyright 2022 WIZnet Co., Ltd. All rights reserved.
During the installation, ensure that it's installed 'for all users' and add Python 3.9 to the
system PATH when prompted by the installer. You should additionally disable the
MAX_PATH length limit when prompted at the end of the Python installation.
Figure 8. Install Python
⑤Install Git
When installing Git you should ensure that you change the default editor away from vim.

Copyright 2022 WIZnet Co., Ltd. All rights reserved.
Figure 9. Install Git
⑥Install Visual Studio Code
During the installation add Visual Studio Code to the system PATH.

Copyright 2022 WIZnet Co., Ltd. All rights reserved.
Figure 10. Install Visual Studio Code
2) Clone the Raspberry Pi Pico SDK and WIZnet example repository using below commands
∙SDK : https://github.com/raspberrypi/pico-sdk
∙Example : https://github.com/Wiznet/WizFi360-EVB-Pico-AWS-C
// create a project directory
D:\>mkdir RP2040
D:\>cd RP2040
// get the SDK
D:\RP2040> git clone -b master https://github.com/raspberrypi/pico-sdk.git
D:\RP2040> cd pico-sdk
D:\RP2040\pico-sdk> git submodule update --init
// get the example
D:\RP2040\pico-sdk> cd ..
D:\RP2040> git clone -b main https://github.com/Wiznet/WizFi360-EVB-Pico-AWS-C.git
D:\RP2040> cd WizFi360-EVB-Pico-AWS-C
D:\RP2040\ WizFi360-EVB-Pico-AWS-C > git submodule update --init

Copyright 2022 WIZnet Co., Ltd. All rights reserved.
Figure 11. Get the SDK and example
3) Set up Visual Studio Code
①Open a new Visual Studio 2019 Developer Command Prompt
②Run the below command to open Visual Studio Code
D:> code
③Opening Visual Studio Code from Developer Command Prompt
④Open Extensions

Copyright 2022 WIZnet Co., Ltd. All rights reserved.
Figure 12. Install Extensions in Visual Studio Code
⑤Install some tools
-CMake Tools
-C/C++
⑥Open CMake Tools Extension Settings
⑦Scroll down and set up some items
-Add Cmake: Configure Environment Item as PICO_SDK_PATH
-Add Cmake: Configure Environment Value as D:\RP2040\pico-sdk
-Add Cmake: Generator as NMake Makefiles

Copyright 2022 WIZnet Co., Ltd. All rights reserved.
Figure 13. CMake Tools Extension Settings in Visual Studio Code
Figure 14. Add CMake Configure Environment path

Copyright 2022 WIZnet Co., Ltd. All rights reserved.
Figure 15. Add CMake Generator name
⑧Add folder WizFi360-EVB-Pico-AWS-C to Visual Studio Code
⑨Visual Studio Code will scan for kits
⑩Select 'Yes' when asked: Would you like to configure project WizFi360-EVB-Pico-
AWS-C?
⑪Select 'Yes' if you like to configure the project upon opening
⑫Click CMake in the bottom bar to select the kit WizFi360-EVB-Pico-AWS-C
⑬Select Debug / Release based on your preference
⑭Visual Studio Code will save all file and configure the project
⑮Click on Build to build all examples, if no error Build will finish with exit code 0
4.2 Other software required to develop and debug applications for the device
Serial terminal program is required for operation check and debugging.
∙Tera Term
You may use your preferred serial terminal program.

Copyright 2022 WIZnet Co., Ltd. All rights reserved.
4.3 Other pre-requisites
None
4.4 Additional Software References
Refer to the '9.2. Building on MS Windows' section of 'Getting started with Raspberry Pi Pico'
document below to set up the development environment.
∙Getting started with Raspberry Pi Pico
And refer to the links below for instructions how to setup environment and proceed with tests.
∙Getting Started with AWS IoT SDK Examples
∙Connect AWS IoT through MQTT
5Set up your hardware
Figure 16. WizFi360-EVB-Pico front

Copyright 2022 WIZnet Co., Ltd. All rights reserved.
Figure 17. WizFi360-EVB-Pico back
Figure 18. WizFi360-EVB-Pico pin-out
WizFi360-EVB-Pico pin-out is directly connected to the GPIO of RP2040 as shown in the
picture above. It has the same pinout as the Raspberry Pi Pico board. However, GPIO4, GPIO5,
GPIO6, GPIO7, GPIO20 are connected to WizFi360 inside the board. These pins enable UART

Copyright 2022 WIZnet Co., Ltd. All rights reserved.
communication with WizFi360 to use Wi-Fi function. If you are using the Wi-Fi function, these
pins cannot be used for any other purpose.
The RP2040 GPIO used inside WizFi360-EVB-Pico is as follows.
I/O
Pin name
Description
O
GPIO4
Connected to RXD1 on WizFi360
I
GPIO5
Connected to TXD1 on WizFi360
O
GPIO6
Connected to RTS1 on WizFi360
I
GPIO7
Connected to CTS1 on WizFi360
O
GPIO20
Connected to RST on WizFi360
I
GPIO24
VBUS sense - high if VBUS is present, else low
O
GPIO25
Connected to user LED
I
GPIO29
Used in ADC mode (ADC3) to measure VSYS/3
Apart from GPIO and ground pins, there are 7 other pins on the main 40-pin interface.
Pin no.
Pin name
Description
PIN40
VBUS
Micro-USB input voltage, connected to micro-USB port pin 1. Nominally
5V.
PIN39
VSYS
Main system input voltage, which can vary in the allowed range 4.3V to
5.5V, and is used by the on-board LDO to generate the 3.3V.
PIN37
3V3_EN
Connects to the on-board LDO enable pin. To disable the 3.3V (which also
de-powers the RP2040 and WizFi360), short this pin low.
PIN36
3V3
Main 3.3V supply to RP2040 and WizFi360, generated by the on-board
LDO.
PIN35
ADC_VREF
ADC power supply (and reference) voltage, and is generated on
WizFi360-EVB-Pico by filtering the 3.3V supply.
PIN33
AGND
Ground reference for GPIO26-29.
PIN30
RUN
RP2040 enable pin, To reset RP2040, short this pin low.
6Setup your AWS account and Permissions
Refer to the instructions at Set up your AWS Account. Follow the steps outlined in these
sections to create your account and a user and get started:
•Sign up for an AWS account and
•Create a user and grant permissions.
•Open the AWS IoT console
Pay special attention to the Notes.
7Create Resources in AWS IoT
Refer to the instructions at Create AWS IoT Resources. Follow the steps outlined in these
sections to provision resources for your device:
•Create an AWS IoT Policy

Copyright 2022 WIZnet Co., Ltd. All rights reserved.
•Create a thing object
Pay special attention to the Notes.
8Provision the Device with credentials
You need to enter the root certificate, client certificate and private key that were downloaded
earlier.
Root certificate uses the RSA 2048 bit key, Amazon Root CA 1, and does not use the public key.
Device certificate and key can be set in 'mqtt_certificate.h' in 'WizFi360-EVB-Pico-AWS-
C/examples/aws_mqtt_demo/' directory.
uint8_t mqtt_root_ca[] =
"-----BEGIN CERTIFICATE-----\r\n"
"...\r\n"
"-----END CERTIFICATE-----\r\n";
uint8_t mqtt_client_cert[] =
"-----BEGIN CERTIFICATE-----\r\n"
"...\r\n"
"-----END CERTIFICATE-----\r\n";
uint8_t mqtt_private_key[] =
"-----BEGIN RSA PRIVATE KEY-----\r\n"
"...\r\n"
"-----END RSA PRIVATE KEY-----\r\n";

Copyright 2022 WIZnet Co., Ltd. All rights reserved.
Figure 19. Set up certificates
9Build the demo
①Click 'build' in the status bar at the bottom of Visual Studio Code or press the 'F7' button
on the keyboard to build.
②When the build is completed, 'aws_mqtt_demo.uf2' is generated in 'WizFi360-EVB-
Pico-AWS-C/build/examples/aws_mqtt_demo/' directory.
10 Run the demo
①While pressing the BOOTSEL button of WizFi360-EVB-Pico power on the board, the
USB mass storage 'RPI-RP2' is automatically mounted.
Table of contents
Other Wiznet Motherboard manuals

Wiznet
Wiznet WizFi250 User manual

Wiznet
Wiznet AX1 User manual

Wiznet
Wiznet WizFi360 Series User manual

Wiznet
Wiznet WIZ610wi User manual

Wiznet
Wiznet W5100E01-AVR User manual

Wiznet
Wiznet WizFi310 User manual

Wiznet
Wiznet W5300E01-ARM User manual

Wiznet
Wiznet WIZ550SR User manual

Wiznet
Wiznet WizFi250 User manual

Wiznet
Wiznet W7200-EVB User manual
Popular Motherboard manuals by other brands

Texas Instruments
Texas Instruments ADS1x20EVM user guide

Freescale Semiconductor
Freescale Semiconductor Babbage 2.5 Startup guide

Asus
Asus A8N32-SLI - Socket 939 NVIDIA nForce SPP 100 ATX AMD Motherboard... user guide

AOpen
AOpen AX4PE Max Easy installation guide

Commell
Commell LV-676 user manual

DFI
DFI SD331-C236 user manual