6
S A F E T Y INSTRUCTIONS AND PRECAUTIONS
Start the ventilation hood approxi-
mat ly fiv minut s b for cooking
on th rang or top surfac burn rs;
this stablish s an air curtain, and
improv s th captur of vapor and
moistur .
Do not cover th burn rs and grat s
with anything xc pt prop rly
s l ct d ut nsils. D corativ cov rs
should not b us d.
Wear proper apparel. N v r l t loos
clothing or oth r flammabl mat ri-
als com in contact with th burn rs
whil in op ration. Fabric may ignit
and caus p rsonal injury.
When using the range, do not touch
th grat s, burn r caps, burn r
bas s or any oth r parts in proximity
to th flam . Th s compon nts
may b hot nough to caus burns.
If the range is near a window, do
not us long curtains as a window
tr atm nt, as th y could blow ov r
th rang and cr at a fir hazard.
Boilovers and greasy spills may
smoke or ignite.
Do not store or use gasoline or
oth r flammabl vapors and liquids
in th vicinity of this or any oth r
applianc .
Choose pans with asily grasp d
handl s that will stay cool whil
cooking. R f r to Cookwar S l c-
tion on pag 43.
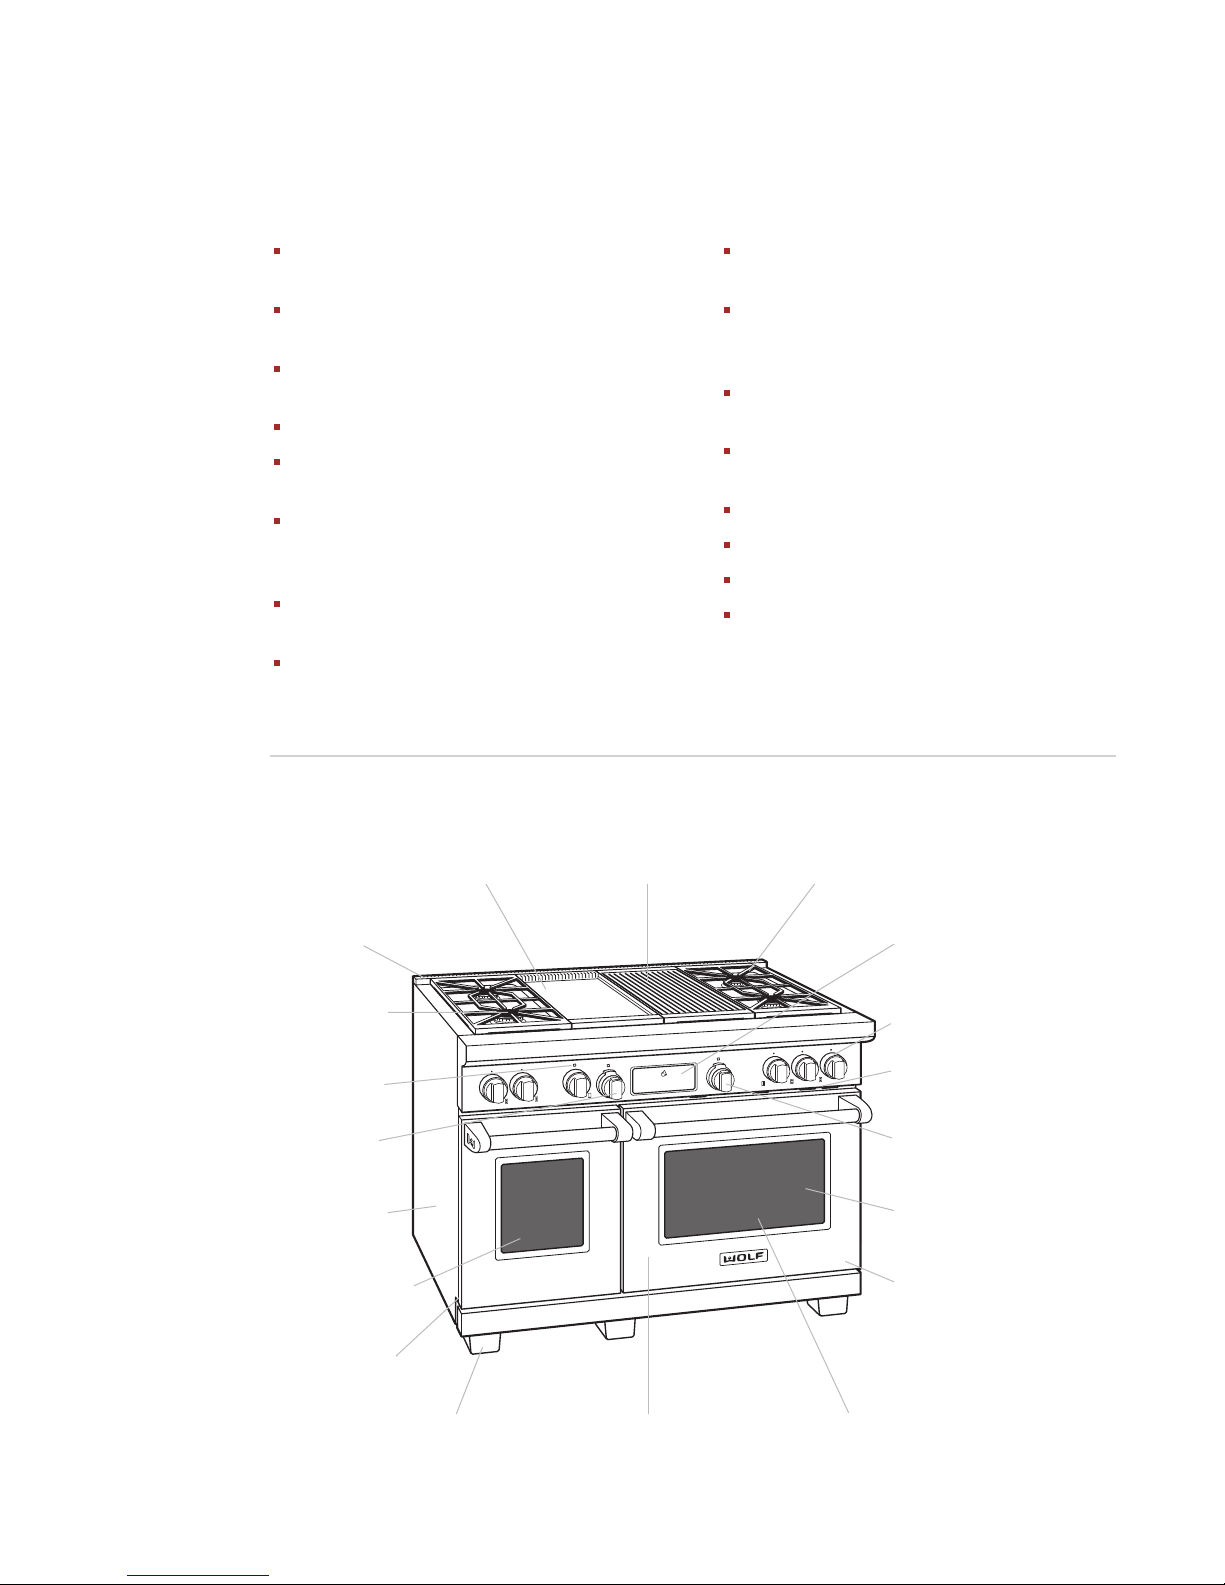
T O P S U R F A C E BURNERS
When deep fat frying, b c rtain that
th pan is larg nough to accom-
modat th d sir d volum of food
without ov rflow caus d by
bubbling of th fat. N v r l av a
d p fat fry r unatt nd d. Avoid
d p fat frying of moist or frost-
cov r d foods, as foods with high
wat r cont nt may caus spatt ring
or spilling of th hot fat. H at fat
slowly, and stir tog th r any combi-
nations of oils and fats prior to
applying h at. Utiliz a d p fat
frying th rmom t r to avoid h ating
th fat to t mp ratur s abov th
flash point.
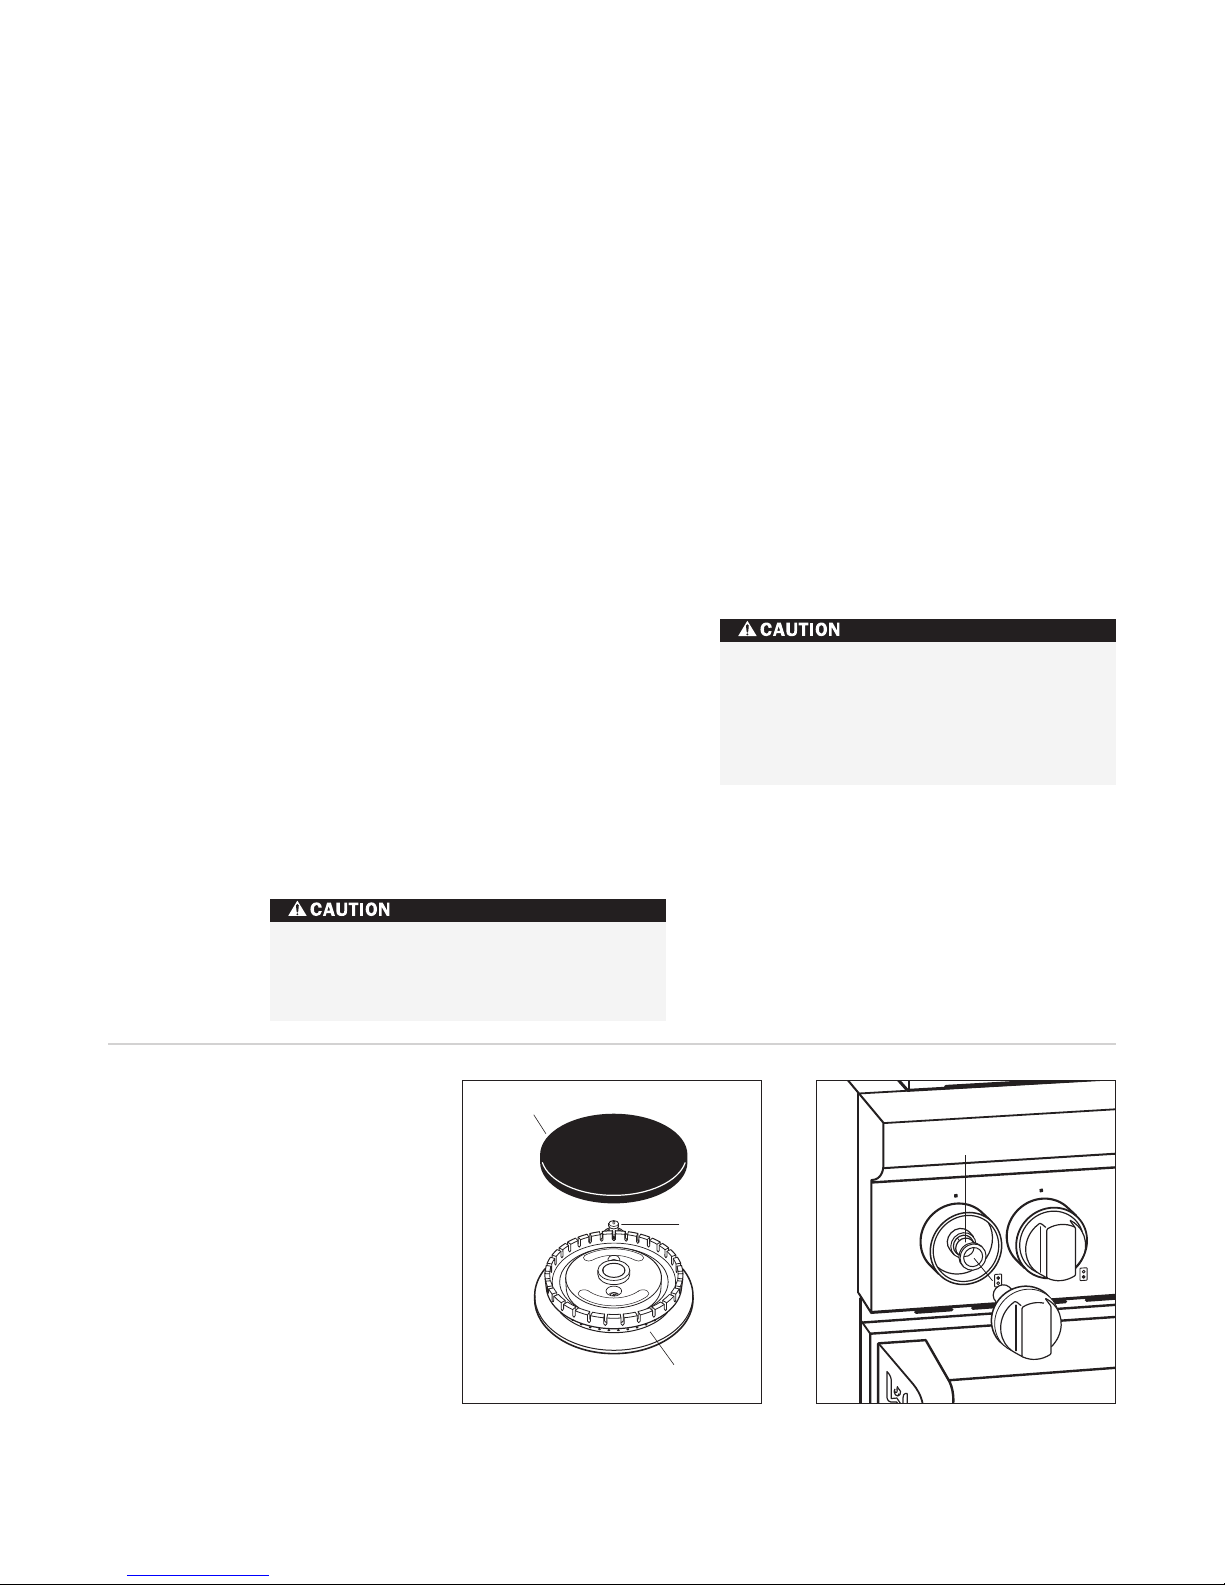
Always light each burner prior to
placing a pan on th burn r grat .
Also, turn th control knob to th
OFF position b for r moving a pan
from th burn r grat .
Do not clean the range whil it is
still hot. If using a damp spong or
cloth, wait until th rang has cool d
suffici ntly to pr v nt st am burns.
Also, som cl an rs can produc
harmful or unpl asant fum s if
appli d to hot surfac s. R f r to
Car R comm ndations on pag s
45–47.
Keep any ventilation filters clean to
avoid gr as fir s.
Always set pans g ntly onto th
grat s and c nt r th m so that th y
ar w ll balanc d.
Do not allow aluminum foil, plastic,
pap r or cloth to com in contact
with a hot burn r or grat . Do not
allow pans to boil dry.