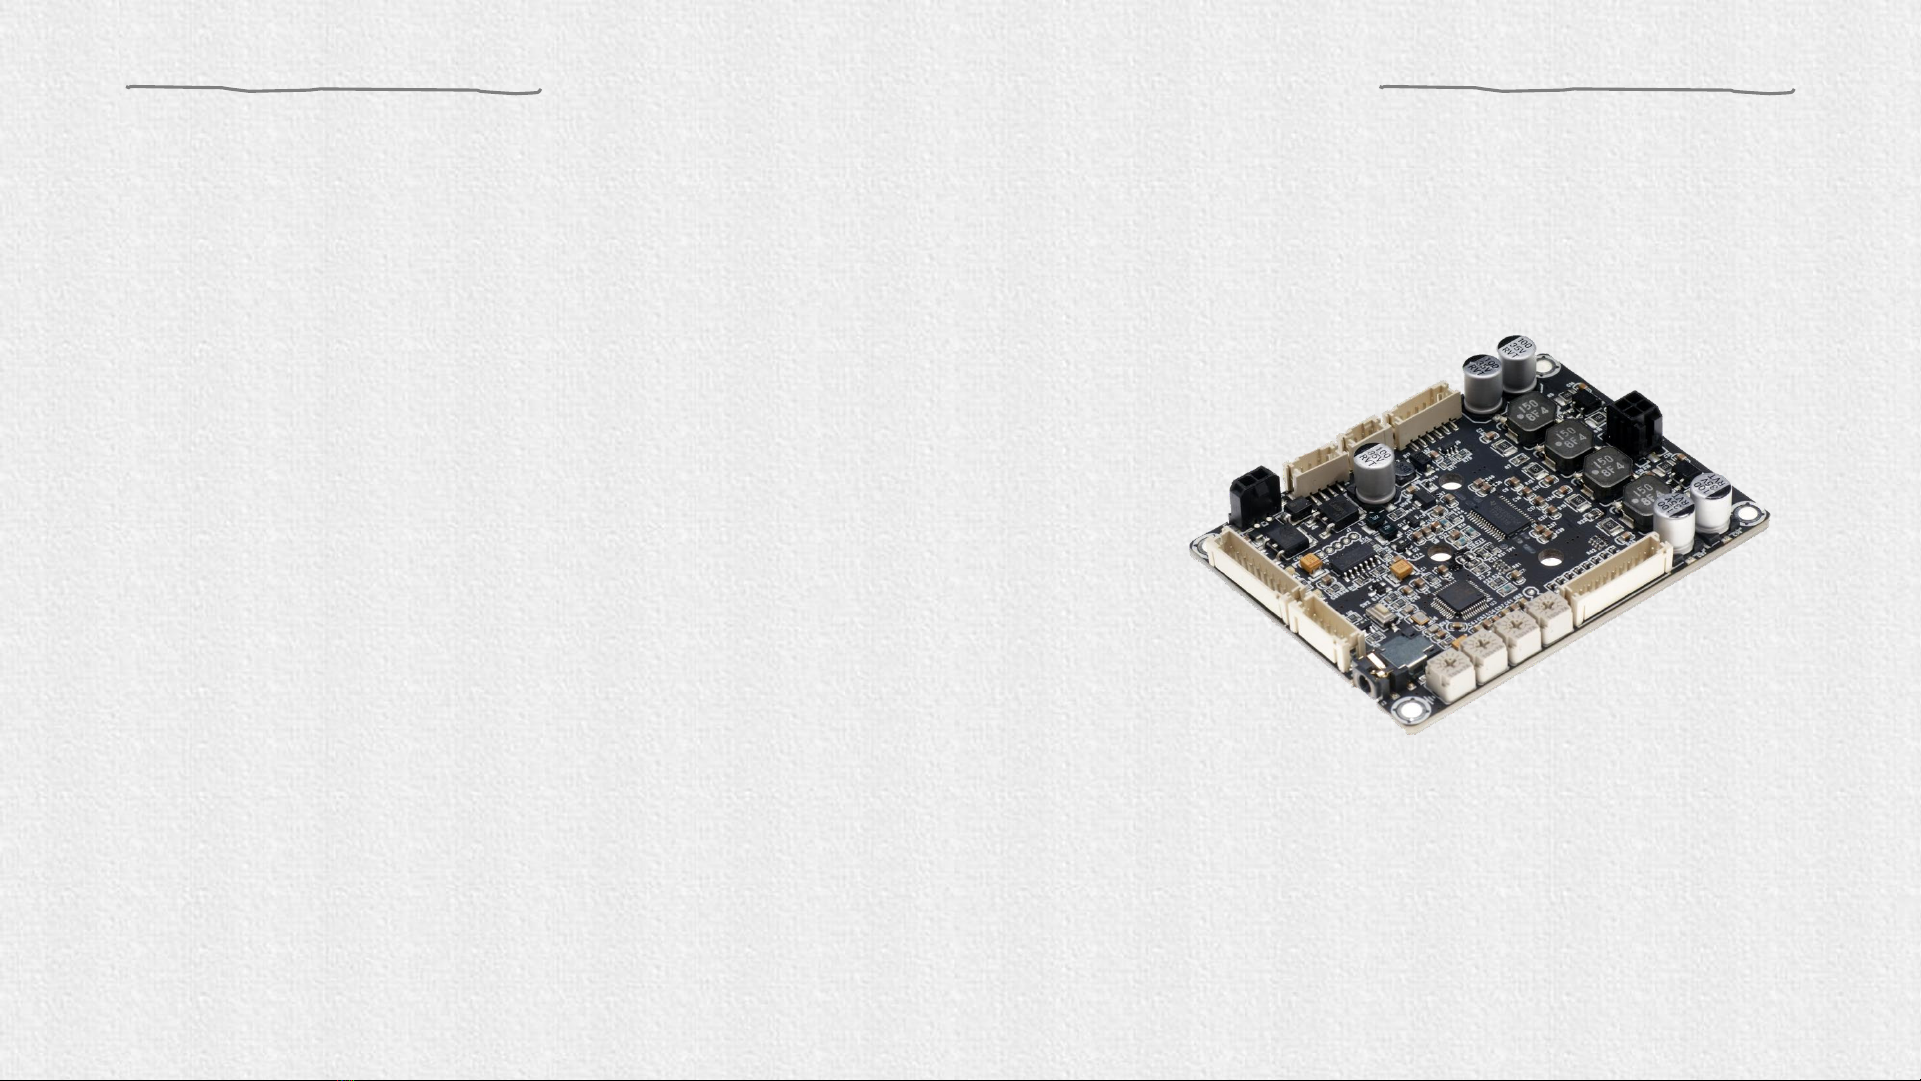
WONDOM ICP1 Setup guide

Function
PRODUCT LIST WITH
DSP INTEGRATED ICP PRODUCTS Software INSTRUCTION VIDEO
Programming with SigmaStudio APM2 + APM3
JAB3 - 160
JAB3 - 1100
JAB3 - 230
JAB3 - 250
ICP1 SigmaStudio How to Program APM2 with WONDOM ICP
How to Program JAB3 with WONDOM ICP
How To Re-Program DSP To Get More Functions
ICP3
How To Reprogram DSP Function of Amplifier Board With DSP
APP Control ICP3 Miumax (APP) How to Realize APP Control with WONDOM ICP How To Use APP To Change DSP Settings Of Your Amplifier?
ICP5
PC UI Control ICP5 Miumax (PC UI) How to Realize PC UI Control with WONDOM ICP Video
Note: The products and documentation in red are processing and will be released soon.
Open Source Files for PROGRAMMING
Products Function File Version Download
APM2 Demonstration of Signal Flow Chart APM2_SigmaStudio.dspproj - Download
JAB3 - Mono Demonstration of Signal Flow Chart JAB3_SigmaStudio_MONO.dspproj - Download
JAB3 - Stereo Demonstration of Signal Flow Chart JAB3_SigmaStudio_STEREO.dspproj - Download
Note: All the "Demonstration of Signal Flow Chart" files are just for signal flow chart demonstration and customers can not u
se them as running programming.
Various Applications Required Products and Instructions

Overview
JAB3 is an audio amplifier board with control interfaces and signal
processing. The application ranges from active louderspeaker
concepts (digital 3 way 3 unit, 2 way 2 unit crossover, bass
enhancement, etc.) and realizes the tansformation from 2.0 to 2.1
(when used with JAB2). With four potentiometers, customers can get
the default function and adjust the master volume, high-pass filter,
low-pass filter and sub-channel (headphone output).
With integrated debug port for Sigima Studio, customers can pre-
program with WONDOM ICP1/ICP3 or the original Analog USBi to get
more functions which includes equalization, crossover, bass
enhancement, multiband dynamics processing, delay compensation,
etc.
Note: In this document, we will use WONDOM ICP3 as the example to show you how to
program JAB3. The operation of WONDOM ICP1 is the same.

In-circuit Programmer For ADAU1701 Digital Signal - ICP1
WONDOM provides our own programming board named In-circuit
Programmer For ADAU1701 Digital Signal - ICP1. It can be
connected directly with JAB3 Board by a 6-pin cable without a
pinboard to achieve programming the DSP integrated in JAB3.
On-board self-boot EEPROM is included in ICP1 for operating the
board independently of the Analog Devices, Inc., SigmaStudio™
software.
The programming package contents include
✓In-circuit Programmer with BLE Bluetooth
for APP control –ICP1
✓A 6-pin cable
This kit cost $19.9.
In-Circuit Programmer –ICP1
In-circuit Programmer For ADAU1701
Digital Signal - ICP1
6 pin cable
Function: Programming

In-circuit Programmer with BLE Bluetooth for APP control - ICP3
WONDOM provides our own programming board named In-circuit
Programmer with BLE Bluetooth for APP control - ICP3. It can be
connected directly to JAB3 Board by a 6-pin cable without a
pinboard to achieve programming the DSP integrated in JAB3.
On-board self-boot EEPROM is included in ICP3 for operating the
board independently of the Analog Devices, Inc., SigmaStudio™
software. With the Bluetooth integrated, customers can realize APP
control of audio system through the ICP3.
The programming package contents include
✓In-circuit Programmer with BLE Bluetooth
for APP control - ICP3
✓A 6-pin cable
This kit cost $24.9.
In-Circuit Programmer –ICP3
In-circuit Programmer
with BLE Bluetooth for APP control - ICP3
6 pin cable
Function: Programming + APP Control

JAB3 Interfaces
3.5mm AUX IN
Port J6
DSP Extension
Port J2
Programming
Port J4
Lithium Battery
Board Port J8
Audio Extension and
Compatible Port J5
POT1
POT4
POT3
POT2
Audio Output
Port J10
Power Supply
Port J9
Switch Control
Port J12
Reset
Switch SW2
3.5mm
Headphone
Output Port J5

PIN Definition
PIN Description
+3.3V Analog Audio Input 0
MP04 Analog Audio Input 1
MP05 I2C Clock
MP01 I2C Data
MP00 Active Low Reset Input
MP07 Serial Input Port Data 2
DATA Serial Input Port Data 3
LRCLK Serial Output Port Data 2
BCLK Serial Output Port Data 3
GND Digital Power Supply Output
J2 DSP Extension Port, including common
I/O port and I2S master mode output

The corresponence between four potentiometers and for pins
on ADAU1701 is shown in the figure.
PIN Definition
Functions of potentiometers based on specific applications
Port
Function
JAB3S
JAB3M
JAB3S+ JAB2
JAB3M+ JAB2
POT1
CH2 Gain
Gain of 3.5mm
Headphone Output
Gain of 3.5mm Headphone
Output
Gain of Stereo of JAB2
POT2
CH2 HPF
High-pass Filter of 3.5mm
Headphone Output
High-pass Filter of 3.5mm
Headphone Output
High-pass Filter of
Stereo of JAB2
High-pass Filter of
Stereo of JAB2
POT3
CH1 HPF or BPF
High-pass Filter of
Speaker Output
Band-pass Filter of Speaker
Output
High-pass Filter of
Speaker Output of JAB3
Band-pass Filter of
Speaker Output of JAB3
POT4
CH1 & CH2
Volume
Volume of Speaker &
3.5mm Headphone Output
Volume of Speaker &
3.5mm Headphone Output
Overall Volume of JAB3
& JAB2
Overall Volume of JAB3
& JAB2
POT1
POT4
POT3
POT2
36
35
34
33
32
31
30
29
28
27
26
25
1
2
3
4
5
6
7
8
9
10
11
12
AVDD
PLL_LF
PVDD
PGND
MCLKI
OSCO
RSVD
MP2
MP3
MP8
MP9
DGND
DVDD
MP7
MP6
MP10
VDRIVE
IOVDD
MP11
ADDR1/CDATA/WB
CLATCH/WP
SDA/COUT
SCL/CCLK
DVDD
AGND
ADC0
ADC_RES
ADC1
RESET
SELFBOOT
ADDR0
MP4
MP5
MP1
MP0
DGND
13 14 15 16 17 18 19 20 21 22 23 24
48 47 46 45 44 43 42 41 40 39 38 37
AVDD
FILTA
VOUT0
VOUT1
VOUT2
VOUT3
AGND
FILTD
CM
PLL_MODE1
PLL_MODE0
AGND
ADAU1701
TOP VIEW
(Not to Scale)
PIN 1
INDICATOR

INSTALLING SIGMASTUDIO SOFTWARE CONNECTING THE AUDIO CABLES
INPUTING AUDIO SIGNAL
13 42
SETTING UP THE ICP3 CONNECTING ICP3 WITH JAB3
POWERING UP THE BOARD
How to programme
5
PROGRAMMING

1.Open the provided zip file and extract the files to your computer. Alternately, insert
the SigmaStudio CD into the PC optical drive and select the SigmaStudio folder.
2.Install Microsoft . NET Framework version 2.0, if it has not been previously installed.
To do so, double-click “dotnetfx.exe”.
3.Double-click “setup.exe” and following the prompts. A computer restart is not
required.
Installing Sigmastudio
software

2. Set the SW of ICP3 at * and connect the ICP3 to
the computer with a USB cable.
1. Compile the needed program in advance.
4. Please notice whether the ICP3 can be recognized by
the computer, if the underpainting of the “USB” turn
green, it represents the ICP3 is recognized, otherwise it
will ture orrange and you should reconnect the ICP3 until
it turn green. See figure 1.
Setting up the ICP3
Figure 1
PROGRAM
REMOTE
Setting of SW
SW
*Note:
Customers can realize program with SigmaStudio or APP control of
audio system with ICP3 because of the integrated Bluetooth. We
provide a switch on ICP3 for customers to switch between program
and remote control mode.
3. Select “USBi” from the list on the left and drag it to
the blank area on the right. Repeat the action to
move “ADAU1701” and “E2Prom” to the right.

01.
Connection
02.
Input
03.
Output
Connecting Audio Cables
1)Use 3.5mm AUX-IN cable for
playing music.
2)Connect the JAB3 with JAB2
throug J5 on JAB3 and J11 on JAB2 for
audio input.
Refer to <Installation Guide for JAB3 & JAB2.pdf>
for details.
1) 3.5mm AUX-IN cable
2) Bluetooth or 3.5mm AUX-IN of JAB2
1) Molex 4-Pin-3mm connector of
JAB3 for audio output (J10)
2) 3.5mm headphone output of
JAB3 (J3)
3) PH-6-Pin-2mm connector to
transmit audio signal to JAB2 (J5)
Molex-4pin-3mm
*Note: Signal level sensor system is employed in JAB3 so JAB3 will enter into standby mode when there is no audio signal. Please feed audio signal to JAB3
when programming it.

Powering up the board
1. Power of JAB3 board:
The JAB3 could be powered by:
1) External 12-24V DC supply through Vin control port (J9)
2) Be powered by 3S18650 Lithium Battery Balance and Protection Extension Board (J8)
3) The two methods could be used at the same time.
➢If the voltage of external power supply > the voltage of battery board, the JAB3
board would be powered by the external power supply;
➢If the voltage of external power supply <the voltage of battery board, the JAB3
board would be powered by the battery board.
2. Power of IC Programmer:
WONDOM ICP3could be powered by:
1) 5V micro USB through micro USB charging port
2) JAB3 board through the 6-pin connection cable
Power up the JAB3 and then connect ICP3 with the JAB3.

Programming and writing
2.Click the “Link Compile Download” (see figure 3) and
you will find “Active:Compiled” in the lower right
corner of your computer.
3. Make sure the SW of ICP3 is at , and right-click the “ADAU1701” and select “Write Latest Compilation to E2PBOM”
to download the program (see figure 4), then you will see a window, choose the “I2C” on the right and click “OK” (see
figure 5).
Figure 4
Figure 5
Figure 3
1.Click the “Link Compile Connect” (see figure 2)
and you will find “Ready:Compiled” in the
lower right corner of your computer.
Figure 2

TROUBLE SHOOTING
TROUBLE
HOW TO SOLVE
Cannot
writing the program into DSP successfully
➢
Make sure the ICP3 be recognized by PC
➢
Make sure the JAB3 is not in the standby mode*
➢
Make sure the SW of ICP3 is at (PROGRAM)
JAB3 cannot
work normally under powering condition when
connected with ICP3
➢
Power on again
➢
Press the SW2 switch on JAB3 at first, then press the RST
(KEY1) switch on ICP3
ICP3
cannot be recognized by PC
➢
Make
sure the Micro USB cable is of good quality and support
data communication
➢
Make sure ICP3 is not connected to controlled device (JAB3)
when connected to PC
APP control failure
➢
The SW on ICP3 is set at (REMOTE)
➢
Relaunch the APP
➢
Do not press the SW2 on JAB3 when using APP control
*Note: Signal level sensor system is employed in JAB3 so JAB3 will enter into standby mode when there is no audio signal. Please feed audio signal to JAB3
when programming it.
Other manuals for ICP1
2
This manual suits for next models
2
Table of contents
Other WONDOM Motherboard manuals