Wood master 1200 User manual

Model 1200 Sander
Operator’s Manual
READ THOROUGHLY BEFORE
OPERATING

1431 NORTH TOPPING AVE. KANSAS CITY, MISSOURI 64120
816-483-0078
Dear Woodmaster Owner,
Thank you for purchasing the Woodmaster Drum Sander. Your new sander
is designed for years of service in your shop - - whether you are a commercial user
or a serious hobbyist, I know you are anxious to get your sander hooked up and
running, but please read this manual completely before you run your machine.
It will help you get to know your sander and will point out the areas that need
special attention.
Throughout the manual you will see the following four symbols. Here’s a
description what each means - -
WARNING: Failure to follow the directions could result in
injury, loss of limb or life.
CAUTION: Failure to follow the directions could result in
temporary or permanent damage to the machinery.
NOTE: This symbol highlights important procedures - -
either in set-up or operation.
SHOP-TIP: We have included some of the hints, tips, and
suggestions that we have learned in our shop, and
other Woodmaster owners.
We’ve included these symbols to draw your attention to important points
that deserve special attention, either for your safety, the continued performance of
your machine, or to enhance the usefulness of your machine.
If you should have problems that the manual does not cover, you can reach
us during regular business hours at 1-800-821-6651.
Again, thank you for your business, and best wishes in all your
woodworking projects.
Sincerely,
John E. Miller
President

INDEX
GENERAL SAFETY INSTRUCTIONS.....................................................................1-2
SAFETY INSTRUCTIONS FOR YOUR WOODMASTER SANDER ...................3-4
POWER SUPPLY ............................................................................................................ 5
REMOVAL OF SANDING DUST AND DEBRIS ........................................................ 5
INSTALLING THE MAIN DRIVE MOTOR ............................................................5-6
ATTACHING THE DRUMHEAD MOTOR SWITCH................................................ 6
OPERATING INSTRUCTIONS .................................................................................7-9
INDEXING YOUR SANDER ................................................................................. 7
SANDPAPER INSTALLATION ............................................................................. 8
VELCRO PAD REPLACEMENT ........................................................................... 9
INSTALLING SANDPAPER ON FEED ROLLERS.........................................9-10
MAINTENANCE......................................................................................................10-13
LUBRICATION..................................................................................................... 10
CLEANING ........................................................................................................... 10
BED ALIGNMENT............................................................................................... 11
JACKPOST AND TIEBAR ADJUSTMENT ........................................................ 12
BEARING ALIGNMENT ..................................................................................... 12
BEARING LOCK COLLARS............................................................................... 13
PARTS LISTING ........................................................................................................... 14
EXPLODED VIEW DRAWING WITH KEY NUMBERS........................................ 15

Page 1
GENERAL SAFETY INSTRUCTIONS
Know your power tool – Read the owner’s manual carefully. Learn the applications and
limitations of your sander as well as the potential hazards this particular tool presents.
Ground all tools – Check the receptacles in your shop. They should all be approved
3-prong grounding type. If they are not, a qualified electrician should install grounded
receptacles throughout your shop. Any tool that has a three-pronged plug should be
connected to a grounded receptacle. Double insulated tools do not require this type plug,
however, only a small proportion of the tools manufactured today are double insulated.
Protect yourself – Use full face shield or approved safety glasses with side shields.
Everyday eyeglasses should not be used as safety glasses. Use dust mask when sanding.
Wear safety approved hearing protectors. Extended exposure to noise from power tools
can damage your hearing.
Never operate power equipment if you are fatigued, taking medication or drinking
alcohol.
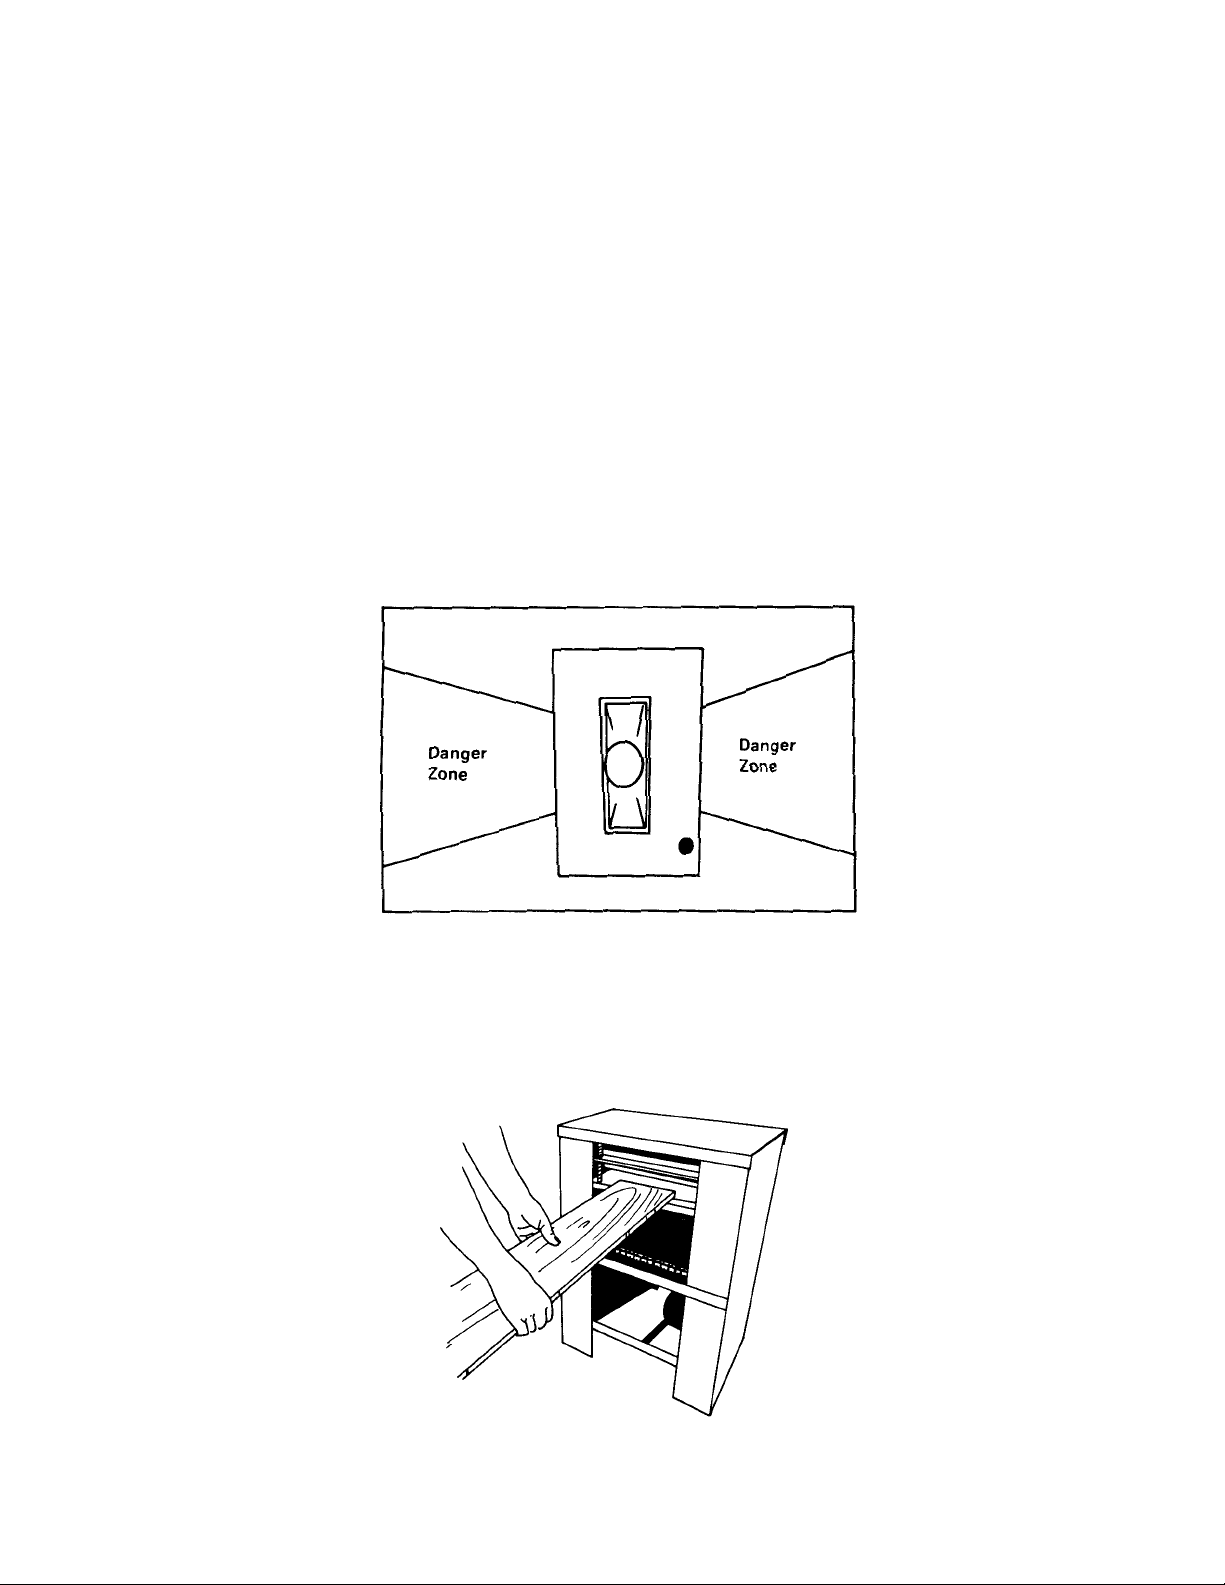
Keep all machine guards in place and in working order.
Remove adjusting keys and wrenches – Any time you attach accessories, change belts
or make adjustments to any tool, make sure that all keys, adjusting wrenches and other
tools are removed from the machine before turning it on.
Keep your shop clean, well lot, and dry. Clutter invites accidents. You can make your
shop time more comfortable with proper lighting – eye strain fatigues your entire
body. Particular attention should be paid to moisture. Using power tools in damp or wet
locations can result in electrocution.
Keep children away – All visitors should be kept at a safe distance from work area and
should wear eye and ear protection.
Maker workshop childproof – Use padlocks, master switches, or any system that
prevents children or other unauthorized persons from starting machinery.
Use the right tool at the recommended rate – Don’t force tools or attachments to do a
job for which they were not designed. Learn the recommended rate of use for each tool.

Page 2
Wear proper apparel –Do not wear loose clothing, gloves, neckties, rings, bracelets,
wrist watches or other jewelry which can get caught in moving parts. Roll your sleeves
above the elbows. Wear comfortable, non-slip shoes. Tie back or net long hair.
Secure work – Use clamps, dogs or a vise to hold work when practical. You’ll have more
control if both hands are free to operate the tool. Keep proper footing and balance at all
times.
Maintain your tools – Safety and quality of work are improved when you keep your
tools clean. Follow lubrication schedules for all tools and accessories.
Disconnect tools – Never rely on the switch when changing or cleaning belts or making
adjustments. Always unplug any machine before servicing or changing belts.
Beware of unintentional start-ups – Check the switch before connecting any machine
to the power source – be sure it is in the “Off” position.
Do not use machines as step stools or ladders – Serious injury could result if the
machine tips over.
Check damaged parts – Repair or replace any part that becomes damaged or worn
before using the tool again. Any time a repair or adjustment is made, check alignment
of all moving parts, breakage of parts, mounting and all conditions that may affect its
operation.
Always turn tool off before leaving it – until tool comes to a complete stop.

Page 3
SAFETY INSTRUCTIONS FOR YOUR WOODMASTER SANDER
1. Always disconnect power supply before removing the cover from your sander or
before making any adjustments.
2. Always replace cover before connecting sander to power supply.
3. Keep hands and fingers at least 12” from the front, rear and sides of your sander while
in operation.
4. Never reach under the cover while sander is in operation.
5. Form a habit of looking for tools, wrenches, rulers, etc., before replacing the cover
and connecting the power supply.
6. Before starting the sander, check its stability --is it resting firmly on the floor?
7. Before starting sander, always check condition of sanding belt.
8. As you face the infeed table of the sander, all controls are on the left. Stand to that
side of the machine while operating – never directly in front of or behind the board
being fed through the machine. You’ll have best control of the workpiece from this
side, and ready access to the switch should a problem develop.
9. Learn the capabilities of your machine (outlined in the specifications) and never
exceed these.
10. Before starting the sander, check to see that there is sufficient clearance on both the
infeed and out feed sides of the machine for the stock to be sanded.
11. Never feed two boards of different thickness at the same time. The thicker board
will raise the spring-loaded feed rollers allowing the thinner board to slip beneath
them without being properly held down. This can cause the thinner board to be
thrown through the machine when it contacts the spinning drum.
12. Never feed boards one after another of different thickness without adjusting the
sander. The feed rollers will not properly hold the thinner board and kick-outs leave
the machine at high speed.
13. Keep stock parallel with the sides of the sander as it is fed through the machine.

Page 4
14. Never attempt to clear dust from the sander while it is running – turn the
machine off, disconnect the power supply and allow the drum to come to a complete
stop before reaching under the infeed or out feed sides of the machine.
15. Support long or heavy stock with roller stands.
16. Carefully check all stock for nails, screws, imbedded bullets, loose knots, or any
other foreign object that may contact the drum. Failure to do this may result in
damage to the drum.
17. While your sander is plugged in --even when it is switched off – it is surrounded by
a Danger Zone. This zone extends away from the infeed and outfeed openings as
shown in Illustration.
Exposure of your hands, fingers and body to the Danger Zone should be kept to an
absolute minimum.
WARNING
Never stand directly in front of or behind the sander while feeding stock. Always
stand to the left of the machine out of the Danger Zone holding the stock by the
edges as shown in Illustration.

Page 5
POWER SUPPLY
Your sander is powered by a 2HP motor which requires a 25 amp, 220 volt circuit. All
wiring should be done by a licensed electrician.
Do not use extension cords for the motor. Line loss from extension cords can cause
poor performance and damage
REMOVAL OF SANDING DUST AND DEBRIS
Woodmaster recommends the use of some form of dust collection system while
operating your sander. Dust poses both a fire hazard and a safety hazard. Piles of dust
can hide power cords, lumber, tools, etc. that might cause you to trip. Also, the fine dust
produced by sanding may cause breathing discomfort and” other respiratory problems.
You will find that your sander operates more efficiently when dust is removed before
it accumulates and “cakes” on the feed rollers.
Even when using a dust collection system, you should provide adequate ventilation
in your shop while operating your sander and wear a dust mask around your mouth and
nose.
SHOP TIP – In certain applications, where an extremely large volume of dust is created,
directing a jet of air from an air compressor at the lower part of the drum on the outfeed
side is helpful. This will create turbulence and kick up the dust before it can cake or
clump and allow it to be drawn upwards into the dust collection system.
INSTALLING THE MAIN DRIVE MOTOR
The motor mount on your sander is designed to maintain optimum alignment and belt
tension once it is installed. Care should be taken to obtain proper alignment. This will
increase belt life and deliver maximum power to the drum.
Loosen the bolts that attach the motor mount rails (these run from front to back of
sander) to the crossbars.
Place the motor on the rails, insert a 5/16” carriage head bolt in each hole on the
motor mount so that the head of the bolt in each hole on the motor mount so that the head
of the bolt is toward the floor and place a flat washer, lock washer and nut on the bolt
Tighten nut finger tight.

Next, attach a belt to the drumhead pulley and position the motor so that the motor
pulley is directly underneath the drumhead pulley.
Once the motor mount rails are positioned so that the pulleys are aligned, square them
to the crossbars using a combination square (see Illustration).
Tighten the bolts that attach the motor mount rails to the crossbars. Now, slide the
motor toward the outfeed side of the sander until the belt will deflect about 1/2” under
light finger pressure. (For smooth performance and longer bearing life, it is better to have
the belt too loose than too tight.) Next, tighten the bolts that attach the motor to the rails.
ATTACHING THE DRUMHEAD MOTOR SWITCH
Make sure that the drumhead motor is unplugged and the switch is in the OFF
position.
Remove the two screws that hold the aluminum faceplate to the front of the switch.
Insert the box from inside the base. Now, from the outside of the base, replace the two
screws (see Illustration).
Page 6

Page 7
OPERATING INSTRUCTIONS
Now that you have assembled your sander, please take a moment to review the safety
instructions outlined in previous sections of this manual.
INDEXING YOUR SANDER
WARNING
Failure to follow this procedure for indexing may result in kickout of the
workpiece.
With the motor off, rest a practice piece of stock on the bed and turn the depth adjustment
crank until the feed rollers just touch the stock. Remove the stock from the machine,
turn the depth adjustment crank 2 1/2 turns clockwise (this procedure sets the depth of
the machine where the stock will feed without kickout, but still below the point where
sanding would occur).
Feed the stock into the machine keeping it parallel with the sides of the sander. Turn
the depth adjustment crank clockwise until the abrasive just contacts the stock (about 4
revolutions).
To make a sanding pass, determine the depth of sanding you want and turn the crank
the appropriate amount. In most cases, 1/4 to 1/2 turn of the crank will be sufficient.
SHOP TIP – You will achieve a better surface by making several passes at the same
setting instead of turning the crank between each pass.
SHOP TIP –If you are working with stock of varying thicknesses, work the thicker
boards down to the thinner ones before running all boards at a single setting.
SHOP TIP –You may find that a hardwood or formica insert bolted to the steel bed
will improve feeding with certain types of stock.

Page 8
SANDPAPER INSTALLATION
(Size = 3” x 55”)
Your Woodmaster sander uses an exclusive “Velcro-Mount” system. This
revolutionary system eliminates need for adhesives, take-up springs or wedge locks.
This same system also prevents stretching, creasing and buckling, so common with other
sanders.
To install the paper, make a diagonal cut 10 5/8” in length from one side of the strip to
the other. Start the sandpaper at the left side of the drum (facing infeed) with the freshly
cut diagonal edge to the left. Spiral the paper onto the drum and butt the edges flush with
each other. Do not overlap. Do not worry if a small space appears (1/16” or less) between
the edges. This will not affect sanding performance.
At the opposite end, trim paper to the edge of the head.
Wrap 1 1/2 turns of narrow (1/2” or 1/4”) filament tape at one end. (Leading end)
SHOP TIP – Use the sanding paper which was originally on the drum to make a
template for future use.

Page 9
VELCRO PAD REPLACEMENT
In the unlikely event that the velcro pad affixed to the sanding drum should become worn
or torn, follow this procedure for replacement.
1. Remove the old pad and clean the head.
2. Wrap the sheet of self-adhesive velcro around the head to form a tube with the
longer ends overlapping.
3. Cut through the overlapped portion from left to right across the drum and peel off
the portion which was overlapped.
NOTE: Depending on availability from our supplier, most velcro pads come to us with a
peel-off, self-adhesive
If the Velcro you receive does not have this backing, use a good quality contact cement to
affix the pad.
ALSO: Depending on availability from our supplier, our velcro sometimes comes to us
in 4” wide, self-adhesive rolls. In this case, simply spiral the velcro onto the drum in the
same way that sandpaper is applied.
INSTALLATION OF SANDPAPER ON FEED ROLLERS
Because fine sanding dust can cause feed roller slippage, your sander comes to you with
its rollers wrapped with self-adhesive sandpaper to increase traction. Since this paper
serves only to improve feeding ·and does not sand, it should last for several thousand
board feet.
If this paper should need replacement, simply peel off the worn paper and spiral
new paper onto the rollers. A 2” X 34” strip is equipped. To provide working room, you
should first lower the bed to its full open position. 1-1/2 turns of filament tape should be
applied at the ends.
Additional self-adhesive paper is available from Woodmaster in 3” Width. Call for
pricing.

Page 10
SHOP TIP – To help you get maximum performance from your sander, here are
the proper steps in drum sanding as defined by the technical department of the 3M
Company.
Drum sanding can be divided into three steps:
1. Primary Sanding
2. Secondary Sanding
3. Finish Sanding
The purpose of primary sanding is to develop a flat surface with little concern for
the sanded finish.
Secondary sanding should be done with just enough depth of cut to remove primary
scratches.
In finish sanding, the flatness of surface and the sanded finish should be such that
stock removal of only a few thousandths of an inch will complete the sanding.
MAINTENANCE
With proper care and maintenance, your Woodmaster sander should last for many
years. This chapter of your manual will cover preventative maintenance as well as repair
of common problems that you may encounter.
LUBRICATION
The table jackpost screws should be cleaned and lubricated every 8 machine hours.
lubricant such as WD-40, or a powdered graphite may be used for this application.
The bushings which support the feed rollers (commonly referred to as “Oilite”
bushings) are impregnated with a light machine oil. Under daily use, you may want to
apply a few drops of machine oil to the junction between the feed roll shafts and the
bushings on a weekly basis. Under infrequent use, this may be reduced to a monthly
application.
The drumhead bearings are permanently lubricated and sealed for life, as are the
motor bearings.
CLEANING
Clean the dust from the machine each time it is used. This ~ay be done with a shop
vacuum or an air compressor.
When you first receive your sander, you should wax the bed with a furniture paste
wax (do not use automotive wax). This will form a good protective coating and will
reduce Friction. Repeat the waxing every week for about 6 weeks.

Page 11
BED ALIGNMENT
The bed to drumhead relationship is one of the most critical adjustments on your
sander. If the bed and drum are not perfectly parallel, your finished stock will be thinner
on one side than the other. This adjustment should not be necessary very often. However,
the check to see if it is necessary is quite simple and should be conducted periodically.
To check bed alignment, place a small piece of scrap stock beneath the drum. The
piece should be short enough so that it does not touch the feed rollers. With the scrap
stock on the extreme left of the drum, raise the bed until the drum just contacts the stock.
Now move the scrap from left to right across the bed. If the stock binds at the right side
of the drum, the bed is too high on that side. If the stock does not touch the drum at the
right, the bed is too low.
Once you have determined that the bed needs adjustment, remove the master
link from the bed elevation chain and carefully take the chain off each sprocket (see
Illustration).
If the right side of the bed is higher than the left, turn both sprockets on the right side
counter-clockwise by the same amount.
NOTE: It is rare for the bed to be out by any more than 1/32”. Therefore, you will
probably never have to turn the sprockets more than one quarter to one half a turn.
Be sure that you turn both sprockets by the same amount (to make sure, it is useful to
mark the original position with a marking pen or small piece of tape).
Next, without attaching the chain, move the scrap stock left to right under the drum
to check alignment. Once you have the bed aligned, carefully replace the chain on the
sprockets and install the master link.

Page 12
JACKPOST AND TIEBAR ADJUSTMENT
The tiebars (see exploded view) perform three functions on your sander. First, they
hold the sides in position; second, they serve as the upper pivot for the jackposts; third,
they provide support for the sander bed by holding the jackposts firmly against the base
of the sander.
You should check the tiebar adjustment periodically by grabbing the front edge of the
sander bed and trying to raise it. If there is up and down play in the bed, the following
procedure will remedy the situation and increase the accuracy of your sander.
Loosen the carriage bolts that hold the tiebars in place. Next, push straight down in
the center of the tiebar while re-tightening the bolts (an extra pair of hands is welcome in
the shop for this procedure). Repeat the procedure on the other tiebar.
BEARING ALIGNMENT
The sanding drum bearings are permanently lubricated and sealed. In the unlikely event
that a bearing becomes “bound” it can cause excess vibration and wear on the shaft.
To correct this problem, loosen the set screws in the bearing lock collars and rotate the
collar against the direction of rotation of the drum. If they do not turn freely with light
pressure from the allen wrench, tap lightly with a center punch in the dimple. One quarter
turn should release the collar. After both collars are released, position them about 1/2”
away from the bearings and retighten the setscrews.
Replace the hood and connect the power supply. Turn the machine on for about 10
seconds. Disconnect the power supply and remove the hood. Loosen the lock collars from
the shaft and re-install them on the bearings by turning them in the same direction as the
rotation of the drumhead and retightening the allen screws.

Page 13
BEARING LOCK COLLARS
CAUTION
Lock collars must be installed on the drumhead shaft and bearings before running the
sander.
The two black lock collars located just outside the bearings on both sides of the
machine prevent the drumhead from moving side to side. These collars lock onto the
bearings by means of an internally cut cam and the setscrew locks the collar to the shaft.
(See Illustration).
The cam will lock onto the bearing when turned in either direction. However, you
should always tighten the collar by turning it in the same direction as the drumhead
rotation. If tightened against drumhead rotation, the collar will further tighten itself as
the drum spins. This makes the collar very difficult to remove.

Page 14
1 RZ-81 5/16-18 Hex Nut 10
3 WS08 Hood Center 1
4 RZ-52 Name Plate Tag 1
5 RB-66 V Belt Roller Drive 1
6 RB-83 Top Bar 2
7 RZ-83 1/4-20x1/4 Soc Set Screw 16
8 RB-91 Feed Roller Pulley 2
9 RZ-179 5/16-18x3/4 Carriage Bolt 4
10 WS-25 1/4-20 Insert Knob 2
12 RB-352A Feed Roller 2
13 RS-57 Feed Roller Bearing 4
14 WS09 Hood Access Cover 1
15 03Z Base Top 1
16 WS-13 Skirt RH 1
17 WS-01 Skirt LH 1
18 WS07 Sanding Head 1
19 RBZ-205 5/16-18x3/4 Full Thread 4
20 RS-19 Feed Roll Spring 4
21 RB-58 Flangettes 4
22 RB-56 Sander Head Drive Pulley 1
23 RB-93 Sander Head Pulley Key 1
24 RB-59 1” Bearing With Collar 2
26 WS-17 Side 2
28 RBZ-207 1/4” Split Lock Washer 44
29 RBZ-208 1/4-20 Hex Nut 44
30 WS04A Table 1
31 RB-78 Corner Screw 3
32 RZ-178 5/16 Split Lock Washer 2
34 RB-99 1/4-20x! Carriage Bolt 2
36 WS-19 Cross Bracket 2
37 WM-01 2-1/4” Motor Pulley 1
38 RB-52 Motor with Key 1
40 RB-45 Chain Tightening Bracket 1
43 RBZ-202 3/8-16x1 Hex Bolt 1
52 R-549 5/8” Machine Bushing 4
53 RZ-59 1/4x1-1/8 Roll Pin 5
54 RS-4 S-4 Corner Sprocket 4
55 RB-79 Crank Screw 1
56 RB-84 Crank Assembly 1
57 WS-11 Drive Wheel Shaft 2
58 RB-153 V Pulley 2
59 WS-18 Reinforcement Plate 1
63 RB-63 Idler Spring 1
65 WS-12 Idler Bracket 1
67 RB-62 2” Idler Pulley 1
79 WS-15 1260 26” V Belt 1
80 R-368 Bronze Flanged Brg 5/8 ID 4
81 WS-14 1350 35” Sanding Head
V Belt 1
82 RZ-58 3/8-16 Hex Nut 1
84 WS-18 Motor Mount Brackets 2
85 WS-16 Skirt Brace 2
89 WS-10 Drive Guard 2
90 WS-20 Drive Guard (Right) 1
91 WS-21 Dust Chute (optional) 1
92 WS-22 Infeed Baffle 1
93 WS-23 Outfeed Baffle 1
94 WS-24 Rubber Strip 2
150 RB-150 5/16 Washers 2
178 RZ-178 5/16 Split Lock Washers 10
181 RZ-181 5/16-18x1 Hex Bolt 10

Page 15


www.woodmastertools.com
1/11
Table of contents
Popular Sander manuals by other brands

MK
MK MK-1503 Owner's manual & operating instructions

Bosch
Bosch GEX33-5 Operating/safety instructions

Delta
Delta 31-120 instruction manual

Scheppach
Scheppach DS200 Translation of original instruction manual

Bosch
Bosch GSS 140-1 A Professional Original instructions

WolfPack
WolfPack KPSA0237 instruction manual