manuals.online logo
Brands
  1. Home
  2. •
  3. Brands
  4. •
  5. Worcester
  6. •
  7. Boiler
  8. •
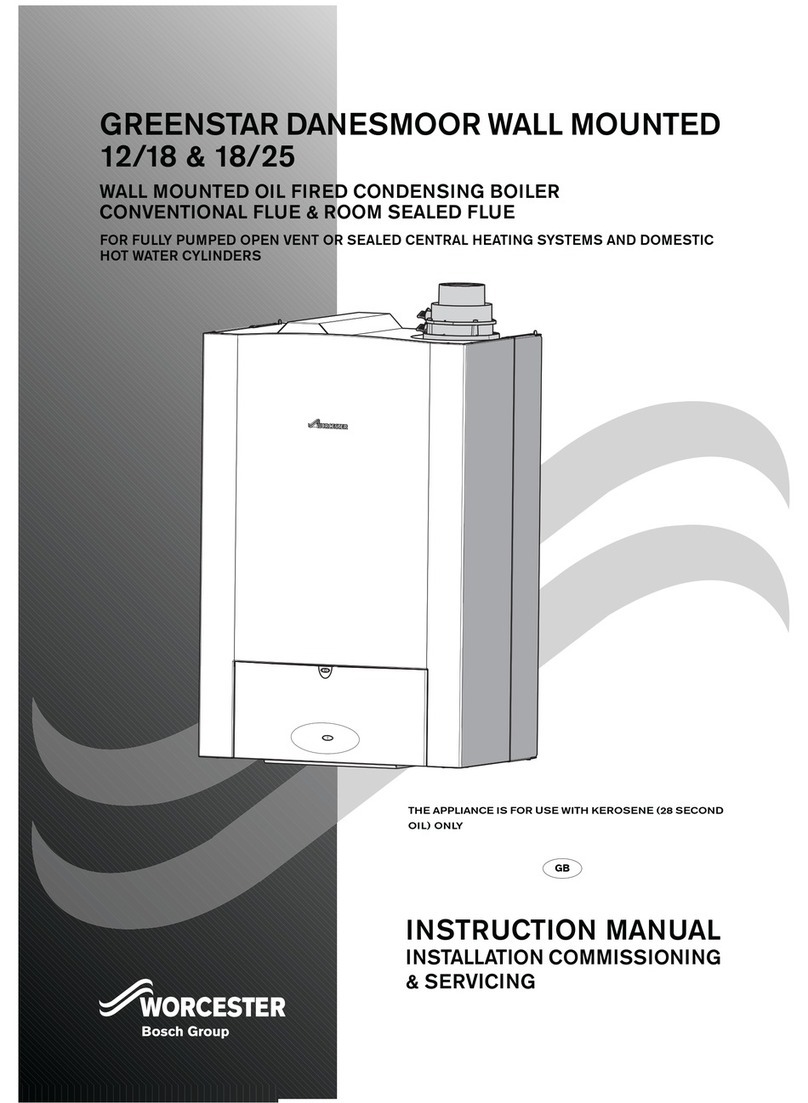
  9. Worcester DANESMOOR User guide

Worcester DANESMOOR User guide

DANESMOOR
SYSTEM BOILER
CONVENTIONAL FLUE AND ROOM SEALED BF
FLOOR STANDING OIL-FIRED PRESSURE JET APPLIANCES
INSTALLATION AND
SERVICING INSTRUCTIONS
BOILER OUTPUT
Hot Water and Central Heating
12/14 MINIMUM 12 kW (41,000 Btu/h)
MAXIMUM 14 kW (48,000 Btu/h)
15/19 MINIMUM 15 kW (51,000 Btu/h)
MAXIMUM 19 kW (65,000 Btu/h)
20/25 MINIMUM 20 kW (68,000 Btu/h)
MAXIMUM 25 kW (85,000 Btu/h)
THESE I STRUCTIO S APPLY TO UK MODELS O LY
THESE I STRUCTIO S ARE TO BE LEFT WITH THE APPLIA CE
1 1 General installation information and advice may be obtained
from the Oil Firing Technical Association for the Petroleum
Industry (OFTEC). Training courses are also offered by OFTEC,
leading to inclusion on their list of registered engineers.
1 2 The appliance should be installed by a competent person. The
person installing the appliance should be aware of the Health and
Safety at Work Act and take appropriate action to ensure that the
regulations are adhered to. In order to give optimum efficiency
and trouble free operation the appliance should be commissioned
by a qualified engineer. OFTEC recommends the use of registered
engineers for the commissioning of oil-fired burners.
1 3 The manufacturers notes must not be taken, in any way, as
overriding statutory obligations.
1 4 The compliance with a British Standard does not, of itself,
confer immunity from legal obligations. In particular the installa-
tion of this appliance must be in accordance with the relevant
requirements of the following British Standards and regulations in
respect of the safe installation of equipment.
BS 5410: part 1& 2: Code of practice for Oil Fired Boilers.
BS 799: part 5: Specification for Oil Storage Tanks
BS 7593: Code of practice for treatment of water in domestic hot
water central heating systems.
BS 5449: part 1: Specification for forced circulation hot water
central heating for domestic premises.
BS 5955: part 8: Specification for the installation of
thermoplastic pipes and associated fittings for use in domestic
hot and cold water services and heating systems.
BS 7291: Thermoplastic pipes and associated fittings for hot and
cold water for domestic purposes and heating installations in
buildings.
BS 7074: part 1: Application, selection and installation of expan-
sion vessels and ancillary equipment for sealed water systems.
BS 7671: IEE Wiring Regulations current edition.
The Building Regulations Part J and L1 England and Wales; Part F
Section III and Part J Scotland; Part L and Part F orthern Ireland.
Local water company bye-laws.
The Control of Pollution (Oil) Regulations.
1 5 To ensure that the installation will perform to the highest
standards, the system and components should conform to those
mentioned in the instructions.
The Benchmark initiative is the new code of practice
to encourage the correct installation, commissioning and
servicing of domestic central heating boilers and system
equipment.
The 'Log-book' is a vital document that must be completed
by the installer at the time of installation It confirms that the
boiler has been installed and commissioned according to the
manufacturers instructions
Without the completion of the Log-book, manufacturers may refuse
to respond to a call-out from a householder, who will be advised
that he or she must call back the installer, who has not fulfilled his
obligations to record the information required by the initiative.
It is important that:
The services and the system are properly flushed as specified.
The User is clearly instructed on the correct operation of the
appliance.
The benefits of regular servicing are explained - to maintain the
efficiency and extend the life of the appliance.
2 1 These instructions cover both conventional flue (CF)/low-level
discharge (LLD) and room sealed balanced flue (RS) appliances.
2 2 The Worcester Danesmoor range of appliances covered in
these instructions have been designed to serve domestic central
heating and hot water requirements ranging from 12 kW to 25 kW.
2 3 The RS balanced flue appliance forms a fully room sealed
system by surrounding the burner with a unique,fully sealed,
push fit box. This causes the combustion air to be drawn
through a factory sealed air duct formed at the rear and under-
side of the boiler. The sealed burner cover gives excellent
acoustic noise reduction and alleviates the need for an air brick
to be located in the boiler room.
Because the balanced flue system does not rely on the cabinet
panels to form the room seal, combustion readings can be taken
from the flue outlet plate as on a conventional appliance, and the
cabinet panels can be easily removed during installation thereby
preventing any damage.
2 4 The boiler is factory set to the mid range output and can be
altered, if necessary, by adjusting the burner as specified in Tables
2 to 4. The low level discharge and room sealed models are only
suitable for use with 28 second Kerosene heating oil.
NOTE: It is a mandatory requirement of the building
regulations that only 28 second kerosene is used on low level
discharge flues
2 5 The conventional flue 15-19 and 20-25 models may be
converted to burn 35 second gas oil by changing the nozzle and
burner settings as specified in Tables 3 and 4.
2 6 A colour coordinated twin channel programmer can be fitted
to the appliance facia panel. This is available from Worcester Heat
Systems as an optional extra.
2 7 Principle appliance components See Figs 2 and 3
Oil Fired Burner
A fully automatic oil fired pressure jet burner is used to supply
heat to the boiler. The burner can be set to the output require-
ments as detailed in Tables 2 to 4.
Pump
An integral circulating pump is incorporated within the appliance
casing. The pump speed may be altered to suit the heating load by
2. General Information
1. Installation Regulations
2
1 Installation Regulations Page 2
2 General Information Page 2
3 Technical Data Page 3
4 Siting the Appliance Page 5
5 Removal of the Cabinet Page 5
6 Air Supply Page 5
7 Flue System Page 8
8 Oil Supply Page 11
9 Heating and Hot Water System Page 13
10 Electrical Page 15
11 Installation Page 19
12 Commissioning Page 20
13 Instructions to the User Page 23
14 Routine Cleaning and Inspection Page 23
15 Fault Finding Page 25
16 Short Parts List Page 26
Contents
3
3. Technical Data
re-setting the speed control knob. This is located on the pump
electrical connection block. Three pump speeds are available,
number 1 being the lowest.
Expansion Vessel
A 10 litre expansion vessel is included within the appliance
cabinet.
Pressure Gauge
A 4 bar pressure gauge is included to allow the system pressure
to be checked and set to the correct level.
Pressure Relief Valve
A 3 bar relief valve is fitted to protect the appliance during
dangerous over-pressure conditions.
Manual Reset Thermostat
An overheat thermostat is located on the underside of the
electrical control box and is accessible by removing the cabinet
front panel.
If a boiler overheat condition arises, the burner will remain
inoperative until the thermostat button is reset.
2 8 Operation
The appliance is supplied with a facia mounted operating switch
to allow the selection of hot water only in the upper position or
central heating and hot water in the lower position.
Domestic Hot Water Mode
The appliance primary hot water is used to heat a domestic hot
water cylinder. The water may be transported to the cylinder by
natural gravity circulation or by a fully pumped method. Control
of the system will depend on which method is used and reference
should be made to the control system manufacturers instructions.
Off
The heating system will remain off unless there is a demand via
the frost thermostat ( where fitted ) whereby the frost thermostat
will activate the pump and burner until the demand is satisfied.
The burner will remain inoperative in all other circumstances.
Central Heating and Hot Water Mode
The appliance will supply heat to the central heating system as
required. The water supplied to the central heating circuit can be
set to the desired temperature by adjusting the heating control
thermostat located on the facia panel.
SPECIFICATIONS
Model 12/14 15/19 20/25
POWER SUPPLY 230V 50 Hz 230V 50 Hz 230V 50 Hz
IP RATI G IP 20 IP20 IP 20
HEATI G FLOW 22mm 22mm 22mm
HEATI G RETUR 1 in. BSP 1 in. BSP 1 in. BSP
FUEL LI E 10 mm Compression 10 mm Compression 10 mm Compression
FLUE REQUIREME T CF 100 mm (4 in.) 100 mm (4 in.) 100 mm (4 in.)
RS Balanced Flue Kit (Sec. 7.3) Balanced Flue Kit (Sec. 7.3) Balanced Flue Kit (Sec. 7.3)
HEARTH TEMPERATURE Below 100°C Below 100°C Below 100°C
MAXIMUM STATIC HEAD 30 m (98 ft.) 30 m (98 ft.) 30 m (98 ft.)
PRIMARY WATER CAPACITY 20 litres (4.4 gal.) 20 litres (4.4 gal.) 23.5 litres (5.2 gal.)
WEIGHT CF 102Kg (224 lbs.) 105Kg (231 lbs.) 116Kg (255 lbs)
RS 106Kg (234 lbs.) 109Kg (240 lbs.) 121Kg (267 lbs)
HEIGHT 855 mm (33.7 in.) 855 mm (33.7 in.) 855 mm (33.7 in.)
WIDTH 370 mm (14.6 in.) 370 mm (14.6 in.) 370 mm (14.6 in.)
DEPTH 600 mm (23.6 in.) 600 mm (23.6 in.) 600 mm (23.6 in.)
BUR ER Electro Oil Inter B9 A Electro Oil Inter B9 B Electro Oil Inter B11C
WATER SIDE RESISTA CE 10°C Difference 7 mbar 8 mbar 18 mbar
WATER SIDE RESISTA CE 20°C Difference 3 mbar 6 mbar 12 mbar
EXIT FLUE GAS MASS FLOW 24Kg/hr 35Kg/hr 43Kg/hr
SEDBUK RATI G* ( SEDBUK BA D C ) 85.3% 85.5% 85.3%
CO TROL THERMOSTAT RA GE 55°C minimum Cut In to 82°C maximum Cut Out
CO TROL THERMOSTAT DIFFERE TIAL 5°C
HIGH LIMIT THERMOSTAT BREAK POI T 100 + 0/–6°C
MA UAL RESET THERMOSTAT BREAK POI T 110 +0/–6°C
Table 1
* The value is used in the UK Government Standard Assesment Procedure (SAP) for energy ratings for dwellings.
4
* NOTE: For use on conventional flue only.
** NOTE: The flue gas temperature is measured in the gas sampling hole on the flue outlet plate. The probe should be inserted to a depth of 50mm and angled towards the flue outlet.
The temperature measured is not an absolute flue gas temperature and is for general guidance purposes only!
NOTE: The pump pressure given is for general guidance only as variations in nozzle output can be up to ± 15%. It is, therefore, essential that the air is adjusted to give the correct CO2value.
NOTE: The nozzle type used on 28 Sec. Kerosene outputs are nozzles calibrated specifically for use with 28 Sec. Kerosene which gives less variation in nozzle output than the standard 35
Sec. Gas Oil nozzles. However, if a 28 Sec. Kerosene nozzle is not available at servicing or commissioning it is appropriate to install a 35 Sec. Gas Oil nozzle providing the output, spray
angle and pattern of the nozzle is the same as the 28 Sec. Kerosene nozzle (e.g. 0.75 80°EH may be replaced with a 0.75.80°H).
28 Sec. Kerosene 0.40 60°ES 130 1.11 1.41 180 10.0 6.0 13.5 46,000 12 41,000
28 Sec. Kerosene 0.50 60°ES 100 1.30 1.64 195 11.5 7.0 15.5 53,000 14 48,000
NOMINAL BOILER RATING AT NORMAL OPERATING TEMPERATURE
12/14 Table 2 Electro Oil Inter B9A Burner (See Fig. 21)
Fuel Nozzle
Pump
Pressure
(p s i )
Fuel Flow
Rate Flue Gas
Temp
(°C)** %CO2
Approx
Air
Setting
Appliance
Input
kW Btu/hr kW Btu/hr
Output
Kg/h l/h
28 Sec. Kerosene 0.50 60°ES 110 1.40 1.77 215 10.5 8.5 17 58,000 15 51,000
28 Sec. Kerosene 0.55 80°EH 115 1.59 2.01 225 10.5 8.75 19 65,000 17 58,000
28 Sec. Kerosene 0.60 60°ES 105 1.78 2.25 235 11.5 9.0 21.5 73,000 19 65,000
35 Sec. Gas Oil* 0.50 80°S 155 1.80 2.12 235 11.5 9.0 21.5 73,000 19 65,000
NOMINAL BOILER RATING AT NORMAL OPERATING TEMPERATURE
15/19 Table 3 Electro Oil Inter B9B Burner (See Fig. 22)
Fuel Nozzle
Pump
Pressure
(p s i )
Fuel Flow
Rate Flue Gas
Temp
(°C)** %CO2
Approx
Air
Setting
Appliance
Input
kW Btu/hr kW Btu/hr
Output
Kg/h l/h
28 Sec. Kerosene 0.60 80°EH 130 1.87 2.37 190 11.0-11.5 5.5 22.5 77,000 20 68,000
28 Sec. Kerosene 0.75 80°EH 105 2.10 2.66 205 11.5-12.0 6.0 25 86,000 22.5 77,000
28 Sec. Kerosene 0.75 80°EH 130 2.34 2.96 220 12.0-12.5 6.5 28 96,000 25 85,000
35 Sec. Gas Oil* 0.60 80°S 120 2.13 2.51 205 11.5-12.0 6.0 25 86,000 22.5 77,000
35 Sec. Gas Oil* 0.60 80°S 150 2.37 2.79 220 12.0-12.5 6.5 28 96,000 25 85,000
NOMINAL BOILER RATING AT NORMAL OPERATING TEMPERATURE
20/25 Table 4 Electro Oil Inter B11C Burner (See Fig. 23)
Fuel Nozzle
Pump
Pressure
(p s i )
Fuel Flow
Rate Flue Gas
Temp
(°C)** %CO2
Approx
Air
Setting
Appliance
Input
kW Btu/hr kW Btu/hr
Output
Kg/h l/h
Fig. 1. Cabinet and Pipe ork Dimensions
1
2
4
3
2
816 mm
814 mm
780 mm
110 mm
600 mm
41
370 mm
855 mm
1. Central heating flow (22mm compression). 2. Central heating return (1" BSP).
3. Gravity feed flow/optional air vent point (1" BSP). 4. Pressure relief discharge pipe (15mm compression).
92mm Flue Center
4 1 The appliance is not suitable for external installation unless
a suitable enclosure is provided.
4 2 The appliance should be positioned on a non-combustible
solid base as near to the flue location point as possible. Care
should be taken to ensure that the appliance is level; use
packing at the corners where necessary.
4 3 When fitting a LLD or RS model, the rear of the appliance
must be positioned against an external wall such that the flue
terminal can safely discharge the flue gases as described in
Section 7.
4 4 The following clearances must be left to allow access for
installation and servicing:
(a) Above - 300mm
(b) In front - 600mm
(c) Right and left hand side – sufficient for panel
removal and access to pipe connections where
required.
See Figs. 2 and 3.
For installation and servicing of the appliance the cabinet should
be removed as follows:
5 1 Remove the cabinet top panel by lifting squarely upwards to
release the four ball stud connections.
5 2 Remove the front panel by pulling the bottom of the panel
forwards to release the ball studs and lifting the panel upwards
and forwards to release from its supporting ledge.
5 3 The side panels are removed by firstly following procedures
5.1 to 5.2 as described above, then remove screw (A) from the
side panel base and the three screws located in the upper flange
of each side panel. Ease the panel clear of the electrical control
box and slide forwards to release from the locating lugs on the
base plate.
5 4 The control box can be removed by undoing the four screws
in the top access cover and then removing the wing nut on the
underside of the control box. The thermostat phials should be
carefully removed from the phial pocket and the control box
placed in a safe place taking care not to kink the thermostat
capillary tubes.
5 5 On the RS balanced flue model, remove the burner box
cover by pulling forwards to release the ball studs. This will be
found easier by pulling on one side of the handle first to release
two of the ball studs and then repeating on the other side. Take
care not to pivot the remaining two ball studs too far around as
this will cause damage to the spring clips.
OPEN FLUE MODEL ( CF/LLD )
This includes conventional flue and standard low level and high
level horizontal discharge kits.
6 1 In order to ensure clean and efficient combustion an
adequate supply of air must be delivered to the combustion
chamber. To provide sufficient air a suitable inlet should be
provided into the room or space in which the boiler is situated,
the sizes of which are given in Table 5. An air brick or other form
of continuous air supply may have to be built into the
installation in order to ensure an adequate supply of air.
6 2 If the appliance is to be installed in a confined space or com-
partment two air vents are required, one at high level and one at
low level. The minimum free area of each vent is given in Table 6
and depends whether the air is taken from another room or
from outside the building. Where the air is taken from another
room that room must contain an air inlet as described in 6.1.
6 3 There must be sufficient clearance around the appliance to
allow proper circulation of ventilation air. The clearances
required for installation and servicing will normally be adequate
for ventilation. See Section 4.4.
ROOM SEALED BALANCED FLUE MODEL ( RS )
6 4 The appliance does not require a separate vent for
combustion air.
6 5 Installation in cupboards or compartments require
permanent vents for cooling purposes, one at high level and one
at low level, either direct to outside air or to a room. Both vents
must pass to the same room or be on the same wall to the
outside air. The minimum air vent free area is given in Table 7.
6 6 There must be sufficient clearance around the appliance to
allow proper circulation of ventilation air. The clearances
required for Installation and Servicing will normally be adequate
for ventilation. See Section 4.4.
6. Air Supply
5. Removal of the Cabinet
4. Siting the Appliance
5
Table 6 Minimum Air Vent Free Area for Open Flue
appliances installed in a compartment
Appliance Ventilation to room or Ventilation to outside
model internal space
High Level Low Level High Level Low Level
12/14 154cm2231cm277cm2154cm2
15/19 209cm2314cm2105cm2209cm2
20/25 275cm2413cm2138cm2275cm2
Table 7 Minimum Air Vent Free Area for Room Sealed
appliances installed in a compartment
Appliance Ventilation to room or Ventilation to outside
model internal space
High Level Low Level High Level Low Level
12/14 154cm2154cm277cm277cm2
15/19 209cm2209cm2105cm2105cm2
20/25 275cm2275cm2138cm2138cm2
APPLIANCE AREA OF AIR INLET
cm2in 2
12/14 77 12
15/19 105 16.5
20/25 138 21.5
Table 5 Minimum Combustion Air Inlet Free Area for
Open Flue appliances
6
Fig. 2. Conventional Flue Appliance. (CF/LLD)
Manual air
vent
Electrical
top cover
Manual reset
overheat
thermostat
System
pressure
gauge
Side
panel
Side panel locking
screw (A)
Burner seal
gasket
Burner locking
screw
Pressure
relief valve
Central heating
flow
Pump
Burner
Front
panel
Expansion
vessel
Electrical
panel
User operating switch
(Optional programmer
position)
Top panel
Thermostat
knob
Fire valve
clip
Manual reset over-
heat thermostat
phial
Automatic reset high
limit thermostat phial Control thermostat
phial
Split pin
Control Box Assembly
7
Fig. 3. Room sealed balanced flue appliance (RS).
Manual air
vent
Electrical
top cover
Manual reset
overheat
thermostat
System
pressure
gauge
Side
panel
Side panel locking
screw (A)
Burner seal
gasket
Burner locking
screw
Pressure
relief valve
Central heating
flow
Pump
Burner
Front
panel
Expansion
vessel
Electrical
panel
User operating switch
(Optional programmer
position)
Top panel
Thermostat
knob
Fire valve
clip
Burner cover
Rear air duct
Rear air duct
access cover
Manual reset over-
heat thermostat
phial
Automatic reset high
limit thermostat phial Control thermostat
phial
Split pin
Control Box Assembly
A flue system must be provided in accordance with BS5410:Part 1 and
the current Building Regulations.
7 1 Conventional Flue (CF) (See Fig. 4).
Conventional Flue Diameters: 12/14 – 100 mm (4 in.)
15/19 – 100 mm (4 in.)
20/25 – 100 mm (4 in.)
NOTE: External flues systems must be of the insulated flue type.
The boiler is fitted with a conventional flue locating spigot. The flue pipe
fits into the spigot and should be correctly sealed with fire cement.
NOTE: The size of the flue must never be reduced from the take-off
diameter. An increase in flue size is permissible provided that the joint is
sealed correctly.
When installed the flue should be vertical and contain as few bends as
possible. Where bends are necessary, a maximum of two are permitted
and 135 degree bends should be used.
All brick and masonry chimneys should be lined with a suitable non-com-
bustible material, properly jointed and able to withstand the effects of the
working temperature of the appliance and any condensate which may form.
Down-draught conditions will adversely affect the operation of the boil-
er and must be avoided. Where possible the flue should be extended
beyond the apex of the roof and should always be taken beyond the
eaves of the building. Where down-draught is experienced a suitable
anti down-draught terminal should be fitted to the flue termination.
The natural flue draught must be checked in the flue pipe immediately
above the appliance or in the hole provided in the flue outlet plate. The
flue draught should be no less than 0.75 mm W.g. and no greater than
5.1 mm W.g. If a flue draught greater than 5.1 mm W.g. is experienced a
draught stabiliser should be introduced into the flue and adjusted to
achieve a flue draught within the specified range.
7 2 Low Level Discharge
(See Fig. 5).
The conventional flue appliance may be converted to discharge the prod-
ucts of combustion at low level. For this purpose a special flueless kit and
associated ducting is available, allowing the conventional flue to be dis-
carded. Detailed instructions for converting the appliance to low level
discharge are supplied with the conversion kit. The flue spigot should be
removed from the flue outlet plate, by undoing the three retaining
screws, and the hole blanked off with the plate provided in the kit.
NOTE: Under no circumstances may 35 Second Gas Oil be burned
with this type of flue terminal arrangement
7 3 Room Sealed Balanced Flue Model (RS)
The appliance is supplied ready for installation as a low level discharge
balanced flue system by the simple addition of one of the flue terminal
kit options shown in Fig. 6.
Details of the installation procedure are included in the Flue Terminal
Installation instructions supplied with the terminal kit.
Alternatively, a range of room sealed balanced flue kits are available to
convert the appliance to discharge the flue products to the left, right, at
a higher level, or vertically up to a roof height of 4.5 metres.
7 4 Siting the flue terminal
1 The flue terminal must be located in a suitable position, as shown in
Fig. 7, such that the products of combustion can be freely dispersed
without the possibility of the gases entering the dwelling or that of a
neighbouring dwelling.
2 Discharge of flue gases into car ports or narrow passageways is not
recommended.
3 The terminal must not cause an obstruction nor the discharge cause
a nuisance as a result of either flue gases or terminal noise.
4 If the terminal is fitted within 1 m of a plastic or painted gutter or
within 500 mm of painted eaves then an aluminium or stainless steel
shield at least 1 m long should be fitted to protect the surface.
5 If a terminal is fitted less than 2 metres above a surface to which peo-
ple have access, fit a terminal guard as shown in Fig. 8.
A suitable guard is available from Worcester Heat Systems, Part
umber 7 716 190 009, or alternatively a proprietary terminal guard
may be used provided it has the minimum dimensions shown in Fig. 8.
The guard should have suitable corrosion resistance due to the acidic
content of the flue gases.
6 The terminal guard must be evenly spaced about the flue terminal
and secured using the screws so that the terminal guard can be
removed for maintenance to the flue terminal.
7 In certain weather conditions a terminal may steam and siting where
this could cause a nuisance should be avoided.
8 Take care to ensure that combustion products do not enter ventilated
roof voids.
7. Flue System
8
Fig. 5. Flue Installation (Rear Discharge).
See Fig. 7 for
flue terminating
positions.
80
min.
FLUE GUARD
766
Fig. 4. Flue Installation.
Where possible take the
flue above the apex – if not
above the apex an anti
down-draught terminal is
advisable.
Brick Chimney.
Use of a flue liner
is recommended.
Use as few bends as
possible.
Use 135° Bends.
Flues must not be reduced from
the boiler take off diameter.
ALWAYS TAKE THE FLUE ABOVE THE EAVES
9
FLUE GUARD
X = 180 mm Maximum
X = 307 mm Maximum
One extension kit – X = 638 mm Maximum
Two extension kits – X = 952 mm Maximum
766 mm
X
X
340 mm
270 mm
Fig. 6. Room Sealed Balanced Flue Terminal Installation.
(b) Rear Discharge 7" to 12" Wall.
For use in standard cavity walls and solid walls
up to 327 mm thick. This terminal offers
maximum noise reduction of the flue gases.
This terminal is designed for use with the
extension kit.
(a) Rear Discharge 4" to 7" Single Skin Wall.
For use with non-standard/single skin walls up to
182.mm thick.
Where noise emission from the flue terminal is likely to
be of concern, it is recommended that the standard 12 in.
terminal is used and the appliance stood away from the
wall to take up the extra terminal body length.
(c) Rear Discharge Extension Kit
12" to 36" Wall.
X
For use where the wall thickness exceeds
327.mm or where the appliance is to be stood
away from the wall as shown. The system uses a
standard 12 in. RS Flue Terminal and up to two
extension kits, which simply bolt together.
10
Fig 8 Terminal guard Minimum dimensions
265
280
280
Terminal guard.
See 7.4.5.
L
F
F
K
G
A
E
B
C D
J
N
O
M
H
F
Boundry
Boundry
P
M
Minimum Distance (mm)
Terminal Position Open Low-Level Vertical
Flue Discharge Balanced Flue
A Directly below an opening, air brick, window, etc. .......................................... ot allowed 600 ot allowed
B Horizontally to an opening, air brick, window, etc. ........................................ ot allowed 600 ''
C Below a gutter or sanitary pipe if combustible material protected. .............. ot allowed 75 ''
D Below a balcony, eaves, gutter or drainage without protection
to combustible material. ...................................................................................... ot allowed 600 ''
E From vertical sanitary pipework.. ....................................................................... ot allowed 300 ''
F From an internal or external corner or boundry along side terminal. .......... ot allowed 300 ''
G Above ground or balcony level. .......................................................................... ot allowed 300 ''
H From a surface or boundry facing the terminal. .............................................. ot allowed 600 ''
J From a terminal facing the terminal. ................................................................. ot allowed 1200 ''
K Vertically from a terminal on the same wall. ................................................... ot allowed 1500
L Horizontally from a terminal on the same wall. .............................................. ot allowed 750 ''
M Above an intersection with the roof. ................................................................. 600 ot applicable 732
From a vertical structure on the side of the terminal...................................... 750 ot applicable 750
O Above a vertical structure less than 750mm from the side of the terminal. 600 ot applicable 732
P From a ridge terminal to a vertical structure on the roof................................ 1500 ot applicable ot applicable
NOTE: The dimensions given are for general guidance only. Other surrounding buildings or objects may affect the clearance of
combustion products. An alternative flue terminal position should be sought when there is any possibility of a nuisance being
caused by inadequate dispersal of flue products.
Terminals should be positioned so as to avoid products of combustion entering into buildings.
Fig 7 Flue terminating positions for oil-fired appliances
Window
Flue
Terminal
(See Figs. 9, 10 and 11).
8 1 Plastic or steel tanks should be installed to BS5410.
A steel tank should also conform to BS799: part 5 and be arranged
with a slope of 1 in 24 away from the outlet valve with a sludge
cock at its lower end.
8 2 Do not use galvanised steel tanks or pipework for the oil
supply system.
8 3 Do not use soldered joints on the oil supply pipework as this
could cause a hazard in the case of a fire.
8 4 The burners on all appliances are supplied so as to be
connected to a single pipe gravity feed system. Details of how to
convert the burners to a double-pipe sub-gravity feed system
are shown in Fig. 9.
8 5 Oil Supply System
(a) Single Pipe System
If a single pipe system is employed then the tank must be positioned
such that the oil level does not exceed 4 metres above the level of
the burner oil pump and in addition the oil level must be at least 0.3
metres above the level of the oil pump. Should it prove impossible to
site the tank below the 4 metres maximum oil level a head breaking
device must be installed between the tank and the burner.
(b) Double Pipe System
If a double pipe system is used then the maximum suction
height allowable is 3.5 metres.
(c) Single Pipe Suction Lift with De-aerator
If a single pipe suction lift with a de-aerator is used, the oil tank
must be positioned below the burner. An inlet and return loop
should be created between the de-aerator and oil pump. The oil
pump should be connected as for a double pipe system. Details
of how to convert to a double pipe system are shown in Fig. 9.
Oil inlet and return flexible hoses should be connected to the oil
pump inlet and return ports.
Table 10 is a general guide to determine the maximum allow-
able pipe run when using a de-aerator.
Table 10 does not override the de-aerators manufacturers
instructions and should only be used in conjunction with the
manufacturers instructions.
If a non-return valve is not incorporated within the de-aerator
unit, a non-return valve should be fitted in the oil line between
the oil tank and the de-aerator.
NOTE: If a de-aerator is used it should be fitted externally to the building.
8 6 Oil Supply Pipework
a) The oil supply pipe diameter can be determined using Tables 8,
9 and 10 depending on whether a single or double pipe system or
single pipe system with de-aerator is being installed. Selection of
the correct pipe diameter will depend on the position of the oil stor-
age tank relative to the burner and the length of the pipe run.
b) The oil supply pipe should be laid as level as possible to avoid
air pockets and unnecessary friction losses.
c) The following components should be fitted in the fuel line
between the storage tank and burner:
1 A manual isolating valve installed as close to the tank as possible.
2 A fire valve in accordance with BS5410 as shown in Fig. 10. The fire
valve should be fitted externally with a fire detection element located
within the appliance case. Use of a capillary type valve will allow a
neat and simple installation. A suitable valve is the KBB manufactured
by Teddington Controls Limited. A spring clip has been provided
behind the electrical panel on CF/LLD models, shown in Fig. 2, and on
the burner box on RS models, shown in Fig. 3, to allow a fire valve ele-
ment to be mounted. Alternatively a fusible link or electrical system
may be used. Under no circumstances should a combination isolat-
ing/fire valve be used as the sole fire protection device.
3 An oil filter should be fitted close to the oil storage tank. If
there is doubt about the internal oil line condition, a further filter
should be fitted near the boiler.
11
8. Oil Supply Fig. 9. Oil Pump.
B. Danfoss BFP 11 Oil Pump.
A. Danfoss BFP 41.
C. Suntec AS47C Oil Pump.
Cartridge filter
12
3
4
4a
5
6
1
2
3
4
5
6A
1 INLET
2 RETURN
3 BLEED AND PRESSURE
GAUGE PORT
4 VACUUM GAUGE PORT
5 PRESSURE ADJUSTMENT
6 NOZZLE OUTLET
To convert to a double pipe sys-
tem, remove plug 4a and insert
the grub screw provided into the
threaded hole. Connect flow and
return pipes to (1) and (2).
To convert to a double pipe sys-
tem: Remove the pump front
cover, remove the changeover
screw (A) nearest to ports 1 and
2, and the horseshoe washer
underneath. Replace the
changeover screw back into the
threaded hole. Connect the flow
and return pipes to 1 and 2.
Note: When removing the pump
front cover ensure that a suitable
receptacle is placed below the
pump to catch the oil residue.
To convert to a double pipe sys-
tem, remove the return port plug
(2) and insert the grub screw (A)
provided into the threaded hole
(B). Connect flow and return pipes
to (1) and (2).
1
2
3
3
4
5
B
A
TABLE 8 Single Pipe Gravity Feed System
MAXIMUM ALLOWABLE PIPE RUN
HEAD (metres) (metres)
8 mm inside dia. pipe 10 mm inside dia. pipe
(10 mm O.D. copper) (12 mm O.D. copper)
0.5 12 30
1.0 25 69
1.5 37 91
2.0 49 100
2.5 62 100
3.0 74 100
3.4 87 100
4.0 99 100
TABLE 9 Double Pipe Sub-Gravity Feed System
MAXIMUM ALLOWABLE PIPE RUN
HEAD (metres) (metres)
8 mm inside dia. pipe 10 mm inside dia. pipe
(10 mm O.D. copper) (12 mm O.D. copper)
0 50 100
0.5 44 100
1.0 38 95
1.5 32 80
2.0 26 66
2.5 20 51
3.0 14 37
3.5 8 22
12
MAXIMUM ALLOWABLE PIPE RUN FROM TANK TO DE-AERATOR (metres)
Fuel
Flowrate 2.5 (kg/h) 5.0 (kg/h) 10.0 (kg/h) 10.0 (kg/h)
HEAD
(metres) 6 mm inside dia. pipe 8 mm inside dia. pipe
(8 mm O.D. copper) (10 mm O.D. copper)
0 100 55 26 100
0.5 95 45 23 100
1.0 80 40 20 90
1.5 70 35 17 75
2.0 60 30 14 65
2.5 45 25 11 50
3.0 35 15 8 35
3.5 25 10 5 20
TABLE 10 Single Pipe Suction Lift with De-aerator
Fig. 10. Oil Supply.
(a) Single pipe system
Oil tank
Oil tank
Maximum oil level
H = 4 m (13 ft) maximum
Fire valve to
BS 5410
Fire valve to
BS 5410
Isolating
valve Isolating
valve
Fire detection
element
Filter
Burner
Burner
Wall
Wall
(b) Double pipe system.
Isolating
valve
Non return
valve
Non return
valve Fire detection
element
Isolating
valve
Oil tank
(c) Single pipe lift system ith de-aerator.
Fire valve to
BS 5410
H = 3.5 m (11.5 ft) maximum
Burner
Wall Fire detection
element
De-aerator
H = 3.5 m (11.5 ft) maximum
Isolating
valve
H = 0.3 m (1 ft) minimum
Paper element
oil filter
Isolating
valve
Filter
Filter
Isolating
valve Isolating
valve
Full base
(for plastic tanks)
Full base
(for plastic tanks)
Full base
(for plastic tanks)
150 mm
13
Fig. 11. Oil Pipe Installation.
(b) Single Pipe System.
RS Appliance
(a) CF Bracket.
CF Appliance
(c) Double Pipe System or
Single Pipe Suction Lift ith De-aerator.
Burner
oil pump
Flexible
oil hose
Open
grommet
Turn fully clockwise
to isolate
Blind
grommet
Air
bleed
Burner
oil pump
10mm or 12mm
copper pipe
1/4" BSP female x
10/12mm
compression coupling
(not supplied)
10mm
copper pipe
10mm
copper pipe
Retaining
clip
Isolating
valve
Isolating
valve
Pipe support
bracket
Turn fully
clockwise
to isolate
The heating and hot water system must be provided in accor-
dance with the current Building Regulations.
9 1 The appliance is supplied with all of the necessary compo-
nents for connection to a sealed primary system. Suitable con-
trol systems are discussed in Section 10.
9 2 The appliance incorporates a circulating pump. o other
pump is required. The appliance will operate satisfactorily on a
two pipe small bore or micro bore system using thermostatical-
ly controlled radiator valves.
The pump speed should be set in accordance with the heating
load requirements to give a flow and return differential tempera-
ture of approximately 11° C under full load conditions.
9 3 The appliance is suitable for connection to all conventional indi-
rect hot water systems utilising an indirect double feed cylinder.
9 4 On new installations it is recommended a room thermostat
or programmable room thermostat is used in the main zone and
thermostatic radiator valves are used in further heating zones.
On existing systems where a room thermostat is already fitted it
is recommended to fit thermostatic radiator valves at least in
the sleeping zones.
A automatic system bypass should be fitted on heating systems
when all of the radiators are fitted with thermostatic radiator valves.
9 5 The pressure jet burner fitted to the appliance has full auto-
matic control and hence there is no requirement for heat leak
radiators.
9 6 Any unused boiler tappings should be plugged prior to filling.
9 7 The primary system should be flushed and treated in
accordance with the recommendations of BS 7593 before the
system is handed over to the user.
9 8 System Pipework
Sealed System Pipework
Copper pipe work must be used when installing the appliance
on a sealed system.
Open Vent Primary System Pipework
The first metre of pipework from all appliance connections must
be in copper; afterwards copper or plastic pipe can be used. The
plastic pipe must be manufactured to BS 7291 and installed to BS
5955 part 8. It is important to protect the system components; the
plastic pipe specified must be resistant to the ingress of oxygen.
SEALED PRIMARY SYSTEM
See Figs 12 and 13.
9 9 The system must comply with the requirements of BS
7074:1 and BS 5449:1.
9 10 A manual reset overheat thermostat is located on the
underside of the electrical control box and is accessible by
removing the cabinet front panel. If a boiler over-heat condition
arises the boiler will remain inoperative until the thermostat
button is reset. See Figs. 2 and 3.
9 11 The pressure relief valve operates at 3 bar (45 lb./in2). The
discharge must be directed away from electrical components or
where it might be a hazard to the user.
9 12 The pressure gauge, located above the burner, indicates
the system pressure which must be maintained.
9 13 The 10 litre expansion vessel is charged to 0.5 bar and is
suitable for a static head of 5 metres (17.5 ft).
9. Heating and Hot Water System
Table 11
TOTAL SYSTEM VOLUME (Litres)
Initial System Initial Charge Pressure (bar)
Pressure (bar) 0.5 1.0 1.5
0.5 150 – –
1.0 90 115 –
14
Fig. 12. Sealed Primary System.
Heating Flow (22 mm)
Heating Return (22 mm)
Automatic by-pass valve
to be fitted when thermostatic
valves are fitted on all radiators
Pressure
Relief
Valve
Expansion
Vessel
Pump
Static Head of System
9 14 With an initial system pressure of 0.5 bar, a system
capacity of about 150 litres can be accommodated. Refer to BS
7074:1 for more information.
Where the system volume exceeds the value given in Table 11 an
additional expansion vessel, of suitable volume, should be fitted
to the heating return pipe-work as close to the boiler as possible.
Note: The values given in Table 11 are the total system volumes.
The boiler primary water capacity given in Table 1 should be
deducted from the total system volume when calculating the
volume for radiators, pipe-work, etc.
9 15 The method of filling the heating system can be by either
method 1 or 2 shown in Fig. 13. The filling point must be at low
level and must never be a permanent direct fixing to the mains
water supply.
9 16 Water loss must be replaced . See Fig. 13. The connection
should be made to the central heating return as close to the
appliance as possible.
9 17 The make up vessel, where fitted, must be fitted with a
non-return valve.
9 18 Repeated venting loses water from the system. It is essential
that this water is replaced and the system pressure maintained.
9 19 Connections to the mains water supply must not be made
without the authority of the local water company.
9 20 Connections to the system must resist a pressure of up to
3 bar.
9 21 Radiator valves must conform to BS 2767(10).
9 22 Other valves used should conform to the requirements of
BS 1010.
Heating return
Non return
valve Non return
valve Hose union
Test cock Temporary hose
Stop cock
Auto
air vent
Heating return
Stop
cock
Fill point
Non return
valve
Make up
vessel
300 mm (12 in) min.
above the highest
point of the system.
Fig 13 System filling and make-up
Method 1 Method 2
(See Figs. 14 to 19).
10 1 The wiring between the appliance and the electrical supply
shall comply with current IEE wiring regulations (and any local
regulations which apply) for fixed wiring to a stationary appliance.
NOTE: It must be possible to completely isolate the appliance.
10 2 To gain access to the electrical terminal strip.
1. Isolate the mains electrical supply.
2. Remove the cabinet top panel by snatching squarely
upwards.
3. Release the four screws securing the cover of the
electrical control box and remove.
10 3 Mains Wiring
MAINS SUPPLY – 230V AC ~ 50HZ 5A External Fuse to BS1362
LIVE - Brown, EUTRAL - Blue, EARTH - Green/Yellow
Mains Cable: 0.75mm (24 x 0.20 mm) to BS6500 Table 16.
The supply to the boiler must be the only electrical supply to the
system. This ensures the safety of a single fused supply.
The mains supply cable should be connected into the terminals
marked L (Live), N ( eutral) and E (Earth) on the appliance
terminal strip and securely held in the cable clamp located in the
left-hand side of the electrical tray box. To secure the cable,
remove the clamp retaining screw and pull its inner body out to
allow the cable to be fed through. With the cable in position refit
the screw and fully tighten to grip the cable. Feed the cable
between the side panel and the boiler insulation jacket and route
to the connection point avoiding any hot surfaces.
The appliance must be earthed.
10 4 Programmer
(See Fig. 16a).
A plug in, colour co-ordinated, 2 channel electronic programmer
is available from Worcester Heat Systems Limited. Full
instructions covering installation and operation of the
programmer are included with the kit.
The programmer will give fully independent central heating (CH)
and hot water (HW) programmes when the switch on the rear of
the unit is set to P.
If an external programmer is to be fitted to the boiler the link plug
should be removed from the programmer terminal strip. (See Fig.
16b). The LIVE, EUTRAL and EARTH wires should be connected to
the LIVE, EUTRAL and EARTH terminals on the main terminal strip
and the switched lines connected to terminals 1 and 2.
10. Electrical
15
Brown
Brown
Brown
Brown
Green/Yellow
E N L
Green/Yellow
Earth
Stud
Manual reset
thermostat Time clock
white
connecter
Post purge
black
connecter
High limit
thermostat
Control
thermostat
Mains on
neon
Lockout
neon
5 Amp.
Blue
Blue Green/Yellow
Green/Yellow
Post Purge Unit.
For use on open flue low
level discharge models
only. (Not RS models) Unit
supplied in Flue Kit.
Yellow
Pink
Brown
Blue
Yellow
Pink
Brown
Black
Black
Red
Grey
Grey
Brown
White
White
Operating Switch
Brown
Plug in
connector
Brown
Brown
Orange
(1)
(C)
Blue
Blue
Green/Yellow
Blue
White
Grey
LNEEN123456
1 2 34 56
78910 11 12 13 14 15
Mains supply 230/240V 50Hz
Fig. 14. Wiring Diagram (Standard).
Blue
Green/Yellow
Brown
Pump
Plug in connector
NNE
L
Satronic control box
Fan motor
Blue
Brown
E
Green/Yellow
Green/Yellow
Yellow
Grey
Pink
Red
Black
123456
1234567 89
Burner Control
Grey
Brown
White
Note: The mains supply cable should not be connected to an
external time switch when a frost thermostat or low-level
discharge post purge unit is fitted to the Danesmoor standard
wiring block.
NOTE: Under no circumstances should the timer be connected
to a separate electrical supply. Safety is assured from a single
fused supply to the boiler.
10 5 Safety Check
In the event of an electrical fault after the installation of the
appliance, the electrical system shall be checked for short
circuits, fuse failure or incorrect polarity of connections.
10 6 Pre-wired Remote “Y” or “S” Plan systems
(See Fig. 17).
If the system is fully pre-wired at a junction box remotely from
the boiler, it can be connected to the boiler. The diagram shows
connection details of two proprietary systems (Honeywell and
Invensys).
The WHS facia mounted programmer can be fitted instead of an
external timer to the remote junction box. Remove the operating
switch plug and connect the programmer plug into the time
clock connector. Connect terminal 1 from the boiler terminal
block to the 'HOT WATER O ' on the remote 10 way junction
box. Connect terminal 2 from the boiler terminal block to the
'HEATI G O ' on the remote 10 way junction box.
NOTE: A “Y” Plan requires a live feed from the 'HOT WATER OFF '
switch position. In order to achieve this, using a WHS program-
mer, remove the orange wire from terminal 9 and pull back
through the tie wraps. Ensure the brown wire is firmly secured in
terminal 9. Connect the orange wire to terminal 6 on the boiler ter-
minal block and connect terminal 6 to the 'HOT WATER OFF' con-
nection at the remote 10 way junction box.
10 8 Honeywell “S” Plan
(See Fig. 18).
The “S” plan provides complete control on installations having
pumped circulation to both the domestic hot water and radiator
circuits.
The domestic hot water and radiator circuits are independently
controlled by two motorised valves via a cylinder thermostat
and a room thermostat. Both thermostats switch the water
circulator and the boiler on and off.
10 9 Honeywell “Y” Plan
(See Fig. 19).
The “Y” Plan provides complete control on installations having
pumped circulation to both the domestic hot water cylinder and
radiator circuits.
The domestic hot water and radiator circuits are controlled by a
3 port motorised valve via a cylinder thermostat and a room
thermostat. Water flow is diverted to either circuit or to both
circuits at the same time. Both thermostats switch the water
circulator and the boiler on and off.
Note: The “Y” plan requires a live feed from the hot water “off”
switch position. In order to achieve this, using a WHS
programmer, remove the orange wire from terminal 9 and pull
back through the tie wraps. Do not attempt to cut the tie wraps.
Ensure that the brown wire is firmly secured in terminal 9.
Connect the orange wire to terminal 6.
10 10 Frost Protection
(See Fig. 15).
For full frost protection a single pole double switch thermostat
should be fitted so that both the boiler and the circulating pump
circuits are energised under frost conditions. Frost protection
will be lost if there is no power supply to the appliance..
16
Fig. 15. Frost Protection.
Terminal strip
L
N
E
E
N
1
2
3
4
5
6
1
2
3
4
5
E
Fig. 16. Programmer Connections.
(a) Internal Programmer (b) External Programmer
Programmer Note: Remove link plug 8 & 9.
Pre-wired time clock
terminal strip socket
(Located in boiler
electrical cover).
Pre-wired time clock
terminal strip plug
(Connected to time
clock leads).
Grey
White
Brown
Blue
White
Grey
Brown
HW
CH
Blue
HW
CH
E
N
L
78 910
7
6
5
4
3
2
1
N
E
E
N
L
8910
17
11 12 13 14 15
LNEE N1 2 34 5 6
Mains Wiring
230V 50Hz (5 amp fuse)
Tank Stat
Room Stat
System Water Valves
External Timer
Earth
Neutral
Permanent Live
Switched Live
Fig. 17. Pre- ired Remote ‘Y’ Plan or ‘S’ Plan.
NOTE: When using a WHS Programmer set the switch on the rear of the programmer to ( P ).
NOTE: Remove link 1 to 3 and link 2 to 4 and make link 3 to 4
10 WAY JUNCTION BOX
NOTE: If a frost thermostat is required it
can be wired to the remote junction box.
NOTE: The 10 way junction box must be
a terminal block type and current rated
to at least 5 amps.
Remote Pre-wired
Junction Box
OUTSIDE BOILER
INSIDE BOILER
78910
X
External Pump
(disconnect and remove)
Pump (supplied in boiler)
NOTE: Optional
Worcester Programmer
is available (see Section
10.6).
Operating Switch
Boiler socket
Room thermostat Heating Valve. Honeywell V4043H
Burner Socket
Optional
Worcester
Programmer
Hot Water Valve
Honeywell V4043H
L
N
E
Pump (supplied in boiler)
N
EN
L
HEATSYSTEMS
HEATING
ADVANCE
OFF
TWICE
ONCE
ON
OFF
TWICE
ONCE
ON
SELECT LOCK SET? YES SELECT
PM
TUE
HOT
WATER
ADVANCE
LNEEN1234 56
Cylinder
Thermostat
Orange
Blue
Blue
Grey Brown
Blue
Brown
Brown
Orange
Grey
Blue
Green/Yellow
Green/Yellow
Brown
Green/Yellow
7 8 9 1112 13 14 15
10
18
Fig. 18. Honey ell ‘S’ Plan.
NOTE: When using a WHS programmer set the switch on the rear of the programmer to ‘P’.
Remove link 1 to 3 and link 2 to 4 and make link 3 to 4
Grey
White
Blue
Brown
Room thermostat Pump (supplied in boiler)
N
EN
L
HEATSYSTEMS
HEATING
ADVANCE
OFF
TWICE
ONCE
ON
OFF
TWICE
ONCE
ON
SELECT LOCK SET? YES SELECT
PM
TUE
HOT
WATER
ADVANCE
Burner Socket
Optional
Worcester
Programmer
Cylinder
Thermostat
C
1
2
Mid Position Valve
Honeywell V4073A
E
N
LNEE N1 2 3 4 5 6 789
11 12 13 14 15
10
Blue
Brown
Green/Yellow
Blue
Grey
Orange
Orange
Grey
Green/Yellow
Blue
Brown
White
Brown
Blue
White
Fig. 19. Honey ell ‘Y’ Plan.
NOTE: When using a WHS programmer remove the orange wire from terminal 9 and
connect to terminal 6. Set the switch on the rear of the programmer to ‘P’.
Remove link 1 to 3 and link 2 to 4 and make link 3 to 5.
11 1 After unpackaging the appliance it is recommended that all
cabinet panels are removed, as described in Section 5, and stored in
a safe place to avoid damage during installation and allow easy
inspection for any leaks after the system has been filled.
11 2 Remove the burner as described below and store in a safe
place until the appliance is ready for commissioning.
(a) Conventional Flue Appliance (CF/LLD)
1 Remove the electrical lead plug by depressing the two locking
ears and pulling the plug downwards.
2 Remove the burner from the boiler by slackening the two M6
retaining screws located in the burner housing ring and pulling the
burner clear. This will require the use of a 5mm allen key.
(b) Room Sealed Balance Flue Appliance (RS)
1 Remove the burner box cover by pulling forwards to release the
ball studs. This will be found easier by pulling on the side of the han-
dle first to release two of the ball studs and then repeating on the
other side. Take care not to pivot the remaining two ball studs too far
around as this will cause damage to the spring clips.
2 Remove the electrical lead plug by depressing the two locking
ears and pulling the plug.
3 Push the electrical lead grommet back through the burner sur-
round box and feed the lead through the hole.
4 Remove the burner from the boiler by slackening the two M6
retaining screws located in the burner housing ring and pulling the
burner clear. This will require the use of a 5mm allen key.
11 3 Flue system installation
Install the appliance flue system as described in Section 7.
11 4 Heating system installation
Before the appliance is fitted to the heating system
flush the system and mains water supply
1 Plumb the boiler into the central heating system.
2 Check that all unused sockets have been plugged.
3 Fill the system and vent all radiators and high points to remove
air from the system.
4 Check the boiler and all pipework connections for leaks.
11 5 Oil supply installation
(See Figs. 9 to 11).
NOTE: ever route the oil supply pipe/hose directly below the com-
bustion chamber base.
NOTE: Connection of rigid copper pipe to the oil pump is not recom-
mended. Connection to the oil pump should be made with flexible
oil hoses as shown in Fig. 11.
(a) Single pipe suction lift with de-aerator
For connection of single pipe suction lift with de-aerator follow the
proceedure as for a double pipe system as described below.
(b) Double pipe system oil return pipe
When fitting an RS balanced flue appliance follow steps 1 to 11.
When fitting a CF/LLD appliance follow step 1 and fit a bulkhead fit-
ting to the bracket for the return pipe and continue from step 10.
1 Remove the isolating valve bulkhead fitting by unscrewing the
locknut on the underside.
2 Remove the blind grommet from the fixed burner surround box
and discard.
3 Replace the blind grommet with the open grommet supplied in
the plastic bag.
4 Slacken the pipe retaining clip screw located directly below the
grommet hole. When using 12mm copper pipe replace the clip with
the larger one supplied.
5 Bend a piece of 10mm or 12mm copper tube ( as selected ) to the
correct profile to allow the pipe to be fed down the side of the appli-
ance. Make a slight chamfer on the end of the pipe to be fed
through the grommet to facilitate easy insertion.
6 Lubricate the grommet hole with vaseline (or butter etc.) and
slide the pipe through the hole, supporting the grommet on its
underside to prevent it dislodging.
7 Feed the pipe through the retaining clip, allowing approximately
80 mm of pipe to project beyond the clip, and tighten the retaining
screw. Take care not to overtighten the screw!
8 Hold the pipe at the retaining clip and gently pull the pipe
forward sufficiently to allow a compression to 1/4 inch BSP female
fitting to be fitted for connection to the oil return flexible hose.
9 Connect the fitting to the pipe and fit a 1/4 inch BSP taper thread
flexible hose, ensuring a good seal using PTFE tape or suitable oil
sealing compound. The flexible hose should have a 1/4 inch BSP
rotating union taper fitting at the other end with a 90 degree bend
and 1/4 inch BSP nipple for connection to the oil pump.
10 Replace the isolating valve bulkhead fitting.
11 Fit the oil supply pipe as described in the following section.
(c) Single pipe system oil supply pipe
1 Bend a piece of 10mm or 12mm copper tube (as selected) to the
correct profile to allow the pipe to be fed down the side of the appli-
ance. The pipe may be routed along either the right or left hand
side of the boiler as required. When using 12mm pipe fit a 12mm
to 10mm compression coupling and connect to the valve with a
short piece of 10 mm pipe, otherwise connect direct to the valve.
Note: never use soldered joints on oil supply pipes as this could
cause a hazard in the case of a fire.
2 Route the pipe back to the oil supply tank ensuring that it is
hard against the boiler, to allow installation of the side panel.
3 With the isolating valve in the correct orientation tighten the
back-nut.
4 Turn the isolating cock fully clockwise to close the valve.
5 Open the main oil supply valve at the tank and check for any leaks.
6 Place a suitable container below the bulkhead fitting and
open the valve.
7 Draw off at least 2.5 litres of oil until a steady flow of clear
uncontaminated oil can be seen and turn off the isolating valve.
Note: This method may not be possible on some installations
where a sub-gravity system is used. Where this problem arises
bleed the system using the oil pump as described in Section 12
and remove and clean the oil pump filter to remove any debris
collected as a result of installation.
11 6 Replace the electrical control panel and side panels in
reverse order to the removal procedure of Section 5 and connect
the electrical supply as described in Section 10.
11. Installation
19
Ensure that no foreign matter is left in the system as this could
cause damage to the appliance.
Benchmark Water Treatment: For optimum performance after
installation, this boiler and its associated central heating
system should be flushed in accordance with the guidelines
given in BS7593:1992 - Treatment of water in domestic hot
water systems Full instructions are supplied with proprietary
cleansers sold for this purpose If an inhibitor is to be used
after flushing, it should be used in accordance with the
inhibitor manufacturers instructions
Suitable flushing agents and inhibitors are available from Betz
Dearborn Tel: 0151 4209563 and Fernox Tel: 01799 550811
Instructions for use are supplied with these products
IMPORTANT: Any system cleanser must be flushed from the system
before an inhibitor is added
12 1 Check that the electrical supply to the appliance is
switched off.
12 2 When commissioning the appliance after initial installation
follow the procedure from 12.3, otherwise remove the burner
first as described in Section 14.3.
12 3 Prepare the heating system.
1 After initial installation and checking for leaks, as previously
described, drain down the system sufficiently to add a flushing
agent. After flushing drain the system before filling.
2 Set the expansion vessel pressure.
The charge pressure of the expansion as despatched is 0.5 bar,
which is equivalent to a static head of 5 metres (17ft). The
charge pressure must not be less than the static head at the
point of connection. See Figs. 12 and 13. A Schraider type valve
is fitted to the expansion vessel to allow the charge pressure to
be increased if necessary.
3 Fill the system using one of the methods described in Section 9,
adding a suitable corrosion inhibitor in accordance with BS 7593.
4 Check that the pressure relief valve operates by turning the
knob anti-clockwise until it releases. Water should be expelled
from the discharge pipe. See Fig. 1.
5 Set the system pressure.
Fill the system until the pressure gauge shows 1.5 bar (21.5 psi) and
check for water soundness. Release water from the system until the
system design pressure is obtained,up to a maximum of 1.5 bar.
System design pressure = Static head of the system in bar + 0.3.
Note: 1 bar is equivalent to 10.2 metres (33.55 ft) of water.
Set the moveable pointer giving a permanent record of the set sys-
tem pressure.
If the pressure indicated on the pressure gauge is greater than 2.5
bar when operating at the maximum central heating temperature,
then an extra expansion vessel must be fitted to the system as close
as possible to the appliance central heating return connection. Refer
to Section 9 for further information on system capacities.
Any extra vessel must be pressurised to the same figure as the inte-
gral vessel. If the expansion vessel fails then the specified replace-
ment must be fitted.
12 4 Check the Burner
1 Check that the nozzle and electrode settings are correct for the
relevant burner. (See Figs. 20, 21 and 22).
2 Check that the nozzle lies central with the combustion head hole.
3 Check for any visible defects.
12 5 Replace the burner
1 Connect the flexible oil supply hose to the isolating valve bulkhead
fitting and tighten sufficiently to form a good seal. Where a double pipe
system or single pipe system with de-aerator is being used fit the
bypass plug, provided in the plastic bag on the burner, as shown in
Fig. 9 and connect the oil return flexible hose to the return pipe fitting.
2 With the sponge O-ring gasket around the burner blast tube
insert the burner into the housing tube. Push the burner firmly for-
ward to compress the gasket and tighten the two locking screws
using a 5mm Allen key.
Note: It is important that a good seal is made between the burner
and the boiler to prevent re-circulation of the flue gases from the
combustion chamber to the burner inlet or the room in the case of a
CF/LLD appliance.
3 On the RS balanced flue model, feed the electrical lead back
through the hole in the burner surround housing and fit the grom-
met into the hole ensuring a seal is made.
4 Re-connect the electrical lead plug into the control box.
12 6 Check the installation
1 Check that the appliance is correctly wired as described in Section 10.
2 Check the combustion chamber base insulation is positioned cor-
rectly in the bottom of the boiler.
3 Check that all baffles are correctly located and the heatshield is
correctly mounted (20-25 model only) as shown in Fig. 23.
4 Check that the baffle retainer is correctly mounted (20-25 model
only) as shown in Fig. 23.
5 Check that the control thermostat and auto reset high limit ther-
mostat phials are correctly located in the boiler thermostat pocket
positioned in the top front of the boiler.
6 Check that the manual reset limit thermostat is located in the
steel pocket above the electrical box mounting bracket on the front
face of the boiler.
7 Check that all of the air-ways to the burner are clear of any obstruction.
12 7 Fit a pressure gauge and manifold to the burner pump at the
point indicated in Fig. 9, or the pressure gauge port shown in Fig. 22
on the 20/25.
12 8 Turn on the electricity to the appliance.
12 9 Bleed the burner (single pipe systems only)
Release the fuel bleed port on the manifold and place a suitable
receptacle beneath. Turn on the boiler thermostat. Set the operating
switch (or programmer) to heating and hot water and allow the
burner to run through to lockout. Wait two minutes and reset the
burner control box. Repeat the procedure at least three times or
until a steady stream of oil, without air, is exhausted from the bleed
port. Re-lock the bleed port.
Double pipe system
A double pipe system will automatically vent the air back to the oil
tank. Turn on the boiler thermostat. Set the operating switch (or
programmer) to heating and hot water and allow the burner to run
through to lockout. Wait two minutes and rest the burner control
box. Repeat the procedure until the burner fires and runs in a
steady state. This may take several attempts depending on the oil
pipe length and height.
Single pipe suction lift system with de-aerator
A single pipe suction lift system with de-aerator will automatically
vent air through the de-aerator. Turn on the boiler thermostat. Set
the operating switch (or programmer) to heating and hot water
and allow the burner to run through to lockout. Wait two minutes
and reset the burner control box. Repeat the procedure until the
burner fires and runs in a steady state.
On long oil pipe runs from the oil tank to the boiler it is recommend-
ed that the de-aerator be primed to prevent damage to the oil
pump.
To prime the the de-aerator follow the following procedure:
a) Disconnect the flexible oil inlet hose nearest to the de-
aerator and place the end in a container of oil.
b) Place an empty container to collect oil from the oil
inlet pipe from the de-aerator.
c) Prime the de-aerator and reconnect the de-aerator
to the flexible oil inlet hose.
12 10 Adjust the air shutter and pump pressure to the settings rec-
ommended in Tables 2 to 4. After a pre-ignition period of approxi-
mately 15 seconds the burner should ignite. Flame sensing is car-
ried out by means of a photocell mounted in the burner body.
Should the boiler fail to establish a normal firing pattern (or should
flame failure occur during running), the absence of a flame is sensed
and the control box is monitored to a safe lockout condition and the
12. Commissioning the Appliance
20

This manual suits for next models

3

Other Worcester Boiler manuals

Worcester GREENSTAR 24i junior User manual

Worcester

Worcester GREENSTAR 24i junior User manual

Worcester Greenstar 8000 Style Series User manual

Worcester

Worcester Greenstar 8000 Style Series User manual

Worcester 280 RSF Operation instructions

Worcester

Worcester 280 RSF Operation instructions

Worcester GB162-50 User manual

Worcester

Worcester GB162-50 User manual

Worcester Greenstar 12Ri Manual

Worcester

Worcester Greenstar 12Ri Manual

Worcester Greenstar 8000 Life Series User manual

Worcester

Worcester Greenstar 8000 Life Series User manual

Worcester Gas boiler User manual

Worcester

Worcester Gas boiler User manual

Worcester Greenstar Ri Compact ErP User guide

Worcester

Worcester Greenstar Ri Compact ErP User guide

Worcester Greenstar 12Ri User manual

Worcester

Worcester Greenstar 12Ri User manual

Worcester GR8300iW 30 S User manual

Worcester

Worcester GR8300iW 30 S User manual

Worcester Highflow 4.5 OF User guide

Worcester

Worcester Highflow 4.5 OF User guide

Worcester GREENSTAR i SYSTEM User manual

Worcester

Worcester GREENSTAR i SYSTEM User manual

Worcester Greenstar 8000 Life GR8300iW 30 C User manual

Worcester

Worcester Greenstar 8000 Life GR8300iW 30 C User manual

Worcester Greenstar Heatslave II 12/18 User guide

Worcester

Worcester Greenstar Heatslave II 12/18 User guide

Worcester 41-311-67 User guide

Worcester

Worcester 41-311-67 User guide

Worcester GREENSTAR 25Si User manual

Worcester

Worcester GREENSTAR 25Si User manual

Worcester Greenstar utility 32-50kW User manual

Worcester

Worcester Greenstar utility 32-50kW User manual

Worcester Greenstar FS 30CDi ErP User manual

Worcester

Worcester Greenstar FS 30CDi ErP User manual

Worcester GREENSTAR 35CDi Classic System ErP 41-406-39 User guide

Worcester

Worcester GREENSTAR 35CDi Classic System ErP 41-406-39 User guide

Worcester Greenstar Danesmoor Utility Regular ErP... User guide

Worcester

Worcester Greenstar Danesmoor Utility Regular ErP... User guide

Worcester 28Si User guide

Worcester

Worcester 28Si User guide

Worcester 12/18 User manual

Worcester

Worcester 12/18 User manual

Worcester GREENSTAR 25Si User guide

Worcester

Worcester GREENSTAR 25Si User guide

Worcester Greenstar 2000 User manual

Worcester

Worcester Greenstar 2000 User manual

Popular Boiler manuals by other brands

Weil-McLain PEG 5 Series User's information manual

Weil-McLain

Weil-McLain PEG 5 Series User's information manual

Logano G334X Installation and service instructions

Logano

Logano G334X Installation and service instructions

M&G DuraVent DIS installation instructions

M&G

M&G DuraVent DIS installation instructions

Viessmann VIESMANN VITOLIGNO 300-H Technical guide

Viessmann

Viessmann VIESMANN VITOLIGNO 300-H Technical guide

Lamborghini Caloreclima ERA 31 B 60 Installation and maintenance manual

Lamborghini Caloreclima

Lamborghini Caloreclima ERA 31 B 60 Installation and maintenance manual

Potterton Performa 9 SL HE user guide

Potterton

Potterton Performa 9 SL HE user guide

Laars MASCOT LX user manual

Laars

Laars MASCOT LX user manual

DUYAR OPUS Series Installation operation & maintenance

DUYAR

DUYAR OPUS Series Installation operation & maintenance

Sime RMG Mk.II Series Installer's instructions

Sime

Sime RMG Mk.II Series Installer's instructions

Vaillant ecoTEC plus VC 406/5-5 Installation and maintenance instructions

Vaillant

Vaillant ecoTEC plus VC 406/5-5 Installation and maintenance instructions

Warmhaus EWA 20 installation manual

Warmhaus

Warmhaus EWA 20 installation manual

Weil-McLain CGA 2 Series Installation and maintenance guide

Weil-McLain

Weil-McLain CGA 2 Series Installation and maintenance guide

U.S. Boiler Company B series 2 User's information manual

U.S. Boiler Company

U.S. Boiler Company B series 2 User's information manual

Lochinvar KNIGHT 399 - 800 User's information manual

Lochinvar

Lochinvar KNIGHT 399 - 800 User's information manual

Evo HW 79 Installing, operating & maintaining

Evo

Evo HW 79 Installing, operating & maintaining

Baxi Bermuda SP Installation & servicing instructions

Baxi Bermuda

Baxi Bermuda SP Installation & servicing instructions

Gorenje AQUA ECOLOGIC 25C Instructions for use, maintenance and installation

Gorenje

Gorenje AQUA ECOLOGIC 25C Instructions for use, maintenance and installation

ECR Utica Heating UH15B-K Installation, operation & maintenance manual

ECR

ECR Utica Heating UH15B-K Installation, operation & maintenance manual

manuals.online logo
manuals.online logoBrands
  • About & Mission
  • Contact us
  • Privacy Policy
  • Terms and Conditions

Copyright 2025 Manuals.Online. All Rights Reserved.