Workhorse W3DC Series User manual

WorkhorsePumps.com | 916-623-4621
WORKHORSE
Owner’s Manual
W3DC Series
WORKHORSE. Hard working
Solar Pumps for hard
working Americans
W3DC

on your WORKHORSE Solar Pump
and a new era of harvesting sunlight for water on your
land - for years and years to come! Our company feels
blessed with the support from great customers - the
families, the plants, and the animals WORKHORSE
pumps support. Our engineers have invested millions in
making it the best solar water pump you can buy with
your hard earned dollars. But we also know it doesn’t
stop there. Industry leading warranties and USA-based
technical support engineers will keep your pump
performing at its best for years to come. We hope you
enjoy your solar pump, and feel free to reach out to us at
any time for support… or for more solar pumps!
Warning: Risk of Electric Shock. Solar panels and batteries can produce a significant amount of energy,
which can cause electric shock. Whenever you’re working with wiring or connections, make sure to use
caution. Be sure to ground the system for safety and to prevent damage to equipment. Remember, safety
first! Workhorse is not liable for damage or injuries that result from improper installation technique. If you’re
unsure about the safety of any step in this manual, please consult a professional.
WorkhorsePumps.com | 916-623-4621
2

System Components
1. PUMP MOTOR — Heavy duty permanent magnet DC motor with laser
welded stainless steel housing. The motor has a built in, state of the art
controller and can operate from Solar Panels DC power directly. Motors
have two conductors, two for power and one for ground. ** This series of
pumps cannot run on AC Power
2. PUMP END — Pump ends are stainless steel and designed for years of
pumping. Outlet size is 1-¼” for each model. Female NPT thread. See
specification table for exact outlet sizes, diameters and lengths.
3. DC101 DISCONNECT SWITCH — All systems come with a DC101 Cut-off
switch for safely shutting down the system. The DC disconnect switch
should only be turned on once all electrical connections have been made.
Whenever connecting or disconnecting solar panels or pump
connections, make sure the DC disconnect switch is turned off. Even
when using a PSC50 controller (optional) the DC disconnect switch
should be installed between the solar array and the PSC50.
4. SOLAR PANELS & WIRE— Each solar panel, each one has a Positive
(male) and Negative MC4 Connector which will wire to the DC101
switch. 20’ of extension wire is included allowing for quick connection.
5. PSC50 CONTROLLER (optional) — The controller is optional, it adds
the functionality to use a Tank sensor or pressure switch to shut the
pump off.
6. FLOATS / SENSORS (optional) — Depending on usage, systems with
PSC50 Controllers may include a float switch. Low water sensors not
required for W3DC models.
3
WorkhorsePumps.com | 916-623-4621

Overview Diagram
Solar Panels with DC101 Cut-off Switch
4
* Waterproof (if
possible protect
from direct sun
and weather)
WorkhorsePumps.com | 916-623-4621
+ To Pump
Splice
together
MC4s pigtails
to + and -
Pump Wires
(wire nuts can be
used for testing but
butt crimps and
heat-shrinks are
included)
Ground the
green wire
from pump

(Optional) Overview Diagram
With Optional PSC50 and Tank Float Sensor
5
WorkhorsePumps.com | 916-623-4621
Waterproof (if possible,
protect from direct sun
and weather)
* Waterproof
(if possible
protect from
direct sun and
weather)

TANK WATER LEVEL
For ‘tank full’ shutoff, use TWL
terminals for use with tank float
or regular action pressure switch.
Connect with jumper wire if not
using sensor or pressure switch
WELL WATER LOW
When low water sensor does
not come pre-wired to W4H
pumps, use WWL terminals
and included 2 wire low
water sensor
PUMP WIRES - To extend pump wire, splice on
two strand + ground (three total strands),
submersible pump cable. 10 or 12 AWG are most
common depending on length. Label wires + and
- from the pump to ensure proper polarity! Ground
wire must be in the Ground terminal.
PSC50 Wiring Details
Your PSC50 allows you to:
- Connect a tank float switch or pressure switch for shut-off
- If needed, use a low water sensor for shut-off
SOLAR INPUT
Connects to solar array
through DC Cut-off Switch
Ensure Proper Grounding
and Polarity
6
OPEN CIRCUIT - Pump On
CLOSED - Pump Off
OPEN CIRCUIT - Pump Off
CLOSED - Pump On

POWER
Button
Toggle Pump
On & Off
Sensor Indicator Lights
TANK = Tank Full
DRY = Well Level Low
Pump Light
SOLID Light when
running
BLINKING during
two minute
warm-up!
POWER LIGHT
ON / OFF
PSC50 Indicator Lights
7
WorkhorsePumps.com | 916-623-4621

Site Planning
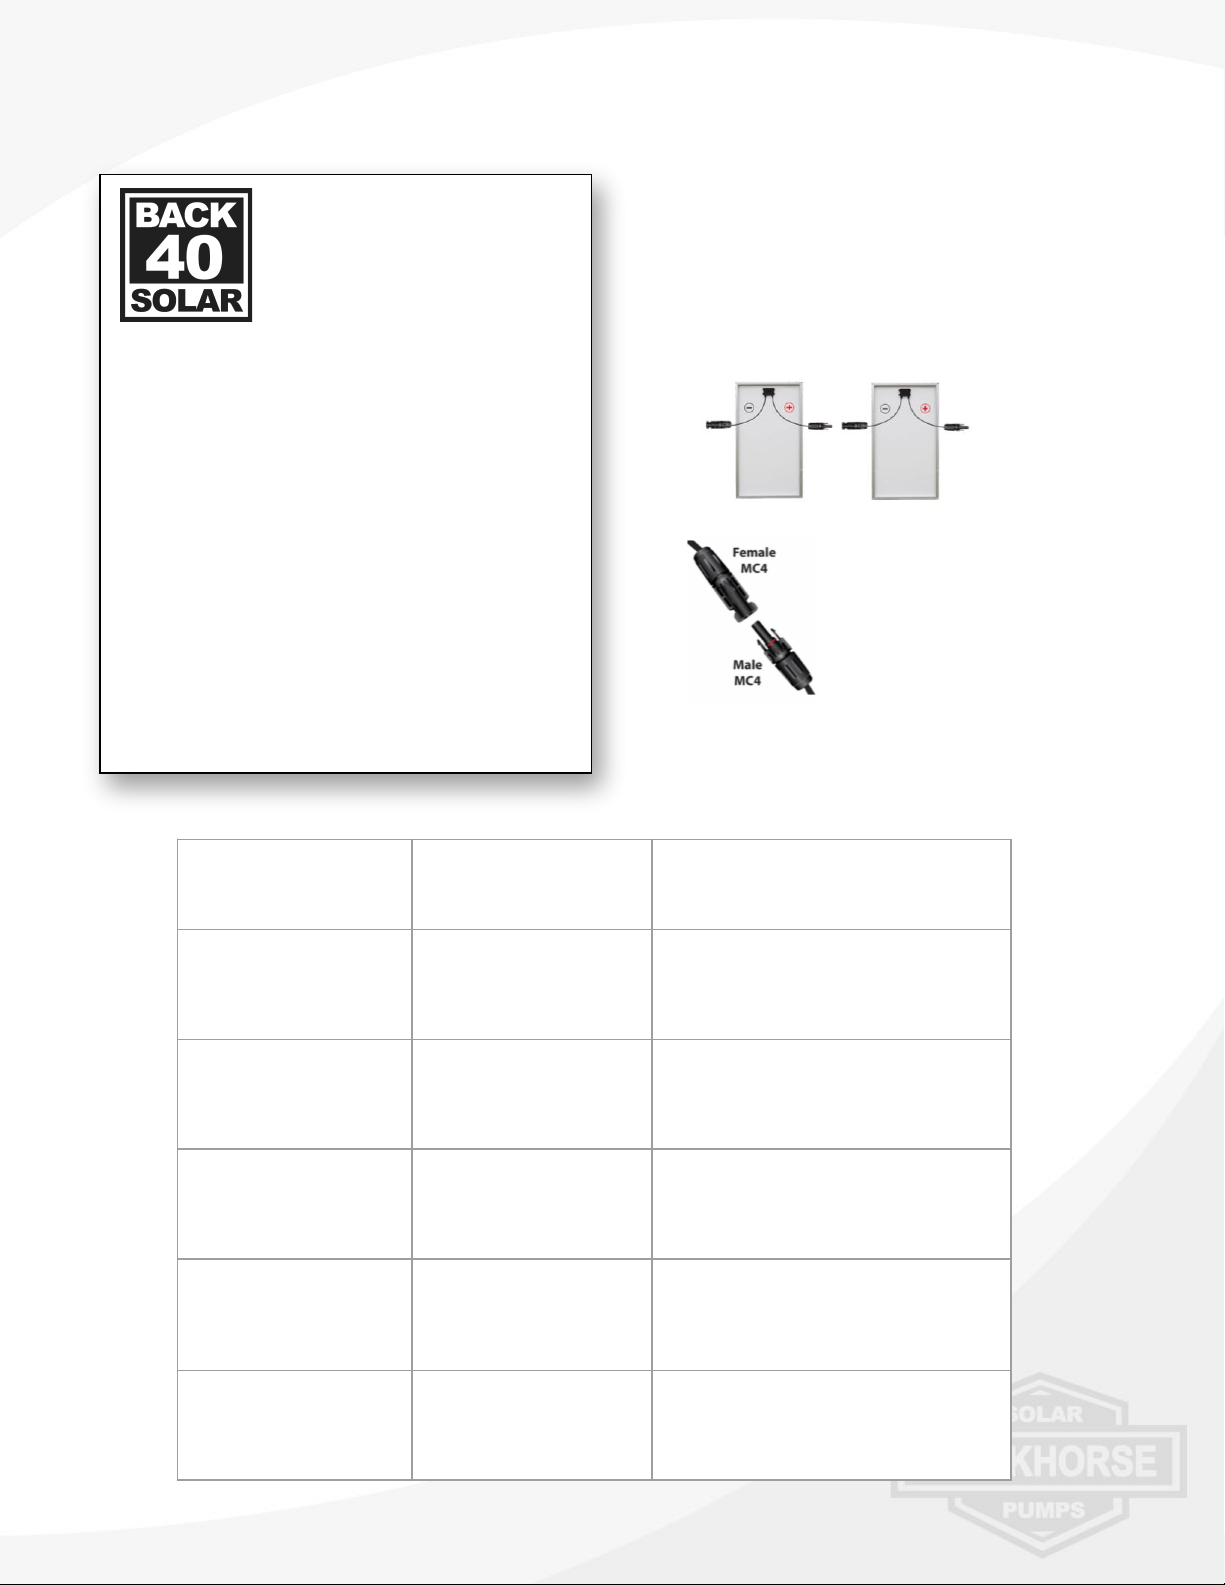
✓PANEL LOCATION- Solar panels
should be mounted on a secure
structure, ground mount or top of
pole mount. Panels should face true
South and at an angle appropriate
for your latitude. If you are
mounting your panels on an already
existing structure, try to get as close
to the correct angle as possible.
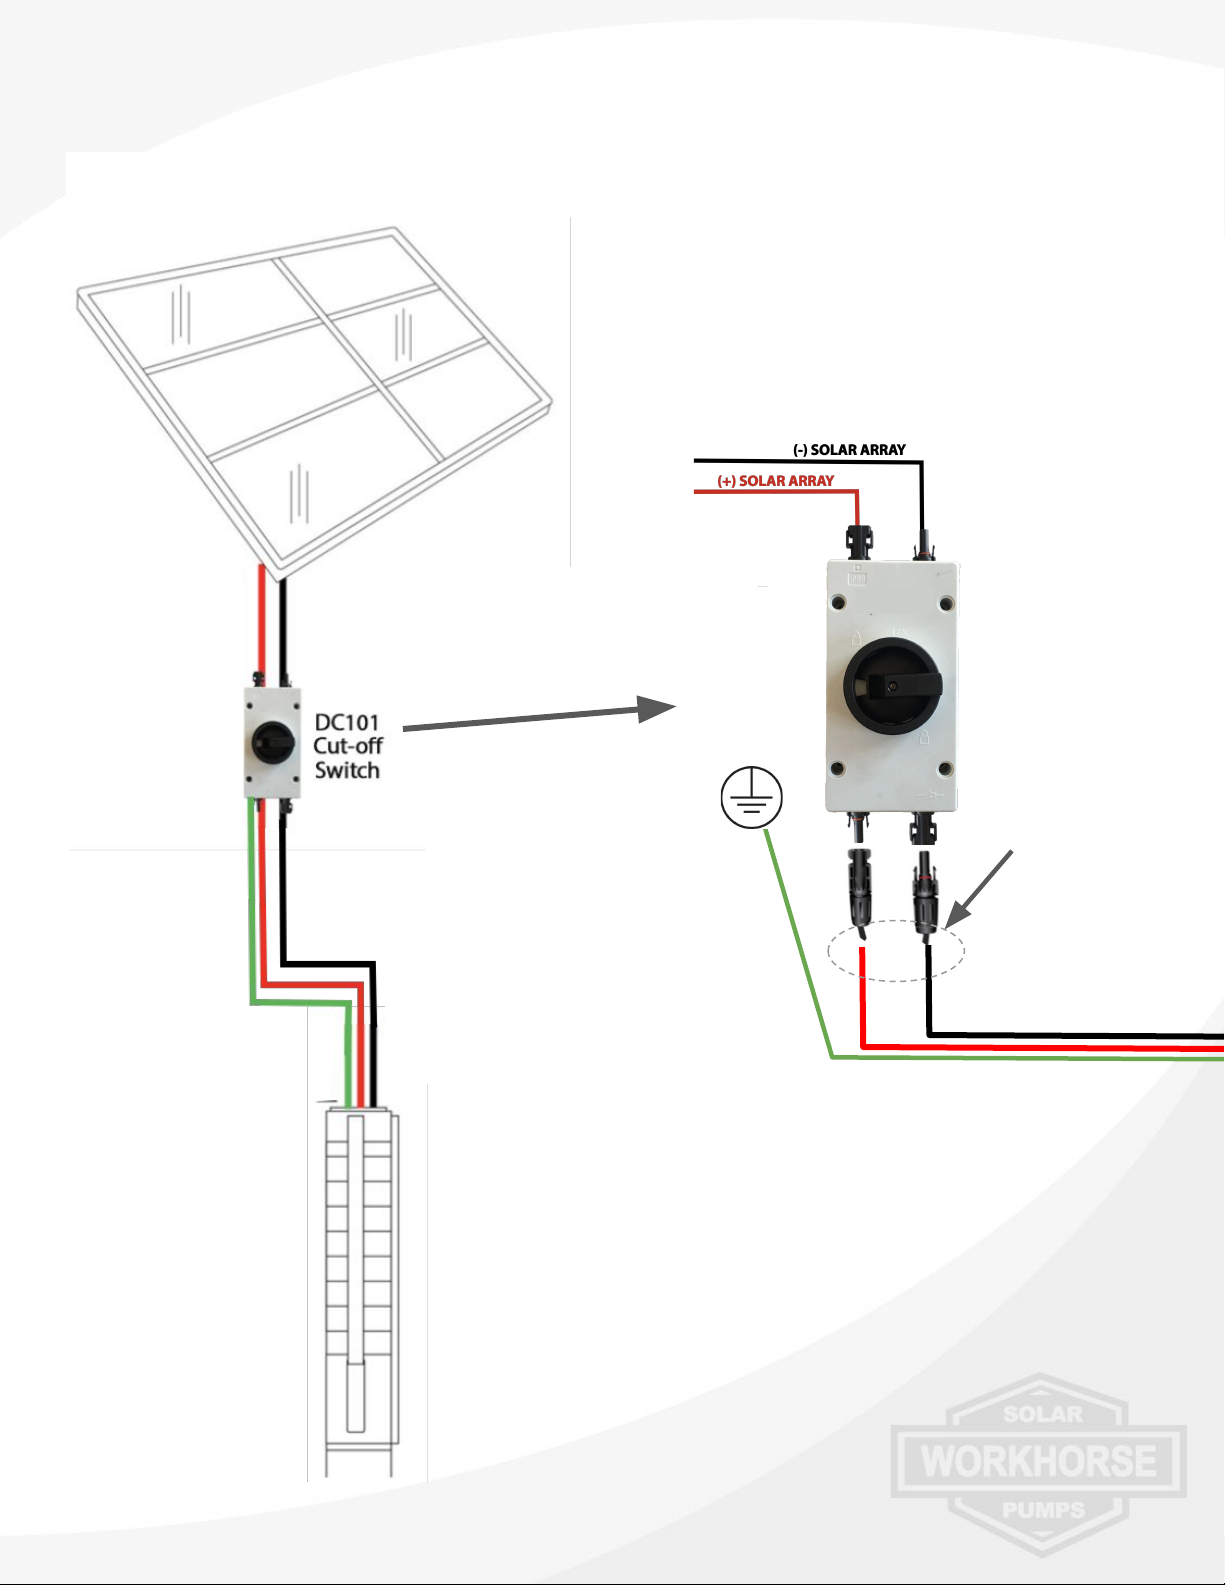
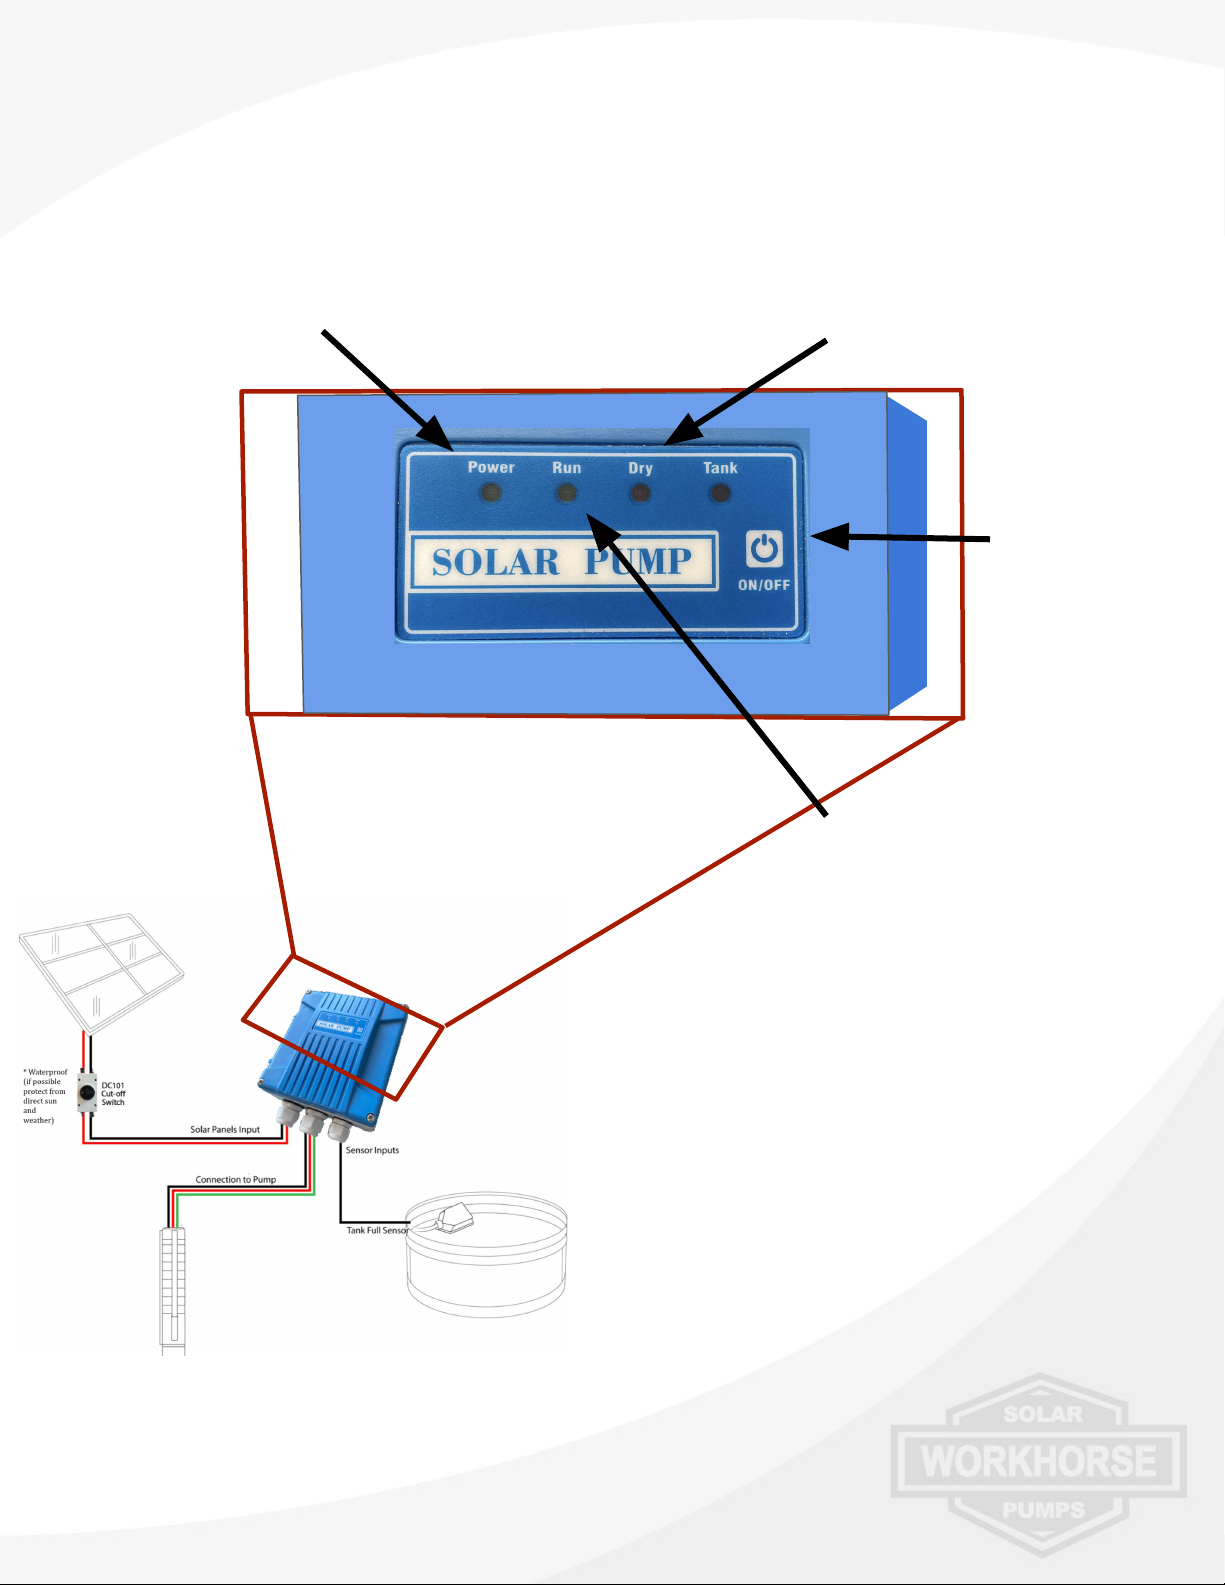
✓GROUNDING- It is important to
ground the entire solar well pump
system to ensure proper safety
and to prevent damage in the
event of a lightning strike but also
to prevent static buildup. In
lightning prone areas, this is
especially important and a long
dedicated copper ground rod
should be installed near the solar
panels and controller. If the well
casing is metal and local code
allows, it can be used for an Earth
ground, instead of dedicated
ground rod. Do not connect the
sensors or the solar panel returns
(-) to Earth ground.
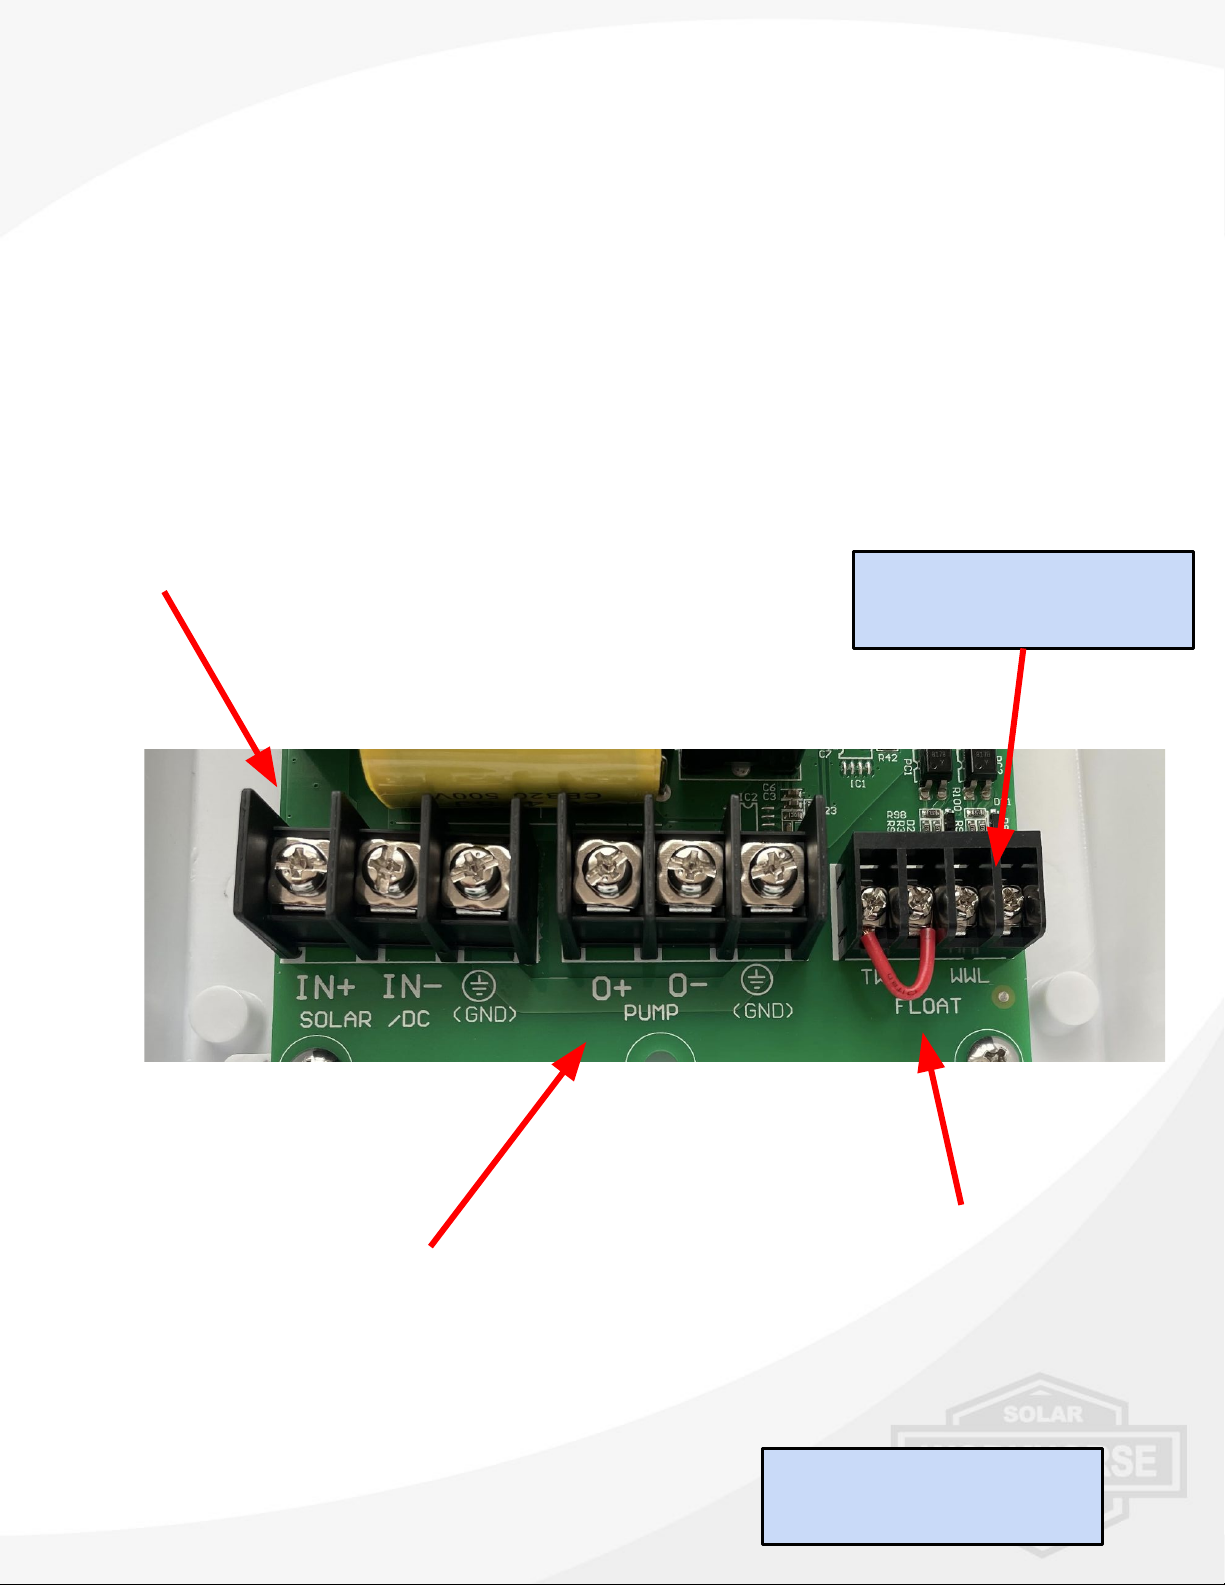
✓No AC POWER- Without an
external converter box that
converts AC to DC for the W3DC
pumps, AC power cannot be used.
KEY POINTS
●Mount the solar panels facing south at
an angle appropriate for your latitude.
●Avoid all shadows on the solar array.
Even a small shadow on one part of a
panel can restrict current for all of the
panels, significantly affecting system
performance.
8
✓AVOID SHADOWS- Choose a location
for the panels that gets plenty of sun
and is free from daily shadows. One of
the most common issues with low
performing systems is shadows on the
solar arrays. Even a small shadow on
one part of a panel can restrict current
for all of the panels, significantly
affecting system performance.
WorkhorsePumps.com | 916-623-4621

Solar Panel Configurations
200 Watts
2P - 2 Panels
Mounts to 2”
ID, 2-3/8” OD
Steel Post
400 Watts
4P - 4 Panels
Mounts to 4”
ID, 4-1/2” OD
Steel Post
800 Watts
8P - 8 Panels
Mounts to 4”
ID, 4-1/2” OD
Steel Post
1600 Watts, 2x 8P - 16 Panels
2x 4” ID, 4-1/2” OD Steel Posts
1000 Watts
2x 8P - 10 Panels
5 panels on each
Mounts to 2x 4”
ID, 4-1/2” OD
Steel Post
Using 100W Solar Panels and Adjustable Tilt Top-of-Pole Racking
Wire Panels
in Series
Wire Panels
in Series
Wire Panels in
Series/Parallel (4x2)
Wire Panels in
Series/Parallel (5x2)
Wire Panels in
Series/Parallel (8x2)
9
WorkhorsePumps.com | 916-623-4621
1200 Watts, 2x 8P - 12 Panels
2x 4” ID, 4-1/2” OD Steel Posts
Wire Panels in
Series/Parallel (6x2)

Solar Panel Specs
Tested to Hail, Wind
Requirements,
IEC 612512 / IEC 61646
UL1703 Standards comply fully
with NRCS
You will link your solar
panels together and connect
to the controller by clipping
MC4 connectors together.
Each MC4 connector is either
a male end or female end
(see image). They simply
snap together to make safe
and easy connections.
Model Low Power High Power **
Wired with Y Connectors
W3DC03 2x 100w
In Series
Add 2x 100w
In Parallel to
the first 2x Panels
W3DC05 3x 100w
In Series
Add 3x 100w
In Parallel to
the first 3x Panels
W3DC07 4x 100w
In Series
Add 4x 100w
In Parallel to
the first 4x Panels
W3DC10 6x 100w
In Series
Add 6x 100w
In Parallel to
the first 6x Panels
W3DC15 8x 100w
In Series
Add 8x 100w
In Parallel to
the first 8x Panels
WorkhorsePumps.com | 916-623-4621
Maximum Power
Open-Circuit Voltage
Short-Circuit Current
Maximum Power Voltage
Maximum Power Current
Pm
Voc
Isc
Vmp
Imp
B40-M100-38L
100W Mono
Solar Panel
100 W
23.4V
5.35A
19.8V
5.06A
All technical data at standard test condition
(E=1000W/m² Tc=25℃ AM=1.5)
Maximum System Voltage
Module Application
Nom Operating Cell Temp (NOCT)
Temperature Cycling Range
Weight
Dimensions
Cell Technology
DC 1000V
Class A
47±2℃
-40℃ to +85℃
6kg / 13.2lbs
980×530×30 mm
38.6”x20.9”x1.18”
Mono-Si
Company Name : Back40 Solar
ETL Certified to UL 1703
Power Tolerance 0~+3%
Made in Malaysia

WorkhorsePumps.com | 916-623-4621
Dimensions
DC101 G
W
H
DC101
Switch
H7” / 10”
W3.75”
G4.5”
11
W3DC03 W3DC05 W3DC07 W3DC10 W3DC15
S1.25”
FNPT
1.25”
FNPT
1.25”
FNPT
1.25”
FNPT
1.25”
FNPT
P7.7” 9.7” 10.8” 13.4” 13.8”
M12” 12” 14” 15” 17”
T19.7” 21.7” 24.8” 28.4” 30.8”
D3 25” 3 25” 3 25” 3 25” 3 25”

Other Equipment
Drop Wire
Most use 12 gauge 3-strand wire (3
conductors, no ground OR 2 conductors
with ground) to extend the pump wire to
your desired depth. Deeper wells consider
thicker gauge wire.
Drop Pipe
PVC, Steel, Black poly pipe. For solar, more
guys are moving to black poly pipe that is
at least 160psi. For shallower wells the 1-
¼” Female thread outlet can usually be
reduced down to a 1” barb and pipe
without significant frictional loss.
Plumbing Parts
Proper couplers and thread tape to attach
pump’s female thread to your drop pipe,
and at the top of the well casing.
Safety Rope / Line
The drop pipe will hold the pump, but the
rope will support the pump in case the
drop pipe breaks or is damaged.
Tools to bring
●Wire stripper/crimper
●Screwdrivers (flat and Phillips head)
●Electrical tape (for wrapping around
wire to drop pipe)
●Teflon tape or thread sealant for tight
thread connections (recommended)
Parts & Tools for Install
Grounding
Grounding rod and bare copper wire to
ground your pump system
Well Seal
A cap or seal and plumbing for the top of
your well casing
Torque Arrestors & Spacers
With slow-start and slow-stop pumps like
WORKHORSE, torque arrestors are far
less commonplace and are usually omitted
during installation. There is no sudden
starting and stopping of the motor.
Solar Panel Racking
Hardware to mount solar panels unless
using WORKHORSE racking.
Mounting Posts
For WORKHORSE racking, you’ll need 8’ to
10’ of 2” ID, 2-3/8”OD (for the 2-panel
mount) or 4” ID, 4-1/2”OD (for each 4P and
8P mount system) Schedule 40 Steel Pipe
●Adjustable wrenches
●Heat gun or torch for heat-shrink
sleeves
●Multimeter (highly recommended)
WorkhorsePumps.com | 916-623-4621
12

System Troubleshooting
TEST1: CHECK SOLAR PANELS
By far the number one issue with systems are the solar panels
being incorrectly setup or located. Make sure testing is performed
on a sunny day and there are no shadows on the solar array. Even
a very small shadows on one panel will impact output of all panels.
Adjust your panel angles for the season and make sure they are
facing south. Avoid testing on cloudy days.
TEST 2: SOLAR CONNECTORS
Second most common issue are the solar panel connectors not
making contact. Either the connectors are not fully seated, or the
internal pins are not fully seated in the connector housing. Check
all connectors and make sure the wire is fully seated and locked
into the housing. Check for DC voltage at the output of the DC
disconnect.
TEST 3: CURRENT CHECK
Use a clamp on amp meter to check for current flowing through the
solar panel wires or pump wires. Current is an indication the
motor is running but there might not be enough power for the
water to reach the surface. Record this current and compare
against Imp on the backside of the panels. Current output is
directly proportional to amount of sunlight on the panels.
TEST 4: HARD RESET
If the controller/pump is getting power but not operating perform
a hard reset. Turn off DC Cut-off switch to disconnect all power
from the controller, allow the system to power down for about a
minute and power back up. Once powered up, you’ll have to wait a
full 120 seconds before the system will begin pumping.
TEST 5: WIRE RESISTANCE
Unlike single and 3 phase pumps, testing wire resistance does not
provide us any usable information for troubleshooting, other than
differentiating wires if they get mixed up after splicing. Sometimes
you can catch a bad splice as resistance between + and - is usually
in the low MOhms, and + / - and ground will be open circuit.
13
WorkhorsePumps.com | 916-623-4621

System Troubleshooting
Issue Possible Causes Test/Fix
No Water
Solar power not reaching
pump
Failed Underwater Splice
Startup initialization
countdown
Check all MC4 connections TEST 2,
TEST 3
Vibration, but
No Water Still ramping up speed Wait for 120 seconds
Pumped, then
Stopped Safety shutdown
Open the valve on your plumbing
outlet slowly on first startup. Soft or
Hard reset to override timer and
reset to 120s startup countdown.
Low Flow
Rate
Not enough power is reaching
the pump
Too late / early in the day for
sufficient current from solar
panels
-Most common low flow or no flow is
low power due to evening, clouds or
shadows on the array.
-Eliminate any shade from the solar
panels
-Ensure proper panel angle and full
sun exposure
TEST 1, TEST 3
Surging /
Decreased Flow
Rate
Pumping dirty / sandy water Check water pumped to ensure it is
free of any particles, rust, sand etc
14
MAINTENANCE
●We recommend wiping down the surface of your solar panels every 3–6 months (more
often if you’re in a dusty area)
WARRANTY
●WORKHORSE extends a comprehensive warranty discussed fully in the attached
documents. Work with a Certified Installer for more information or to submit a claim.
WorkhorsePumps.com | 916-623-4621

WorkhorsePumps.com
916-623-4621
This manual suits for next models
5
Table of contents
Popular Water Pump manuals by other brands

Warren rupp
Warren rupp SANDPIPER SH2-M Service & operating manual

KNF
KNF NF5 Operating and installation instructions

Veeder-Root
Veeder-Root VaporTEK Maintenance and Repair Instructions

EBARA
EBARA DVSU Operating instructions, installation & maintenance manual

KNF
KNF UFK 1.1100 EX installation instructions

Power Fist
Power Fist 8887135 manual

Milwaukee
Milwaukee M18 HUP700 Original instructions

Wilo
Wilo Stratos ECO 25/1-3 Installation and operating instructions

Bayrol
Bayrol Automatic Cl/pH quick guide

Flotec
Flotec FPXS2400A Series owner's manual

Homa
Homa Bully C140 WA Original instruction manual

Wayne
Wayne 351301-001 Operating instructions and parts manual