WYLMAN PEGASUS User manual

FILLINGTHEGAPSINTECHNOLOGY
UserManual
PATENTPENDING
Dec2020
Rev.0

Table of Contents
1. WYLMAN PEGASUS 3
2. Safety Instructions 4
3. Compliance Statements 5
4. PEGASUS Overview 6-7
5. Included Accessories 8-10
6. Important Notes 11
7. Getting Started 12
7.1. Assigning PEGASUS Target 12-13
7.2. Activation 13-17
7.3. Deactivation 17-19
7.4. Activating/Updating PEGASUS Shield 19-21
8. Users 22
8.1. Users Privileges 22
8.2. Logging In 22-23
8.3. Changing Passwords 23-24
8.4. Resetting Passwords 24-25
9. Options 26
9.1. Session Settings 26
9.1.1. Session Time 26-27
9.1.2. Auto Logout and Shutdown 27
9.1.3. Session Invitations 27-29
9.1.4. Remote Access 29-30
9.1.5. IP Watchdog 30-31
9.1.6. Security 31-32
9.2. Network Settings 32
9.2.1. Network Adapters 32-34
9.2.2. Wi-Fi Access Points 34-36
9.3. PEGASUS Settings 36
User Manual 1
©2020 WYLMAN LLC. All Rights Reserved.

9.3.1. PEGASUS Password 36
9.3.2. Auto Updates 36-37
9.4. System Time 37-38
9.5. Shield Manager 38-39
9.6. License Manager 39-40
9.7. Check for Updates 40-43
10. Sessions 44
10.1. Connecting PEGASUS to Target Machine 44
10.2. Demo Sessions 44
10.3. Session Invitation 45-46
10.4. View Session 46-49
10.5. Control Session 49-52
11. Index 53
User Manual 2
©2020 WYLMAN LLC. All Rights Reserved.

1WYLMAN PEGASUS
PEGASUS is the most secure remote desktop setup and the only one that provides end to end remote desktop access
while effectively maintaining the air gapping of secured networks. It can be used in the most security sensitive systems.
Features:
1. Effectively maintains the air gapping of the remotely accessed computer
2. New approach achieving highest security
3. Easy User Interface
4. Can establish various types of connections with different privileges : Viewer, Controller
5. Doesn't require installation of any software to the accessed computer
For any questions please refer to https://wylman.com/contact
For any suggestions or for reporting technical issues contact [email protected]
User Manual 3
©2020 WYLMAN LLC. All Rights Reserved.

2Safety Instructions
Use the following safety guidelines to protect your PEGASUS from potential damage and to ensure your personal safety.
Unless otherwise noted, each procedure included in this document assumes that the following conditions exist:
You have read the safety information included.
A component and/or attachment can be removed by performing the installation procedure in reverse order.
If a third party attachment was used, you have read the safety instructions that came with it.
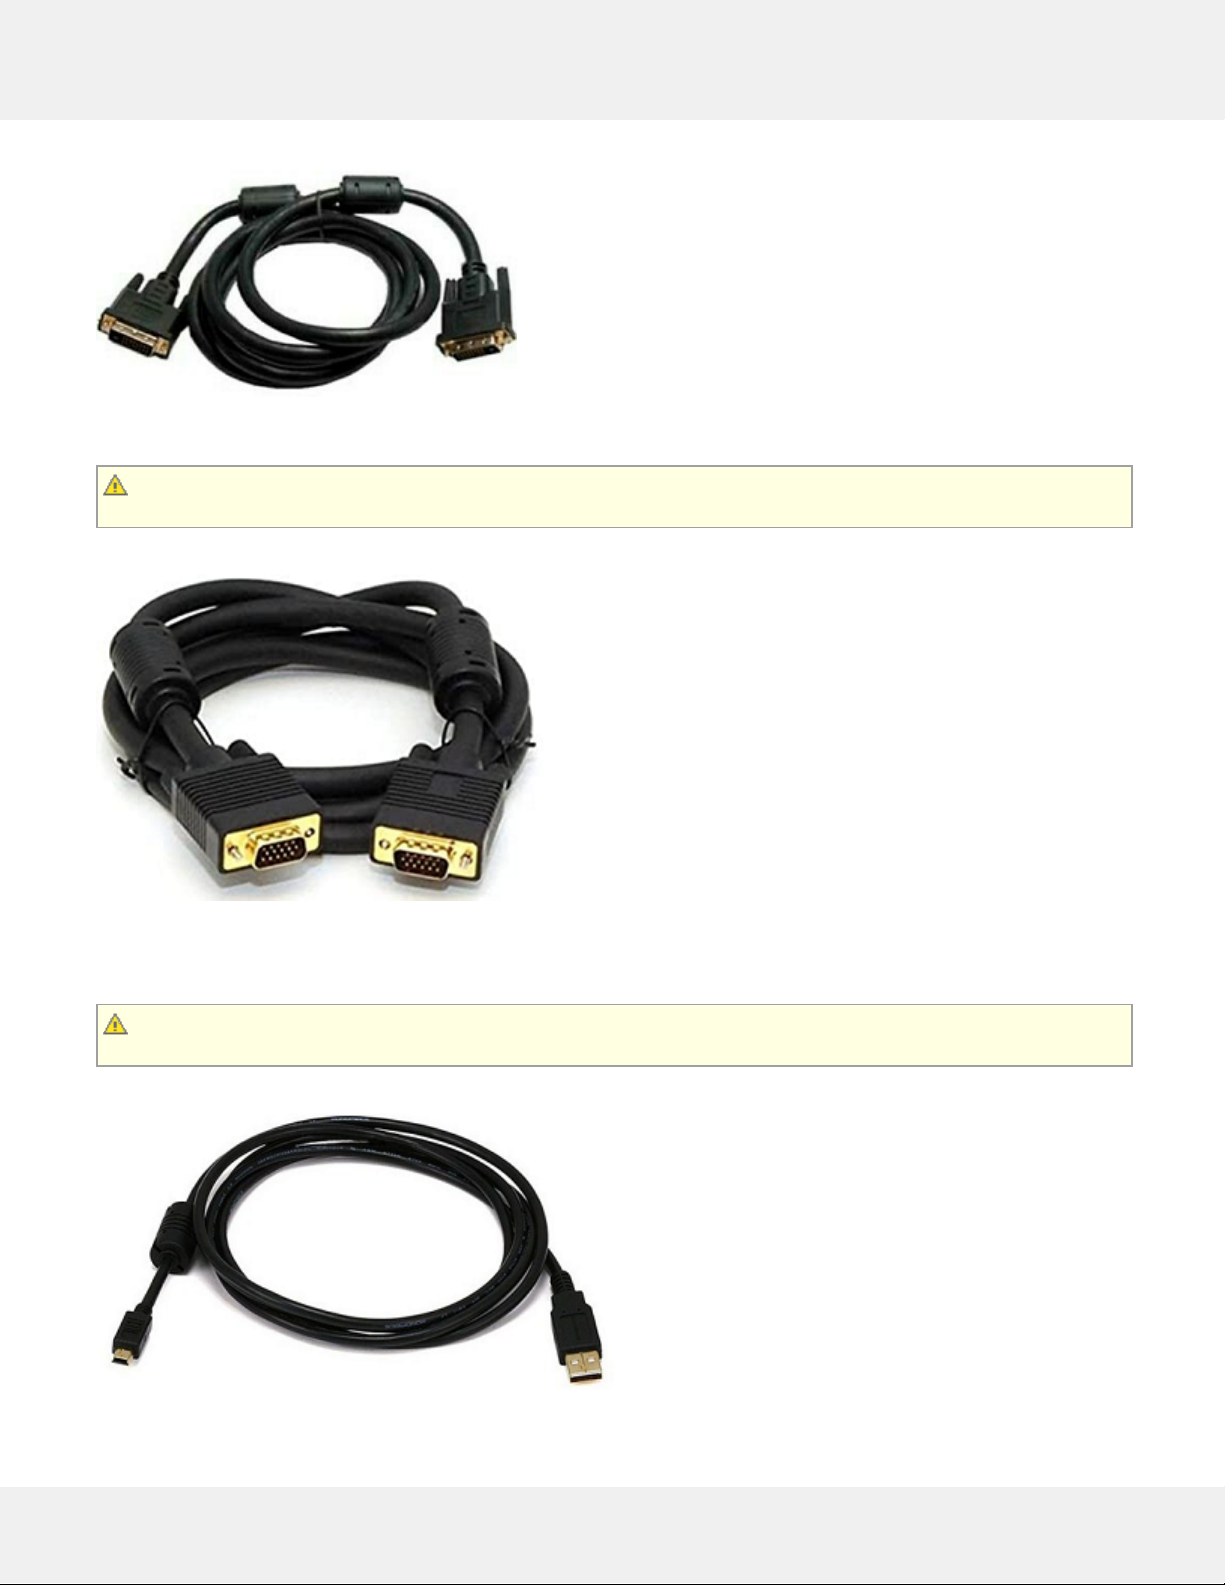
For best performance, only use the provided accessories and cables. Please contact us if cable(s) replacement or
cable(s) different length is/are needed.
Repairs may only be done by a certified service technician. End user should only perform troubleshooting and
simple accessory/cable replacement as authorized in this product documentation, or as directed by the online or
telephone service and support team. Damage due to servicing that is not authorized by WYLMAN is not covered
under warranty. Read and follow the safety instructions that came with the product.
Handle PEGASUS and accessories with care. Although PEGASUS enclosure is very rigid, strong impact from drops
can cause internal electronics to malfunction. Such damage will not be covered under warranty.
When disconnecting a cable, pull on its connector or on its pull-tab, not on the cable itself. As pulling connectors
apart, keep them evenly aligned to avoid bending any connector pins. Also, before connecting a cable, ensure that
both connectors are correctly oriented and aligned.
PEGASUS is secured with high security tamper proof screws, the screws must be checked for tampering marks
before every use. If any tampering marks are noticed, DO NOT use PEGASUS and contact WYLMAN for support.
WARNING: This product is designed to be used indoors and in non-hazardous areas. Do not use this product in a
hazardous classified areas as this may result in fires and/or explosions.
WARNING: To avoid damage to PEGASUS, use only the power supply provided. Do not use power supplies
designed for other devices.
User Manual 4
©2020 WYLMAN LLC. All Rights Reserved.

3 Compliance Statements
FCCComplianceStatement:
This device complies with part 15 of the FCC rules. Operation is subject to the following two conditions: (1) this device
may not cause harmful interference, and (2) this device must accept any interference received, including interference
that may cause undesired operation.
Note: This equipment has been tested and found to comply with the limits for a Class A digital device, pursuant to part
15 of the FCC Rules. These limits are designed to provide reasonable protection against harmful interference when the
equipment is operated in a commercial environment. This equipment generates, uses and can radiate radio frequency
energy and, if not installed and used in accordance with the instruction manual, may cause harmful interference to radio
communications. Operation of this equipment in a residential area is likely to cause harmful interference in which case
the user will be required to correct the interference at his own expense.
RoHSComplianceStatement:
All components and solder alloys used in this product comply with the RoHS Directive. The RoHS Directive prevents all
new electrical and electronic equipment placed on the market in the European Economic Area from containing more
than agreed levels of lead, cadmium, mercury, hexavalent chromium, poly-brominated biphenyls (PBB) and poly-
brominated diphenyl ethers (PBDE).
User Manual 5
©2020 WYLMAN LLC. All Rights Reserved.

4 PEGASUS Overview
1. Grounding Screw
It is recommended to connect the grounding screw to a clean/instrument ground bus.
2. 12VDC Power Input
Power input port; only user provided power supply.
3. Audio Output (3.5mm)
Optional audio output.
4. USB 2.0 Ports (x2)
Optional expansion USB ports, can be used to connect external network adapters, Keyboard, mouse, etc. It does not
support using any type of storage read and/or write devices; USB flash drive, external disc drive, etc.
5. Network Port (RJ45)
Optional wired network connection to connect to LAN and/or to the internet.
6. HDMI Output
Optional video output, can be used for PEGASUS configuration and/or monitoring.
User Manual 6
©2020 WYLMAN LLC. All Rights Reserved.

7. HDMI Input
Optional HDMI input, can be used to receive video signal from Target computer.
8. DVI Input
Optional DVI input/VGA input with the DVI-VGA adapter (included), can be used to receive video signal from Target
computer.
9. Keyboard & Mouse Port (Micro USB Type B)
Used to transfer the Keyboard & Mouse Commands from PEGASUS to Target Computer.
10. Power Switch
Used as the master on/off switch for PEGASUS.
User Manual 7
©2020 WYLMAN LLC. All Rights Reserved.

5 Included Accessories
1. Power Supply
UL certified AC (100-240VAC) to DC (12VDC 5A maximum) adapter.
It is strongly advised to only use the included power supply.
2. PEGASUS Shield
USB 2.0 8GB USB drive. Preloaded with PEGASUS Target ID software. Refer to "Activating/UpdatingPEGASUS
Shield(Section7.4)" section for details on loading the PEGASUS Shield software to the USB drive.
Please make sure that the included PEGASUS Shield USB drive is labeled with the same serial number as your
PEGASUS device. For security, these are the only USB drive that will work with your PEGASUS. Any other USB
drive will be detected as a security thread and PEGASUS will immediately shutdown.
Although PEGASUS Shield USB drive has much more capacity than needed for its function, it is strongly advised
to limit its use as intended in this manual.
3. HDMI Cable (6.6 ft)
High Speed HDMI Cable (30 AWG) Gold Plated with Ferrites (2M / 6.6 FT). This cable to be used to connect the Target
machine HDMI output to PEGASUS HDMI input.
Although any HDMI cable would work, it is strongly advised to use this cable to maintain the RFI under the FCC
legal limits. If your need different cable length please contact WYLMAN for support.
4. DVI-D Dual Link Video Cable (6.6 ft)
User Manual 8
©2020 WYLMAN LLC. All Rights Reserved.

DVI-D Dual Link DVI Cable with Ferrites (2M / 6.6 FT). This cable to be used to connect the Target machine DVI output
to PEGASUS DVI input.
Although any DVI cable would work, it is strongly advised to use this cable to maintain the RFI under the FCC
legal limits. If your need different cable length please contact WYLMAN for support.
5. SVGA Cable (6 ft)
SVGA Cable with Ferrites (1.8 M / 6 ft). This cable to be used to connect the Target machine DVI output to PEGASUS
DVI input (DVI to VGA adapter must be used, included).
Although any VGA cable would work, it is strongly advised to use this cable to maintain the RFI under the FCC
legal limits. If your need different cable length please contact WYLMAN for support.
6. USB 2.0 Cable (6.6 ft)
USB 2.0 cable A-MicroB male with ferrites (2M / 6.6 FT). This cable to be used to connect the PEGASUS Keyboard and
Mouse output to the Target machine.
User Manual 9
©2020 WYLMAN LLC. All Rights Reserved.

This cable must be connected to establish a session, even if the session was View only session.
7. VGA to DVI Adapter
Converts the VGA video signal to DVI video signal to be compatible with PEGASUS DVI input. To be used together with
the VGA cable when the Target machine video output is VGA.
8. USB Ethernet Adapter
USB 2.0 to Ethernet 10/100Mbps, to be used when redundant communications is needed for PEGASUS.
9. USB Wi-Fi Adapter
USB 2.0 to Wi-Fi (2.4 GHz), to be used when wireless connection is needed for PEGASUS.
Please make sure that the included network adapters are labeled with the same serial number as your PEGASUS
device. For security, these are the only external network adapter that will work with your PEGASUS. Any other
network adapter will be detected as a security thread and will be immediately disabled by PEGASUS.
User Manual 10
©2020 WYLMAN LLC. All Rights Reserved.

6Important Notes
All passwords in the system are set to “WYLMAN” as default. It is strongly recommended to change the passwords
on the first use and frequently.
If wireless connection is required, connect the Wi-Fi adapter included to PEGASUS using one of the available USB
2.0 ports.
If communication redundancy is required, connect the USB Ethernet adapter included and/or Wi-Fi adapter
included to the available USB 2.0 ports.
Default passwords can be restored in case administrator password is lost. Please contact [email protected] for
assistance with passwords reset.
If authentication between PEGASUS and Target machine using PEGASUS Shield fails, this may be due to
unsynchronized time, please make sure that PEGASUS system time and Target machine time are synchronized.
If a hardware change was done to the Target machine or assigning a new Target machine, PEGASUS Shield must
be reconfigured. Please contact [email protected] for assistance.
Before Launching PEGASUS Shield software, make sure PEGASUS is connected to Target machine using the
provided USB cable, otherwise PEGASUS Shield will not work.
User Manual 11
©2020 WYLMAN LLC. All Rights Reserved.

7Getting Started
7.1 Assigning PEGASUS Target
PEGASUS will only work with the assigned PEGASUS Target Machine, to assign a target machine to PEGASUS follow
this procedure.
1. Plus the provided PEGASUS Shield USB in the machine you want to assign as PEGASUS Target
2. Browse to the root folder on the USB drive, the USB should only have one file "Pegasus Target ID.exe"
3. Before running the program, right click on the file, select properties and then go to Digital Signatures Tab
4. Verify the program digital signature is made by WYLMAN LLC, this makes sure that you have a safe and
untampered with program.
5. If you don't find the digital signature or it states anything else other than WYLMAN LLC, DO NOT RUN the
program, remove the USB immediately and contact WYLMAN for support
6. If digital signature is verified, run Pegasus Target ID.exe
7. This software pulls the hardware ID of your machine, this ID is encrypted for your security
User Manual 12
©2020 WYLMAN LLC. All Rights Reserved.

8. You may save the ID to a text file by pressing "Save ID to File" then email this file to WYLMAN to prepare your
license (Typically takes 1 business day)
9. The ID may be provided to WYLMAN in a phone call if the user is not comfortable sending the encrypted text,
call +1-832-632-4400 for assistance
10. Once the license has been prepared, WYLMAN will send an email (to the email on the account) notifying the user
that the license is ready and PEGASUS can be activated
7.2 Activation
This procedure explains how to activate your PEGASUS.
Make sure the box include all contents mentioned in the paper manual. Do not mix and match serialized
components.
This procedure assumes the user has read and completely understood the instructions in the paper manual,
powered up PEGASUS and has a way of interfacing with it (direct using keyboard, mouse and a monitor or
remotely using Microsoft Remote Desktop or TeamViewer).
PEGASUS is configured to start automatically once the power supply has been connected. This insures that the
device will restart after a loss of power event has been resolved.
The procedure assumes that PEGASUS is connected to the internet.
Procedure
1. After PEGASUS finishes the initial boot, the main login screen will show, login using PEGASUS USER password
All passwords in the system are set to “WYLMAN” as default. It’s strongly advised to change the passwords on the
first use and frequently.
For security, week passwords will not be allowed by the system.
2. After logging in, PEGASUS will continue to boot and a splash screen will popup
User Manual 13
©2020 WYLMAN LLC. All Rights Reserved.

3. During this time the system is going through software checks, hardware check and files integrity checks. If any
problem was detected, PEGASUS will state the problem on the Splash screen and shutdown. If this happens,
contact WYLMAN for support
Make sure no external removable drives are connected to PEGASUS, this will be detected as a security threat and
PEGASUS will shutdown.
4. After all checks are passed, PEGASUS main screen will be shown
User Manual 14
©2020 WYLMAN LLC. All Rights Reserved.

5. Go to Users -> Login
6. Select Administrator
7. Type you password and press Login
User Manual 15
©2020 WYLMAN LLC. All Rights Reserved.

8. The status bar will now show the logged in user as Administrator and Administrator controls will be available on
the menu bar
9. Go to Options -> License Manager
10. License Manager will popup
11. Enter your Activation Code, should be provided separately by an email from WYLMAN
Activation code will be needed to deactivate PEGASUS in case user wants to change the assigned target machine.
12. Click Activate
13. If the activation code is wrong an message stating "Activation Failed" will appear
14. If the activation code is correct, PEGASUS will be activated and will automatically restart to finalize the activation
User Manual 16
©2020 WYLMAN LLC. All Rights Reserved.

process
7.3 Deactivation
This procedure explains how to deactivate your PEGASUS. PEGASUS must be deactivated and reactivated in order to
pair it with a different target machine.
This procedure assumes PEGASUS is already activated.
The procedure assumes that PEGASUS is connected to the internet.
Procedure
1. If Go to Users -> Login
2. Select Administrator
3. Type you password and press Login
User Manual 17
©2020 WYLMAN LLC. All Rights Reserved.

4. The status bar will now show the logged in user as Administrator and Administrator controls will be available on
the menu bar
5. Go to Options -> License Manager
6. License Manager will popup
7. Enter your Activation Code used to activate PEGASUS
8. Click Deactivate, confirm deactivation request
9. If the activation code is wrong an message stating "Wrong Activation Code" will appear
10. If the activation code is correct, PEGASUS will be deactivated and will automatically restart to finalize the
User Manual 18
©2020 WYLMAN LLC. All Rights Reserved.

activation process
7.4 Activating/Updating PEGASUS Shield
This procedure explains how to activate or update your PEGASUS Shield.
This procedure assumes that PEGASUS has already been activated and connected to the internet and
Administrator is logged in.
1. Go to Options -> Shield Manager
2. Plug in the PEGASUS Shield USB into a PEGASUS USB port
3. Click "Detect Shield"
User Manual 19
©2020 WYLMAN LLC. All Rights Reserved.
Other manuals for PEGASUS
1
Table of contents