Xtreme XR-201 User manual
Page
1
(Photos may vary)
PLEASE BE SAFE WHEN RIDIN
X-Treme TM Electric Scooters
Model: XR-201
Product Handbook
Page
2
PLEASE BE SAFE WHEN RIDING
!ALWAYS WEAR A HELMET AND OBEY ALL LAWS!
BATTERY MAINTENANCE and
CHARGING INSTRUCTIONS
1. You MUST charge completely prior to initial use. (Follow
charging instructions in your Product Handbook)
2. Charge immediately after each use.
3. Charge before storage. You must charge every 30 days if not
in use.
4. Charge the unit for 6-8 hours after the light on the charger turns
green.
5. DO NOT allow this unit to deep discharge the battery.
6. For safety purposes, DO NOT charge for over 12 hours.
7. Turn the unit OFF when not in use.
This PRODUCT IS NOT INTENDED FOR EXTREME or
OFF-ROAD Use! Please take care of your XR-201!
DO NOT JUMP or ABUSE THIS PRODUCT!
DO NOT RIDE IN WET/ICY CONDITIONS!
Failure to follow these instructions will
VOID YOUR WARRANTY!
IMPORTANT
Failure to follow these INSTRUCTIONS will
VOID YOUR WARRANTY!

Page
3
WARNING
This product does not conform to Federal Motor Vehicle Standards and is not
intended for operation on public streets, roads or highways. Serious injury can
result from the unsafe operations of this product. Operator can minimize these
risks by using certain safety equipment such as: safety helmet, goggles, gloves,
elbow and kneepads and appropriate footwear.
DO NOT operate this product in traffic, on wet, frozen, oily or unpaved surfaces.
Avoid uneven surfaces, potholes, surface cracks and obstacles.
DO NOT use a water hose to clean this product.
This product is recommended for riders 3-8 years of age and under 80lbs.
SAFETY GUIDE
An adult should perform charging of the scooter. TO AVOID ELECTRIC
SHOCK, NEVER ALLOW CHILDREN TO HANDLE THE CHARGER OR
ATTEMPT TO PLUG THE BATTERY CHARGER INTO AWALL OUTLET!
Keep children away from the scooter during the charging process.
Do not place the battery near fire or heat.
To avoid damage to the battery, do not use the charger if it has been damaged
in any way.
Keep hands, face, feet and hair away from all moving parts.
Do not touch the motor or wheels while they are rotating.
Adult supervision during operation is required at all times.
The scooter is designed for flat terrains only. For safety purposes, never
allow children to operate the scooter in hilly areas.
When not in use, ensure the scooter is turned off and stored in an enclosed dry
area away from moisture or rain.
This product is ELECTRIC! DO NOT ride this product in wet conditions,
puddles or rainy weather.
The user of this product assumes ALL risks associated with its use. To
minimize these RISKS, the user must wear safety helmet, goggles, gloves,
elbow and kneepads and appropriate footwear.
IMPORTANT
PLEASE READ THIS BEFORE USING THIS PRODUCT
READ THIS FIRST!

Page
4
SAFETY GUIDE
The recommended age for riding this scooter is 3-8 years old and under 80lbs.
To avoid damage to the motor and footplate, do not overload the scooter.
Never ride with more than one person.
Inspect your scooter thoroughly before each use for loose or missing parts.
Avoid unintentional starts by turning the scooter off while not in use.
To avoid the risk of a short circuit in the electrical parts, do not use your
X-Treme Electric scooter in the rain and never spray or wash off your scooter
with water.
Do not place the battery near fire or heat.
To avoid damage to the battery, do not use the charger if it has been damaged
in any way.
Keep hands, face, feet and hair away from all moving parts.
Do not touch the motor or wheels while they are rotating.
Brakes are designed to control speed as well as stop the scooter. Practice
braking for proper slowing down and smooth stops.
Maintain your X-Treme XR-201 as recommended in this Product Handbook.
Use only quality replacement parts as recommended by the manufacturer.
Inspect the entire scooter prior to each use. Replace any part that is cracked,
chipped or damaged before use.
*NEVER ALLOW CHILDREN TO OPERATE THE SCOOTER WITHOUT ADULT
SUPERVISION.
Contact your dealer or X-Treme (www.x-tremescooters.com/support/)
if you need further assistance
QUICK
REFERENCE
SAFETY GUIDE

Page
5
TABLE OF CONTENTS
IMPORTANT
INFORMATION…………………………………….………………………...……2-3
QUICK REFERENCE……………………………………………………………….4
TABLE OF CONTENTS……………………………….…………….………………5
GETTING TO KNOW YOUR X-TREME XR-201………………..………...……..6
PACKAGE CONTENTS…………………………………………………………….7
GETTING STARTED………………..……………………………..………………..7
ASSEMBLY………………………………………………………………….…..…7-9
CHARGING……………………………………………………………..………….10
OPERATING INSTRUCTIONS…………………………………………………9-10
IMPORTANT SAFETY GUILDINES..…………………………….……………9-10
MAINTENANCE……………………………………………………………………10
OTHER QUESTIONS….………………………………………………………….10
GENERAL INFORMATION/TECH SUPPORT………………………………….11

Page
6
GETTING TO KNOW YOUR X-TREME XR-201
(Photo’s may vary)
Recommended Age 3-8yrs Speed 1.5mph – 3mph
Maximum Weight 80lbs Battery 6V 10AH x 2
Assembled Size 103 x 710x 75cm Charge Time 6-8 hours
Acceleration Foot Pedal Charge AC110V
Fuse 18A Speed Dual speed switch
Direction Forward/Reverse Sounds Yes
Page
7
PACKAGE CONTENTS
Your X-Treme XR-201 comes with the following items in the box. Please locate
all of the following:
1. Car Body, 1pc
2. Handlebar Assembly, 1pc
3. Wheel Covers, 4pc
4. Rear Fenders, 2pc
5. Faceguard, 01pcs
6. Seat Cushion, 1pc
7. Rear Axle, 1pcs
8. Steering Shaft, 1 pc
9. Front Wheels, 2pc
10. Rear Wheels, 2pc
11. Tool Kit nuts/bolts/washers
12. Charger, 1pc
GETTING STARTED
Please read and understand these instructions and the OPERATING
PROCEDURES section, prior to starting or riding your XR-201
KEEP CHILDREN AWAY DURING ASSEMBLY. SOME SMALL
PARTS POSE A CHOKING HAZARD. DISCARD ALL PLASTIC
COVERINGS AND BAGS.
Assembly
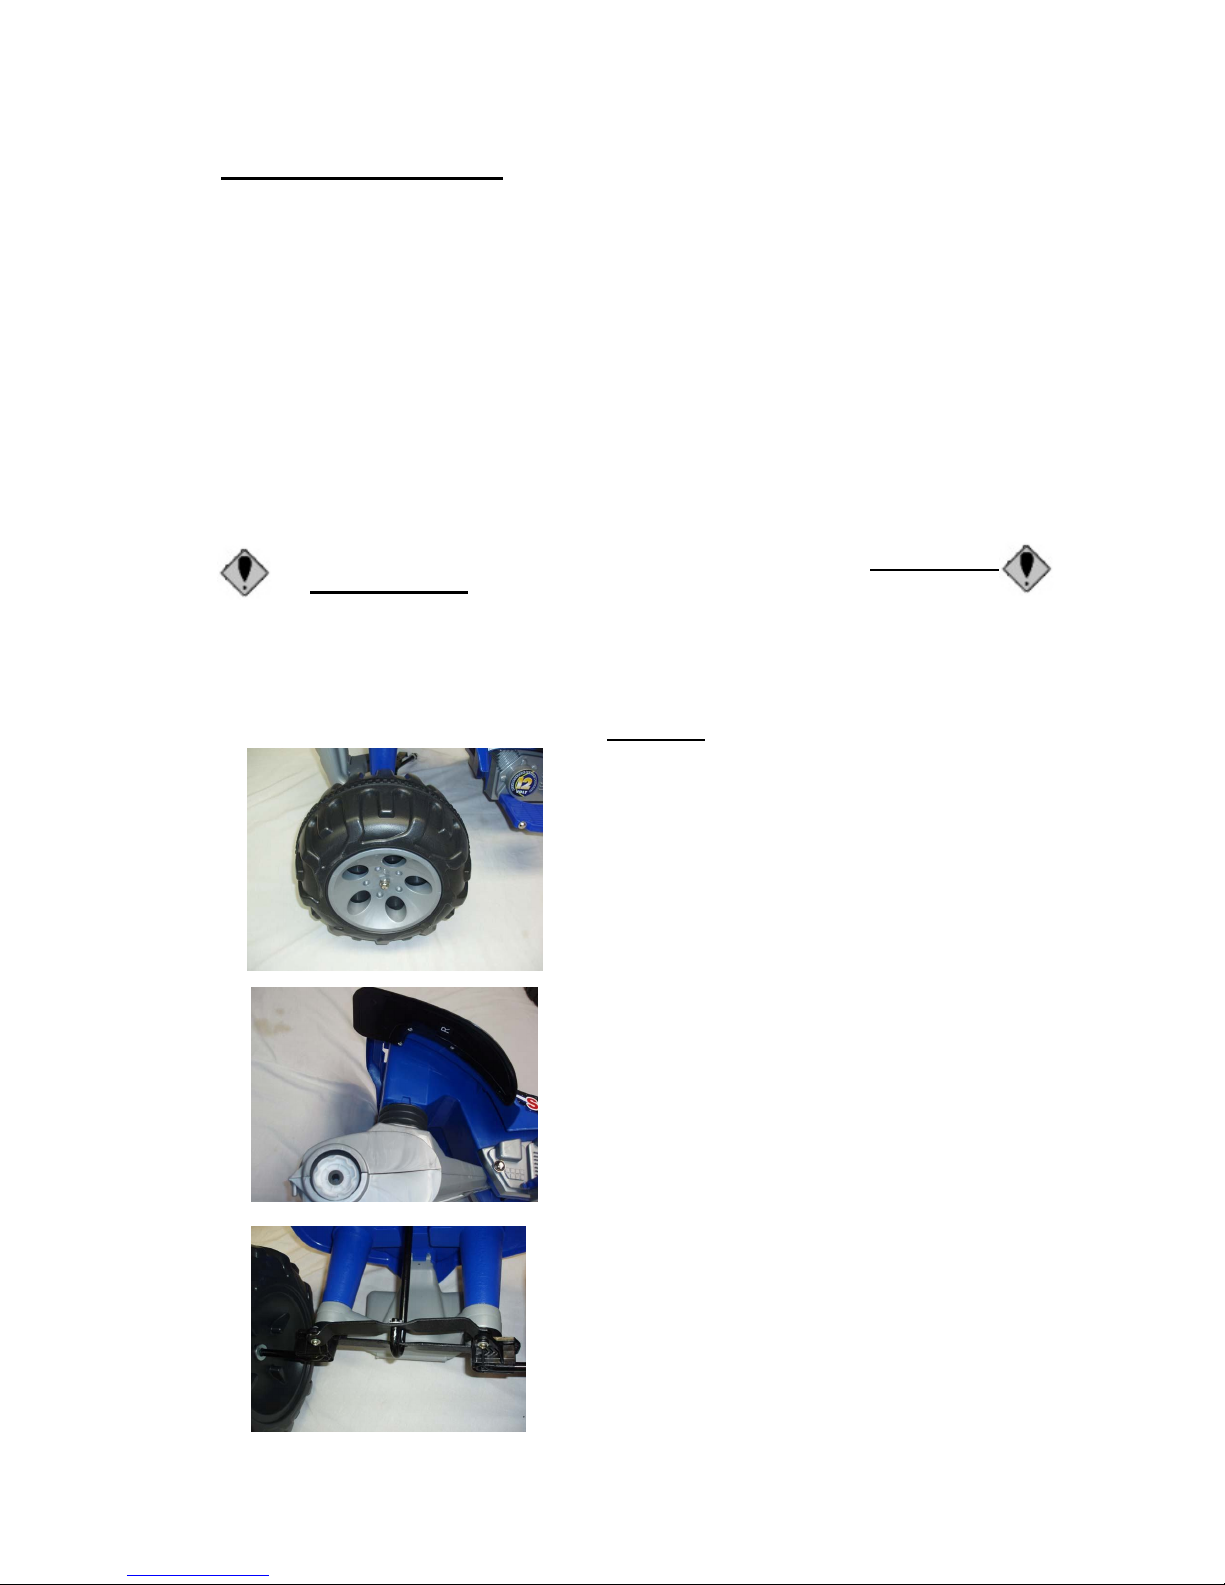
1. Carefully remove the XR-201 from the box.
2. Attach the two front wheels to the front
axles using the enclosed nut caps and
washers.
3. Turn the scooter on its site and Install the
rear fenders using the enclosed screws as
shown.
4. Install the steering shaft by turning the
scooter on its back and insert the shaft thru
the opening in the steering bracket as
shown having the u-shaped end also being
inserted into the second steering bracket.
When inserted correctly, the front wheels
should turn when the shaft is turned.
5. Secure the shaft by inserting a cotter pin
and washer thru the small opening in the
end of the steering shaft and bending the
pin to hold it in place.
Page
8
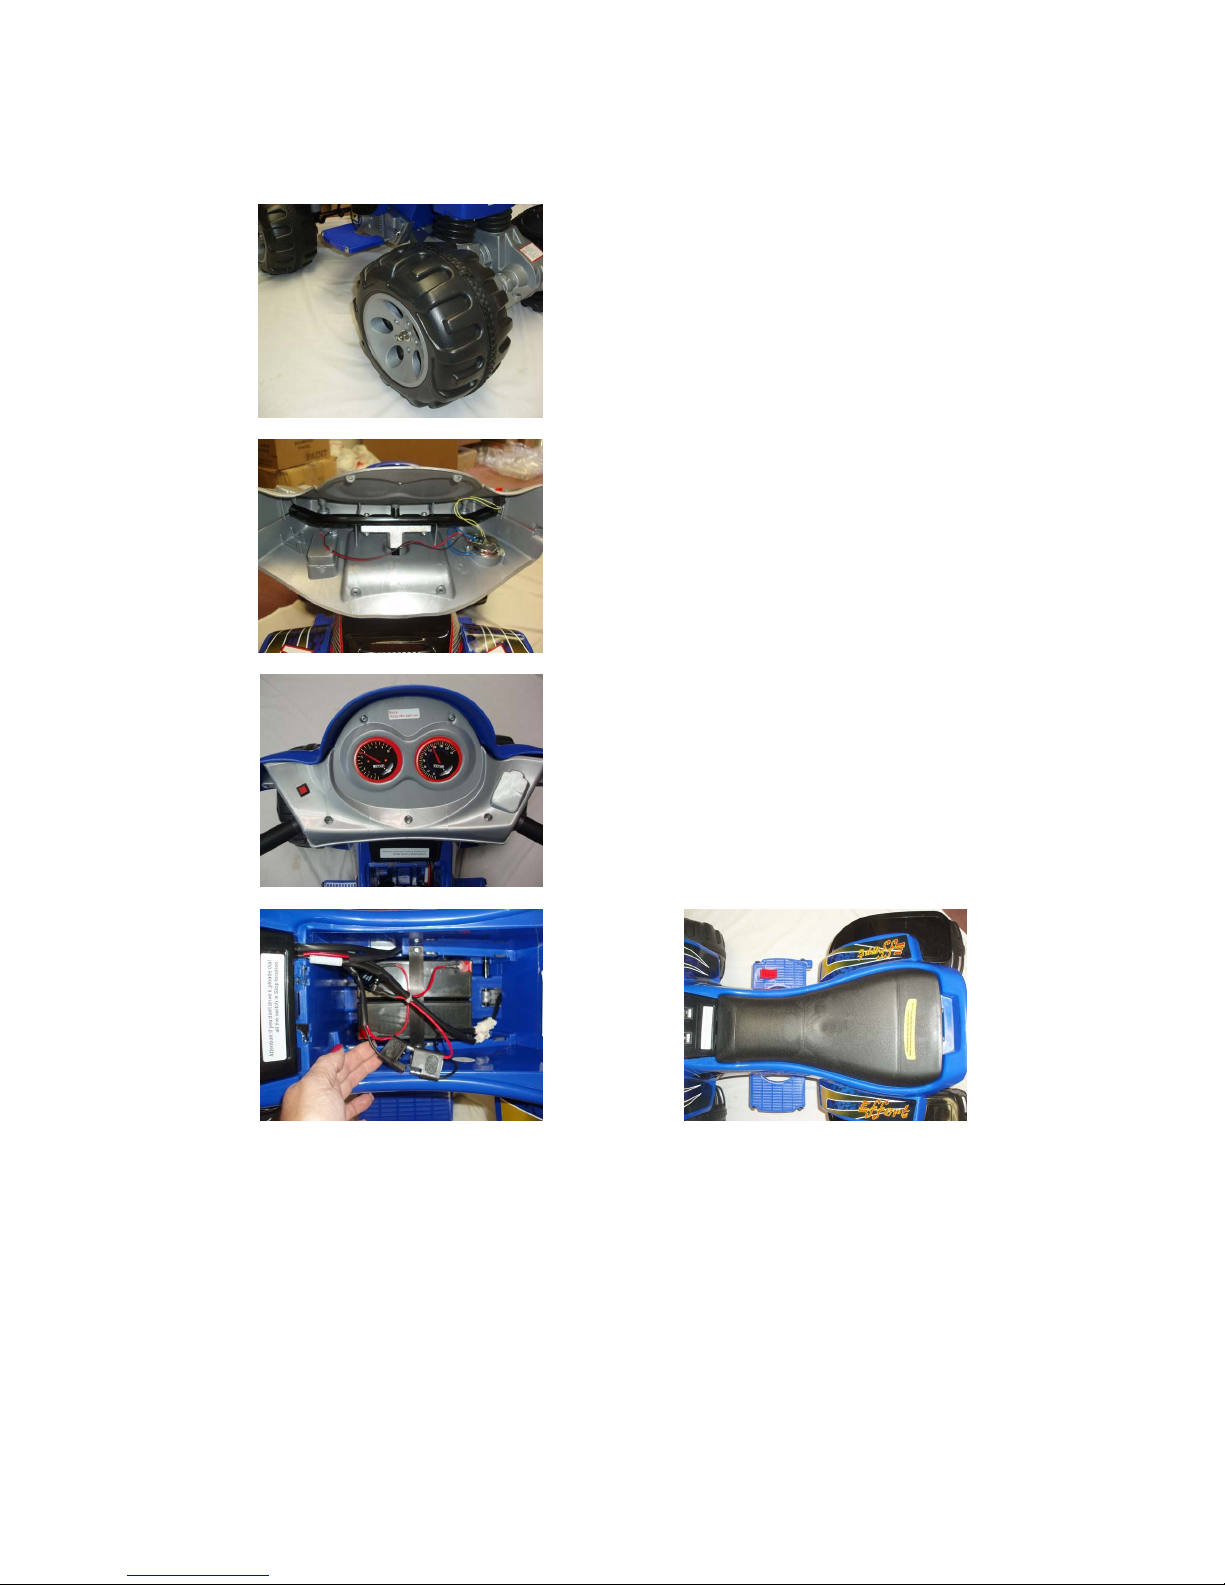
Your XR-201 is now complete and ready for use.
6. Install the rear wheels by inserting the long
axle thru the wheel hub covers, wheel and
completely thru both gearboxes. Secure
by using the enclosed washers and nut
caps.
7. Install the handlebar assembly onto the
steering wheel shaft that protrudes up thru
the scooter body until it snaps into place.
Use the enclosed cotter pin and insert thru
the small hole at the top of the shaft.
Bend to keep it in place.
8. Attach the faceguard to the handlebar
assembly using the enclosed screws.
9. Attach the battery wires to the gearbox
wires under the seat as shown.
10. Install the seat by snapping it into place.

Page
9
Operation Instructions
*Be sure all assembly is complete before riding.
*Disconnect charger from scooter and store properly.
Your scooter is operated using a foot push button. To ride the scooter, simply
set on the scooter, select the desired direction and turn the speed switch to the
desired speed. Use your right foot; push the foot button located on the right
footplate. To stop the scooter, simply release the foot button.
1. Locate the high/low speed switch located below the dash. Select
desired speed.
2. Locate the forward/reverse switch located below the dash. Select
the desired mode.
3. To accelerate forward, use your right foot to press the foot button on
the right footplate.
4. To move in reverse, stop the scooter; switch the forward/reverse
switch into neutral (OFF) then switch the forward/reverse switch into
the reverse position. Not following this step correctly can
damage the gear box/motor.
5. To stop, simply release the foot button.
6. To park the car, keep the high/low speed switch in the middle (OFF)
position.
Charging Instructions
***WARNING*** An adult should perform charging of the scooter. TO AVOID
ELECTRIC SHOCK, NEVER ALLOW CHILDREN TO HANDLE THE
CHARGER OR ATTEMPT TO PLUG THE BATTERY CHARGER INTO A
WALL OUTLET!
1. Locate the enclosed battery charger. Plug the charger into a wall
outlet.
2. Unplug the charger socket from the battery under the seat.
3. Plug the battery charger into the charger socket on the scooter.
Depending on the charge remaining in the battery, charging time will
vary. Normal charging time will be 6-8 hours.
Do not allow the charger to charge the batteries for more than 20 hours as
this may damage the batteries.
IMPORTANT SAFETY GUIDELINES
Keep hands, face, feet and hair away from all moving parts.
Do not touch the motor or wheels while they are rotating.
Adult supervision during operation is required at all times.
The scooter is designed for flat terrains only. For safety purposes,

Page
10
never allow children to operate the scooter in hilly areas.
When not in use, ensure the scooter is turned off and stored in an
enclosed dry area away from moisture or rain.
This product is ELECTRIC! DO NOT ride this product in wet
conditions, puddles or rainy weather.
You MUST charge completely prior to initial use.
Charge immediately after each use, before prolonged storage and at
least every 30 days if not used for at least 6-8 hours. DO NOT allow
this unit to deep discharge the battery
DO NOT charge the scooter for more than 20 hours as this may
damage the batteries.
Keep children away from the scooter during the charging process.
Do not place batteries near fire or heat.
The user of this product assumes ALL risks associated with its use. To
minimize these RISKS, the user must wear safety helmet, goggles,
gloves, elbow and kneepads and appropriate footwear.
MAINTENANCE SCHEDULE
Proper care of your X-Treme XR-201 will insure optimal performance and
longer life span. The following are a few maintenance suggestions that will
keep your X-Treme XR-201 running in top condition:
Daily Maintenance
Perform each time you ride your XR-201
Clean the exterior of the unit with a soft, damp rag.
Check that all nuts and bolts are securely tightened.
Check battery charger for any frayed/cut wires.
OTHER QUESTIONS
For additional questions, service instructions, further information and important
phone numbers, please go to the X-Treme website at www.x-tremescooters.com
Thank you for purchasing an X-Treme XR-201 and please tell your friends how
much fun you’re having on the X-Treme XR-201

Page
11
For General Information or Parts Visit
www.x-tremescooters.com
For Technical Support or Assistance Visit
www.x-tremescooters.com/support/
Table of contents
Popular Motorized Toy Car manuals by other brands

RC4WD
RC4WD JDM 158 manual

Reely
Reely 1:10 EP Monstertruck Titan RtR Service manual

Team Corally
Team Corally KRONOS XTR 6S Quick start user guide

GMX MOTORBIKES
GMX MOTORBIKES HAMMER DUNE user guide

Ofna Racing
Ofna Racing Nitro Z10 instruction manual

Peg-Perego
Peg-Perego John Deere GROUND LOADER Use and care


