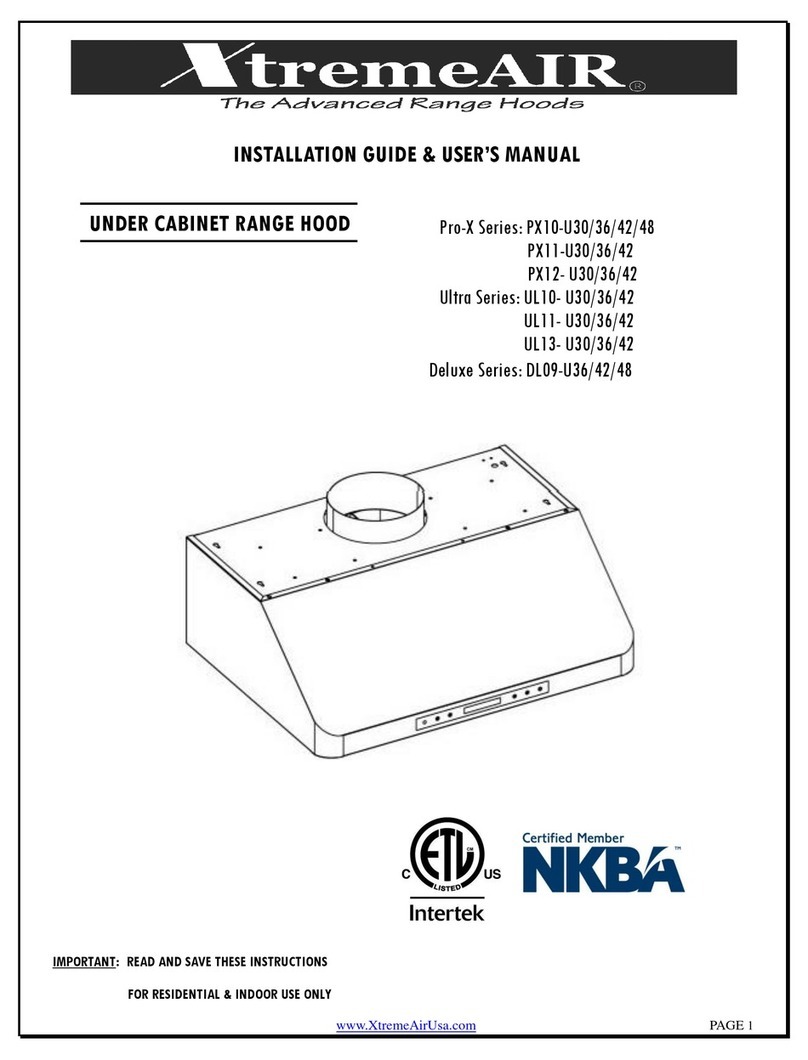
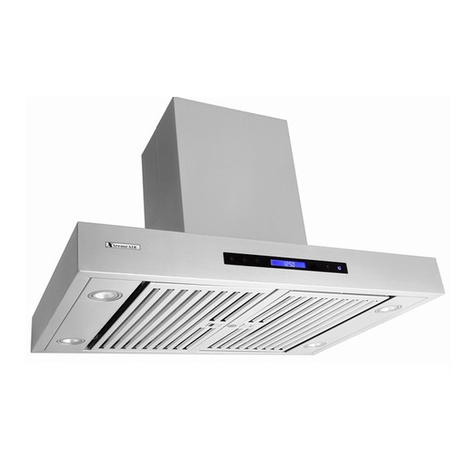
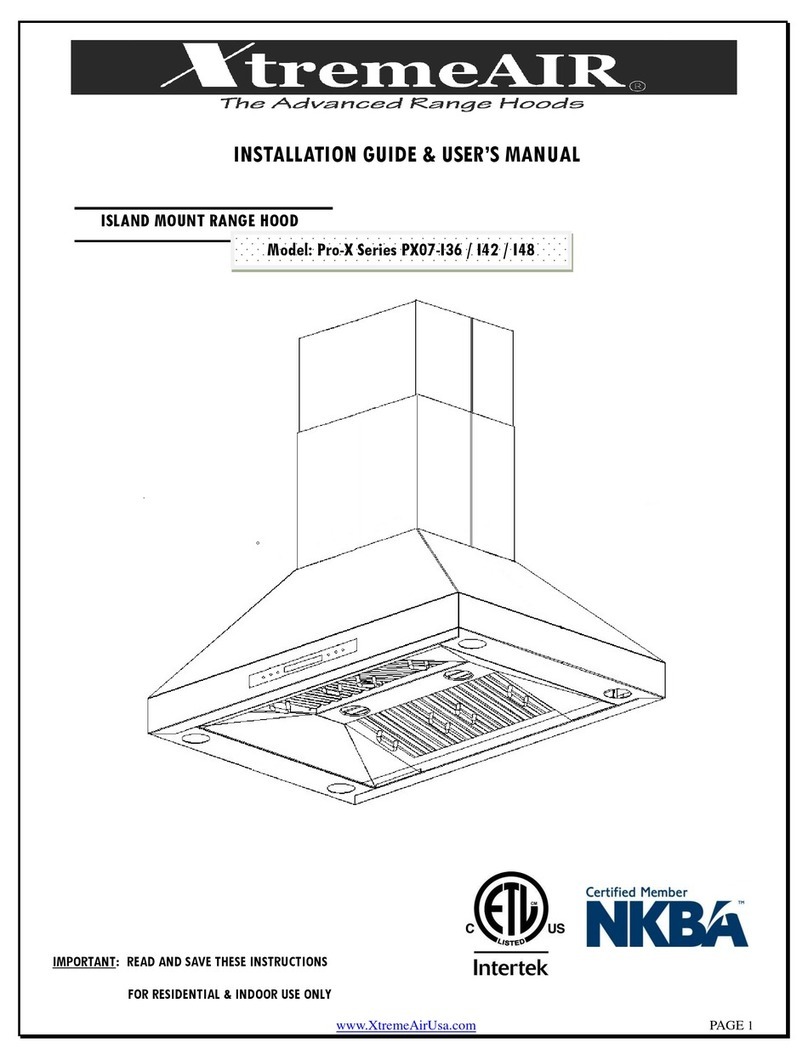
XtremeAIR Ultra Series Troubleshooting guide

www.XtremeAirUsa.com PAGE
1
Under Cabinet Range Hood
IMPORTANT: READ AND SAVE THESE INSTRUCTIONS
FOR RESIDENTIAL & INDOOR USE ONLY
INSTALLATION GUIDE & USER’S MANUAL
PRO
-
X
& ULTRA SERIES

www.XtremeAirUsa.com PAGE
2
IMPORTANT NOTICE: The Important Safety Instructions and warnings in this manua are not meant to cover a possib e
prob ems and situations that can occur. P ease a so use common sense and caution when insta ing, maintaining or operating
this or any other app iance. P ease a ways contact the XtremeAir USA, LLC. Customer Support Team at 1-714-554-9000 or
emai : support@XtremeAirUsa.com with any prob ems or situations that you do not understand.
The manufacturer disc aims a iabi ity for any damage or injury caused as a resu t of not fo owing instructions for
insta ation contained in the fo owing text.
To avoid the possibi ity of exp osion or fire, do not store or use combustib e, f ammab e or exp osive vapors and iquids (such
as gaso ine) inside or in the vicinity of this or any other app iance. Keep items that cou d exp ode (such as aeroso cans) away
from cook top burners, ovens and range hoods. Do not store f ammab e or exp osive materia s in adjacent cabinets or
surrounding areas.
Disclaim r: The manufacturer and/or distributor/reseller decline all responsibility in the event of failure to observe the
instructions provided for installation, maintenance and suitable use of the product. The manufacturer and/or
distributor/reseller shall NOT be responsible for any in ury due to negligence and the warranty of the unit shall automatically
be voided due to failure to observe proper safety and installation procedures. The manufacturer and/or distributor/reseller
will not be held responsible for any damages to personal property or real estate or any bodily in uries whether caused directly
or indirectly by the range hood.
TABLE OF CONTENTS
1 IMPORTANT SAFETY INSTRUCTIONS..2-3
2 HEIGHT & CLEARANCE REQUIREMENT..4
3 VENTING REQUIREMENT..4
4 VENTING METHODS4
5 ELECTRICAL REQUIREMENT & CIRCUIT DIAGRAM..5
TOOL & MATERIAL YOU WILL NEED....5
7 PART SUPPLIED..5
8 RANGE HOOD DIMENSIONS....
9 INSTALLATION.... -8
10 RANGE HOOD OPERATION.....8-11
11 SPECIFICATION...11
12 REPLACING THE LIGHT BULB....12
13 TROUBLE SHOOTING.....12
14 USE & CARE.....13
15 PRODUCT WARRANTY......14
DANGER
IMPORTANT SAFETY INSTRUCTIONS
01

www.XtremeAirUsa.com PAGE
3
WARNING
-
TO REDUCE THE RISK OF FIRE, ELECTRIC SHOCK, OR INJURY TO PERSONS, OBSERVE
THE FOLLOWING:
Use this unit on y in the manner intended by the manufacturer. If you have questions, contact the manufacturer
PRODUCT
: Do not remove permanent y affixed abe s, warnings, or p ates from the product. This may void the
warranty. Do not try to a ter the hood
INSTALLATION
:
The insta ation in this manua is intended for qua ified insta ers, service technicians or persons with
simi ar qua ified background. Insta ation and e ectrica wiring must be done by qua ified professiona s and in accordance
with a app icab e codes and standards, inc uding fire-rated construction. When cutting or dri ing into wa or cei ing; do
not damage e ectrica wiring and other uti ities. Due to the size and weight of this range hood, two peop e insta ation is
recommended. Range hood may have very sharp edges; p ease wear protective g oves if it is necessary to remove any
parts for insta ing, c eaning or servicing.
VENTTING
: For kitchen range or cook top venti ating use on y. DO NOT use to exhaust hazardous or exp osive
materia s and vapors. Ducted fans MUST a ways be vented to the outdoors. DO NOT vent exhaust into spaces between
wa s, craw spaces, cei ing, attics or garages. Use on y meta ductwork. O d duct work shou d be c eaned or rep aced if
necessary to avoid the possibi ity of a grease fire. Check a joints on duct work to insure proper connection and a joints
shou d be proper y taped.
ELECTRICAL:
A e ectrica wiring must be proper y insta ed, insu ated and grounded. Before servicing or c eaning
unit, turn power OFF and un-p ugged
OPERATION:
Use high settings on cooking range on y when necessary. Keep a fan, baff e, spaces, fi ter, grease tunne ,
oi container and grease- aden surfaces c ean. Grease shou d not be a owed to accumu ate on fan, baff e, spaces, fi ter,
grease tunne and oi container. Never a ow the fi ters to become b ocked or c ogged. Do not a ow foreign objects, such
as cigarettes or napkins, to be sucked into the hood.
WARNING
:
TO REDUCE THE RISK OF A RANGE TOP GREASE FIRE:
■ Never eave surface units unattended at high settings. Boi overs cause smoking and greasy spi overs
that may ignite. Heat oi s s ow y on ow or medium settings.
■ A ways turn hood ON when cooking at high heat or when greasy food.
■ C ean venti ating fans frequent y. Grease shou d not be a owed to accumu ate on fan or fi ter.
■ Use proper pan size. A ways use cookware appropriate for the size of the surface e ement.
WARNING:
TO REDUCE THE RISK OF INJURY TO PERSONS IN THE EVENT OF A RANGE TOP GREASE FIRE,
OBSERVE THE FOLLOWING
:
■
SMOTHER FLAMES
with a c ose fitting id, cookie sheet, or meta tray, then turn off the burner. Be carefu
to prevent burns. If the f ames do not go out immediate y,
EVACUATE AND CALL THE FIRE DEPARTMENT
.
■
NEVER PICK UP A FLAMING PAN
- you may be burned.
■
DO NOT USE WATER
, inc uding wet dishc oths or towe s - a vio ent steam exp osion wi resu t.
■ Use an extinguisher
ONLY
if:
– You know you have a c ass ABC extinguisher, and you a ready know how to operate it.
– The fire is sma and contained in the area where it started.
– The fire department is being ca ed.
– You can fight the fire with your back to an exit.
IMPORTANT SAFETY INSTRUCTIONS-continu
www.XtremeAirUsa.com PAGE
4
HEIGHT &
CLEARANCE
VENTING METHODS:
VENTING REQUIREMENT
IMPORTANT:
• NEVER exhaust air or terminate duct work into spaces between wa s, craw
spaces, cei ing, attics or garages. All xhaust must b duct d to th
outsid .
• Hood mounted too ow cou d resu t in heat damage and fire hazard; whi e
hoods mounted too high wi be hard to reach and wi oose its performance
and efficiency.
• Us m tal duct work only. Rigid meta vent is recommended. A minimum
of 8” round (standard for this range hood, purchased separate y must be used
to maintain maximum airf ow efficiency
• DO NOT us plastic v nt.
• DO NOT us 4” (10.2 cm) laundry-typ wall caps
• Fasten a connections with sheet meta screws and tape a joints with
a uminum tape.
1. Use cau king to sea exterior wa or roof opening around the cap.
2. The vent system must have a damper. If roof or wa cap has a damper, do
not use damper supp ied (for some mode s on y) with the range hood.
For the most efficient & quiet operation:
• A distance of 26” to 30” is recommended between stove top and the bottom
of range hood.
• It is recommended that the range hood be vented vertica y through the roof
through 6” or bigger vent work.
• ALWAYS, when possib e, reduce the number or transitions and turns. If
ong duct run is required, increase duct size from 8” to 9” or 10”. If a reducer
is used, insta a ong reducer instead of a pancake reducer. Reducing duct
size wi restrict airf ow and decrease airf ow, thus reduce duct size as far
away from opening as possib e.
• If turns or transitions are required: Insta as far away from opening and as
far apart, between 2, as possib e.
• The size of the vent shou d be uniform.
• Us no mor than thr 90° lbows.
• Make sure there is a minimum of 24” (61 cm) of straight vent between the
e bows if more than one e bow is used.
• DO NOT insta two e bows together.
02 03
04

www.XtremeAirUsa.com PAGE
5
ELECTRICAL REQUIREMENTS & CIRCUIT DIAGRAM:
IMPORTANT: Observe a governing bui ding codes and city ordinances.
■ A 120 vo t, 60 Hz., AC on y, 15-amp, fused e ectrica circuit is required.
It is th custom r’s r sponsibility:
• To contact a qua ified e ectrica insta er.
• To assure that the e ectrica insta ation is adequate and in conformance with Nationa E ectrica Code, ANSI/ NFPA 70
— atest edition*, or CSA Standards C22. 1-94, Canadian E ectrica Code, Part 1 and C22. 2 No. 0-M91 - atest edition**
and a oca codes and ordinances.
TOOL & MATERIAL YOU WILL NEED:
PARTS SUPPLIED:
Except UL14
PX10, PX12 PX11 ALL U tra Series
05
06
07
(1) Remote Contro : for
a Pro-x Series on y,
except PX11)
Baff e Fi ters
Instruction manua
Penci or Marker Phi ip Powered Screwdriver
Stud Finder
Measurement Tape 1/8” & 1
1/4”
Dri bit
(2) 2” x 4” x 24” stud
(1) 24” x 36”/42” x ¾” p ywood
Note: about 6” wider than stove is ok
Cabinet
Jack
OPTIONAL
Sawza or Keyho e Saw A uminum Tape
10” Hex bit extension

www.XtremeAirUsa.com PAGE
6
HOOD DIMENSIONS:
INSTALLATION
NOTE: DO NOT TRY TO REMOVE BLOWER OR ITS HOUSING, THE WARRANTY WILL BE
VOIDED. MOREOVER, YOU WON’T BE ABLE TO PUT IT BACK IN.
STEP 1: Prot ct th cook top
•
Put a thick, protective covering over counter top, cook top or range to protect from damage or dirt.
STEP 2: Cr at work station (OPTIONAL)
08
09
Have 2 pieces 2” x 4” x 20” on both
sides of stove & p ywood on top of
them to protect cook top or stove
from damage or dirt. This p ywood
wi a so create a comfortab e work
station for easy to insta ing.

www.XtremeAirUsa.com PAGE
7
St p 7: S cur th hood
From inside of the hood, p ace 1 ¼” provided screw into each key ho es (A) OR
Pre-ho es (B) and secure to cabinet bottom. There are tota of 8 ho es (4
keyho es, 4 pre-ho es-EXCEPTED UL14) avai ab e, you can use either key or
pre-ho e as ong as minimum 1 screw at each corner of hood body.
St p 6: Attach th hood
Lift the hood up and have it p ace
be ow the cabinet. Make sure center
the hood beneath the cabinet and f ush
with the front of the cabinet.
TIP (optional): since the hood is
heavy, use cabinet jack is high y
recommended.
St p 3: Pr par ductwork & singl outl t
Make sure you have a 15amp, 120V, 60Hz, sing e out et on the eft or
right of the duct pipe (usua y is on ¼ of cabinet width).
Make sure duct pipe is ready to hook up to the range hood before
beginning insta ation (8” diameter duct, and roof or wa cap, depending
on where you wi be venting your hood)
St p 5: Cr at acc ss s
•Create or cut access opening for e ectrica wires and hood exhaust under the
cabinet.
St p 4: attach 4-inch wid wood fill r strips
• For insta ing under the cabinet with recessed bottom, attach 4-inch wide
wood fi er strips (not provided) on each side.

www.XtremeAirUsa.com PAGE
8
.
RANGE HOOD OPERATION
BEFORE YOU BEGIN (important): this machine is equipped with TOUCH SENSITIVE CONTROL, so p ease
1. DO NOT PRESS. On y TOUCH & HOLD DOWN 1 SECOND for every change makes.
2. TOUCH A WHOLE BUTTON on y, p ease see be ow picture wrong vs. right
NOTE: For best results, start the range hood before cooking and allow it to operate several minutes after the
cooking is completed to clear all smoke and odors from the kitchen.
St p 10: Install baffl filt rs
Insta baff e fi ters; refer to eft picture for the fo owing three steps:
1.Ang e baff e fi ter toward back of hood.
2.Lift a baff e fi ter up above horizonta eve .
3.S ide forward into s ot behind the front of hood.
To remove the baff e, p ease reverse the process.
St p 9: Install oil tunn l or oil contain r (not availabl for all mod ls)
Drop oi tunne into recess support near rear of hood. Refer to the eft picture
RIGHT: a who e button is
covered by a finger
WRONG: On y ha f of a button
is covered by a finger
RIGHT
VS.
WRONG
St p 7: S cur th hood-continu
Secure the hood by using 1 7/8” provided screws though the back of the hood to
the studs (use stud finder to find the stud and use 1/8” dri bit to dri though the
back of the hood)
CAUTION: Mak c rtain th rang hood is s cur b for r l asing!
St p 8: Conn ct ductwork
•Connect the exhaust on the hood to the ductwork about. Use a uminum tape to make a joints
secure and tight.
Oi Tunne
Side View
Baff e Inst
a
ation Side View
10

www.XtremeAirUsa.com PAGE
9
1. TYPE 1: TOUCH SCREEN CONTROL (For Pro-X S ri s PX10, PX12-mod ls)
Note: This range hood is equipped with remote control and smoke sensor that will self-calibrate within 5 seconds
when the range hood is first electrically activated. Self-calibration will be set when the range hood beeps. LCD panel
will turn off automatically after a period of inactivity.
A.
Activating Smok D t ctor Function:
B. Activating Normal Blow r Function:
C. Activating Light Function:
D. Activating Pow r-Off D lay Function:
E. Changing th clock:
Whi e the b ower is off:
1. Touch power sign once; the hour indicator wi f ashing
2. use (+) or (-) to adjust to designed hour
3. Touch power sign again; the “minutes” indicator wi f ashing
4. use (+) or (-) to adjust to designed minutes
5. Touch power sign again to c ear the screen. Touch ight button to va idate. To check time, touch ight
button.
Note: The c ock disp ay is on y for PX10
• Touch Light button to turn the ights on or off.
1. Whi e the range hood is on and the b ower is running in norma mode, touch Power-Off Delay
button to activate de ay off timer.
2. Adjust to desired period of de ay of timer by touching (-) or (+) button quick y (1-15 minutes).
Timer begins to countdown immediate y, when it reaches 0, the b ower wi shut off.
3. Disp ay screen wi show f ashing c ock if timer is working
• Whi e the range hood is off,
Touch (+) to start from lowest speed, F1
Touch (-) to start from Highest speed, F4
Touch (+) or (-) again to change the b ower speed as indicated in LCD pane
00 = b ower off
F1 = quiet speed
F2 = ow speed
F3 = medium speed
F4 = high speed
• Touch Auto Function button to activate the smoke detector auto function mode
NOTE: this function wi on y worked when there’s a ot of smoke. ONCE THIS BUTTON IS
TOUCHED, ALL OTHER BUTTONS ARE NOT ACTIVE.

www.XtremeAirUsa.com PAGE
10
F. R mot Control S nsor:
2. TYPE 2: TOUCH BUTTON CONTROL (For Pro-X S ri s PX11 mod l)
NOTE: For best results, start the range hood before cooking and allow it to operate several minutes after the cooking
is completed to clear all smoke and odors from the kitchen.
Button functions:
1. (1) To power ON/OFF, and to activate power-off de ay timer.
2. (2) To decrease b ower (motor) speed, decrease timer va ue, and enter timer mode.
3. (7) To increase b ower (motor) speed, increase timer va ue, and cumu ative timer reset.
4. (3) B ower (motor) is running ight indicator
5. (4) Shows current b ower (motor) speed (1-4).
6. (5) Lights up when ights turned on.
7. (6) To turns ON/OFF ights.
8. (8) Indicates the accumu ated time the system is running.
9. (9) Indicates the ength of time eft for de ay off function.
10. (10) Lights up when auto-shutdown de ay timer function is on.
A. Activating Blow r Function:
* Option 1: Touch and ho d down (+)for 1-2 seconds
* Option 2: Touch and ho d down power sign (1) for 1-2 seconds
(the b ower wi be running at the same speed as ast used)
Note: The system saves user configurations, settings such as timer and blower (motor) speed will
remain the same the next time it is turned on.
B. Adjusting blow r sp d:
* Touch and ho d down (+) for increase
* Touch and ho d down (-) for decrease
C. Turning off th blow r:
*Touch and ho d down power sign (1) for 1-2 seconds
D. To turn th light ON/OFF:
* Touch Light button once to turn on the ights, and once again to turn off the ights.
Remote contro sensor receives infrared (IR) signa from the remote contro . The maximum
distance for IR data transmission is 3 meter and requires direct ine of sight. The transmission
distance may vary depending on temperature and remote contro battery condition.
Light settings are independent from other settings (including power-off delay) and lights have to
be manually turned on or off.
The system saves user configurations, settings such as light, timer and blower (motor) speed
will remain the same the next time it is turned on.

www.XtremeAirUsa.com PAGE
11
E. Adjusting th tim r function:
1. Whi e the b ower (motor) is not running, touch and ho d Decrease Va ue button over 3 seconds to
enter timer mode.
2. Adjust to desired period of de ay off timer by touching Increase Va ue or Decrease Va ue button
(minimum 1 minut to maximum 15 minut s). This s tting will b sav d imm diat ly.
F. Activating th tim r function:
* Whi e the b ower (motor) is running, touch and ho d Power button for over 3 seconds to activate de ay
off timer. Power-off de ay indicator wi ight up and power-off de ay digita timer wi begin to
countdown, when it reaches zero, the b ower (motor) wi shut down.
G. To cl ar cl aning r mind r:
• When b ower (motor) starts to rotate, cumu ative running time wi be shown in Power-On Elapsed
Digital Timer. This timer icon f ashes when 30 hours is up and reminds user to c ean the baff e fi ters.
• After c eaning the fi ters and when the motor is not in use, touch and ho d (+) Increase Value button
over 3 seconds to reset the timer. P ease note that turning off the system wi not reset the Power-On
Elapsed Digital Timer.
F. AUTOMATIC SHUT OFF:
• MACHINE WILL AUTOMATICLY SHUT OFF AFTER APPROX. 2 ½ HOURS (FOR THOSE
MANUFACTURED AFTER AUGUST 2012 ONLY)
3. TYPE 3: SOFT PRESS BUTTON CONTROL (For All Ultra S ri s)
SPECIFICATION:
Body Design Seam ess Stain ess Stee , Satin Finish
Power Rating 120V/60Hz (USA & Canada standard)
Genera Input Power 184W (90W + 2x2W)
Motor Input Power 90 W each
Ampere 1.70 A
Leve s Of Speed Contro 4 Leve s
Airf ow (Q/L/M/H) 280CFM / 460CFM / 670CFM / 900CFM
Noise Leve (Q/L/M/H) 1.2Sone(43dB) / 2.8Sone(55dB) / 5.0Sone(63dB) / 6.5 Sone(67dB)
Number Of Motors 2 Motors
Motor Type Sing e Chamber U tra Quiet
Fan Type Centrifuga Squirre Cage
Fi tration Type Heavy Duty Stain ess Stee Baff e Fi ter
I umination LED ight, 2W Maximum
Venting Size Top, 8 inches Round
Interference Protection Radio Frequency Interference Protected
Note
Specification subject to change without notice, contact your oca rese er for detai s.
A. Activating Normal Blow r Function
• Press (2) for owest speed
• Press (3) for medium speed
• Press (4) for highest speed
B. To turn off th pow r:
•Press (1)
C. To turn th light ON/OFF:
•Press (5) once to turn on, press again to turn off
11

www.XtremeAirUsa.com PAGE
12
REPLACING THE LIGHT BULB
TROUBLE SHOOTING
1.
If th rang hood or lights do s not op rat aft r installation:
• Check if the range hood has been p ugged in, make sure that a power has been turned back ON, the fuse is
not b own and a e ectrica wiring is proper y connected.
• Swap out ight assemb y to working ones to determine whether it is caused by defective bu bs. See replacing
the light bulbs on Page 12.
2. Th rang hood vibrat s wh n th blow r is on:
• The range hood might not have been secured proper y on to the cabinet or wa .
• Check if the motor is secured in p ace. If not, then tighten the motor in p ace. Check if the b ower whee is
damaged.
3. Th blow r or fan s ms w ak:
• Check that the duct sized used is at east 6”. Range hood WILL NOT function efficient y with insufficient
duct size & oose y secured.
• Check if duct is c ogged or if damper unit (ha f-circu ar f apper) is not insta ed correct y or opening proper y.
A tight mesh on a side wa cap unit might a so cause restriction to the air f ow.
4. Th lights work but th blow r is not spinning at all, is stuck or is rattling.
• The b ower might be jammed or scraping the bottom due to shipping damage.
P ease contact us immediate y.
• The motor is defective, possib y seized - change the motor.
5. Th hood is not v nting out prop rly:
• Make sure the distance between the stove top and the bottom of the hood is within 26” and 30” in distance.
Due to different ceiling height configurations, recommended height may not be applicable.
• Reduce the number of e bows and ength of duct work. Check if a joints are proper y connected, sea ed,
and taped.
• Make sure the power is on high speed for heavy cooking
6. Th hood is nois r than normal
• The duct is not secure and causes vibration
• The sma er duct size than required is used
7. Control pan l is not activ
• Check to make sure the auto function is not on
8. R mot control is not working
• Check to make sure the p astic fi m was removed.
1. Make sure the range hood is unp ugged or turn OFF breaker.
2. Use the sma f at crew driver to ift any where around the outsider
ring as show in be ow picture Arrow.
3. Insta new ight bu b
4. Put back the ight set by press it in.
5. Turn ON breaker and range hood to test for operation.
Note: you can pop out the ight by pressing behind ight fixture.
1
3
1
2

www.XtremeAirUsa.com PAGE
13
USE & CARE INFORMATION:
Op rations:
• Read and understand a instructions and warnings in this manua before operating the app iance. Save these instructions
for future reference.
• A ways eave safety gri s and fi ters in p ace. Without these components, operating b owers cou d catch on to • hair,
fingers and oose c othing.
• NEVER dispose cigarette ashes, ignitab e substances, or any foreign objects into b owers.
• NEVER eave cooking unattended. When frying, oi in the pan can easi y overheat and catch fire. The risk of se f
combustion is higher when the oi has been used severa times.
• NEVER cook on “open” f ames under the range hood. Check deep-fryers during use: Superheated oi may be f ammab e.
Cl aning:
• The saturation of greasy residue in the b ower and fi ters may cause increased inf ammabi ity. Keep unit c ean and free of
grease and residue bui d-up at a times to prevent possib e fires.
• FILTERS MUST BE CLEANED PERIODICALLY AND FREE FROM ACCUMULATION OF COOKING
RESIDUE. Old and worn filt rs must b r plac d imm diat ly.
• DO NOT operate b owers when fi ters are removed. Never disassemb e parts to c ean without proper instructions.
Disassemb y is recommended to be performed by qua ified personne on y. Read and understand a instructions and
warnings in this manua before proceeding.
MAINTENANCE:
SAFETY WARNING: Never put your hand into area housing the fan whi e the fan is operating!
For optima operation, c ean range hood and a baff e/spacer/fi ter/grease tunne /oi container regu ar y. Regu ar care wi he p
preserve the appearance of the range hood.
C eaning Exterior surfaces:
• C ean periodica y with hot soapy water and c ean cotton c oth. Do not us corrosiv or abrasiv d t rg nt ( .g. Com t
Pow r Scrub
®
, EZ-Off® ov n cl an r), or st l wool/scoring pads, which will scratch and damag th stainl ss
st l surfac . For heavier soi use iquid degrease such as “Formu a 409
®
” or “Fantastic
®
” brand c eaner.
• If hood ooks sp otchy (stain ess stee hood), use a stain ess stee c eaner to c ean the surface of the hood. Avoid getting
c eaning so ution onto or into the contro pane . Fo ow directions of the stain ess stee c eaner. CAUTION: Do not eave
on too ong as this may cause damage to hood finish. Use soft towe to wipe off the c eaning so ution, gent y rub off any
stubborn spots. Use dry soft towe to dry the hood.
• After c eaning, you may use non abrasive stain ess stee po ish such as 3M ® or ZEP®, to po ish and buff out the stain ess
uster and grain. A ways scrub ight y, with c ean cotton c oth, and with the grain.
• DO NOT a ows deposits to accumu ate or remain on the hood.
• DO NOT use ordinary stee woo or stee brushes. Sma bits of stee may adhere to the surface and cause rusting.
• DO NOT a ow sa t so utions, disinfectants, b eaches, or c eaning compounds to remain in contact with stain ess stee •
for extended periods. Many of these compounds contain chemica s, which may be harmfu . Rinse with water after ex-
posure and wipe dry with a c ean c oth.
C eaning A uminum Grease Fi ter / Stain ess Stee Fi ter ess Gri :
IMPORTANT: Drain oi from oi containers before oi and residue overf ow!
• The meta fi ters fitted by the factory are intended to fi ter out residue and grease from cooking. It need not be rep aced on
a regu ar basis but are required to be kept c ean.
• Fi ters shou d be c eaned after every 30 hours of use.
• Remove and c ean by hand or dishwasher. Spray “Formu a 409®” or equiva ent degreasing detergent and eave to soak if
heavi y soi ed. Dry fi ters and re-insta before using hood.
Rep acing Fi ters:
• Shou d fi ters wear out due to age and pro onged use, p ease contact your oca rese er for rep acement fi ters.
Note: A so rep ace damaged fi ter that has punctured or broken mesh, bent or broken frame.
.
14

www.XtremeAirUsa.com PAGE
14
This manual suits for next models
5
Table of contents
Other XtremeAIR Ventilation Hood manuals

XtremeAIR
XtremeAIR Special Series Troubleshooting guide

XtremeAIR
XtremeAIR Pro-X Series Troubleshooting guide

XtremeAIR
XtremeAIR R130 / PX10-U30 User manual

XtremeAIR
XtremeAIR PX01-130 User manual

XtremeAIR
XtremeAIR PX06-I42 Troubleshooting guide

XtremeAIR
XtremeAIR SP05-I36 Troubleshooting guide

XtremeAIR
XtremeAIR PRO-X PX01-I36 Troubleshooting guide

XtremeAIR
XtremeAIR PX07-I36 Troubleshooting guide

XtremeAIR
XtremeAIR PX01-W30 Assembly instructions

XtremeAIR
XtremeAIR PX05-I36 Troubleshooting guide