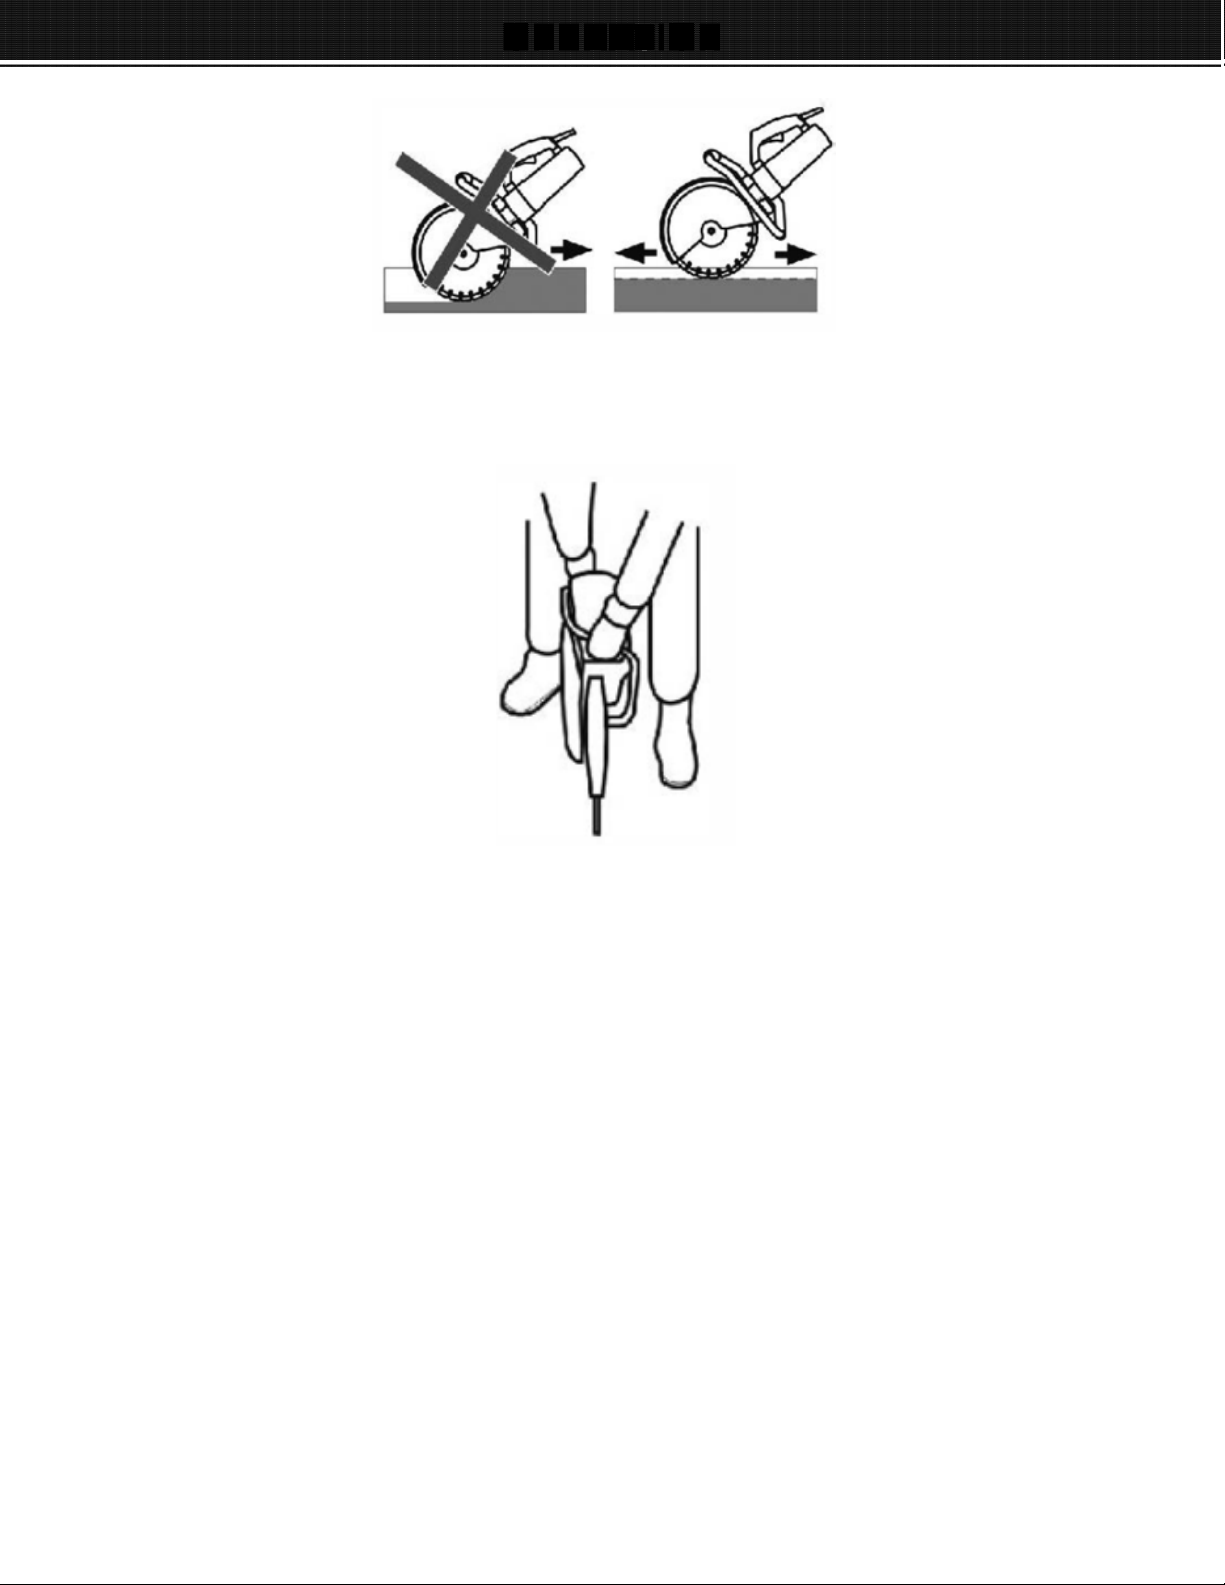
XtremepowerUS 50130 Original instruction manual

I � us
16" 3200W POWER CUTTER SAW
ITEM: 50130
OWNER'S MANUAL AND SAFETY INSTRUCTIONS

SAFETY RNINGS

2
SAFETY RNINGS

SAFETY RNINGS

ASSEMB

ASSEMBLY
5

6
OP
E
R
A
TION
PRIOR TO OPERATION
1. Power source: Ensure that the power source to be utilized conforms to the power requirements
specified on the product nameplate.
2. Power switch: Ensure that the power switch is in the OFF position. If the plug is connected to a power
receptacle while the power switch is in the ON position, the power tool will start operating immediately,
which can cause a serious accident.
3. Extension cord: When the work area is removed from the power source, use an extension count of
sufficient thickness and rated capacity. The extension cord should be kept as short as practicable.
4. Checking and installing the diamond wheel
Check the diamond wheel is a specified one and is not cracked. broken or damaged. Check that the
diamond wheel is installed securely. For installation refer to " installing and removing diamond wheel".
5. Check that the knob
Check that the knob used to secure the wheel guard is tight. Make sure that the knob that secures the
wheel guard is adequately is tight. If this knob is loose, it may reset and injury to the operator.
INSTALLING DUST COLLECTION HOSE
When cutting a material which generates cutting dust, use the dust collection nose as follows:
(1) Remove the rubber cab and install the accessory hose.
(2) Install the dust collector hose for the power tool in the access hose.
•
Do not use the dust collection hose with cutting metal.
•
Always install a rubber cap on the dust collection adapter when the dust collection hose is not
used.
INSTALLING/REMOVING DIAMOND WHEEL
1. Installation
(1) Wipe the cutting dust from the spindle and washers.
(2) Make sure the rotation direction of the diamond wheel conforms to the direction indicated on the wheel
guard and install the diamond wheel.
(3) Press the lock pin and secure the spindle Tighten the bolt adequately with the approved wrench.
(4) Rotate the wheel by hand to ensure the spindle lock has released.
NOTE
Always use the provided wrench to secure the belt.
•
Be careful because the bolt tightens to the left (counter
-
clockwise direction to prevent it from being
loosened during cutting.

OP
E
R
A
TION
2. Removal
Remove the bolt with the provided wrench and remove the diamond wheel.
CUTTING
1.Wheel guard adjustment
Adjust the wheel guard angle with the knob so dust and debris from the material or sparks do not
contact the operator during the cutting operation.
2.Cutting Procedures
(1) Place this tool on the material to be cut and align the pre-marked line and the diamond wheel. The
culling can be pre-lined smoothly if you cut straight ahead on the line in the initial cut.
(2) Turn on the switch when the diamond wheel is not touching the material to be cut.
CAUTION
•
Always check the diamond wheel before starting work. Newer use a diamond wheel which is cracked,
broken or bent.
•
Do not apply water or coolant to the diamond wheel.
•
Start cutting only when diamond wheel reaches its maximum speed.
•
lf the diamond wheel seizes or there is any abnormal noise, immediately turn the power off.
•
Never use the diamond wheel to cut zig zag or curved lines.
• Never use the side surface of the diamond wheel.
• Never use to perform inclination cutting
•
If excessive force is applied to the diamond wheel to make it align with the pre-marked line during
cutting, this might not only overload the motor and cause burn damage, but may also overheat the
diamond wheel and shorten the service life.
•
Take care not to allow the power cord to come into contact with the diamond wheel during operation.
•
When the work is completed, turn the power off and disconnect the power plug from the receptacle.
•
Support the work piece in such a way that it is possible to predict what will happen, and so that the cut
remains open while cutting.
•
Check that the blade is not in contact with anything when the machine is started.
•
Always cut at the maximum speed
•
Start cutting smoothly, allowing the machine to work without forcing or pressing the blade.
•
Move the blade slowly forwards and backwards to achieve a small contact area between the blade and
the material to be cut. This reduces the temperature of the
blade and ensures effective cutting.
7

•
Feed down the machine in line with the blade. Pressure from the side can damage the blade and is
very dangerous.
OP
E
R
A
TION
/ MA
INT
E
N
A
N
CE
1. Inspection of the diamond wheel
A worn diamond wheel overloads the motor and reduces working efficiency. Replace it with a new one.
2. Inspecting the mounting screws
Regularly inspect all mounting screws and ensure that they are property tightened Should any of the
screw's be lose, retighten them immediately. Failure to do so can result in serious injury.
3. Maintenance of the motor
Exercise due care to ensure the winding does not become damaged and/or wet with oil or water.
4. Keep tool clean and free from debris
Avoid using cleaning products, which include benzene. trichloroethane, chloride, or ammonia as these
can damage plastic parts.
5. In case of electrical or mechanical malfunction. Immediately switch off the tool and disconnect the
plug.
6. For all other service take machine contact us at [email protected]
M
AINT
E
NANC
E
8

PARTS INFORMATION
9

PARTS INFORMATION
10

11
Table of contents