YAAHKIEH MC40 User manual

WOOD CHIPPER
User’s Manual
MC40/MC60/MC80
Please read through this owner’s manual carefully before using the product, to ensure the safety of yourself and
others.
*Due to continuing improvements, actual product may differ slightly from the product described herein.


CONTENT
2. SAFETY ..................................................................................................................................................................... 1
2.1. GENERAL SECURITY ..................................................................................................................................1
2.2. PERSONAL PROTECTION .......................................................................................................................... 1
2.3. ENVIROMENT SECURITY ..........................................................................................................................1
2.4. ENGINE SECURITY ..................................................................................................................................... 2
2.5. MACHINE SECURITY ..................................................................................................................................2
3. SECURITY STICKERS .............................................................................................................................................2
4. UNPACKING ............................................................................................................................................................. 4
4.1. ASSEMBLY .................................................................................................................................................... 4
4.1.1 MC40 HOPPER AND OUTPUT ASSEMBLY ............................................................................................ 4
4.1.2 Machine assembly of MC40/60/80 ............................................................................................................... 4
4.2. FUEL AND OIL .............................................................................................................................................. 6
5. STARTING .................................................................................................................................................................6
6. STARTING AND OPERATION ................................................................................................................................ 6
7. MAINTENANCE .......................................................................................................................................................8
7.1. CLEANING .....................................................................................................................................................8
7.2. BELT ADJUSTMENT AND REPLACEMENT ............................................................................................ 8
7.3. LUBRICANT AND GREASE ........................................................................................................................ 9
7.4. BLADE AND ANVIL .....................................................................................................................................9
8. WHEEL TIRES ........................................................................................................................................................ 10
9. PROBLEMS, REASONS AND SOLUTIONS ........................................................................................................10
10. TRANSPORT ......................................................................................................................................................... 11
11. STORAGE ..............................................................................................................................................................11
12. INFORMATION OF RECYCLING/ENVIROMENTAL PROTECTION ........................................................... 11

1
2. SAFETY
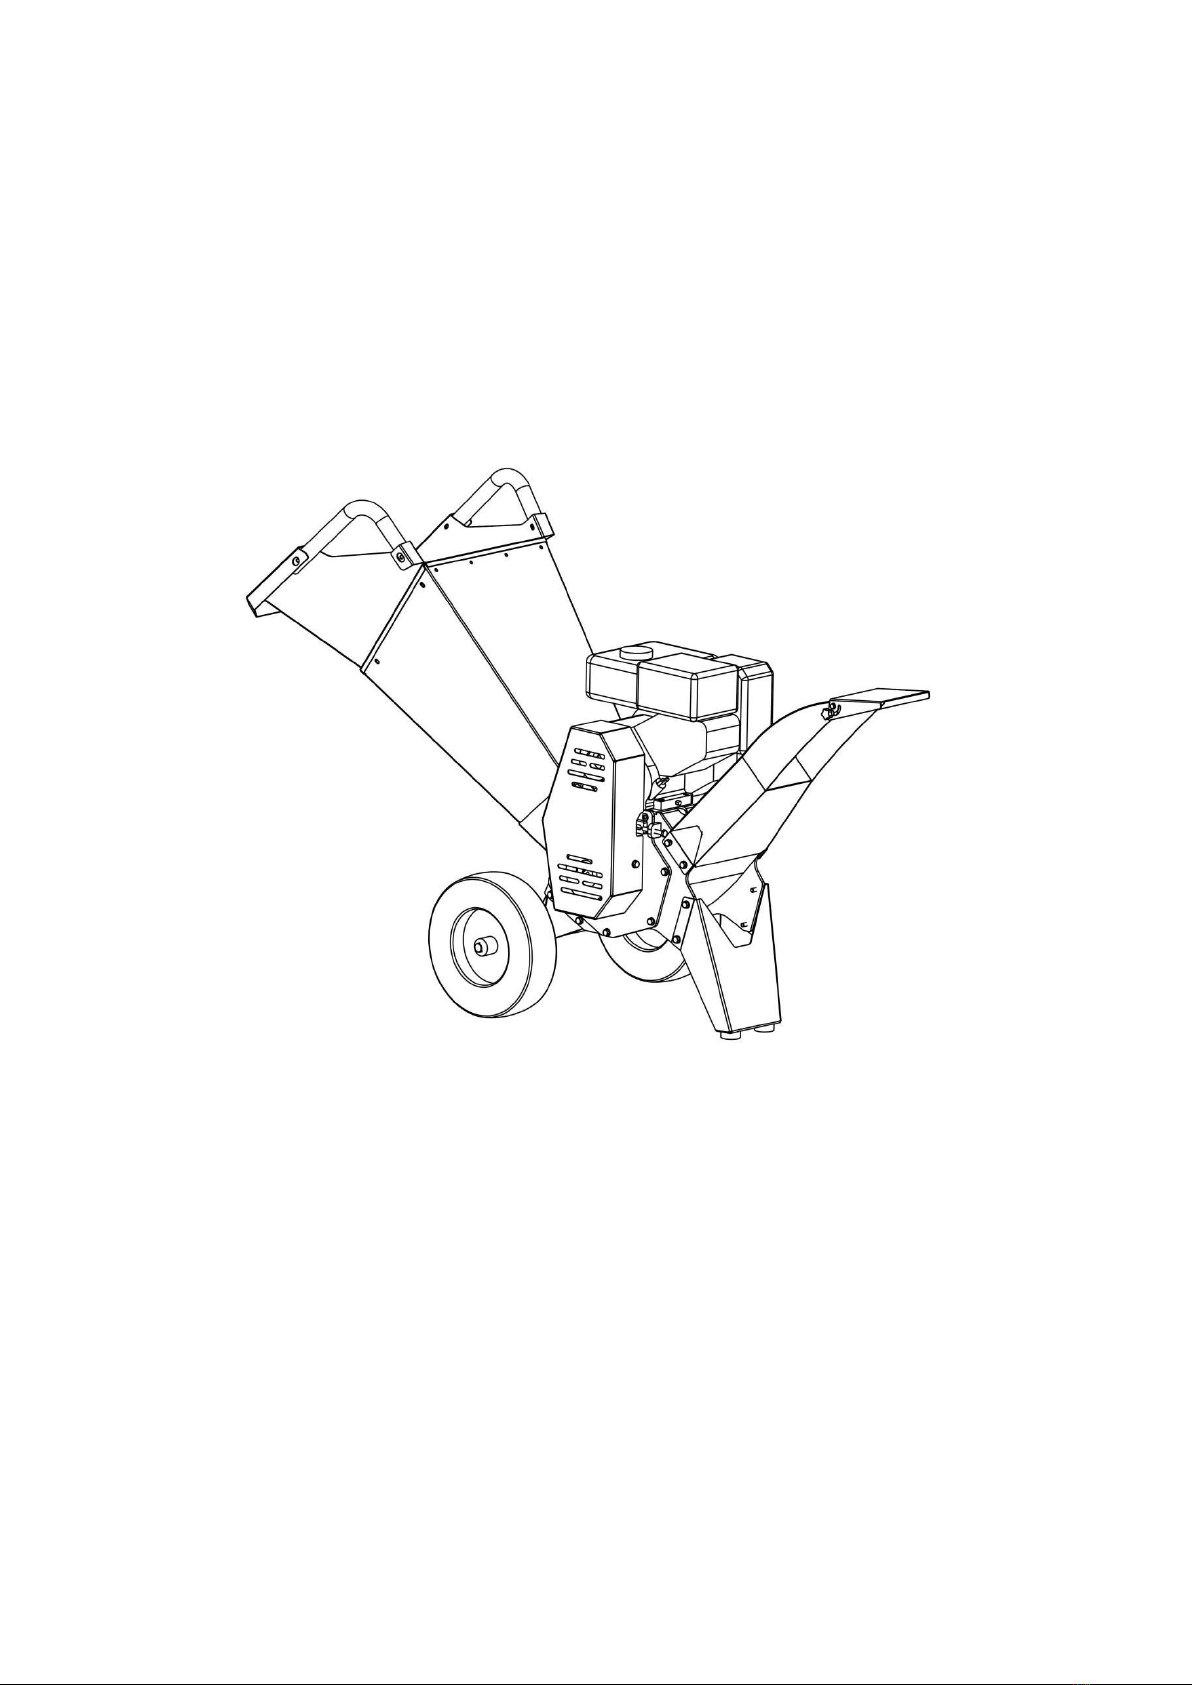
These chippers are designed to chip wood with chip capacity up to 40mm -80mm at maximum (according to model
respectively).
No input of any material which is not allowed, such as metal, stone, plastic, fabric or any wood branch with
diameter over the maximum size, as they can seriously damage the machine or cause injure to operator or the third
party or things. Please have the manual and all signs in good condition for future use. When you sell the machine,
make sure you have all instructions material passed to the new owner.
Remember the operator is responsible for any accident caused by improper use of the machine.
This manual contains all necessary instructions which are related to personal safety and that of others, animals
around. if you have any questions about safety instructions in this manual, kindly contact professional service or
ask for help from the shop authorized to solve it.
2.1. GENERAL SECURITY
This machine has been designed to be used by an adult who has read and understood the manual and has been
trained to know all security rules. Children, people with mental or psychological problem or anyone who is lack of
info about this machine are NOT allowed to use this machine.
Before using the machine, make sure you know how to use them, where all control parts and devices are, and know
Chip system of this machine is very sharp.
To the first-time user, we strongly recommend that a practice with pieces of wood should be processed if possible,
with company of experienced user.
Before working, mark an area with 3 meters wide and 12 meters long on the output side.
Make sure no one could get injured by the wood chips flying out during working, make sure no one is around with
radius of 12 meters
*Suggestion*
To mark the area by yellow, or red and white beacon.
2.2. PERSONAL PROTECTION
Be careful of what you are doing and use common sense to operate it.
Do not use this machine while tired or under the influence of alcohol, drugs or medication. A moment of inattention,
serious injuries to people or damage to machine could occur.
Any tools or parts left on or in the machine, can cause serious damage to the machine, or injure to people around.
Clear up the surroundings and remove all tools around the machine.
Always use personal safety equipment, such as, goggle, earmuff and gloves. The machine is working with noise
over 90dB; ear muffler is a must while working with the machine. If ear is not protected, long time working noise
could affect user's listening ability.
Do not wear loose clothing or ties during working.
Make sure the machine is well balanced and stand firmly on ground all the times.
2.3. ENVIROMENT SECURITY
Do not use this machine in an explosive place or nearby flammable liquid, gas or dust. Suggest using the machine
outdoor only.
Do not go back to work only if the place is fully refreshed.

2
If you must use it indoor, make sure you keep the place very well ventilated.
Do not use the machine at night, in a foggy day or any situation with less visibility. Clear up the working area,
and work with good lighting
When the machine is operated by two persons at the same time, make sure the position of another person is safe,
before you start the machine. Always check and confirm with your company before running the machine.
2.4. ENGINE SECURITY
2.5. MACHINE SECURITY
Failure to follow all instruction listed in this manual could cause serious problem
Remember the operator is responsible for any accident to himself, third party or things. Manufacturer is not
responsible for injuring or damage caused by improper use of the machine.
Before use of the machine, always check:
If any screw or bolts are loose.
If the rubber curtain is broken.
If there is damage to machine body, broken parts.
(Replace it if it is damaged or worn)
if the oil is enough
If the wires are good.
If blade is sharp enough
Always make sure all misalignment, loose parts or breakage are fixed and repaired before machine started.
Make sure the machine is in good maintenance by professionals from authorized dealers.
Manufacturer disclaims the responsibility for any damage caused by non-original parts, defective parts or worn
parts.
Any adjustments, refuel, nozzle fixing, transport, or storage, are made, please recheck the machine. All preventive
maintenance can reduce the risk to meet the machine problem. Do not leave the running machine alone.
Reduce the speed of engine, before you shut off completely.
Sudden stop is recommended to be used only under emergency.
Replace the sticker if it is broken or not sufficient legible.
Do not move or tilt the machine while machine is running.
Periodically maintain your machine through authorized dealers or shops. Using the original parts from authorized
dealers or shops could ensure the safety of your machine.
3. SECURITY STICKERS
All the following security stickers on the machine or in this manual indicate necessary information of safety, and
the right way to use this machine.

3
LABOR PROTECTION
WARNING ON INPUT MATERIALS
WARN ROTATING BRUM AND SHARP BLADE
BE CAUTION OF FLYING DEBRIS
READ MANUAL
LUBRICANT NEEDED
OIL CHANGING

4
4. UNPACKING
Carefully remove the CARTON, check the machine thoroughly to ensure there is no damage, missing parts or tools.
If there is damage, missing parts or tools, please contact the seller for a make-up, do not run the machine before
they are fixed or repaired.
4.1. ASSEMBLY
4.1.1 MC40 HOPPER AND OUTPUT ASSEMBLY
HOPPER ASSEMBLY
Assemble handles(2) to extended tray (1)
Assemble rubber flap(3) to top plate(4), together
with emergency switch(5). Strip(7) is to fix the rubber
flap
Assemble top plate to hopper. Notice that top plate
should be placed inside with all holes in line, and
tighten all bolts.
OUTPUT CHUTE ASSEMBLY
Assemble bottom plate(8) to output(9). Notice that
bottom plate should be placed inside with all holes in line,
and tighten all bolts.
4.1.2 Machine assembly of MC40/60/80
In the process of installation, do not touch the blades with your hands or any other body parts.
Considering the heavy weight of the machine, do not try to install it by oneself in case of the possible injury.
All bolts, nuts and washers have been fixed on the machine in the factory, please remove them before assembly and
put back on the machine at the same locations.

5
Step1 — Wheels and Wheel axel
Step 2 —Support and Debris collector
Step3 —Conveyor assembly
Step4 —Infeed hopper and handle

6
Step5 —Hopper Assembly
4.2. FUEL AND OIL
*PLEASE REFER TO ENGINE MANUAL CAREFULLY*
5. STARTING
*Do follow the instructions as below*
Bolts for blade and counter blade are tightened by torque wrench at torque of (60Nm for blade and 40Nm for
counter blade).
Check the hopper before starting, to make sure there is nothing in it. If there is something, please clean it up by
stick or reach tools.
Put your clothes, hands, limb away from hopper, rotor or any rotating parts.
Stay away from conveyor side before starting
Stand on your feet in balance.
It is obligatory to wear safety gloves, earmuff and safety goggles.
Please do not use this machine where the exhaust fumes might collect.
This machine should be used by one, preferably the same person only.
This machine is designed to be used in an open air.
6. STARTING AND OPERATION
The hardness of the wood depends on the wood type, the time between pruning and chipping and how dry the
branches are. This machine performs best if the branches are chipped right after pruned.

7
To start the machine
Emergency switch is pop-up
Engine switch is of 'on' position
Fuel supply is open
Open Air intake to allow fresh air
Slowly pull the recoil rope 3-5 times to get fuel supply system filled
Then pull with strength till engine is fired
Keep engine running at idle speed for 1 minutes
Slowly push the throttle bar to the 'Rabbit'
Keep the engine at full RPM (revolution per minute) while working to protect machine from clogging.
*NOTE*
This machine is only for the use that has been designed. To use it for other purpose may cause injure to people or
damage to machine.
Put the branches into the hopper and when they are pulled in and let them go. The branches will be pulled in
automatically.
While chip thick ones, pay attention the engine and keep it maintained.
Trim the side branch over 3cm in diameter, before put it into hopper separately. Long branches and thick branches
will shake and might slash into your face, make sure you hold it firmly and always wear the face protection.
TO STOP MACHINE:
Use the emergency switch immediately if there is urgency.
Normally, the engine should be allowed to idle status by turning to(TURTLE) first for a minute then switch off the
engine
If you want to stop chipping let the machine run for a while, to chip and eject all debris left which could jam the
rotor while you want to start the machine next time.
MACHINE GET JAMMED
If the machine gets stuck by pieces of input. do as follow:
Stop the machine, disassemble the plastic bearing cover, and turn the rotor a few degrees by rotor spanner specially
made.

8
If piece of wood in the hopper lying crosswise. It can only be removed when the machine is fully stopped.
DO NOT PUT YOUR HAND ON THE ROTOR.
Check machine after work, to ensure all bolts, nuts and screws are tight. If not, tighten them
7. MAINTENANCE
*WARNING*
Before any performance of maintenance or repairing, make sure the engine is fully stopped. and spark plug is
removed.
Regularly do the maintenance to ensure the effective performance of the machine. For a seasonal check and
maintenance, we strongly recommend doing it through the service by dealer authorized.
Removal of safety devices, replacement of parts with non-original ones, improper maintenance can cause injure to
people and damage to the machine
Do not adjust the carburetor, as the adjustment of carburetor is complicated. We suggest to do that adjustment by
the professional service of dealer authorized. Wrong adjustment of carburetor could damage the engine and make
the warranty voided.
It is always necessary to stop the machine before any clean or transport work. Maintenance should be done in a flat,
clean area.
7.1. CLEANING
Using high pressure air flow to clean debris left in Rotor box, on surface of machine (esp. on the engine)
Cylinder fins is the main way to cool the heat from working cylinder. So keep the fins clean and check it out
regularly is very helpful to prevent over heating in the engine. Use the suitable tool to clean away the dirt, wood
chips, earth and all possible thing that block the cooling process.
Clean electrical components with a damp rag, spray with WD40 and then wipe with dry rag.
7.2. BELT ADJUSTMENT AND REPLACEMENT
7.2.1 MODEL MC60/MC80
- Remove the belt cover
- Loose the block nut (2) and lock bolts (3)
- Slightly turn adjust Thread rod (1) in to tighten belts
- Slightly turn adjust Thread rod (1) out to tighten belts
- Check if the pulleys are in line. You can see this by holding a bar
against the pulleys
- You have reached the right tension when the belt can be pushed down by +/- 8 MM.
- Tighten the lock bolts and block nut, put back the belt cover
7.2.2 MODEL MC40

9
To raise belt tension,
- Loose the nuts (3), then loose the nuts (1), there are 4 nuts
front and back totally.
- Screw the bolts (4) in evenly, to pull the tension plate (2) out.
- Belt tension will be raised with the movement of engine.
While you need to loosen belt tension, you can do it in return.
After adjustment, make sure you have all bolts and nuts in right
position and tightened.
7.3. LUBRICANT AND GREASE
Grease / oil bearings daily before use.
Recommended Lubricants
Specifications
Grease
Complex grease EP2 - High temperature
PARTS NEED GREASING
Rotor bearing
7.4. BLADE AND ANVIL
Blade are extremely sharp, take care please!
Blades and anvil need cleaning after every time chipping work, and protected from rusty corrosion
7.4.1 BLADE MOUNTING
Slacken blades bolts with Torx tool supplied and remove
Turn blades round and refit to use opposite edge
Clean the blade holder surface thoroughly
Tighten blade bolts to 60Nm from middle to both sides evenly
Check clearance to anvil is 0.5mm.
If blades have been reground the anvil will need readjusting to 0.5mm.
7.4.2 BLADE REGRINDING
Both edges of each blade must be ground on front at 30° angle and on back
5° angle over 2mm to ensure correct clearances.
Blades must only be sharpened by grinding on a bench grinder. Do not
sharpen with hand held equipment. Always sharpen in sets to maintain balance of cutter assembly.
7.4.3 ANVIL SERVICING
Change side when the side edge on the tapered top gets round.
Change anvil when both sides get round.
*Note*
The anvil will need readjusting to 0.5mm.

10
8. WHEEL TIRES
Check the tire pressure and keep it at the right pressure (min 1.5 bar, max. 1.9 bar)
Perform maintenance periodically as following table:
Maintenan
ce
Every time
First 5
hours
Every 25
hours
Every 50
hours
Every 100
hours
First use of
season
Last use of
season
Grease
parts
×
Check oil
level
×
Change oil
×
×
×
×
×
Empty oil
and fuel
×
Clean air
filter
×
×
Check
spark plug
×
×
Belt
checking
×
Blade
checking
×
9. PROBLEMS, REASONS AND SOLUTIONS
By the performance of machine, you see, you can detect the problem and find solution accordingly.
Hereafter is a trouble shooting table, where you can find solution for possible problems:
Problem
Reason
Solution
Machine cannot chip properly
Rotor cannot pull branches
Chips are not in similar size
Blade worn too much
Oversize input
Gap between blade and counter blade
is not right
Reverse, sharpen or replace blade
Take input out and make it right
Right adjustment on counter blade
Engine cannot be started or stop
by itself
Electricity line was loose or broken
Oil level is not right
No fuel, fuel supply was blocked
Check the switch and emergency
switch is disabled
Fill or drain oil to make it right (ref.
8.1.2)
Check fuel tank and carburetor cup
Rotor get jammed
Material being chipped is not right
Too much input
Ref. 6.3.2
Conveyor gets jammed
Too much wet, soft or light material
Disassemble the conveyor and take
jam out.
Please refer to the trouble shooting table in the engine manual. STRONGLY RECOMMEND TO REPAIR
ENGINE AT SERVICE CENTRE, if the engine is not working properly, such as lack of power, shaking at idle
speed...

11
10. TRANSPORT
Do not carry and move the machine while it is still running. Always remember to stop the machine before you
intend to move the machine.
Be caution that the muffler is still very hot even after the engine is turned off. So, keep the machine completely
cool down.
Take a look at the weight of machine in this manual if you want to move it. It is better to be moved or transported
by two people,
Transport by two people can reduce the risk of possible injure caused by heavy weight.
If it is carried by vehicle, make sure you have the machine firmly fixed to avoid sliding and tipping.
11. STORAGE
Make sure this machine is not accessible for children,
Never store this machine nearby flammable material such as, gas, fuel, dry grass, wood...etc., so that it cannot
endanger any person.
Store this in a dry, well ventilated place with temperature between 0°C to 45°C.
*NOTE*
If you are planning to store this machine for a while, please pay attention to the following points.
Cool the machine completely
Clean the machine thoroughly
Drain off all fuel and oil in the machine Waste fuel and oil should be dealt according to local recycling regulation.
12. INFORMATION OF RECYCLING/ENVIROMENTAL PROTECTION
It is obligatory for each people to protect our only earth, to protect our environment we are living around. Do not
pour the waste fuel, oil or grease in to soil, river, lake and sea, always bring them to certain place authorized.
Package material of this machine, are recyclable, please do not dispose them together with household waste; put
them to the official authorized site.

12

13
Spare parts are available from our dealers or our official website.
This manual suits for next models
2
Table of contents
Other YAAHKIEH Chipper manuals