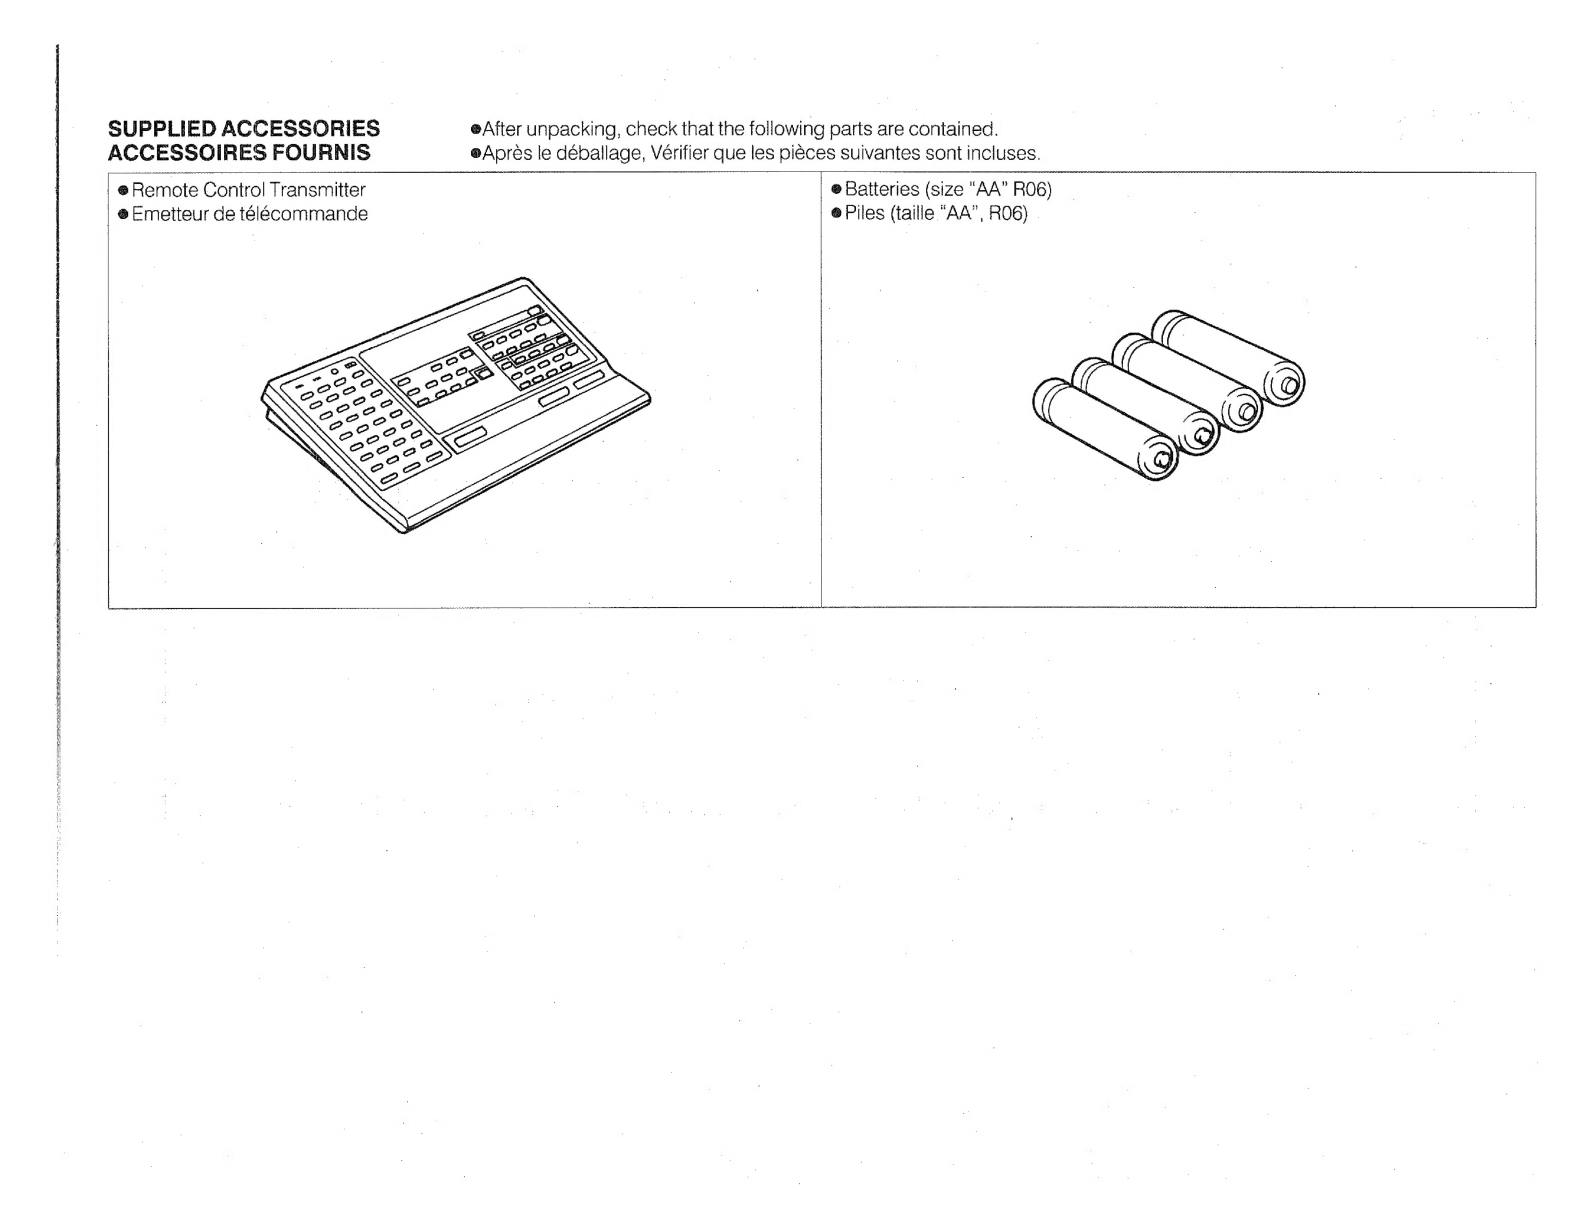
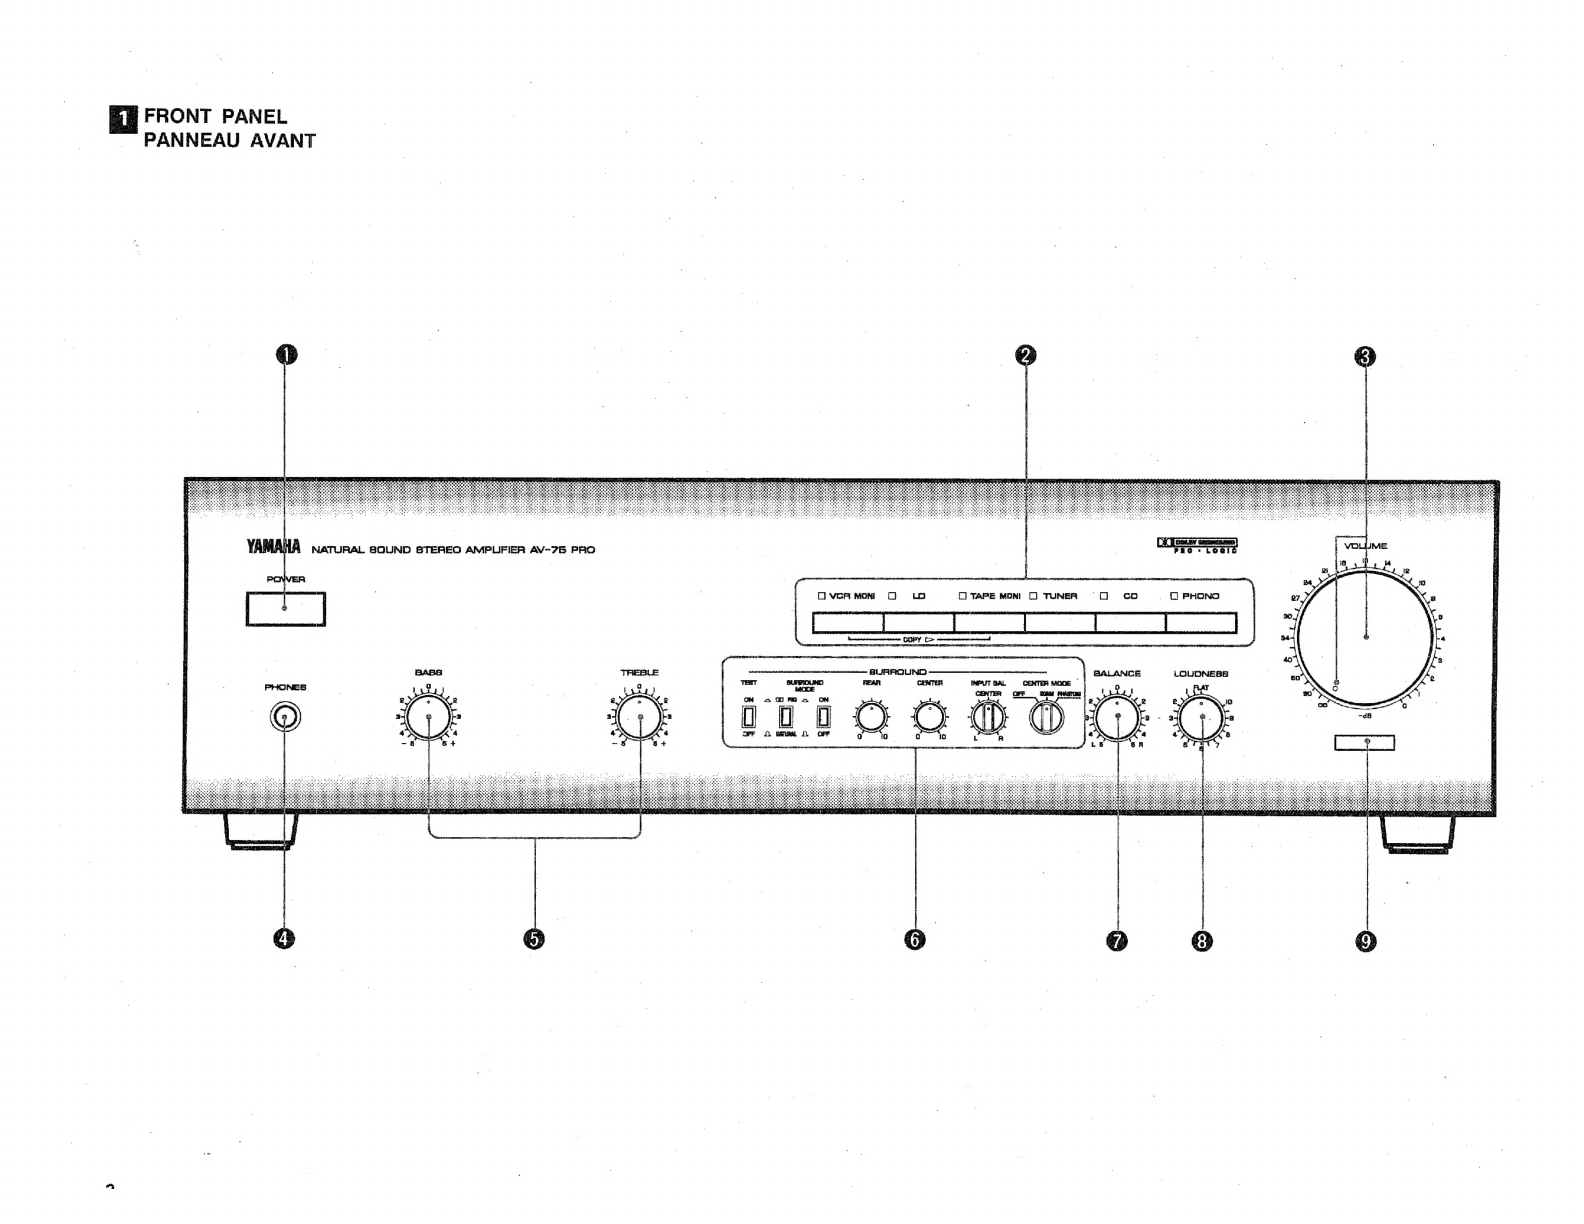
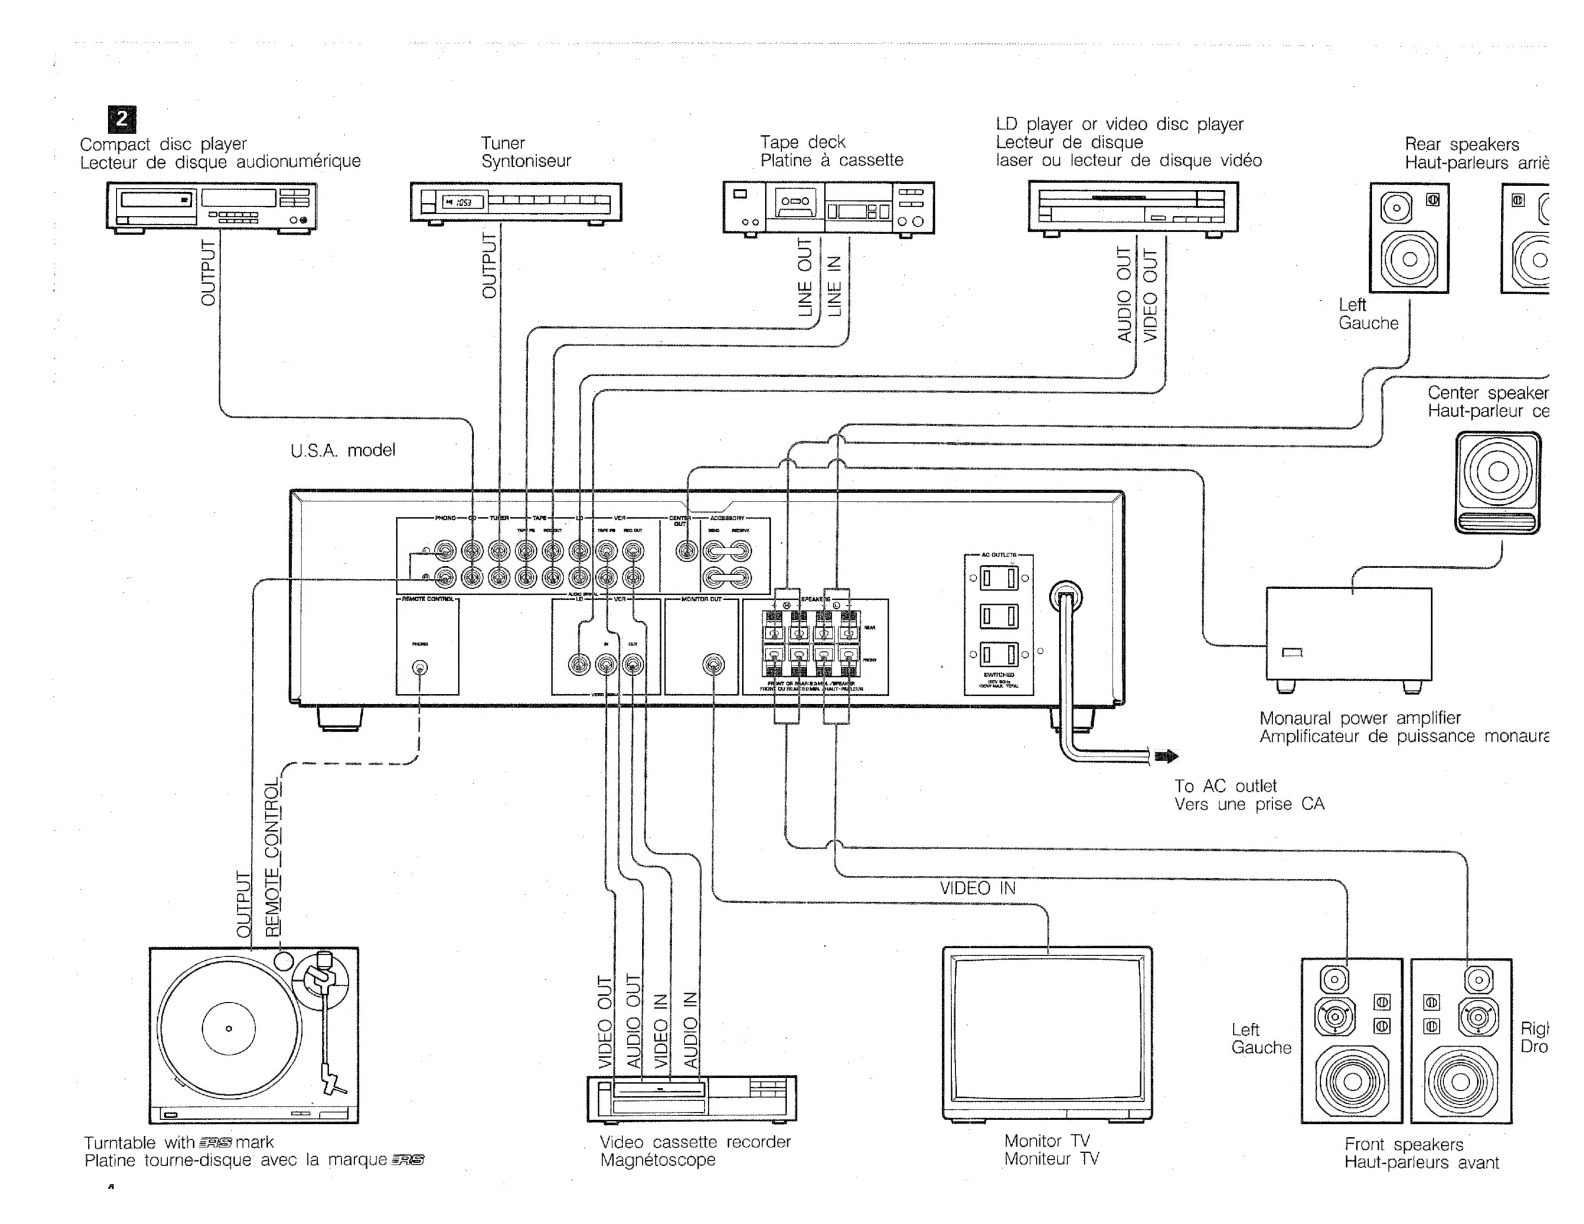
Yamaha AV-75PRO User manual
Other Yamaha Amplifier manuals

Yamaha
Yamaha XP7000 Setup guide

Yamaha
Yamaha KAX-2500 User manual

Yamaha
Yamaha MX-1000 User manual

Yamaha
Yamaha A-S700 - Amplifier User manual

Yamaha
Yamaha C-80 User manual

Yamaha
Yamaha AX-890 User manual

Yamaha
Yamaha A-S700 - Amplifier User manual

Yamaha
Yamaha TX6n User manual

Yamaha
Yamaha CA-44 User manual

Yamaha
Yamaha MX-70 User manual

Yamaha
Yamaha PC3000A User manual

Yamaha
Yamaha C 160 User manual

Yamaha
Yamaha MX-A5200BL User manual

Yamaha
Yamaha RX-V730 User manual

Yamaha
Yamaha P1600 User manual

Yamaha
Yamaha AX-530 User manual

Yamaha
Yamaha M-65 User manual

Yamaha
Yamaha XP7000 User manual

Yamaha
Yamaha AX-700U User manual

Yamaha
Yamaha CA-400 User manual