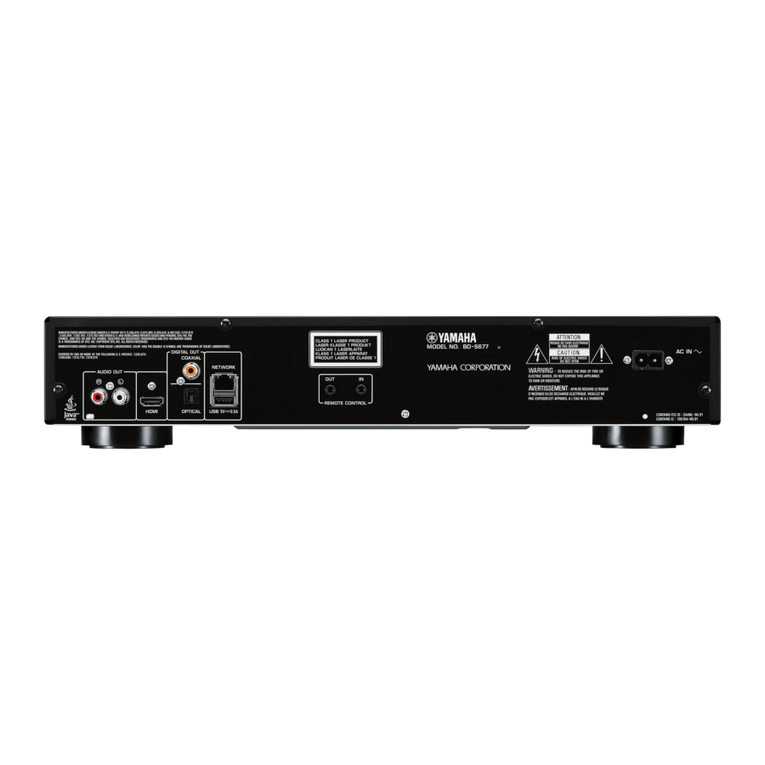
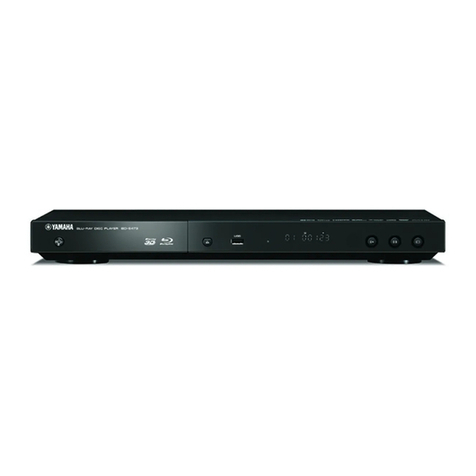
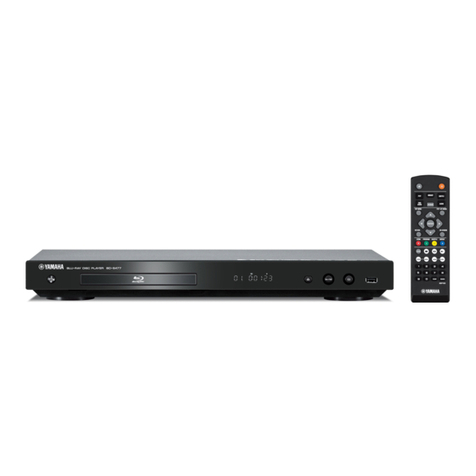
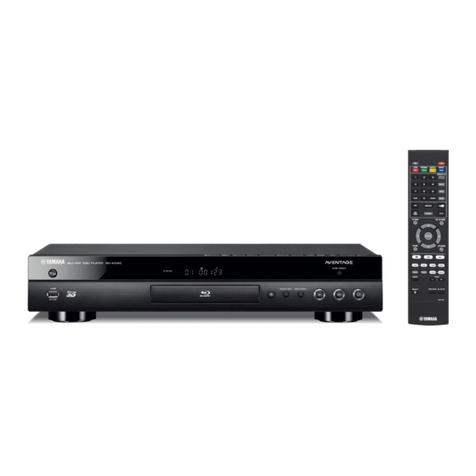
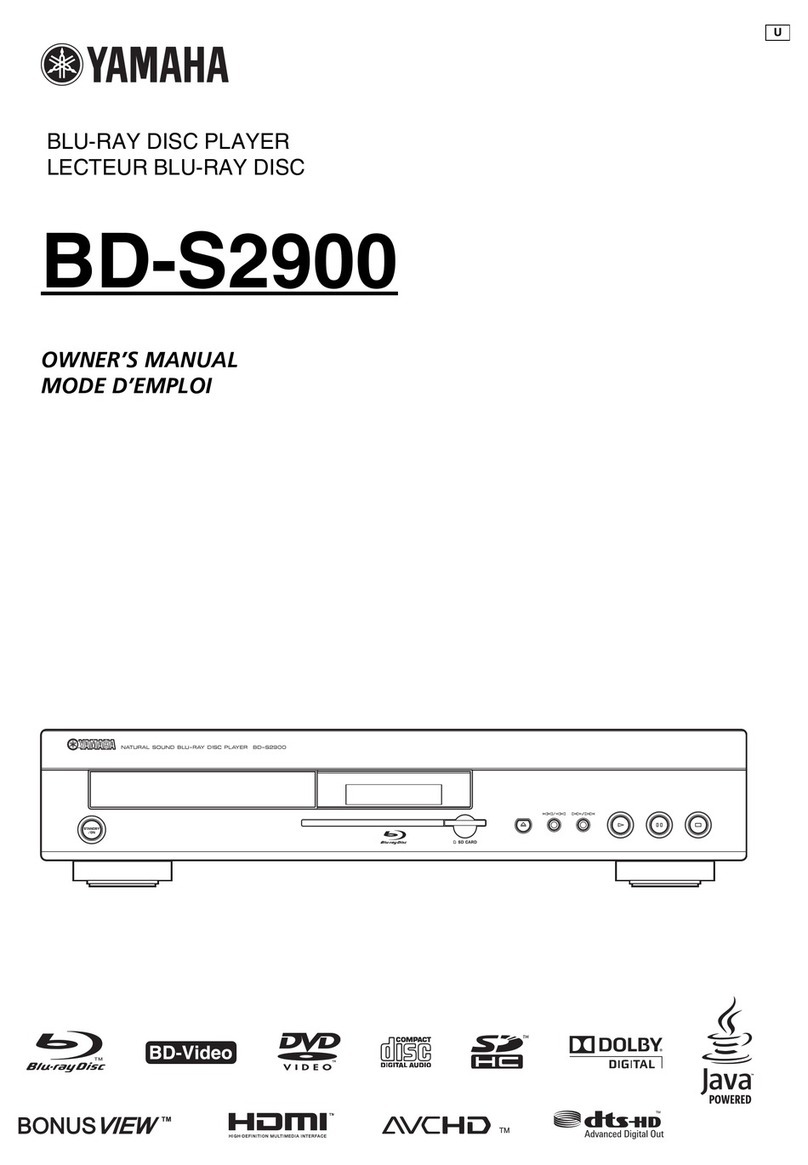
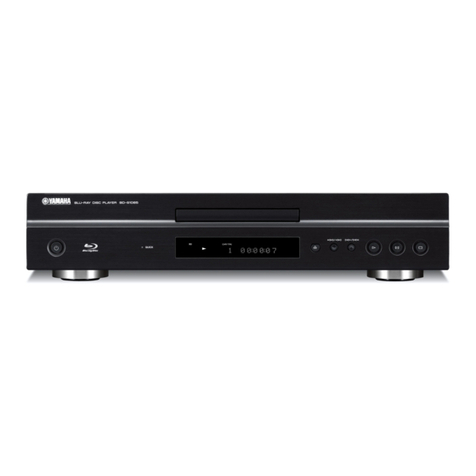
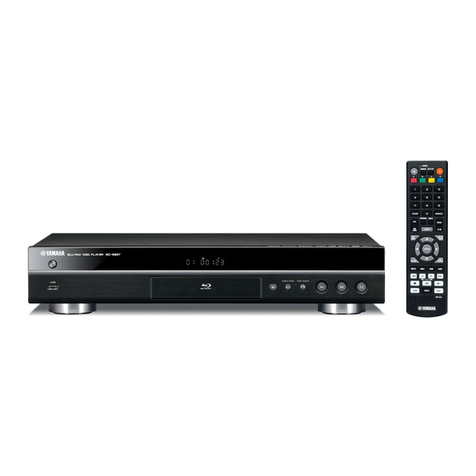
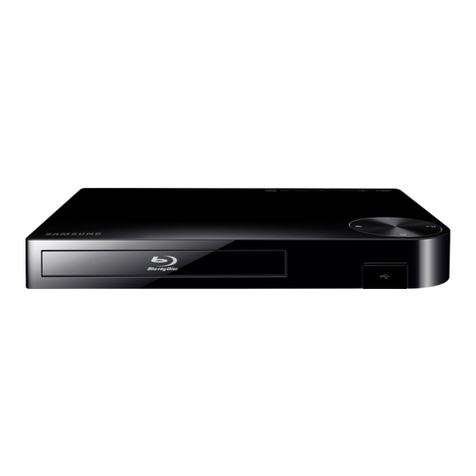
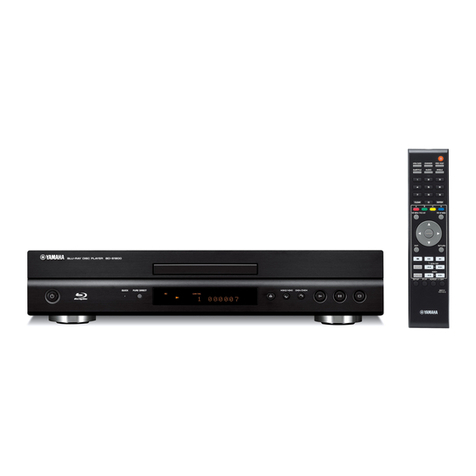
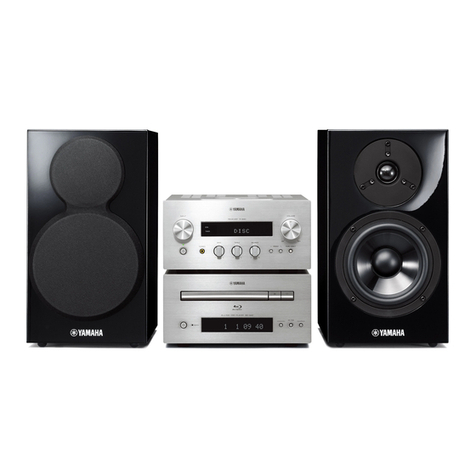
Yamaha 80-51065 User manual

_YAMAHA
BLU-RAY DISC PLAYER
LECTEUR DE BLU-RAY DISC
80-51065
OWNER'S
MANUAL
MODE
D'EMPLOI
MANUAL
DE INSTRUCCIONES
OVAMAHA
II
11---·
-
~
0-
I
10
@H@
C0
0
~
---
IIII
I--
~
BDt"'1
nun
r.!1C-.:f
A)
~
{LIVE
~
BONUS
VIEW
III
::;;;;
lUJO~@
£'=::.
B.lu-r,;,gD/sc......
TloA
V
IDE
0
0__
J
ava
POW£R£O
t!~m!"
x.v.Color
L\VCHD
1M
~I~?~~~
III
DOLBY:
~
dts-HD
TRUE(:I!:
I
Malii'
Alldio
I
Euenti81

IMPORTANT
SAFETY
INSTRUCTIONS
Read lhese operating instructions carefuJly before
lL~ing
the unit.
Follow
lhe
safety instructions
on
the unit and the applicable safety
Instnlction~
listed below.
Keep
these openlting instructions
handy
for future reference.
1Read these instructions.
2Keep these
instruction~.
3
Heed
all warnings.
4Follow all
Inslruction.~.
5Do not use this apparatus near water.
6
Clean
only with
dry
clOlh.
7Do not
block
any venlilation openings. Insl.all in accordance
with
the
manufacturer's in\tructions.
8Do not install
near
any heat sourees s-uch
as
radiators.
heat
registeffi, sloves,
or
other
apparatus (including amplifiers)
that produce heal.
9Do not defeat lhe safety purpose
of
the
polariz.ed
or
grounding-type plug. Apolariz.ed
plug
has two blade.
...
with
one
wider
than the other. Agrounding-type plug has
two
blades and athird grounding pnlng.
The
wide blade
or
lhe
third
prong
lU'C
pnwided
for
your
safety.lfthe
provided
plug
docs
not
tit into
your
outlet,
consult
an electrician
for
replacement
of
the obsoletc outlet.
WARNING:
TO
RHHJCE
TIm
RISK
OFFIRK
ELECTRIC
SHOCK
OR
PRODUCT OAMA<a:,
•
DO
NOTEXPOSE THIS APPARATUS
TO
RAIN,
MOISTURE, I>RIPI'ING OR SPLASHING
AND
THAT
NO
OllJECTS FILLEI> WITH LIQUIDS,
StiCH
AS
VASES,
SHALLIlE
PLACEI>
ON
THE
AI'PARATlTS.
•(JSE ONLY THERECOj\IMKNDEI>
ACCESSORIES.
•
DO
NOT REMOVE
Tin:
COVER (OR UACK);
THERE ARE NO
l1SI~R
SERVICEAIlLE PARTS
INSIIlE. REFER SERVICING
TO
QtIAUFIKD
SERVICE
PERSONNEL
CAUTION!
1>0
NOT
INSTALL OR PLACE THIS UNIT IN A
nOOKCASI':,
nUlLT·lN
C,\8INET
OR
IN
A.NOnmR
CONI'INEI> SPACE.
ENSURE nn': UNIT
IS
WELl.
VENTIlATEI>.
TO
I'REVI':NT RISK
01'
ELECTRIC
SHOCK
OR
.FIRE
H.U,;\RD
miE
TO
OVERHI,,\TING,
I':NSURE
THAT
Cl'R1AINS
AND ANV
OTIU:R
MATERIALS UO
NOT
0I4STRLCT
nm
VENTII.'\
nON
VENTS.
CAUTION!
THIS PRODUCT LTILlZI':S ,\ LASI':R.
liSE:
<)If
CONTROU;
OR
AD.lliSTl\n:NTS
OR
PI':RI"ORMANCI':
OF
I'ROCEI)FRI'~'"
UHlER
THAN
THOSt':
sl't:cnu:n
HEREIN
;'viA
V
RES1Tf
IN
I","ZAROOlTS
R,\UL\
1l0N
K'XPOSlIRI':.
1>0 NOT OPEN COVERS AND
DO
NOT
REPAIR
'iO(TRSt':I.F.
REI"I':R
SI~RVICING
TO
Ql'ALIHEI>
I'I':RSONNI~I._
Caution-i
En
10
Protct.1:
the
power
cord
from being walked
(m
or
pinched
particulnrly at plugli, convenience receptacles.
and
U\C
poinl
where
they
eA
it from the apparatus.
UOnly use attachments/accessorics specified
by
the
manufacturer.
1.2
Use only with
U\C
can. stnnd. tripod, bracket,
or
table specitied
by
the manufacturer.
or
sold
(I
with the apparatus. When acart is used. use
cnullon when moving the carl1appaT"dtus
combinall(m to avoid injury from tip-over.
1.3
Unplug
this appamtus during lightning stormli
or
when unused for
long
periodli
of
time.
1.4
Refer
all servicing 10 qualified service personnel. Sel'\'icing
is required when the apparatus has been
damagcd
in
any
way. such
a.~
power-s-upply
cord
or
plug is damaged, liquid
ha.
...
bccn
spilled
or
objccts
have
fallen Into
the
apparatus,
the
apparatus has been eAposed torain
or
moislure. docs not
0pCT"dte
nonnally.
or
has
been
dropped.
CAUTION
Danger
of
eApklSion
if1>atlery is i
oc<ll'reCtly
replaced. Replace only
with the same or equi
\"alent
type.
The SOCKeI ouUet
shJIll
be insUllled near the equipment and easily
acce.~sible.
The mains plug ofthe power supply cord shall remain
readily operable.
To
crnnplel.ely disconnect lhis
apparallL~
from the
AC
Mains.
disconnect the power supplycord plug from AC receptacle.
CAUTION:
TO
REDUCE THE RISK
OF
ELECTRIC
SHOCK,
00
NOT REMOVE SCREWS.
NO USER-SERVICEABLE PARTS INSIDE.
REFER
SERVICING
TO
QUAl.IRED
SERVICE
PERSONNEL
The lightning
11a.~h
with arrowhead symbol.
within an
C;.'quilateral
triangle,
is
intended to alert
the userto the presence
of
uninsulated "dangerous
voltage" within the product's enclosure that may
be
of
sufficient magnitude
to
constitute arisk
of
electric shock
toO
persons.
The exclamation point within
an
equilateral
triangle is intended to alert the user
to
the presence
uf
important operating and maintenance
(serYicing) instrul1:ions
in
the literature
accompanying the appliance.

FCC INFORMATION (for US customers)
Relocate either this product
or
the device that
is
being
affct.'1cd
by theinterference.
Utilize power outlets that are
on
dilTerent branch (circuit
breaker orfuse) circuits
or
install AC line I1llerls.
The
above statements apply
ONLY
to those
produCL'\
distributed
by
YamahaCorporation
of
America
or
its
subsjdiurie.'l.
In the ca'le
of
radio
or
TV
inlerft-,,-ence, relocatclreorient the
antenna.
If
the
antenna lead-in is
3(XJ
ohm
ribbon lead,
change the lead-in to couxialtype cable.
If these correctivetTIea'lures do not produce satisfactory
re,l,ults, please contact the local rt-'tailer authorized to
distribute this type
of
product. Ifyou
can
not locate the
appropriate retailer. please contactYamaha
Ekx.1.TOnics
Corp
.•
U.S.A. 6660 Onmgethorpe Ave., Buena Park.
CA
90620.
IMPORTANT
NOTICE:
DO
NOT
MODIFY
THIS Compliance with FCC regulatitms docs not b'Uarantee that
UNIT!
interference will not occur in all instalJarilms.
If
this
pmduct
This produCl when in'ltalled
us
indicated in the inslIUt:tiolls is found to be thesource
of
interference, which can be
contained in this manual,
meeL~
FCC
requirements. detennjned by lUrning the unit
"OFF'
and
"ON".
please
lry
Moditicatitms not expres.'lIy approved
by
Yiullaha may void to eliminate the
pmblem
by
using one
of
the following
your authority. granted
by
the FCC,to
use
the
produl,,'1:..
measures:
2
IMPORTANT:
When
connct.1.ing this product to accessories
andlor anotherproduct use only high quality shieWed cables.
C.ablcls supplied with this pmduct
MUST
be ust-xi Follow
all installation instruction'l. Failure to follow jnstructions
could void your
FCC
authorization to use this product
in
the
USA.
3
NOTE:
This product has been tested and found
to
comply
with the requirements
lislt-'<!
in
FCC
Regulations,F-Jrt 151br
Class
"B"
digital devices. Compliance with these
requirements provides arellsonable level
lyf
a'lsurance that
your use
of
this product in aresidentiaJ environment will not
result
in
harmful interference with other
elct.1.TOnic
devices.
This t-'quipment gener.ueslu.'lt.'S radio frequencie.'l and,
if
not
installed and used according to the instruction'l found
in
the
U.'lefS manual.
may
cause interference harmful to the
operatitm
of
otherelectronic devices.
COMPLIANCE INFORMATION STATEMENT (DECLARATION
OF
CONFORMITYPROCEDURE)
.Responsible Party:
Address:
Telephone:
Fax.:
Type
of
Equipment:
Model Name:
Yamaha Electronics Qlrp<lr.ltion. U.S.A.
6660 Orongethorpe Avenue
BuenaPari",
CA
90620
714-5~910.'l
1-800-492·6242 (toll frcc)
714-228-3390
.Blu-ray Disc Player
BD-SI065
•This device complies with Part
15
of
l.he
FCC
Rules.
•Operdtitm
if;
subject to the following conditions:
-This device may not cause hannful interference.
-This device must acceptllI1Y interference received including
interl'crence that may causeundesired operation.
See
the "Tmubleshooting" sccti(m at the end
of
this manual
if
interference
to
radio reception is suspected.
We
Want You Listening For ALifetime
Yamaha
and the Electronic Industrie.'l
Association's
Consumer
Electronics
Group
want
you to
get
the
most
out
of
your
equipment
by playing
it
at a
sale
level.
One
that lets
the
sound
come
through loud
and
clear
without
annoying
blaring
or
distortion -and. most importantly,
without
affecting
your
sensitive hearing.
Since
hearing
damage
from loud
sounds
is
often undetectable until it
is
too late.
Yamaha
and the Electronic
Industries
Association's
Consumer
Ek-ctronics
Group
recommend
you
to avoid prolonged exposure from
excessive
volume
levels.
IMPORTANT
Please
record
the
serial
number
of
Ihis ullit
in
the
space
below.
MODEL:
Serial
No.:
The
seriaillumber
is
Incnled
on
the
rear
of
the
unit
Relain
this
Owner's
Manual
in a
sale
place
for
future
rofercllce.
Caution-ii En

CAUTION:
READ
THIS
BEFORE
OPERATING
YOUR
UNIT.
1To assure the
fine.\1
performance. plea.'ie read this manual
carefully. Keep it in asafe place for future reference.
2Install this sound system
in
awell ventilated. cool, dry, clean
place-away from direct sunlight. heat
source
...
vibrntion.
d\L\1,
moisture. and/or cold. For proper ventilation, allow the
following minimum clearances.
Top:
10
'.:m
(3.718
in)
Rcar: 10
cm
(3·7/8 in)
Side: 10
cm
(3·7/8 in)
3Locate this unit away from other electrical appliances,
motors,
or
transformers
to
avoid humming
sound
...
4Do not exposc this unit to sudden temperature chwlges from
cold
to
bot. and donot locate this unit in
un
environment with
high humidity (i.e. aroom with ahumiditier) to prevent
condensation inside this unit, which may cause an electrical
shock, fire. damage to this unit, and/or personal injury.
SAvoid installing this unit where foreign object may fall onto
this unit and/orthis unit may
be
exposed
to
liquid dripping
or
splnshing. On the top
of
this unit. do not place:
-Other
componenL.,.
as they may cause damage and/or
discoloration
on
the surface
of
this unit.
-Burning objects (i.e. candles), as they
may
cause fire,
damage to this unit, and/or personal injury.
-Containers with liquid in them,
as
they
mllY
fall
llnd
liquid may cause electrical shock
to
the user and/or
damage
to
this unit.
6
Do
not.
cover this unit with anewspaper. tablecloth. cunain.
etc. in order not to obstruct hcut rddiation.
If
the temperdture
inside this unit rises, it may cause fire, damage
to
this unit.
and/or personal injury.
7
Do
not plug in this unit to awall oudel until all connections
arc complete.
S
Do
not operdte dlis unit upside-down. II may overheat,
possibly causing dwnage.
9
Do
not
use
force on switches, knobs and/or cords.
10
When disconnecting the powercord from the wall outlet.
grasp ilie plug; do not pull the cord.
11
Do
not
c1cun
this unit with chemical solvents; this mighl
damage the finish. Use aclean. dry c1oili.
12 To prevent damage by lightning, keep the powercord
disconnected from awall outlet
or
this unitduring alightning
storm.
13
Do
not attempt
10
modify or
t1x
this unit. Contact qualit1ed
Yamaha service pccsonnel when any service is needed.
The
cabinet should never be opened for any reason
....
14
When
nOI
planning to
usc
dlis unit for long periods
of
time
(i.e. vacation). disconnect the
AC
power plug from the wall
outlet.
15
.Be
sure
to
rcud the ''Troubleshooting'' section on
C{Jmmon
operating emJrs before concluding that this unit is faulty.
16
Before moving iliis
unit
press
<!>
to set this unit to the
stwulby mode, anddisconnect ilie
AC
power plug from Ihe
wall oude!.
17
Condensation will form when the surrounding temperature
changes suddenly. Disconncct the power cable from the
outlet, then leave this unit alone.
Caution-iii En
18 When using iliis unit for along time, iliis unit may become
warm. Turn the power off. then Ienve this unit alone for
cooling.
19 Installlhis unit ncar the
AC
outlet and where the AC power
plug can
be
reached ea.,ily.
20
The batteries shall
not
be exposed to excessive heat such as
sunshi
nco
tire
or
the like.
This unit is not disconnected from the
AC
power source
as long as it is connected
to
the wall outlet, even if this
unit
it<;elf
is tumed offby
C,).
This state is called the
standby mode.
In
this state, this unit is designed to
consume avery small quantity
of
power.
WARNING
TO
REDUCE
niE
RISK
OF
FIRE
OR
ELEC'IRIC
SHOCK,
DO
N(IT EXPOSE
THIS
UNIT
TO
RAIN
OR
MOISTURE.
The lasercomponent in this product is capable
of
emitting n\{liatioll exceeding the limit for Cla"s
l.
FOR CANADIAN CUSTOMERS
To prevent
dechic
shock.. match wide blade
of
plug to
wide slot and fully insert.
This Class Bdigital apparatus complies with Canadian
ICT:...'l·IXn.
-------------------·--r:i]··-·-
IMlli~
~
-
I
CLASS 1LASER PRODUCT
LASER KLASSE 1PRODUKT
LUOKAN 1LASERLAITE
KLASS 1LASER APPARAT
PRODUIT LASER
DE
CLASSE 1
Contents
4. SETTINGS
1. INTRODUCTION
About
Discs 2
Types
of
Discs
that
Can
Be
Used
with
This
Player 2
Disc.
..
that
Cannot
Be
Used with
This
Player 3
Disc
Precaution'
4
Getting Started 5
Supplied accc-\.
..
ories 5
The
lcon.,
Used
in TIlL
..
Operation
ManuaL
5
Copyright
5
Controls and Functions 6
Fmnt
panel 6
Rear
panel 6
Remole Control ,7
2. CONNECTION
Introduction
to
Connections 8
Video/audio lerminal
on
Ihis Player 8
Video
jacks
0I1lhis
Player
(Connecl
G),
®,
or
@)
8
Audio
terminals/jacks
on
thi.,
l'layer
(Coonect
CD.
®.
or
@) 8
Bmadband
[nternetconneclion
8
USB
device C(Jnnection 8
HOMI
Connection 9
Connecling 10 the
HDMI
Terminal
9
Video Connections........................................... 10
Connecting
10 lhe
Component
Jack!l
lO
Connecling
10
the S
Video
or
Video
Jack. 1J
Audio
Connections
12
Connecting
10
lhe Digital
Audio
IackITerminal... J2
Connecting
10 lhe
Audio
Jacks
13
Broadband Internet Connection 14
Connecling
10
the
NETWORK
terminal and
USB
BD
STORAGP1SERVICE
teoninal
J4
other
Connections 15
Connecling
10
the
REMOTE
CONlROL
jacks.
15
Connecting the
power
coole
15
3. DISC
PLAYBACK
Before
starting
Playback 16
Loading the Batleries
in
the Remote Conlrol 16
Turning lhe .Power
On
16
Indicators on lhe fnJnl panel
display
16
Selling the on-screen display language 17
Updating
the 60Uware
of
Ihis unit 17
Selling the
audio
output 18
Preparing for BD-L1VE 18
Activaling the
S(.."Condary
Audio 18
Controlling
the
Blu-ray disc
player
ulii
ng the
HDMrr~
contml
funClion 18
BDIDVD/CD Playback
20
Loading aDisc
20
Basic
playback
opemtion
20
Repeat.Playback
21
Using
BD/DVD
Mcnu.,
22
Using
DVD-R/-RW
Menu 22
Using lhe
Audio
CD
Playback Menu 24
Enjoying
HONUSVIEW
or
BD-L1VE
24
Function Control
Screen
25
Displaying
the
dL'iC
inlbrmation
27
IJPEG File Playback
28
Playing
back
sHU
images in sequence 28
Playing back. still
images
in
aselected
folder
28
Playing
back
Slide
Show
28
Setting
slide
show
spoodlrepeat playback 28
settings
29
Common
operatiom; 29
Audio
Video
SeUings
30
Speaker
Settings
32
Quick
Slart 33
Auto
Power
Off
33
HDMI
Control. 33
Playback
Setting 33
Version
34
Syslem
Reset 34
Communication
Setup
34
USB
Memory
Management
36
Snll.wllfC Update 37
5. ADDITIONAL INFORMA
liON
Troubleshooting 39
Power
39
Basic
Operation
39
Disc Playback
39
Piclllre
39
Sound
40
Nelwort
:
40
Other
41
Messages Relating to
BD
diS"
and
DVD
di.'iC
41
Glossary
42
Specifications
43
General 43
Audio Ped:ormance 43
Input/Output 43
(at
the
end
of
this
manual)
Information abont soflware 1
1En
2
3
·'·
,.
4;
•

About
Discs
•Types of Discs that Can Be Used
with This Player
-
The
following discs can
be
played back in this
Player. Do not use an 8cm
(3")
to
12 cm
(5")
adapter.
-Use discs that confonn
to
compatible standards as
indicated by the presence
of
olliciallogos on the
disc label. Plllyback
of
discs not complying with
these standards is not guaranteed. In addition, the
image quality
or
sound quality is not guaranteed
even
if
the discs can
be
played back.
DI8CType
Recording
Contents
DiscSize
Fonnat
..
HDvideo
--
Audio +Video
J2cm(S")
HD-REDL
ODMVfonlUlI (Movie)
HD-RDL
DVD
Video Vidc(l formal
Audio
+
Video
12cmCn
(Movie)
8
cm
(3")
DVD+RWI
VideolVRI Audio +
Vide<l
12
em
(S")
DVD+R
AVCHD
(Movie) 8crn
(3")
DVD+RDL
formal
DVD-RDL
(JinaJil.ed disc
DVD-RWI only)
DVD-R
AndioCD']
Audio
CD
Audio
Ecm(S")
(CD-DA)
8crn
(3")
CD-RWICD-R
Audio
CD
Audio
(CD-DA)
JPEG*2 Slill
image
OPEG
me)
*I
Thi~
PlayeT
has
been
designed
on
lhe
premi~e
of
playing
back
Audio
CDs
lhal
comply
with
CD
(Compa(,'t Disc) standards.
CDs
containing
1I
signa.!
for
the
purpose
of
protecting copyrights
(copy
IXJntrol
signal)
may
nOI
be
able 10
be
played bllclt with this PllIyer.
*2
Refer to
..
Aboul the
lPEG
fi
Ie
formal"
Oil
page 3.
Region
management
Infonnatlon
Model SD-Video DVD-Vldeo
U.S.A and
Canada
Region
code
"A"
(T
Region
number"
I"
"ALL"
or
"ALL"
lOA
(I) [I)
South AmeriCli
Region
code
"A"
or
Region
number
"4"
"ALL"
or
"ALL"
lOa
(I)
[Il
Europe
Region
code
"u"
or
Region
number
"2"
"ALL"
or"ALL"
Ga
lIJ
liJ
2En
Region
management
Information
Model SD-Vldeo DVD-Vldeo
Australia Region code "a"
or
Region number
"4"
"ALL"
or
"AIL"
Ga
(I) III
Rll'l.~ia
Region t'ode "c"
or
Region number
"S"
;'ALL" or "ALL"
Gla
III [I)
Asia
Region
IXJde
"An
or
Region
number
"]"
"ALL"
or
hALL"
lOa
III III
-HD/DVD video players and discs have region codes,
which dictate the regions
in
which adisc can be
played. Forthe region codes, refer to "Region
management information'· (p. 2)
-HD/DVD Video operations and functions may
be
dilTercnt from the explanations in this manual and
some operations may
be
prohibited due to disc
manufacturer's settings.
-
If
amenu screen or operating insimctions are
displayed during playback
of
adisc, follow the
operating procedure displayed.
-The audio component
of
a
DVD
video recorded at96
kHz (LinearPCM) will
be
output as 48 kHz audio
during playback.
N~tdJ
-Playback for some
of
the discs
in
the left side
column tables may not
be
possible depending on the
disc.
-"Finalize" refers
to
arecorder pnK'essing arecorded
disc so that it will play
in
other DVD players!
recorders as well as this Player. Ouly finalized
DVD
discs will play back
in
this Player. (This Player does
not have afunction to finalize discs.)

•Discs that Cannot Be Used with
This Player
The
following discs cannot be played back
or
will not play
back properly on this Player.
If
such a
disc
is mistakenly
played back, speaker damage
may
occur.
eDG,
Video
CD,
Photo
CD.
CD-ROM,
CD-lEXr,
SVCD.
SA-CD,
PD. CDV,
CVD,
DVD-RAM,
DVD-
Audio,
BD-HE
with the cartridge, CD-MP3, CD-WMA
Discs
with
unusual
shapes
cannot
be
played.
-Discs with unusual shapes (heart-shaped
or
hexagonal discs, etc.)
cannot
be used.
The
usc
of
such discs will cause malti,lllelion.
The
following
BD/DVD
video
discs
cannot
be
played.
-Discs not maleh the region code/number
of
this
Player
("Region
management information", p. 2).
-Discs produced illegally.
-Discs recorded
for
commercial use.
About
the
"'PEG
file
format
JPEG is atype
of
file format for storing stiU-image files
(photos, iIIustTIltions. clc.).
The
Player
lets you play
JPEG
fomlat still-image files.
File
fonnats
that
are
not
compatible.
-Still images in formats other than
JPEG
(such as
HFF)
cannot be played.
-
There
may be
some
files that
cannot
be
played
even
if they are in WEG fomlat.
-Progressive
JPEG files cannot be played.
-Moving
image files andaudio liJes as well as Motion
JPEG format files cannot be played, even though
tbey arc TPEG files.
Other
files
that
cannot
be
played
back.
-You may not
be
able to play
some
still images which
you have created, touched up, copied
or
otherwise
edited
on
your
computer.
You
may
experience
one
or
more
of
the
following
symptoms
when
playing
files.
-
It
may take
some
time
to
play hIes depending
on
the
number
of
folders.
number
of
tiles and volume
of
data involved.
-
EXIF
infomlation will not be displayed.
EXIF
stand.,
for Exchangeable
Image
File Format, and
is
a
standard for storing interchange information in
image files, especially those using WEG
compression. (Refer to http://exif.org for llIore
infomla!ion.)
About
Discs
When
using
the
unit
to
playa
CD-RW/R
disc
with
stili
images
stored
(recorded).
-With
CD-RW/R
discs on which still images are
mixed in with music
or
movies, you will he able to
play only the still images. You
may
not he able to
play sOllie
of
these discs
at
all.
-Multi-session discs
cannot
be played.
-You may not
be
able to play
some
still images you
have processed (rotated
or
saved
by
overwriting
other images) using image proccssing software
or
some
still images you have imported from the
Internet
or
e-mail.
-
The
discs which this
Player
can play
back
(recognize) are limited to the following properties:
Contains
EXIF
fomlatliles
Picture resolution: Between 32x32 and 7680x4320
pixels
Maximum
number
of
folders:
256
Maximum
number
of
liles:
256
per
folder
r:ile size: 20MB
or
less
Structure
of
still
Images
(JPEG)
folders
-
You
can play still inlages UPEG) with this unit by
making
folder
on
disc as shown below. Images
situated
on
the
mot
directly cannot he played back.
Root
I
c----.-l
----i_ _J
01
Foldor
1=-----
OOLjpg
t
----------
002.jpg
I
.--
..
-
....
---.-
003.jpg
f-----[~-=]
02 Foldor
I!
----------OO4.jPg
.-----
005.jpg
Ic=:::
-------------
254.jpg
···--255.jpg
L256.jpg
3En
Z
-i
:J3
o
o
c:
~
o
z
•

-
If
the surface is soiled, wipe gently with a
soft. damp (water only) cloth. When
wiping discs. always
lTlove
the
doth
from
the center hole toward the outer edge.
About
Discs
•Disc Precautions
Be
Careful
of
Scratches
and
Dust
-HD. DVD and
CD
disl'S are sensitive
to
dust.
fingerprints and especially scratches. Ascratched
disc may not be able to be played back.
I-Iand1c
discs
with care and store them in asafe place.
Proper
Disc
Storage
Place the
di~c
in
the center
o!"
the disc case
and store the case and disc
upright
Avoid storing diocs
ill
locations subject to
direct
sunlight
close to hC8ling
appliancc-~
or
in
locatiOll~
o!"
high humidity.
Do not drop
dL<;cs
or
subject them to
strung vibrAtions
or
impacts.
Avoid storing diocs
ill
locations where
there are large arnoufilS
or
dust
or
moisture.
Handling
Precautions
l
~
-
Do not use rel'ord cleaning sprays,
I'
benzene. thinller, static e1eluicity
(91.1
1•prevention liquids
or
any other solvent.
-Do not touch the surface.
-Do
not stick paper
or
adhesive labels to the disc.
-
If
the playing sud'ace
of
adisc is soiled
or
scratched.
the Player may decide that the disc is incompatible
and eject the disc lmy,
or
it may fail 10 play
the
disc
correctly. Wipe any dirt
olT
the playing surface with
asoft cloth.
Cleaning
the
Pick
Up
Lens
-Never use commercially available cleaning discs.
The
use
of
Ihese discs can damage the lens.
-Request the nearc·st service center appmved
by
Yamaha to clean the lens.
4En
Warnings
about
dew
formation
-Condensation may form on pick up lells
or
disc in
the f()\Iowing conditions:
-Immediately after aheater has been tumed 011.
-In asteamy
or
very humid room.
-When the
Player
is suddenly moved fmm acold
envimnment to a
warm
one.
When
condensation
forms:
-Itbecomes diflicult for the Player to read the signals
on the disc and prevents the Player from operating
properly.
To
remove
condensation:
-Take
out
the disc and leave the Player with the
power
off
until the condensation disappears. Using
the
Player
when there is condensation
lTlay
cause
malfunction.

Getting
Started
Z
-I
J:J
o
C
c:
g
~
I
-Manufactured
underliccnse from Dolby
Laboratories. "Dolby" and the double-D symbol are
trademarks
of
Dolby Laboratories.
-.Manufactured under license under U.S. Patent #'s:
5,451.942; 5,956,674; 5,974,380; 5,978.762;
6,226.616; 6,487,535; 7392,195; 7,272.567;
7,333.929; 7,212,872 &other U.S. and worldwide
patents issued &pending. DTS is aregistered
trademark and theDTS logos, Symbol, DTS-HD
:Uld
DTS-HDMaster Audio IEssential
lIre
trademarks
of
DTS, Jnc.
~1996-2008
DTS, Inc. All Rights
Reserved.
-
~::::>.
is atradl'mark.
---
-
"BD-IJVE"
logo is atrademark
of
Bllt-ray Disc
Association.
-"BONUSVlEW" is atr.u:lemark
of
Blu-ray Disc
Association.
-
~is
ntrademark
ofDVD
FOflnatJu:lgo
Licensing Corporation.
-HDMJ, the
HDMIlogo
and High-Definition
Multimedia
Inlet"fa(..'C
nre trademarks
or
rcgislercd
tmdemarks
of
HDMI Licensing LLC.
-
'<x..
v.Color'· and "x.v.Color" logo are trademar.ks.
-"AVCHD" and the
"A
VOiD"
logo are trademarks
of
Panasonic Corpomtion and Sony
COrp<w<ltion.
-Java and
aJl
Java-based trademarks and logos are
trademarks
or
registered trademarks
of
Sun
Microsystems, Inc.
in
the United States and/or other
countries.
-This
produ(..'t
is
licensed under the A
VC
patent
pOltfolio license and VC-I patent portfolio license
for the personal and non-commerciaJ use
of
a
("'onsunter to (i) cncode video in compliance with the
A
VC
Standard and VC-I Standard ("AVCYVC-l
Video") and/or (ii) decode
AVCNC-I
Video that
was encoded by acOllsumer engaged in apersonal
and lion-commercial activity and/or was obtained
from avideo pnwider licensed
to
pnwide AVClVC-
IVideo.
No
license
is
granted
or
shall be implied fi)r
any other usc. AdditiollaJ infimnation may be
oblained from MPEG LA, LLC.
Sec http://www.mpegla.com.
-Audio-visual material may consist
of
(..·opyrighted
works which must not
be
recorded without the
authority
of
the owner
of
the copyright. Refer to
relevant laws
in
yourcounlry.
-This
pmdu(..'t
incorporates
(..·opyright
protection
technology that is
prote(..'ted
by
U.S. patents and
other intellectual pmperty rights. Use
of
this
(..·opyright
protection technology must be authorized
by Macrovision, and
is
intended for home and other
limited viewing uses only unless otherwise
authorized by Macmvision. Reverse engineering
or
disassembly is prohibited.
U.s. Patent Nos. 6,836,549: 6,381,747; 7,050.698;
6,516,132: and 5,583.936
•Copyright
Power cable
Video
pin
cable
Audio
pin
cable
Batteries (x2)
(MA,
R03, UM-4)
Remote
control
ii
IJ.
I
'~8t>
I "
i....
...-
10 0
!
0r;;-'1G
I
"1:;"_
188l=J
1
:§3§~·
.0000
I
I
I
i
DB
Indicates the functions Ihat can
be
performed for BD Video discs.
1:JlltJl
Indicates the functions that can
be
perfomled for BD-
RE
discs.
mm
Indicates the functions that
ClIII
be
peti'ormcd for BD-R discs.
",
...
Indicates the functions that can
be
perfOlmed for
DVD
Video discs.
'MDijd
Indicates thelimctions that can
be
peti'ormcd fi)r DVT)-RW discs.
'i\1Q;JI
Indicates the functions that can
be
perfolllled for DVD-R discs.
t4IJIlWu
Indicates the functions that can
be
performcd for Audio CDs.
IImI
Indicates thc fum;tions that can be
JPEG
perfonllcd for CD-R
dis(.."S
in
JPEC;
fimnat.
hllIM
Indicates the functions that can beperfonned
JI'EG
forCD-RW discs
in
JPEGli.mnaL
•The Icons Used in This Operation
Manual
•Supplied accessories
Make sure the following accessories
m:e
provided with the
pmdUf.;t.
SEn

Controls
and
Functions
•
Front
panel
o
YAMAHA
II
I
@)
00<.
I I
GJ@@~0~
I---
--
I---
~
IIl
IJ
=
CD
CD
0(Power) (p. 20)
@QUICK
indicator
(p. 33)
@
Front
panel
display
(p. 16)
o
Disc
tray
(p. 20)
®
....
(Eject) (p. 20)
®
~/~
(Search
backward/Skip
backward)
(p.20)
•Rear panel
@@
®(j) ®®@
(j)
~/~
(Search
forward/Skip
forward)
(p.20)
®
~
(Play) (p. 20)
®
••
(Pause) (p. 20)
® • (Stop) (p. 20)
CD
@ @ @ ®
'\
//
~<Y
'-
O~
"J
r=l
-~oTecoNT~-
~
COll~E"l
~~r~I~(
ll;XEOlCH
."CO
....
XI
...
l
)~
~~
~
~
~W
~~®~~(
)~
!l~
~
~
OJ
~
(@j
AC
IN
"v
W8WOOFEA
VIDEO
P.
OPTICU
"'-=HDM1J'
--AUOIOOUT-
--VIDEO(
,,-
•
OIG~"'OIJ'I'
-NHWORK-
""
-BOSHlRlGI'-
..
~
'-
IlI
®®
@ @
CD
AC
IN
(p. 15)
@AUDIO OUT (8ch
discrete)
(p. 13)
@AUDIO OUT (MIXED 2CH) (p. 13)
oCOMPONENT (p. 10)
®DIGITAL OUT (COAXIAL) (p. 12)
®REMOTE CONTROL (IN/OUT) (p. 15)
6En
(j)
VIDEO (p. 11)
®SVIDEO
(p.11)
®DIGITAL OUT (OPTICAL) (p. 12)
®NETWORK (p. 14)
@USB BD STORAGE/SERVICE (p. 14)
@HDMI (p. 9)

•Remote
Control
CD------.
®
~
I
G'-+H-~
@
III
DPENlClDSE
i
DIMMER
VlDED-RESET
III
@--+iHE:::JL£:::Jc:::3i--i7+--@
III
SUBTITLE AUDIO
ANGLE
III
@--+iHc:::Jc;:::Jc::3
H
1
CH-
11
-@
fC]
G:J
[2]1!
@>
®-:+-!I~~~
I
l~~~
~
Illn~~~:----H-f+--@
IIII
TOP
MENU!TITlE
LIST
POP
UP
MENU
®--O
O:-H++--
®---+::-H(",8
~
EXIT
RETURN
~
11110
°1111
@
@_-++111H-:
1
~
etJ
~:-+rr-@)
1III
[LSlDW/sKiP
Jill
I
@~~
·~·H+.+-IIII-@
®
III!
~(BG}IIII
@
III
SETUP
P;nP
REPEAT OFF
@-----;.I~II
0QQ
0-+'+111-
®
@--+ff--
L@
eYAMAHA
CD
Infrared
signal
transmitter
(p. 16)
(g)
DIMMER (p. 16)
@OPEN/CLOSE (p. 20)
(}) SUBTITLE (p. 26)
®
Number
buttons
(p. 26)
®CLEAR (p. 29)
CD
A,
B, C, D(p. 23, 24, 28, 35)
®TOP MENUITITLE LIST (p. 22, 23)
®
Cursor
buttons
(6
IVI
<]/C»,
ENTER (p. 17,
30)
Controls
and
Functions
@EXIT (p. 28, 29, 30)
®
••
(Pause) (p. 20)
@ • (Stop) (p. 20)
@STATUS (p.
21,27)
@
ON
SCREEN (p. 26)
@SETUP (p. 17, 28, 29)
@Pin P(p. 25)
@(!) (Power) (p. 16)
@VIDEO-RESET (p. 30, 31)
@!
ANGLE (p. 26)
@AUDIO (p. 26)
@ENTER (p. 30, 37)
@POP UP MENU (p. 22)
®RETURN (p. 21, 24, 26, 28, 29)
@
~
(Play) (p. 20)
®
~
I
~
(SLOW/SKIP) (p. 20)
®.....I
~
(SEARCH) (p. 20)
®OFF (p. 21)
@REPEAT (p. 21, 26)
ID
function
You can change the remote control 10 to prevent
unwanted operation
of
the
other
Yamaha player such as
OVO
player. If you have changed the remote control 10.
make
sure that you select the same 10 for the main unit.
The
default selling is
10
I.
CD
Remote
control
setting
To
change the
10
from
10
Ito 102. press and hold Aand 2
simultaneously for 3seconds.
To
change the
10
from
102
to
10
1.
press
and
hold Aand 1
simultaneously for 3seconds.
(g)
Main
unit
setting
Press and hold
~/""
and
~/~
on the front panel
simultaneously for 2seconds while no disc
is
inserted in
this Player and the disc tray
is
closed (current
10
is
displayed). Keep pressing and holding the keys for
another
2
seconds
to
change
the 10 between
10
Iand 102.
Note
-
If
the remote control
is
without balleries for afew
minutes
or
if
exhausted balleries remain in the
remote control. the remote control 10 is
automatically set 10 10I. If you want to use the
remote control in 102 selling. install new balleries
and set the remote control 10 again.
7
En
1
Z
-l
::c
o
c
c:
(")
-f
(5
Z
I

Introduction
to
Connections
This
Player
is
equipped
with the
terminals/jacks
listed below. Find the
corresponding
terminal/jack
on
your
video/audio
equipment.
We
recommend
that you use the
HDMI
terminal
which
provides
high
quality
digital
audio
and
video
on a
single
connection.
If
you use the
other
terminals/jacks.
connect
the
video
first.
Then
connect
the
audio.
•Video/audio terminal on this Player
1•
.1.'
HDMllerminal
•Video jacks on this Player (Connect
CD,
®, or @)
Page 9
Higher Quality
Standard Quality
VIDEO
OUT
(COMPONENT)
jacks
c.t
VIDEO
OUT
(S
VIDEO)
jack
(]I
VIDEO
OUT
(VIDEO)
jack
C()t,l~Elil
,
..
A.
~
SVIOEO
VIDEO
Page 10
Page
11
Page
11
•Audio terminals/jacks on this Player (Connect
CD,
®,
or @)
!.
DIGITAL
OUT
(COAXIAL!
OPTICAl)
jack/terminal
o
AUDIO
OUT
(lkh
discrete)
jacks
\~\
AUDIO
OUT
(MIXED
2CH)
jacks
Page 12
Page 13
Page 13
•Broadband Internet connection
ETWORK
terminal
rtJ
Page 14
NETWORK
•USB device connection
USB BD
STORAGE/SERVICE
~
terminal
us.
Page 14
eoSTOlUlit!
SEill'C~
8En

HDMI
Connection
•Connecting to the HDMI Terminal
-
You
can
enjoy
high
quality
digital picture
and
sound
through
the
HOMI
terminal.
-
Firmly
connect
an
HOMI
cable
(commercially
available) to the
HOMI
terminals
<CD
and
(g)).
-
See
page
38
for
information
on
the
audio
output
formats.
-Use
HIGH
SPEEO
HOMI
cables
that
have
the
HOMI
logo (as
shown
on the cover).
Caution!
Be
sure
to
turn
off
this
Player
and
the
equipment
before
making
any
connections.
2
(")
o
z
z
m
(")
:::!
o
z
This
Player
~
f'
~
~oncONTR~
~
[qA]
~
~HOMI
us.
NETWORK
8D:'~GEJ
~
Hint CI
-
When
using an
HOMI
output, 7.1
ch
Oigital
Output
is available.
CDI
To
HOMI terminal
~
HOMI cable
(commercially available)
(g)1
To
HOMI input terminal
~
Projector
Hints
-You need to select the
"HOM
I"
in
"Settings"
-
"Audio
Video
Settings"
-
"Video
Out
Select"
and
"HOMI
Output"
in
"Settings"-
"'Audio
Video
Settings"
-
"Audio
Out"
to
output
the
video/audio
signals
from the
HOMI
terminal. (page
31)
-Refer to the
HOMI
control function. (Page 18)
Notes
-
When
you
connect
this
Player
to an AV
receiver
using
the
HOMI
terminal. make sure
that the AV receiver is
connected
to a
TV
using the
HOMI
terminal.
If
the
TV
is not
equipped
with
HOMl
terminal.
connect
the
terrninal/jacks
of
this
Player
other
than the
HOMI
terminal to the AV
receiver
for the
video/audio
connections.
-
When
you
connect
the
Player
to a
TV
with an
HOMI
cable,
hHOMI
Video
Out"
is set to
"Auto".
If
you
don't
get
astable image, select
the
desired
resolution*.
When
you set
"HOMI
Video
Out"
to asetting
other
than
"Auto",
you can
only
select
resolutions that are
compatible
with the
connected
TV.
*
Refer
to
"HOM
I
Video
Out"
on
page
31
regarding the resolutions
of
the
HOMI
video
output.
TV
9En
I

Video
Connections
•Connecting to the Component Jacks
-You can enjoy accurate color reproduction and high quality images through the component jacks.
-Firmly connect acomponent video cable (commercially available) to the
component
jacks
(CD
and (g).
Caution!
Be
sure
to
turn
off
this
Player
and
the
equipment
before
making
any
connections.
This
Player
Notes
COWl'O!IEMT
~~tl~10©ll~
~
~0~~
0.~~!l~t,~
~
(Green)
(Blue)
(Red)
Component
video
cable
(commercially
available)
2To
COMPONENT
(g)
input
jacks
COMPOHENTIN
(Red)
~P'~
+
~P'~
(Blue)
+
(Green)
'®
(Green)
+
,if
~"~
CL
~'6i::~
.D
Projector
AV receiver TV
10
En
-You need to select
"Component"
in
"Settings" -
"Audio
Video Settings" -"Video Out Select" to
output the video signal from the
component
jacks. (See page 31.)
-When the priority video output is set to
"HOM!"
in
"Video
Out
Select", the video resolution
which
is
output from the
COMPONENT
jacks
is the
one
set
in
"HDMI
Video Out".
-When the output from the
COMPONENT
jacks
is prioritized, set the priority video output to
"Component".
-
If
you play back the image via VCR, the image
may deteriorate due to the
copy
guard function.
-When you watch the program where copyright
is
protected, we recommend that the Blu-ray
disc player be connected to
LCD
TV
directly
or
via AV receiver.
;_OMW
....
"-.I=~
ol--X--,
)K
=VCR =
~
~~C:I
Blu-ray
Disc
TV
Player t
kl.,_,
__
,~
.....
,,-.
~
..._
......
.J
AV receiver

Video Connections
Caution!
Be
sure
to
turn
off
this
Player
and
the
equipment
before
making
any
connections.
•Connecting to the SVideo or Video Jack
-
Connect
either
the S-video
jack
or
video
jack.
-Firmly
connect
aS-video
cable
(commercially available)
to
the S-video
jacks
or avideo pin cable (supplied) to the
video
jacks
(CD
and
@,
or
@and @).
(Yellow)
o
o
z
z
m
o
::!
o
z
2
"'"""'"
~l®©I~I®@li
0@i-=°'---.-----.
~@~~I~~oo:-
~
@!TOVIDEO
~
Jack
'-----------'
This Player
CD
To SVIDEO
1
jack
This Player
--
"""""'"
iJ®©lffij®@l
i
~
@i-=@'---.'''----,
@10®00qe~e
@
§J
SIIIWOOFEIl
VIDEO I
p~
ISVIDEO
OPnCAI.
'----AUOIOOUT-
VIOEOOUT
!llGlTUOIIf
S-video
cable
(commercially
available)
Video
pin
cable
(supplied)
To
SVIDEO
<iJ
input
jack
To VIDEO
@
input
jack
(Yellow)
~
~
SVIOEO
VIDEO
(Yellow)
5
VIDEO
IN AV INPUT
~"~
V
~o6i::-;;
0
~
Projector AV receiver TV
~'
...
J~
CL
~06i::-;;
o]J
~
Projector AV receiver TV
Notes
-You need to select
"Component"
in
"Settings"-
"Audio
Video Settings"
-"Video
Out Select" to
output the video signal from the S-video/video
jack.
(See page 31.)
-
If
you play back the image via
VCR.
the image may
deteriorate
due
to the
copy
guard function.
-
When
you watch the program where
copyright
is
protected. we
recommend
that the Blu-ray disc
player
be
connecteclto
LCD
TV
directly or via AV
receIver.
r;--~I=~ol-X-~,
~
=VCR = ,
~--~
>-
".
~"·D
~
Connect
directly
~
Blu-ray Disc TV
Player
~
L~·.~,~.",
~
-.i
AV receiver I
11
En

Audio
Connections
•Connecting to the Digital Audio JackfTerminal
-You can connect audio
equipment
or
the
TV
to the
DIGITAL
OUT
Jack/terminal.
-Firmly connect adigital audio pin cable (commercially available)
or
optical
cable
(commercially available) to the
coaxial digital audio
jack
or
optical digital audio terminal
(CD
and
@.
or
G) and
G).
-See page 38 for information on the audio output formats.
Caution!
Be
sure
to
turn
off
this
Player
and
the
equipment
before
making
any
connections.
This Player
CD
To
COAXIAL
1 . k
pc
Digital
audio
pin
cable
(commercially
available)
To
COAXIAL
@input
jack
..
®
COAXIAL.
AV INPUT
~"~
~·bi::~·
0
AV
receiver TV
[
This Player
To
OPTICAL
f3\
terminal
~
Optical
cable
(commercially
available)
To
OPTICAL
input
terminal
G)
..
OPTICAL
DIGITAL AUDIO IN
~"~
~·6i::-;
.
~
0
AVreceiver TV
Hints
-
When
using
COAXIAL/OPTICAL
output.
5.1
ch Digital
Output
is
available.
7.1
ch Digital Output
is
not available.
-You need to select '"Digital
Output"
in
"Settings"
-
"Audio
Video Settings"
-"Audio
Out"
to output the audio signal
from the coaxial
or
optical jack/terminal. (See page 31.)
Note
-
7.1
ch Audio
is
available via the HDMI terminal
or
the 8ch discrete audio jacks.
12 En

Audio
Connections
•Connecting to the Audio Jacks
-
You
can
connect
audio
equipment
or
the
TV
to the
AUDIO
OUT
Jacks.
-
Firmly
connect
an
audio
pin
cable
(supplied)
or
audio
pin
cables
(supplied for 2ch and
commercially
available for
the
other
6ch)
to the
2ch
audio
jacks
or
8ch
discrete
audio
jacks
(G)
and
®.
or
@
and
@).
-
See
page
38
for information on the
audio
output
formats. 2
Caution!
Be
sure
to
turn
off
this
Player
and
the
equipment
before
making
any
connections.
This
Player
-
~
~Ir§,ila©l~
@00
~~'~~@~!l~
~
§!
- - ,UOIOO,",
VIDEOOVT
OOGllilM
----1-----1-------------
This
Player
iJ~©lil~,e
@0<---=0'-'----,
~~®~~le!l~
~
~
IIlUDlO
our-
VlDf:O
OUT
l;l(n
....M
(")
o
z
z
m
(")
-l
6
z
To
AUDIO OUT
~
~
~
~
~
~
~
~
To
MIXED
~CH
cD
;;r
(l)
;;r
(l)
;;r
(l)
;;r
(l)
@
(Sch
discrete)
!-
.EO
~-
.EO
!
.EO
!
.EO
output jack
jacks
Audio
pin
cables
(supplied for 2ch and
commercially available
for the other 6ch)
Audio
pin
cable
(supplied)
To
®
MULTI
CH
IN
jacks
~.
~
~
~
~
~
2:
(l)
2:
(l)
;;r
(l)
~-
.EO
.§:
.EO
!
.EO
+ + + + + + +
To
audio input '4'
jack \.:!J
COO'ER
SUBWOOfEll
Sl.IRlIOl.ND
BACK
SORIW:ll.ICI
FRONT
~~ ~~ ~~ ~~
L R L A L R
(White)~ (White)~ (White)~
MULTICH
IN
L.-----~V~--------J
§t.~.@-c:J
AV
receiver
TV
Hints
AUDIO
~~
AUDIO IN
§t:
••
~-="~
AV
receiver
TV
-You
can
connect
a
subwoofer
to the
SUBWOOFER
jack
directly.
When
you
connect
TV
to this
Player
directly,
connect
an
active
subwoofer
such
as
Yamaha
Active
Servo
Processing
Subwoofer
System
to this
jack.
-
You
need to
select
"7.1
ch
Audio
Output"
in
"Settings"
-
"Audio
Video
Settings"
-
"Audio
Out" to
output
the
audio
signal from the
8ch
discrete
jacks.
(See
page
31.)
-You need to select
"2ch
Audio
Output"
in
"Settings"
-
"Audio
Video
Settings"
-
"Audio
Out"
to output the
audio
signal from the 2ch
audio
jacks.
(See
page
31.)
13
En
I

Broadband
Internet
Connection
•Connecting to the NETWORK terminal and USB
BO
STORAGE/SERVICE
terminal
-You
can
enjoy
avariety
of
contents
with interactive functions by
connecting
to the internet
when
playing BD-L1VE
compatible
discs. Refer to
pages
24
and
25 regarding further information on BD-L1VE functions.
-
You
can
connect
aUSB
memory
device
(2GB
or
greater
and
formatted with
FAT
32/16)
to the
USB
BD
STORAGE/SERVICE
terminal to save the Virtual
Package/BD-L1VE
data
or
to
update
the
software
of
this Player.
-Firmly
connect
a
network
cable
(commercially
available)
and
a
USB
memory
device
(commercially
available)
to
the
NETWORK
terminal
and
USB
BD
STORAGE/SERVICE
terminal
(CD
and
®,
and @).
-Use only an
STP
(shielded
twisted
pair)
network
cable.
-
When
using the internet, a
broadband
internet
connection
as
shown
below
is required.
Caution!
Be
sure
to
turn
off
this
Player
and
the
equipment
before
making
any
connections.
This Player
To
USB
BD
STORAGE/SERVICE @
terminal
To
LAN terminal ®
Net
work cable
(commercially available)
~
L~TtCONT~J
~
~fl~~
,----------,
o
USB memory device
(commercially
available)
CD
i
To
NETWORK
terminal
Notes
-
When
using a
broadband
internet
connection.
a
contract
with an internet
service
provider
is required.
For
more
details.
contact
your
nearest internet service
provider.
-Refer to the
operation
manual
of
the
equipment
you have as the
connected
equipment
and
connection
method
may
differ
depending
on
your
internet
environment.
-Use a
network
cabletrouter
supporting
IOBASE-
T/
IOOBASE-
TX.
Q
t=:2J
~
tJQ
",,'
Internet Modem Hub or
PC
broadband router
After
connecting
-Perform the
communication
setting.
(Page
34-36)
-Load aBD-L1VE
compatible
disc
and
play
back
the contents.
(Page
20-24)
14
En

Other
Connections
•Connecting to the REMOTE
CONTROL jacks
Caution!
Be
sure
to
turn
off
this
Player
and
the
equipment
before
making
any
connections.
(')
o
z
z
m
(')
:::!
o
z
2
~
~
To
AC
IN
"'mln'"
To AC
outlet
Note
-
TO
PREVENT
RISK
OF
ELECTRIC SHOCK. DO
NOT
TOUCH
THE
UN-INSULATED PARTS
OF
ANY
CABLES
WHILE
THE
POWER
CABLE
IS
CONNECTED.
-You can connect aYamaha
component
(such as
DVD
player and
CD
player) corresponds with the
SCENE
function to the
REMOTE
CONTROL
(OUT)
jack
of
this unit.
•Connecting the power cable
-Plug the supplied power cable into the AC
IN
terminal on the rear
of
the Player. Then plug into AC
outlet.
To
REMOTE
CONTROL
(IN) @
jack
lOUT
.IN
I
@ @
LREMOTE
CONTR:L
J
This
Player
-You can transmit the remote control signals by
connecting to the
REMOTE
CONTROL
(OUT/IN)
jacks.
-Firmly connect
3.5mm
mini plug cables
(commercially available) to the
REMOTE
CONTROL
(OUT/lN)
jacks
(CD
and
(g),
or
@and
@).
-If your AV receiver
is
aYamaha product and has the
capability to transmit
SCENE
control signals, you
can use the
SCENE
function.
~~
~O§]
p~
SVIDEO
OPTICAL
-VtOfOOUT
To
REMOTE
CD
CONTROL
(OUTJjack
...
,.
3.5mm
mini plug
cable
(commercially
available)
3.5mm
mini plug cable
(commercially available)
To remote
@control
in
jack
To remote
control
out
@
jack
REMOTE
CONTROL
IN
REMOTE
CONTROL
OUT
@ @
II I I
'-'
c::J
IR
flasher
or
Yamaha
component
Infrared
signal
receiver
or
Yamaha
component
(such as AV receiver)
Hint
-For details about the
SCENE
function, refer to the
owner"s manual supplied with your Yamaha AV
receiver.
15
En

Before
Starting
Playback
•Loading the Batteries
in
the
Remote Control •Turning the Power On
r;:;O====:======::;;;;;;;;;;;;;;;;;;;;;;;;;;;;;;;):\_II._-"':
-"1]
o
(i)Press
the II. part and slide the battery compartmcnt
cover off.
®Inscrt the two snpplied batteries (AAA, RiB. UM-41,
following the indications
(+/-)
on the inside
of
the
compartmcnt.
Q)
Slide the cover back until it snaps into place.
o
---
c:::J
c:::J c:::J
..
111\.&.
....
:
......
c:::J
c:::J
c:::J
Turning
the
power
on
Press
e>
on
the remote contml
or
on
the Player
to
[um on
the power
of
the Player,
•Indicators on the front panel
display
Entering
standby
Press
e>
on
the remote conlml
or
on the Player to enter
standby.
__
..
__
.,
J
I)
t·~
POI.I.I
E R
8 '
....
E
--_.
.
'j
N!'''l
--
If
you press
e>
again imrnediatl'ly aftercntering
standby, the Player
may
not turn on.
If
this happens,
wait for
10
scconds or more and then tum on the
power again.
Indicator Descriptions
BD Lights
up
when playing back a
BD
disc.
DVD Lights up when playing back aDVD-
Videodisc.
CD Lights
up
when playing back aCD.
....
Lights
up
when playing back.
II
Lights
up
when pausing.
TITLE Lights up when playing back a
BD
disc
or DVD.
CHPITRK Lights
up
when playing back aBD disc,
DVD,orCD.
REPS
Lights up when playing back track or
chapter repeatedly.
Remote control sensor
r=-''''==L--if
-=l
~
--
C=-..:..=~:',·
'1
13
.'.000
'c:::r
....
.
.,.
""';'1
\
--
.
I==:J
I \
I \
II \
1'-.1'~\
'30'
30"
6m
(20
tt)
-Do not
subjel.1:
the
remote l.'ontmlunit to shock,
water
or
excessive humidity.
-Thc remote control unit may not function if the
PIaYl'r's remote sensor
is
in
direct sunlight or
any
otherstrong light.
-
Incorrel.1:
use
of
batteries
may
cause them to leak
or
burst. Read the battery warnings and use the
batteties properly.
-
Do
not mix old
~lJId
new balleties,
or
mix different
brands.
-Rl'move the battl'ties ifyou wiJlnot use the remote
control unit for an extended period
of
time.
Approximate
operating
range
of
remote
control
16En
Table of contents
Other Yamaha Blu-ray Player manuals

Yamaha
Yamaha BD-S473 User manual

Yamaha
Yamaha BRX-610 User manual

Yamaha
Yamaha BD-S671 User manual

Yamaha
Yamaha BD-S667 User manual

Yamaha
Yamaha BD-S477 User manual

Yamaha
Yamaha BD-S1067 User manual

Yamaha
Yamaha BD-S1900 User manual

Yamaha
Yamaha BD-A1010 User manual

Yamaha
Yamaha BD-S667 User manual

Yamaha
Yamaha BD-S673 User manual

Yamaha
Yamaha BD-940 User manual

Yamaha
Yamaha BD-S477 User manual

Yamaha
Yamaha BRX-610 User manual

Yamaha
Yamaha BD-A1020 User manual

Yamaha
Yamaha BD-S671BL User manual

Yamaha
Yamaha BD-S1900 User manual

Yamaha
Yamaha BD-A1010 User manual

Yamaha
Yamaha BD-S673 User manual

Yamaha
Yamaha BD-S667 User manual

Yamaha
Yamaha BD-S1065 User manual