manuals.online logo
Brands
  1. Home
  2. •
  3. Brands
  4. •
  5. Yamaha
  6. •
  7. Extender
  8. •
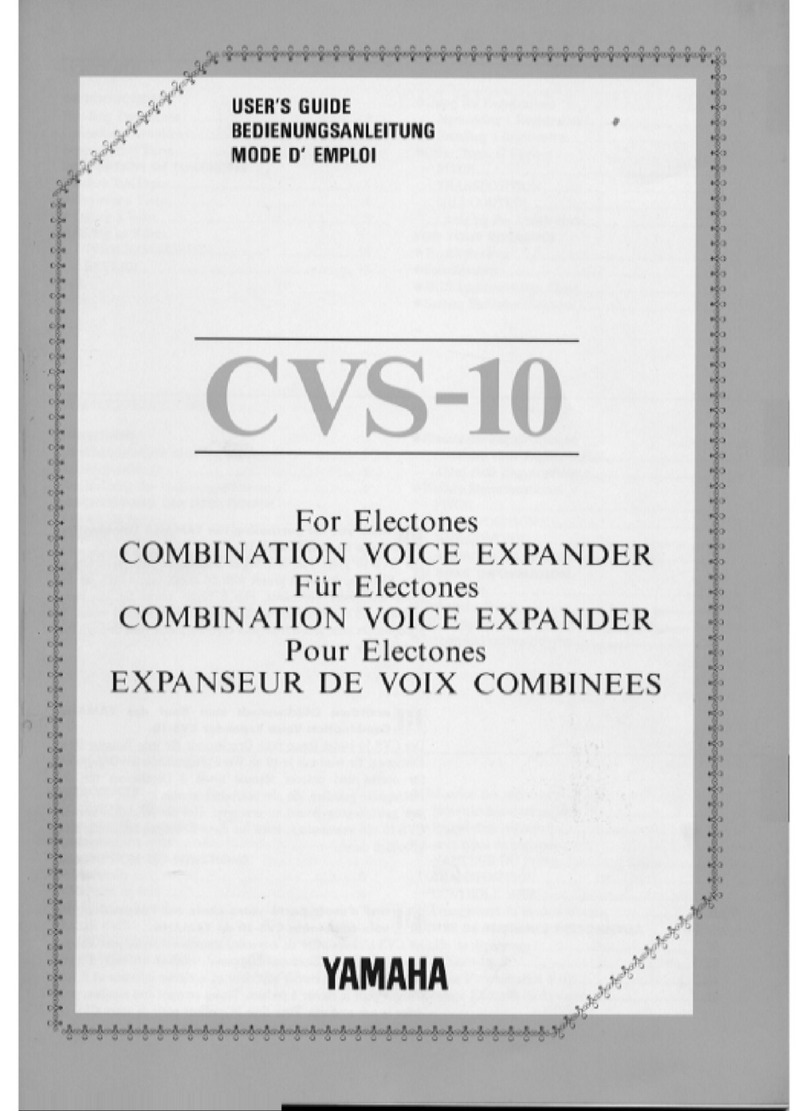
  9. Yamaha CVS-10 User manual

Yamaha CVS-10 User manual

USER'S
GUIDE
BEDIENUNGSANLEITUNG
MODE
D’
EMPLOI
CVS-10
For
Electones
COMBINATION
VOICE
EXPANDER
Für
Electones
COMBINATION
VOICE
EXPANDER
Pour
Electones
EXPANSEUR
DE
VOIX
COMBINEES
hank
you
for
purchasing
the
YAMAHA
Combination
Voice
Expander
CVS-10.
The
CVS-10
gives
you
new
organ
sounds
for
each
keyboard
of
your
Electone.
It
comes
preset
with
16
organ
voices
each
for
the
upper
and
lower
keyboards,
plus
8
organ
voices
for
the
pedal
keyboard,
all
of
which
can
be
edited
to
create
the
desired
sound.
To
get
optimum
satisfaction
from
your
CVS-10,
please
read
through
this
User’s
Guide
carefully.
erzlichen
Glückwunsch
zum
Kauf
des
YAMAHA
Combination
Voice
Expander
CVS-10.
Der
CVS-10
bietet
Ihnen
neue
Orgelsounds
für
jede
Tastatur
Ihres
Electones.
Er
wird
mit
je
16
ab
Werk
programmierten
Orgelvoices
fir
oberes
und
unteres
Manual
sowie
8
Orgelvoices
fir
das
Fußregister
geliefert,
die
alle
bearbeitet
werden
können,
um
genau
den
gewünschten
Sound
zu
erzeugen.
Um
die
Möglichkeiten
des
CVS-10
voll
auszunutzen,
lesen
Sie
diese
Bedienungsanleitung
bitte
gründlich
durch.
erci
d'avoir
porté
votre
choix
sur
l'expandeur
de
voix
combinées
CVS-10
de
YAMAHA.
Le
CVS-10
vous
offre
de
nouvelles
sonorités
d’orgue
pour
chaque
clavier
de
votre
Electone.
L’appareil
contient
16
voix
d’orgue
préréglées
pour
le
clavier
supérieur
et
le
clavier
inférieur
et
8
voix
d'orgue
pour
le
clavier
à
pédales.
Toutes
peuvent
être
montées
pour
créer
le
son
souhaité.
Pour
tirer
le
meilleur
parti
de
votre
CVS-10,
veuillez
lire
attentivement
ce
mode
d'emploi.
Рр
CONTENTS
INTRODUCTION
Напаіпе
Ргесацйопв
..................................................
2
Соппеебоп
Ртоседшез................................................
3
Description
of
EE
4
DESCRIPTION
OF
FUNCTIONS
erter
Kon
Begins
ина
5
ӘСтһоовілр
а
Votee
аана
6
EE
NEE
EE
8
@
Adding
an
Effect
IRKMOLOCHORUS.
10
REVERB
н
ноаен
она
13
———м——...
E
INHALTSVERZEICHNIS
EINLEITUNG
Vorsichtsmaßregeln
гат
Отеапр"................................
2
АпзеЕ
Ці
уепнаРгег
......................................................
8
Beschreibung
der
Bediengngselemente
4
BESCHREIBUNG
DER
FUNKTIONEN
@
Bevor
Die
begmmnen
5
еУаПеп
еіпег
Уосісе...................................................
6
ӨВелібейеп
еілег
Үсісе..............0.0.0...........1..
8
@Hinzufiigen
eines
Effekts
TREMOLOICHORUS.
10
KV
RB
ы
ы
анала
аза
13
рр
урни
TABLE
DES
MATIERES
INTRODUCTION
Drécautops
d'utilisation
2
Démarches
des
copnnevions
3
Певегірбоп
des
eommandes
4
DESCRIPTION
DES
FONCTIONS
@Preparalils
EEN
5
Ө5есіоп
де
уоіх
......................................................
6
@
Montage
Ф
ше
усіх
..................................................
8
@
Ajout
d’effet
ТКЕМОГО/СНОЕГПЕ
.........................................
10
REVERBERATION..
nn.
еды
13
@
Using
the
Registrations
Memorizing
a
Registration.......
e
14
Recalling
a
Еерізігтабоп
......................................
16
©Other
Types
of
Control
ВІН
en
ea
ar
17
TRANSPOSITION
u...
eet
ышы
ы
18
ELSEN
eege
аа
ыы
ыы
19
Changing
the
Attack
Мойе..................................
21
FOR
YOUR
REFERENCE
@
Troubleshooting
а
22
Ф
ресіЙйсайоп5.........................................................
23
OMIDI
Ітріепепіабоп
Срап.....................................
24
@System
Exclusive
Меззаеез
....................................
25
@Einsatz
der
Registrierungen
Speichern
einer
Registrierung.
14
Abruf
einer
Registrierung..
16
@
Weitere
Steuerfunktionen
РИСН
оне
WA.
17
TRANSPOSITION
EE
18
HERE
een
19
Апаетп
des
Attack
Modus
21
ZU
IHRER
INFORMATION
Eeer
анада
22
@Technische
Daten...
23
еМІПІ
ІтрІетепёсабоп
Срагі....................................
24
Фзузіеп-ЕхКІцвітпеіЧипееп
....................................
25
@
Utilisation
des
registres
Мётогізабоп
Ф'п
гееісйе.................................
14
Rappel
п
герізіге............................................
16
@
Autres
types
de
réglages
HAUTEUR.
DU
SUN
asus
ЫДЫ
7
TRANBPOSITION
2...
sis
ойы
18
CONTROLE
MIDI
аан
19
Changement
du
mode
d'attage
21
A
TITRE
DE
REFERENCE
PERSONNELLE
@Guide
de
Чёраппагее................................................
22
DEER
ннн
een
hen
23
©
Tableau
d’implentation
МІ
...................................
24
@
Message
Exclusifs
du
Gvsteme
25
INTRODUCTION
Handling
Precautions
Power
Supply
@Make
sure
to
use
only
the
YAMAHA
power
adapter
PA-W10.
@In
case
of
electrical
storm
probability,
unplug
the
power
cord
from
the
electrical
socket
in
advance.
elf
you
will
not
use
the
CVS-10
for
a
long
period
of
time,
unplug
the
power
adapter
from
the
electrical
outlet.
Power
Cord
|
@Be
careful
not
to
touch
the
power
plug
with
wet
hands;
you
may
receive
an
electric
shock.
@To
prevent
damage
and
short-circuiting
of
the
cord
wires,
always
hold
the
plug
when
unplugging
the
cord
and
never
pull
on
the
cord.
Connection
®@Before
connecting
the
CVS-10,
make
sure
that
the
POWER
switch
of
the
Electone
is
turned
OFF.
®Before
transporting
the
CVS-10,
make
sure
to
disconnect
its
power
cord
and
MIDI
cables.
Handling
@
Never
remodel
the
CVS-10
nor
disassemble
its
parts
yourself.
Such
actions
can
cause
serious
damage
to
the
CVS-10.
@Never
subject
the
buttons
and
switches
to
unnecessary
force.
@To
prevent
damage
and
short-circuiting
of
the
cord
wires,
always
hold
the
plug
when
unplugging
the
cord
and
never
pull
on
the
cord.
e@lf
water
accidentally
enters
the
CVS-10,
immediately
turn
OFF
the
POWER
switch,
unplug
the
power
cord,
and
contact
the
Yamaha
Music
Dealer
where
you
purchased
this
unit.
Choosing
an
Installation
Site
@
Avoid
places
exposed
to
direct
sunlight.
|
@
Avoid
places
exposed
to
excessive
moisture,
dust,
and
excessively
low
temperatures.
Cleaning
the
Outer
Case
@Clean
the
outer
case
by
wiping
it
with
a
soft,
dry
cloth.
@Never
use
thinner,
benzine,
chemically
harsh
solvents
nor
chemically-treated
cloths.
@lf
the
case
is
particularly
dirty,
moisten
a
soft,
clean
cloth
in
a
mild
detergent
diluted
with
water,
wring
the
cloth
out
well,
then
wipe
off
the
soiled
areas.
Next,
wipe
the
unit
again
with
a
dry
cloth.
If
the
CVS-10
Operates
Abnormally
@If
the
CVS-10
produces
an
abnormal
odor
or
smoke,
immediately
unplug
the
power
cord
and
contact
the
Yamaha
Music
Dealer
where
you
purchased
this
unit.
oe
Connection
Procedures
IN
OUT
MIDI
1
OUT
MIDI
2
ІМ
(FOR
ELECTONE)
Э
©
Э
L
R
L
AUX
IN
LINE
OUT
USE
YAMAHA
ADAPTOR
R
PA-WIO
STEREOHI)
бое
1
STEREO{LOW)
Connecting
the
MIDI
Cables
“Set
to
STEREO
(HI).
MIDI-1
OUT
MIDI
IN
MIDI-1
IN
MIDI
OUT
MIDI-2
OUT
MID!
ШЕ
MDR
;
;
,
kg
:
“Arrange
and
bind
the
excess
length
of
each
MIDI
cable,
using
the
band
that
secured
the
cable
in
its
packaged
state,
ave
10
:
*If
there
is
excess
slack
in
a
LINE
cable,
use
the
cord
clamp
provided
to
secure
the
cable
to
the
Electone’s
chassis.
Connecting
the
LINE
Cables
m
To
connect
CVS-10
to
HS-8/7/6:
*Set
to
MONO.
*Separate
the
LINE
cables,
then
use
only
one
LINE
cable.
m
To
connect
CVS-10
to
a
stereo
system:
LINE
OUT
(L)
LINE
OUT
(8)
*Set
to
STEREO
(LOW),
Description
of
Parts
©
©
TRANSPOSITION
SZ
Eegen
'
.
-
i
`
`
i
к
.
`
“
Р
16
8575
4'
22/5
2
1.171
Я
L
T
422у2'
|
Ж
СОМЕН
ШЕН
FLUTE
ATTACK
—
—
ENSEMBLE
—
PITCH
спа
=
=
Ess
=o
ғаш
стз
=
с
UPPER
LOWER
PEDALS
EDIT
TREMOLO
CHORUS
REVERB
REGIST.
M/SHIFT
R.BANK
SPEED
FOOTSW.
DEPTH
MEMORY
0
Ө Ө
0 Ө
Ф
Ф
®
Ф
(DPOWER:
Turns
the
power
ON
or
OFF.
(2)
Display:
The
status
of
various
data
is
shown
here.
@P
<
A
V:
Used
to
move
the
cursor,
change
the
data,
activate
a
function,
ete.
()ENSEMBLE-UPPER:
Turn
this
button
ON
to
enable
the
voice
selected
at
CVS-10
to
be
sounded
from
the
Electone’s
upper
keyboard.
Turn
it
OFF
to
disable
that
voice.
(©)ENSEMBLE-LOWER:
Turn
this
button
ON
to
enable
the
voice
selected
at
CVS-10
to
be
sounded
from
the
Electone’s
lower
keyboard.
Turn
it
OFF
to
disable
that
voice.
(©)}ENSEMBLE-PEDALS:
Turn
this
button
ON
to
enable
the
voice
selected
at
CVS-10
to
be
sounded
from
the
Electone’s
pedal
keyboard.
Turn
it
OFF
to
disable
that
voice.
(EDIT:
Press
to
edit
the
voice
data
of
a
User
Voice.
@R.
BANK:
To
choose
the
Registration
Bank
No.
for
memorizing
a
registration,
press
this
button
while
you
hold
down
the
M./SHIFT
button.
(8)
TREMOLO:
When
the
Tremolo/Chorus
effect
is
ON,
press
this
button
to
select
Tremolo
mode.
®SPEED:
To
change
the
Tremolo
Speed
of
TREMOLO/CHORUS,
press
this
button
while
you
hold
down
the
M./SHIFT
button.
(Q)CHORUS:
When
the
Tremolo/Chorus
effect
is
ON,
press
this
button
to
select
Chorus
mode.
@FOOT
SW.:
To
enable/disable
Foot
Switch
control
of
TREMOLO,
press
this
button
while
you
hold
down
the
M./SHIFT
button.
()
REVERB:
Press
to
enable
the
Reverb
effect.
(DEPTH:
To
change
the
Reverb
Depth,
press
this
button
while
you
hold
down
the
M./SHIFT
button.
(DREGIST.:
Press
to
recall
a
memorized
registration.
This
button
is
also
used
to
change
the
MIDI
Channel
No.
or
to
transmit
Bulk
data.
()MEMORY:
To
memorize
a
registration,
press
this
button
while
you
hold
down
the
M./SHIFT
button.
(2M./SHIFT:
To
select
the
R.BANK,
SPEED,
FOOT
SW.,
DEPTH,
or
MEMORY
function
at
the
bottom
row,
press
the
pertinent
button
while
you
hold
down
this
button.
This
button
is
also
used
to
change
the
Pitch
or
Transposition
setting,
change
the
Attack
mode,
ete.
|
DESCRIPTION
ОҒ
FUNCTIONS
Before
You
Begin
Before
choosing
a
voice,
perform
the
operation
below.
POWER
{
ON/OFF
|
UPPER
1.
Turn
ON
the
POWER
switch.
POWER
ON/OFF
2.
Decide
how
to
set
the
ENSEMBLE
buttons.
—
ENSEMBLE
——
pen
жан
=
UPPER
LOWER
PEDALS
UPPER:
ON/OFF
status
of
the
upper
keyboard.
LOWER:
ON/OFF
status
of
the
lower
keyboard.
PEDALS:
ON/OFF
status
of
the
pedal
keyboard.
TRANSPOSITION
VOICE
EXPANDER
CVS-10
жж
16857,4
22
299519577
Ві
т
4252
L
Ж
АТТАСК
FLUTE
~——
ENSEMBLE
———
=
=
[
PITCH
=
е
=
a
=
=
EDIT
TAEMOLO
CHORUS
REVERB
AEGIST.
M/SHIFT
LH
EH
EH
EH
EH
EH
GH
EH
ESCH
R.BANK
SPEED
FOOTSW.
DEPTH
MEMORY
After
“VOICE
EXPANDER
CVS-10”
appears
on
the
display,
“UPPER
VOICE”
is
displayed.
[Power-ON
Reset
operation]
M
To
return
all
the
CVS-10
data
to
the
originally
preset
values,
turn
OFF
the
POWER
switch,
then
turn
it
back
ON
while
you
hold
down
the
EDIT
button.
This
operation
resets
all
data
to
the
preset
values
described
below,
clearing
any
data
that
you
have
previously
set.
®Voice
No.:
GENERAL
for
all
three
keyboards
@Voice
Volume:
U/L:
24,
P:
12
@User
Voices:
Identical
to
Preset
voices
@Tremolo/Chorus
Speed:
24
@Foot
Switch
Control:
OFF
@Reverb
Depth:
24
@Regist.
Bank:
1
®
Registrations:
All
GENERAL
PRESETS
from
R.
Banks
1
to
4
@MIDI
Receive
Channel:
U:1,
L:2,
P:3
@Attack
Mode:
FIRST
NEW
KEY.
When
an
ENSEMBLE
button
is
ON,
the
voice
selected
at
CVS-10
can
be
sounded
from
the
corresponding
key-
board.
When
it
is
OFF,
that
voice
will
not
be
sounded.
Choosing
a
Voice
TRANSPOSITION
UPPER
VOICE
>
PRESET
|]
16
855
4
2252
17,151
R
L
T
4222
1
Ж
FLUTE
ATTACK
-—
ENSEMBLE
—
PITCH
сә
сә
сз
ссп
One
voice
can
be
chosen
for
each
keyboard
of
the
Electone.
а»
=
oo
сс
=a
UPPER
LOWER
PEDALS
EDIT
TREMOLO
CHORUS
REVERB
REGIST.
=
>
—
С:
R.BANK
SPEED
FOOTSW
DEPTH
MEMORY
Choose
the
Voice
1.
Press
the
>
or
<
button
until
the
menu
of
the
desired
keyboard
is
displayed.
<
LOWER
VOICE
>
PRESET
1
>
button:
Shift
to
the
next
menu.
<
button:
Return
to
the
previous
menu.
The
display
will
change
in
the
sequence
shown
below:
Upper
Keyboard
voice
ad
UPPER
VOICE
>
PRESET
1
ў
Lower
Keyboard
voice
<
LOWER
VOICE
>
PRESET
.
1
1
Pedal
Keyboard
voice
<
PEDAL
VOICE
>
PRESET
1
{
2.
Press
the
V
or
A
button
to
choose
the
desired
voice.
<
LOWER
VOICE
>
PRESET
12
Volume
setting
%
VOLUME
>
0:24
1:24
Р:24
ў
ON/OFF
setting
of
TREMOLO/
CHORUS
(™page
10)
V
button:
Shift
to
the
next
Voice
No.
A
button:
Return
to
the
previous
Voice
No.
Available
Range
of
Voice
Nos.
UPPER
VOICE
PRESET
1-16,
USER
1-16
LOWER
VOICE
|PRESET
1-16,
USER
1-16
PEDAL
VOICE
PRESET
1-8,
USER
1-8
<
TREMOLO/CHORUS
U:OFF
L:OFF
[Additional
Information]
W
After
creating
your
own
unique
voice
by
changing
the
voice
data,
the
new
voice
can
be
stored
as
a
User
Voice.
(page
8)
|
І
|
Set
its
Volume
|
;
3.
Press
the
Ò
or
<
button
to
display
the
VOLUME
menu.
>
button:
Shift
to
the
next
menu.
<
button:
Return
to
the
previous
menu.
U:24
L:24
P:24
|
і
|
<
VOLUME
>
|
4.
Press
the
>
or
<
button
to
position
the
cursor
>
button
Moveth
to
the
night
under
the
keyboard
for
which
you
wish
to
change
ran
More
sora
ie
the
volume.
<
VOLUME
>
U:24
L:24
P:24
5.
Press
the
A
or
V
button
to
change
the
volume.
EE
ae
V
button:
Lower
the
volume
level.
(Additional
Information)
Ш
Тһе
volume
can
be
set
to
one
of
24
levels,
At
<
VOLUME
level
0
(MIN),
the
voice
will
be
inaudible.
Level
24
(MAX)
corresponds
to
the
maximum
volume
of
voice
at
the
Electone.
`
E
The
balance
between
the
volume
levels
of
the
upper
and
lower
keyboards
can
also
be
adjusted
by
the
Electone’s
MANUAL
BALANCE
function.
U:24
L:ı9
P:24
Editing
a
Voice
Try
editing
the
voice
data
of
the
User
Voice
to
create
your
own
unigue
sound.
1.
Press
the
>
or
<
button
to
display
the
menu
of
the
keyboard
for
which
you
wish
to
edit
a
voice.
UPPER
VOICE
>
PRESET
1
2.
Press
the
A
or
V
button
to
choose
the
User
Voice
you
wish
to
edit.
UPPER
VOICE
>
USER
11
3.
Turn
ON
the
EDIT
button.
16
85%
4
29
21
URL
T
A39G3
L
FLUTE
UPPER
EDIT
TRANSPOSITION
SL
ғ
UPPER
EDIT
16
8'5'3
4'
22/3
2'
151031
RLT
422
L
FLUTE
ATTACK
—
ENSEMBLE
—
PITCH
EA
=
EA
сз
=
—
с
сз
=
UPPER
LOWER
PEDALS
EDIT
TREMOLO
CHORUS
REVERB
REGIST.
M/SHIFT
E
>
>
=
RBANK
SPEED
FOOTSW.
DEPTH
MEMORY
{Additional
Information]
@
Because
the
same
voices
are
shared
by
both
UPPER
VOICE
and
LOWER
VOICE,
if
you
edit
the
USER
11
UPPER
VOICE,
for
example,
the
USER
11
LOWER
VOICE
will
also
be
similarly
revised.
Voice
editing
is
performed
by
revising
the
data
of
a
preset
voice.
[Additional
Information]
@
Each
User
Voice
of
the
CVS-10
is
assigned
the
same
factory-preset
voice
as
the
Preset
Voice
of
the
corresponding
number.
For
example,
User
Voice
1
is
initially
assigned
the
same
voice
as
Preset
Voice
1.
The
data
of
the
selected
User
Voice
appears
on
the
display.
[Additional
Information]
@
If
the
EDIT
button
is
pressed
without
selecting
a
User
Voice,
the
EDIT
button
will
not
come
ON.
ATTACK
4.
Press
the
P
or
<
button
to
position
the
cursor
under
the
data
you
wish
to
revise.
D
button:
Move
the
cursor
to
the
right.
<
button:
Move
fhe
cursor
to
the
left.
UPPER
EDIT
16
854,4
24,
2
GIN
URL
T
424,72
L
FLUTE
ATTACK
5.
Press
the
A
or
V
button
to
change
the
data.
A
button:
Raise
the
level,
V
button:
Lower
the
level.
UPPER
EDIT
2.
а
В;
16
8573
4
22/5
2
1351/5
1
В
і
Т
442991
FLUTE
ATTACK
Variable
Range
of
the
Data
[Additional
Information]
ШІ
the
M./SHIFT
button
is
pressed
during
editing,
all
data
being
edited
will
be
cleared
and
the
original
voice
data
will
be
restored.
MIf
the
CVS-10
receives
MIDI
Registration
Change
data
during
editing,
all
data
being
edited
will
be
cleared
and
the
original
voice
data
will
be
restored.
FLUTE,
ATTACK
|1
(MIN)—7
(MAX)
RESPONSE
1
(SLOW)—7
(FAST)
LENGTH
1
(SHORT)—7
(LONG)
TIMBRE
A
(FLUTE)—B
(PRINCIPAL)
6.
When
you
finish
editing
the
voice,
store
it
as
a
User
Voice
by
pressing
the
EDIT
button
again.
A
User
Voice
can
be
recalled
by
performing
the
same
operation
used
for
choosing
a
Preset
Voice.
(page
6)
|
|
Adding
an
Effect
You
can
also
add
the
TREMOLO,
CHORUS,
or
REVERB
effect
to
a
voice.
TRANSPOSITION
ad
TREMOLO/CHORUS
54
2
HU
ON
L:ON
><
16
857,422
2'
1.171
AOL
т
2272
і
FLUTE
ATTACK
—-
ENSEMBLE
—-
PITCH
=
Еа
=
=
=
ES
с=з
=
=
UPPER
LOWER
PEDALS
EDIT
TREMOLO
CHORUS
REVERB
REGIST.
M./SHIFT
Іў
СЗ
СС
Oo
ee
EH
EH
GH
CS?
ABANK
SPEED
FOOTSW.
DEPTH
MEMORY
TREMOLO/CHORUS
1.
Press
the
>
or
<
button
to
display
the
TREMOLO/
CHORUS
menu,
then
check
the
ON/OFF
status
of
the
upper
(U)
and
lower
(L)
keyboards.
<
TREMOLO/CHORUS
U:
OFF
L:
OFF
2.
To
change
the
ON/OFF
status
of
the
TREMOLO/
CHORUS
effect
for
a
keyboard,
position
the
cursor
to
select
the
desired
keyboard.
<
TREMOLO/CHORUS
ei
itional
Information
U:OFF
L:OFF
@
When
the
TREMOLO/CHORUS
menu
first
appears,
the
cursor
is
displayed
under
the
“U”
position.
To
move
it
to
the
“L”
position,
press
the
>
button.
3.
To
turn
ON
the
effect,
press
the
A
button.
To
turn
it
OFF,
press
the
V
button.
<
TREMODLO/CHORUS
U:OFF
L:ON
"77
10
4.
Select
the
TREMOLO/CHORUS
mode.
=m
=
TREMOLO
CHORUS
as
>
TREMOLO
ON:
The
Tremolo
effect
is
enabled
(Tremolo
mode).
CHORUS
ON:
Тһе
Chorus
effect
is
enabled
(Chorus
mode).
Both
OFF:
A
Tremolo
effect
without
trilling
of
the
notes
is
enabled.
5.
Set
the
Tremolo
Speed
by
pressing
the
TREMOLO
button
while
you
hold
down
the
M./SHIFT
button.
=
7
=
M./SHIFT
f
TREMOLO
Ў
SPEED
The
currently
set
Tremolo
Speed
will
appear
on
the
display.
TREMOLO
SPEED
VALUE=24
6.
Press
the
A
or
V
button
to
adjust
the
Tremolo
Speed.
TREMOLO
SPEED
VALUE=15
7.
When
the
desired
setting
is
displayed,
press
the
M./SHIFT
button.
с=з
M./SHIFT
11
{Additional
Information]
Ш
Тһе
ON/OFF
status
of
the
Tremolo/Chorus
effect
for
each
keyboard
is
set
at
Step
1.
No
matter
which
mode
you
choose
in
Step
4,
therefore,
the
effect
will
not
be
added
to
the
keyboard
which
was
turned
OFF
in
Step
1.
[Additional
Information]
E
The
Tremolo
Speed
can
be
set
within
a
range
of
0
(MIN)
to
24
(MAX).
E
To
select
the
Tremolo
Speed
or
Foot
Switch
control
function,
you
must
press
the
TREMOLO
or
CHORUS
button
while
holding
down
the
M./SHIFT
button.
A
button:
Increase
the
Tremolo
Speed.
V
button:
Reduce
the
Tremolo
Speed.
[Additional
Information]
E
Even
after
you
turn
OFF
the
CVS-10’s
POWER
switch,
this
Tremolo
Speed
setting
will
remain
unchanged.
То
switch
between
TREMOLO
and
CHORUS
using
the
Foot
Switch
1.
Press
the
CHORUS
button
while
you
hold
down
the
M./SHIFT
button.
==
2
г
1
M./SHIFT
/
CHORUS
/
FOOTSW.
The
display
below
will
appear.
FOOTSW.
CONTROL
OFF
2.
To
switch
Foot
Switch
control
of
Tremolo/Chorus
mode
from
OFF
to
ON,
press
the
A
button.
FOOTSW.
CONTROL
TREMOLO
ON
To
complete
the
setting,
press
the
M./SHIFT
button
once
more.
You
can
now
switch
between
the
Tremolo
and
Chorus
effects
by
pressing
the
Foot
Switch
to
the
left.
The
bottom
row
of
the
display
indicates
the
ON/OFF
status
of
Foot
Switch
control
of
the
Tremolo
mode.
ON:
The
Foot
Switch
can
control
the
Tremolo/Chorus
mode.
OFF:
The
Foot
Switch
cannot
control
the
Tremolo/Chorus
mode.
To
switch
the
Foot
Switch
control
setting
from
TREMOLO
ON
to
TREMOLO
OFF,
press
the
V
button.
To
immediately
switch
between
TREMOLO
and
CHORUS
during
a
performance
1.
Press
the
A,
V,
>,
or
<
button
while
you
hold
down
the
M./SHIFT
and
TREMOLO
buttons.
um
;
шығы
N
M./SHIFT
й
i
/
i
The
display
below
will
appear.
TREMOLO
CONTROL
Press
4aVa
2.
When
you
reach
a
point
in
your
performance
where
you
wish
to
switch
between
TREMOLO
and
CHORUS,
press
the
A,
V,
D>,
or
<
button.
12
By
performing
this
step,
you
will
later
be
able
to
switch
between
the
Tremolo
and
Chorus
effects
in
realtime.
To
cancel
this
mode,
simply
repeat
Step
1.
1.
Turn
ON
the
REVERB
button.
ене
REVERB
2.
To
set
the
Reverb
Depth,
first
press
the
REVERB
button
while
you
hold
down
the
M./SHIFT
button.
||
if
==
M./SHIFT
/
REVERB
ы
/
С
/
ЕЗ
The
currently
set
Reverb
Depth
will
appear.
REVERB
DEPTH
VALUE=24
3.
Press
the
A
or
V
button
to
change
the
Reverb
Depth.
REVERB
DEPTH
VALUE=15
4.
When
the
desired
setting
is
displayed,
press
the
M./SHIFT
button.
=
M./SHIFT
13
{Additional
Information]
M@The
Reverb
effect
cannot
be
used
if
the
REVERB
button
is
turned
OFF.
[Additional
Information]
E
The
Reverb
Depth
can
be
set
within
a
range
of
0
(MIN)
to
24
(MAX).
For
example,
the
lowest
and
highest
REVERB
buttons
on
an
HS
Electone
respectively
correspond
to
Depth
0
and
24
on
the
CVS-10.
@
To
select
DEPTH,
you
must
press
the
DEPTH
button
while
you
hold
down
the
M./SHIFT
button.
A
button:
Increase
the
depth
of
re-
verberation.
V
button:
Reduce
the
depth
of
re-
verberation.
{Additional
Information]
MB
Even
after
you
tum
OFF
the
CVS-10’s
POWER
switch,
this
Reverb
Depth
setting
will
remain
unchanged.
Using
the
Registrations
The
CVS-10
has
4
Registration
Banks
which
can
store
16
registrations
each,
so
you
can
memorize
up
to
64
of
the
registrations
you
set
at
the
CVS-10.
—
ENSEMBLE
——
=
=
=
UPPER
LOWER
PEDALS
Memorizing
a
Registration
1.
Set
a
registration
at
CVS-10.
2.
To
choose
a
Bank,
you
must
first
press
the
EDIT
button
while
you
hold
down
the
M./SHIFT
button.
The
menu
below
will
be
displayed.
REGIST.
BANK
1
2 З
4
GENERAL
3.
Press
the
P
or
4
button
to
position
the
cursor
under
the
Bank
No.
or
under
GENERAL,
depending
on
where
you
wish
to
memorize
the
registration.
REGIST.
BANK
1
2
3
4
GENERAL
14
Select
MEMORY
1234567891011213141516
16
855,
4
24
21a
RL
TA
L
FLUTE
С
TRANSPOSITION
ES
е
РІТСН
= =
=
=
=
TREMOLO
CHORUS
REVERB
REGIST
M./SHIFT
СЭ
SPEED
FOOTSW.
DEPTH
MEMORY
ATTACK
E
EDIT
В.ВАМК
[Additional
Information]
@
In
the
memory
area
reserved
for
each
registra-
tion,
you
can
memorize
the
selected
Voice
No.,
volume
level,
ON/OFF
status
of
effects,
Tremolo
Speed,
and
Reverb
Depth
for
each
keyboard,
as
well
as
the
ON/OFF
status
of
the
ENSEMBLE
buttons.
@
If
you
set
the
upper
keyboard
voice
to
USER
1
and
memorize
that
registration,
for
example,
the
data
indicating
that
‘USER
1
is
selected
for
the
upper
keyboard”
will
be
memorized
but
not
the
actual
voice
data
of
USER
1.
[What
is
a
Bank?]
E
if
we
assume
that
each
registration
from
1
to
16
is
a
member
of
one
family,
then
each
Bank
from
1
to
4
can
be
regarded
as
a
“house.”
The
CVS-10
is
provided
with
four
houses
(Banks
1
to
4)
in
which
resides
one
individual
16-member
family
each
as
well
as
one
house
(GENERAL)
in
which
resides
one
model
family.
GENERAL
4.
When
the
desired
Bank
is
selected,
press
the
M./
SHIFT
button.
тек
M./SHIFT
pie
it
>;
The
previous
display
is
restored.
5.
Next,
select
a
Registration
No.
by
pressing
the
REGIST.
button
while
you
hold
down
the
M./SHIFT
button.
=
/
=z,
M/SHIFT
а:
REGIST.
CS?
ў
й
MEMORY
The
menu
below
will
be
displayed.
Select
MEMORY
12345678910111213141516
6.
Press
the
P
or
<
button
to
position
the
cursor
under
the
number
at
which
you
wish
to
memorize
your
registration.
Select
MEMORY
12345678910111213141516
7.
To
memorize
your
registration
at
the
selected
Registra-
tion
No.,
press
the
REGIST.
button.
m
REGIST.
MEMORY
The
message
below
will
be
displayed
for
a
few
seconds.
Memorizine..
REGIST.
=
5
8.
To
complete
the
setting,
press
the
M./SHIFT
button.
Cs
M./SHIFT
15
For
example,
if
you
select
Bank
No.
8,
the
16
members
of
the
family
residing
in
BANK
3
(shown
on
page
14)
are
re-
presented
on
the
display
as
numbers
1
to
16.
When
a
Registration
No.
is
selected,
one
memory
area
of
BANK
3
is
selected.
When
the
REGIST.
button
is
pressed,
the
registration
you
have
set
is
memo-
rized
in
that
memory
area.
[Additional
Information]
@
If
you
turn
OFF
the
POWER
switch
and
then
turn
it
back
ON
while
you
hold
down
the
REGIST.
button,
the
GENERAL
Bank
will
be
selected
and
its
memory
areas
1-16
will
contain
the
preset
GENERAL
Registration
data.
(When
this
opera-
tion
is
performed,
any
previously
set
Registrations
in
the
GENERAL
Bank
wil!
be
cleared.)
Wilf
you
press
a
different
numeric
button
of
REGISTRATION
MEMORY
at
the
Electone
while
the
M./SHIFT
button
of
CVS-10
is
ON,
the
registration
at
the
CVS-10
will
also
be
memorized
as
that
same
Registration
No.
Recalling
a
Registration
1.
Press
the
REGIST.
button.
шша
REGIST.
The
menu
below
will
be
displayed.
Select
REGIST.
1234567891011
1
13141516
2.
Press
the
D
or
<I
button
to
position
the
cursor
under
the
number
of
the
desired
registration.
Select
3.
To
recall
the
selected
registration,
press
the
REGIST.
button
again.
5
TA
EEE
The
message
below
will
be
displayed
for
a
few
seconds.
Recalling...
REGIST.
=
|
ı
Registrations
can
also
be
stored
in
the
MDR.
|
When
you
connect
the
CVS-10
to
an
MDR
(Music
Disk
Recorder)
and
|
then
perform
recording
at
MDR
in
Normal
mode,
the
data
of
the
|
Registrations
in
the
currently
selected
Bank
at
CVS-10
will
be
|
|
|
|
|
memorized
onto
the
MDR's
disk.
In
addition,
when
playback
at
MDR
is
performed
in
Normal
mode,
the
registrations
stored
on
the
MDR's
disk
will
be
saved
in
the
currently
selected
Bank
at
CVS-10
(and
the
previous
data
in
that
Bank
will
be
erased).
REGIST.
12345678910111213141516
REGIST.
SOUND
MEMO
16
If
you
wish
to
switch
to
another
Bank
before
selecting
a
Registration
No.,
perform
Steps
2,
3,
and
4
of
“Memo-
rizing
a
Registration”
(page
14),
before
performing
Step
1
on
the
left.
[Additional
Information]
E
Registrations
1-16
of
the
GENERAL
Bank
are
all
provided
with
preset
Registration
data
(GENERAL
PRESETS).
If
you
wish
to
recall
a
GENERAL
Registration,
select
the
GENERAL
Bank
first
by
performing
Steps
2, 3,
and
4
of
“Memorizing
a
Registration”
(page
14).
If
you
select
a
different
REGISTRATION
MEMORY
number
at
the
Electone,
however,
the
current
Registration
No.
at
the
CVS-10
will
also
change
to
that
same
number.
Be
sure
to
set
each
of
the
CVS-10’s
Registration
No.
to
the
same
Registration
No.
at
the
Electone
(REGISTRATION
MEMORY)
that
you
wish
to
use
at
the
same
time.
[Additional
Information]
If
a
disk
has
been
used
to
record
a
performance
using
an
Electone+CVS-10+MDR
system,
that
disk
cannot
be
played
back
when
using
an
Electone+
MDR
system
(without
the
CVS-10).
Other
Types
of
Control
Тһе
CVS-10
also
allows
you
to
finely
adjust
the
РІТСН
wt
|
wt
|
ALUE=
TRANSPOSITION
pitch,
transpose
the
overall
key,
perform
MIDI
16
8
6 8
5h
4
aR
ть!
8
І
1
EPA?
8.1
Т
42%21
control,
or
change
the
Attack
mode.
[ж
IV,
(00
АТТАСК
---
ENSEMBLE
—
een
oo
ao
|
сз
UPPER
LOWER
PEDALS
EDIT
TREMOLO
CHORUS
REVERE
REGIST.
M/SHIFT
Sn
ANK
SPEED
FOOTSW.
DEPTH
MEMORY
1.
Press
the
7
button
while
you
hold
down
the
M./
SHIFT
button.
=
/
The
menu
below
will
be
displayed.
PITCH
CONTROL
VALUE=
@
2.
Use
the
A
or
V
button
to
finely
adjust
the
pitch.
A
button:
Each
time
this
button
is
pressed,
the
pitch
is
slightly
raised.
(When
A3=440
Hz,
1
step
is
equal
to
about
0.3
Hz
over
a
maximum
15-step
range.)
V
button:
Each
time
this
button
is
pressed,
the
pitch
is
slightly
lowered.
PITCH
CONTROL
VALUE=
7
(When
A3=440
Hz,
1
step
is
equal
to
PITCH
about
0.3
Hz
over
a
maximum
4-step
range.)
{Additional
Information]
ШТһе
variable
ranges
described
above
are
identical
to
those
of
the
Electone’s
PITCH
CONTROL
function.
3.
When
the
desired
pitch
is
displayed,
press
the
M./SHIFT
button.
=
M./
Se
17
TRANSPOSTTION
1.
Press
the
A
button
while
you
hold
down
the
M./
SHIFT
button.
Й
TRANSPOSITION
=a
/
M:
E
/
The
menu
below
will
be
displayed.
TRANSPOSITION
VALUE=
Ø
2.
Use
the
A
or
V
button
to
adjust
the
key.
TRANSPOSITION
TRANSPOSITION
VALUE=
5
A
button
(Higher
key)
Nomai
Key
AAA
ана
рака
аа
ee
DË
(ЕР)
F4
(Gb)
V
button
(Lower
key)
Normal
Key|
Vx1
|
Vx2
|
Vx3
|
Vx4
|
Vx5
|
Vx6
С
В
akut
A
3.
When
the
desired
Transposition
value
is
displayed,
press
the
M./SHIFT
button.
с-з
М.
аа
18
А
button:
Each
time
this
button
is
pressed,
the
key
is
raised
one
half-step
(for
a
maximum
of
six
half-steps).
V
button:
Each
time
this
button
is
pressed,
the
key
is
lowered
one
half-
step
(for
a
maximum
of
six
half-steps).
[Additional
Information]
MW
The
variable
ranges
described
above
are
identical
to
those
of
the
Electone’s
TRANS-
POSITION
function.

Other manuals for CVS-10

2

Other Yamaha Extender manuals

Yamaha TX-7 User manual

Yamaha

Yamaha TX-7 User manual

Yamaha AVS-10 User manual

Yamaha

Yamaha AVS-10 User manual

Yamaha CVS-10 User manual

Yamaha

Yamaha CVS-10 User manual

Yamaha YME8 User manual

Yamaha

Yamaha YME8 User manual

Yamaha EXi8 User manual

Yamaha

Yamaha EXi8 User manual

Yamaha EMT-1 User manual

Yamaha

Yamaha EMT-1 User manual

Yamaha CVS-10 User manual

Yamaha

Yamaha CVS-10 User manual

Yamaha AVX-1 User manual

Yamaha

Yamaha AVX-1 User manual

Yamaha YME8 User manual

Yamaha

Yamaha YME8 User manual

Yamaha EMT-1 Quick start guide

Yamaha

Yamaha EMT-1 Quick start guide

Yamaha AVS-10 User manual

Yamaha

Yamaha AVS-10 User manual

Popular Extender manuals by other brands

Rose electronics CrystalView Extreme Installation and operation manual

Rose electronics

Rose electronics CrystalView Extreme Installation and operation manual

Ace Plus EX-G029A-TX user manual

Ace Plus

Ace Plus EX-G029A-TX user manual

ENFORCER Enforcer MVE-AT11-01NQ manual

ENFORCER

ENFORCER Enforcer MVE-AT11-01NQ manual

Anntlent AN-CL70AV Plus user manual

Anntlent

Anntlent AN-CL70AV Plus user manual

Intelix AVO-SVA2 installation manual

Intelix

Intelix AVO-SVA2 installation manual

Lindy 38262 user manual

Lindy

Lindy 38262 user manual

Panio KD150AM user manual

Panio

Panio KD150AM user manual

Teradek Bolt Pro 300 quick guide

Teradek

Teradek Bolt Pro 300 quick guide

Lancaster CITY BOSS Installation, operating and service manual

Lancaster

Lancaster CITY BOSS Installation, operating and service manual

Shinybow USA SB-6335R5 instruction manual

Shinybow USA

Shinybow USA SB-6335R5 instruction manual

DigitaLinx DL-HDFO user manual

DigitaLinx

DigitaLinx DL-HDFO user manual

MuxLab 500770-TX Quick installation guide

MuxLab

MuxLab 500770-TX Quick installation guide

KVM-TEC media4Kconnect DP 1.2 Quick installation

KVM-TEC

KVM-TEC media4Kconnect DP 1.2 Quick installation

AV Access 4KEX100-KVM user manual

AV Access

AV Access 4KEX100-KVM user manual

Factor Electronics HD150BaseT-Balun TX: Transmitter Balun instructions

Factor Electronics

Factor Electronics HD150BaseT-Balun TX: Transmitter Balun instructions

Viking RG-204 product manual

Viking

Viking RG-204 product manual

StarTech.com USBthere USB110EXT Specifications

StarTech.com

StarTech.com USBthere USB110EXT Specifications

Lindy HDMI & IR CAT6 Extender Pro manual

Lindy

Lindy HDMI & IR CAT6 Extender Pro manual

manuals.online logo
manuals.online logoBrands
  • About & Mission
  • Contact us
  • Privacy Policy
  • Terms and Conditions

Copyright 2025 Manuals.Online. All Rights Reserved.