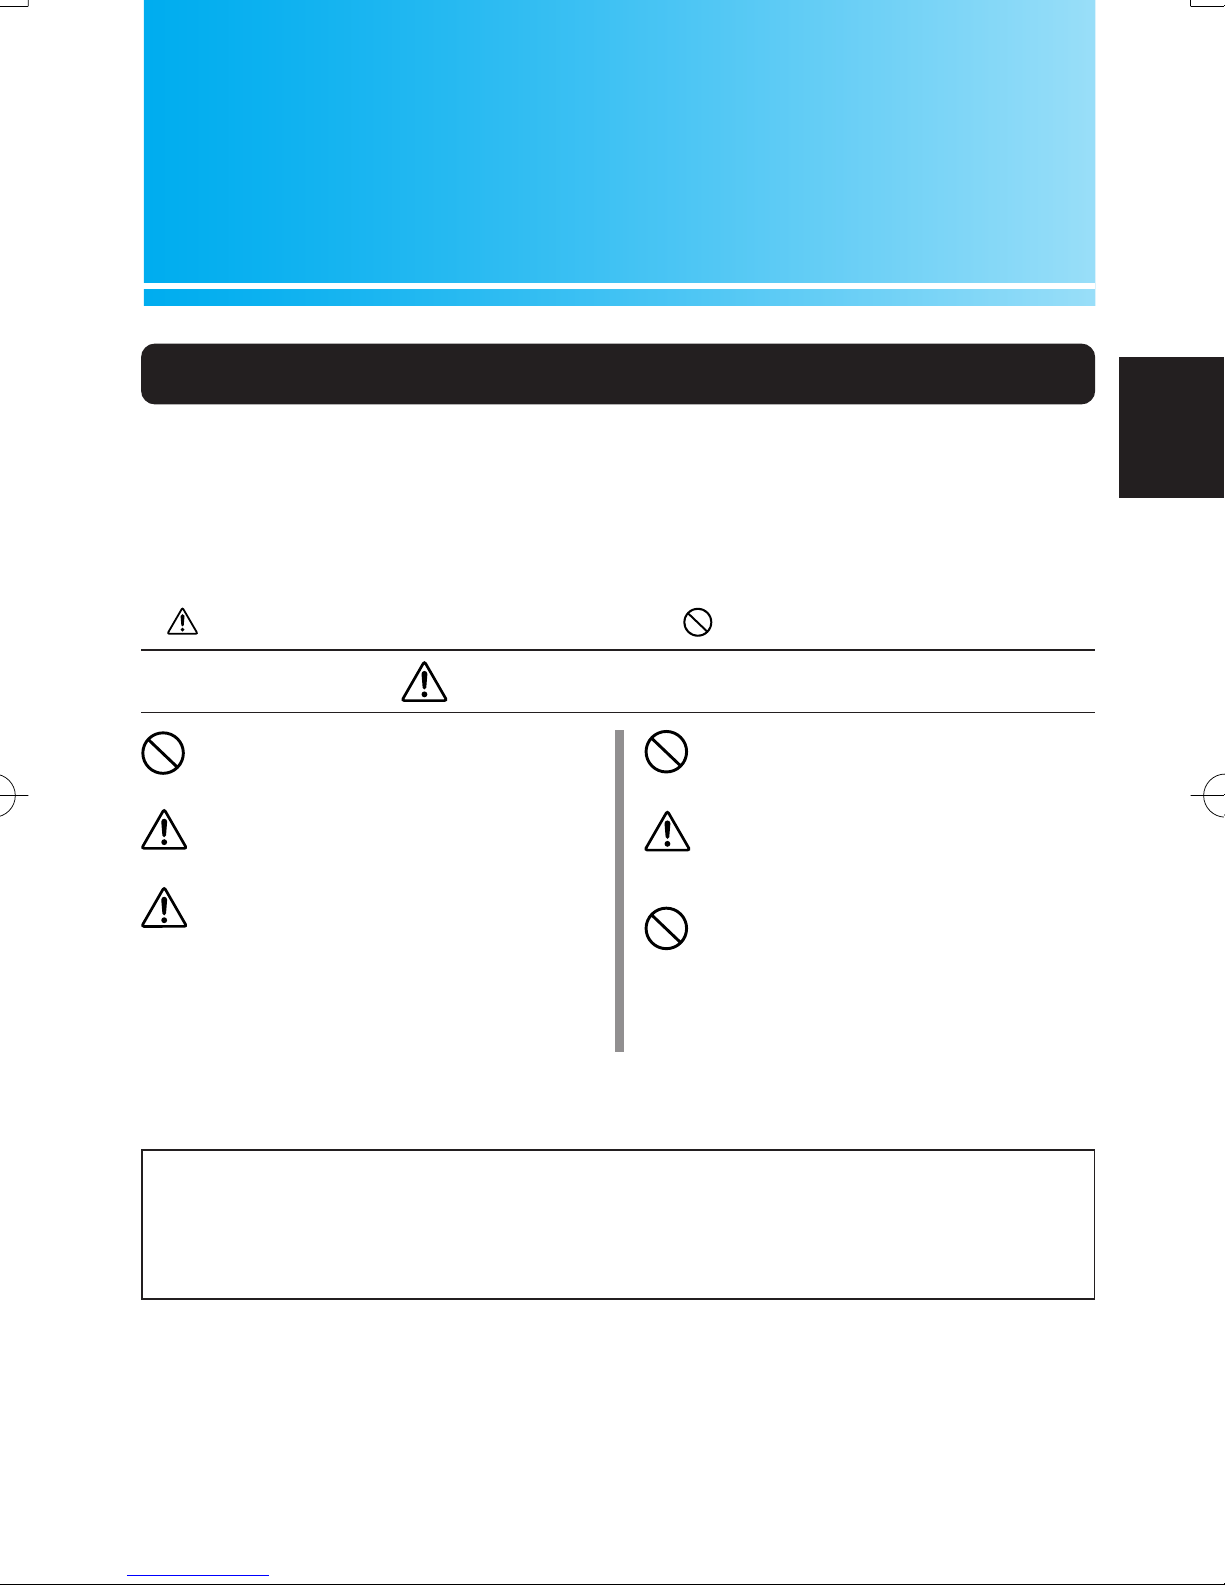
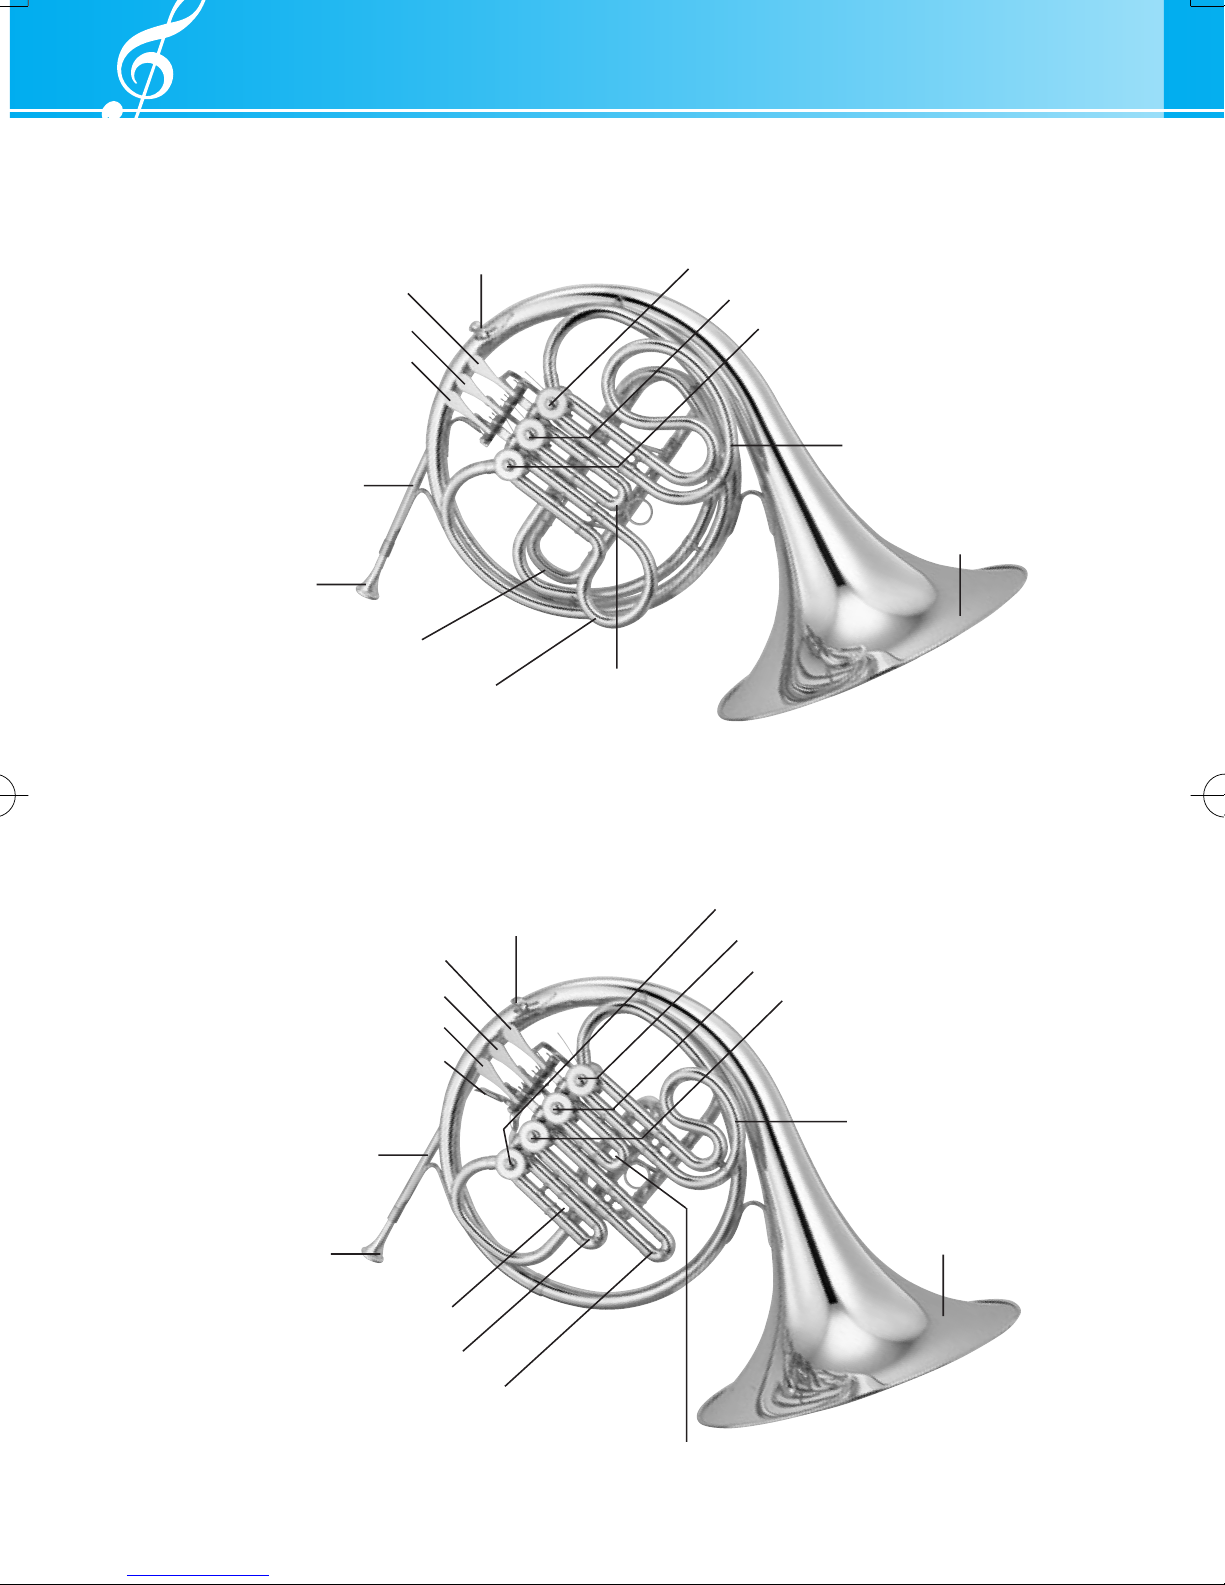
Yamaha YHR-567 User manual

ホルン
取扱説明書
Horn
Owner’s Manual
WALDHORN
Bedienungsanleitung
COR
Mode d’emploi
TROMPA
Manual de instrucciones
圆号
使用手册
Валторна
Руководство пользователя
호른
사용설명서
日本語
ENGLISHDEUTSCHFRANÇAISESPAÑOL
中文
Русский
한국어
horn_om_cover_080709.indd 1 08.7.9 4:37:23 PM

ごあいさつ
このたびは、ヤマハ管楽器をお買い上げいただき、まことにありがとうございます。
楽器を正しく組み立て性能をフルに発揮させるため、また永く良い状態で楽器を
お使いいただくために、この取扱説明書をよくお読みください。
P.19
Congratulations!
You are now the owner of a high quality musical instrument. Thank you for choosing
Yamaha. For instructions on the proper assembly of the instrument, and how to keep the
instrument in optimum condition for as long as possible, we urge you to read this Owner’s
Manual thoroughly.
P.33
Wir beglückwünschen Sie!
Sie sind nun der stolze Besitzer eines hochwertigen Musikinstruments. Vielen Dank, dass Sie sich für
ein Instrument der Marke Yamaha entschiedenen haben. Um mit den Handgriffen zum Zusammen-
setzen und Zerlegen des Instruments vertraut zu werden und dieses über Jahre hinweg in optimalem
Zustand halten zu können, raten wir Ihnen, diese Anleitung aufmerksam durchzulesen.
P.47
Félicitations!
Vous êtes dès à présent le propriétaire d’un instrument de musique de haute qualité. Nous vous
remercions d’avoir choisi Yamaha. En ce qui concerne les instructions relatives à un assemblage adé-
quat de l’instrument et sur la façon de garder l’instrument dans des conditions optimales aussi long-
temps que possible, nous vous conseillons vivement de lire entièrement le présent Mode d’emploi.
P.61
¡Enhorabuena!
Usted es ahora propietario de un instrumento musical de alta calidad. Le agradecemos su elección
de un instrumento Yamaha. Le aconsejamos que lea todo este manual de instrucciones para ver las
instrucciones para el montaje correcto del instrumento y para aprender a conservar el instrumento
en óptimas condiciones durante tanto tiempo como sea posible.
P.75
祝贺您 !
您已经拥有了一款高品质的乐器。感谢您选择雅马哈品牌的乐器。为正确组装乐器且尽量长时间
地保持其最佳状态 , 我们强烈建议您通读此使用手册。
P.89
Поздравляем!
Вы стали обладателем высококачественного музыкального инструмента. Благодарим Вас
за выбор продукции Yamaha. Для получения инструкций по правильной сборке данного
инструмента и его длительном хранении в оптимальных условиях мы настоятельно
рекомендуем Вам внимательно прочитать настоящее руководство.
P.103
인사말
야마하 악기를 구입해 주셔서 감사합니다 . 악기의 알맞은 조립 방법 및 보관을 위해 본 사용설명서를
반드시 읽어주시기 바랍니다 .
P.3
Tabla de digitaciones/ 指法表 /Аппликатура/운지법
A
A
horn_om_cover_080709.indd 2 08.7.9 4:37:25 PM

19
Horn
Owner’s Manual
Precautions Please read before using
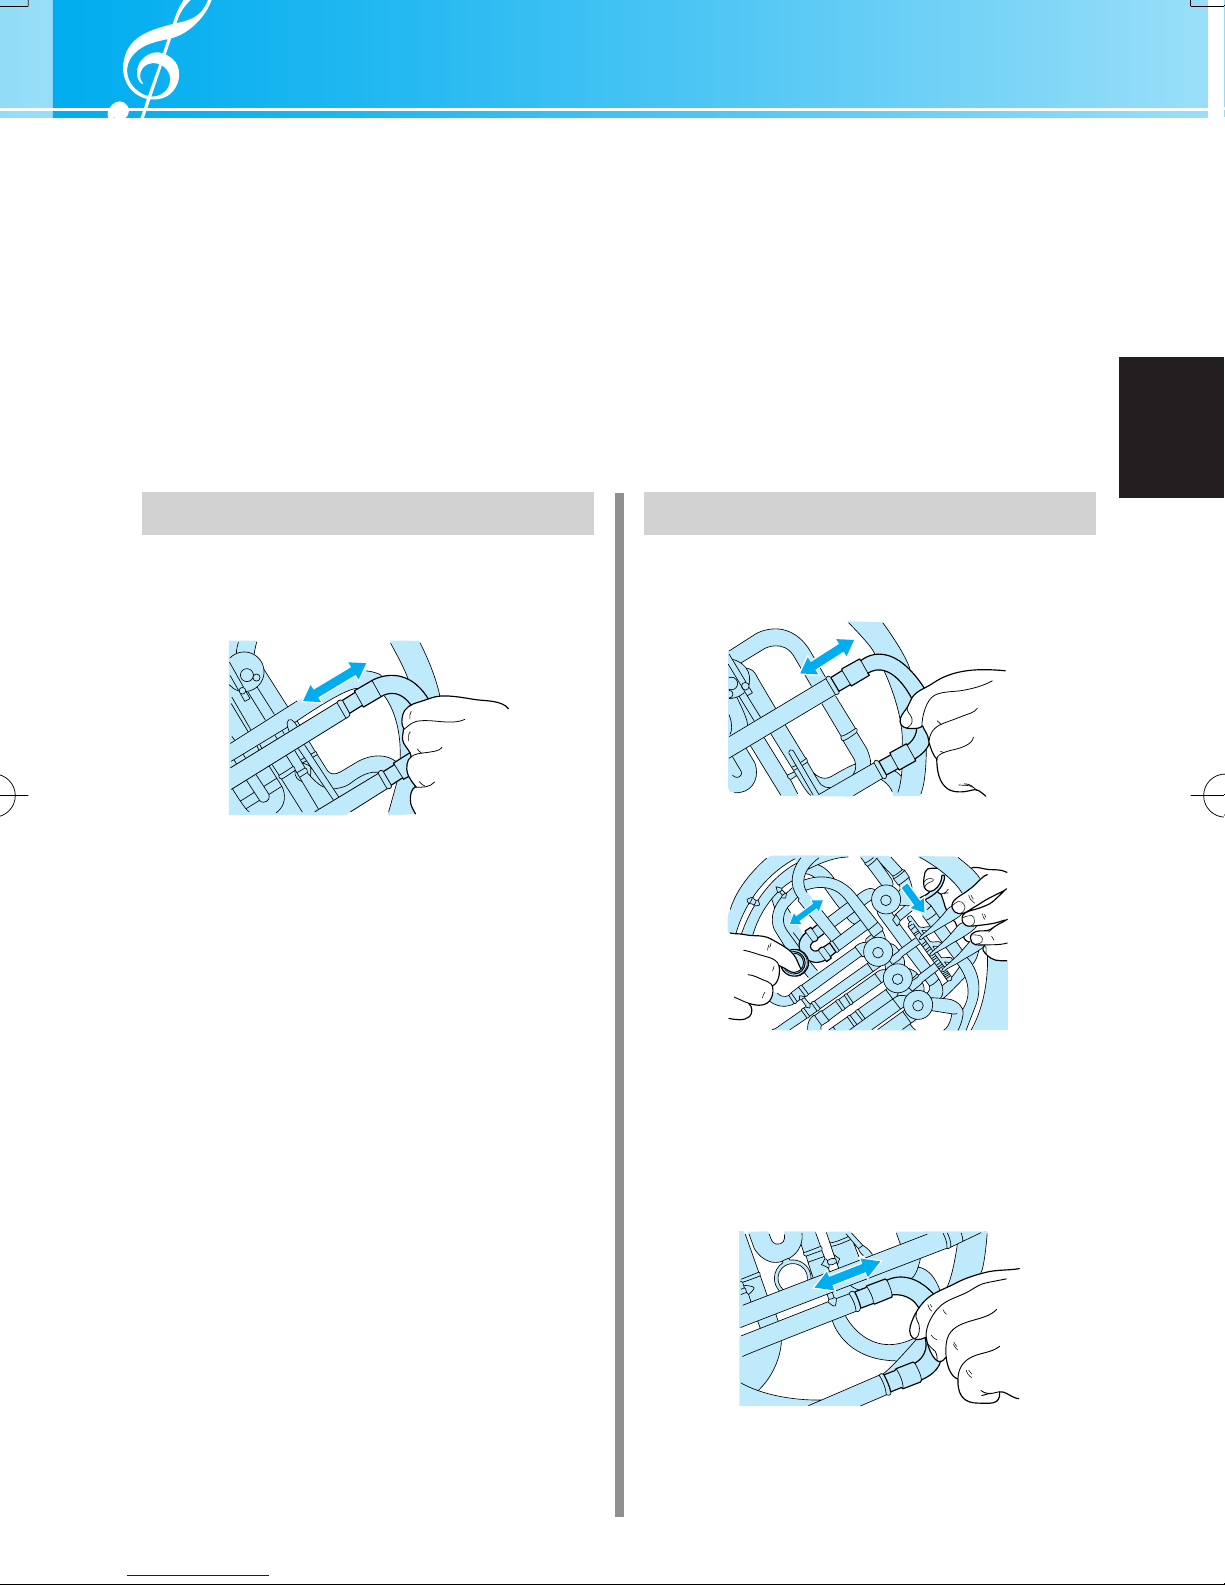
Do not throw or swing the instrument.
The mouthpiece or other parts may fall off hitting other people.
Always treat the instrument gently.
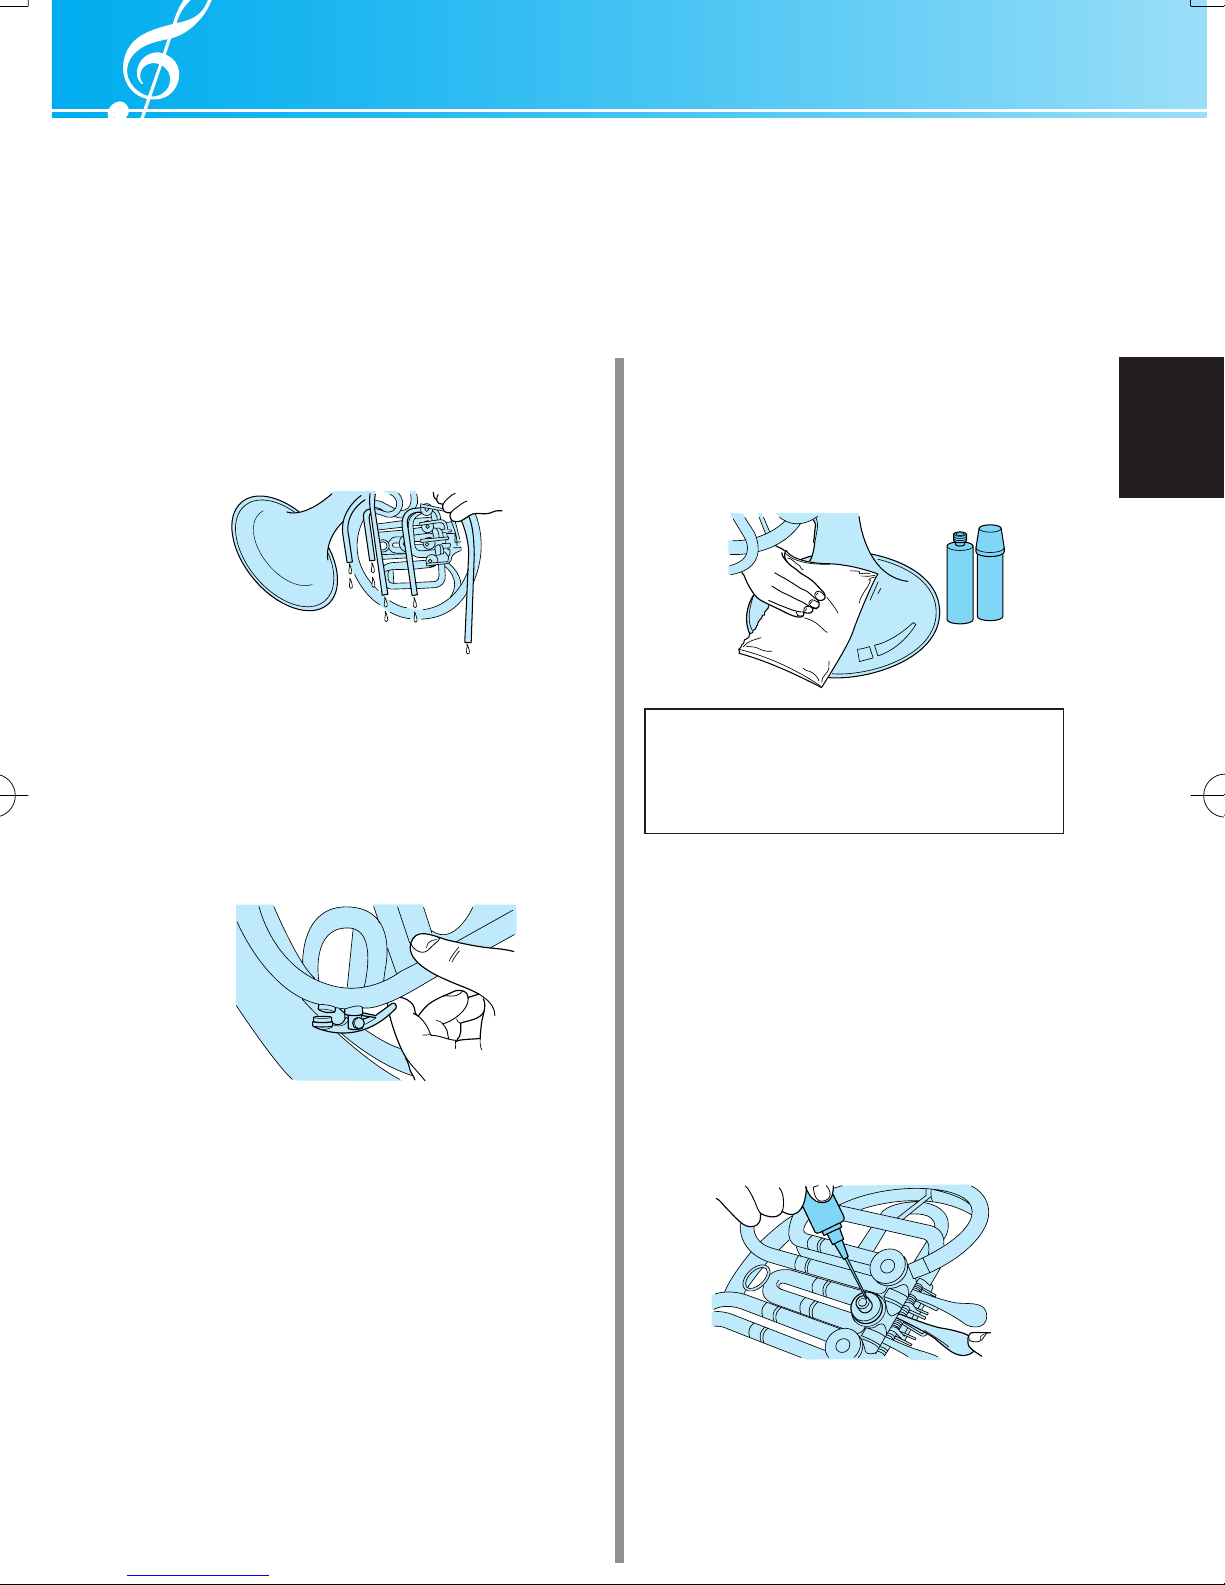
Keep the oil, polish, etc., out of children’s mouths.
Keep the oil, polish, etc., out of children’s reach and do main-
tenance when children are not present.
Be aware of climatic conditions such as tempera-
ture, humidity, etc.
Keep the instrument away from heat sources such as heaters,
etc. Also, do not use or store the instrument in any extreme
conditions of temperature or humidity. Doing so may result
in damage to key balance, linkage, or pads, resulting in prob-
lems during performance.
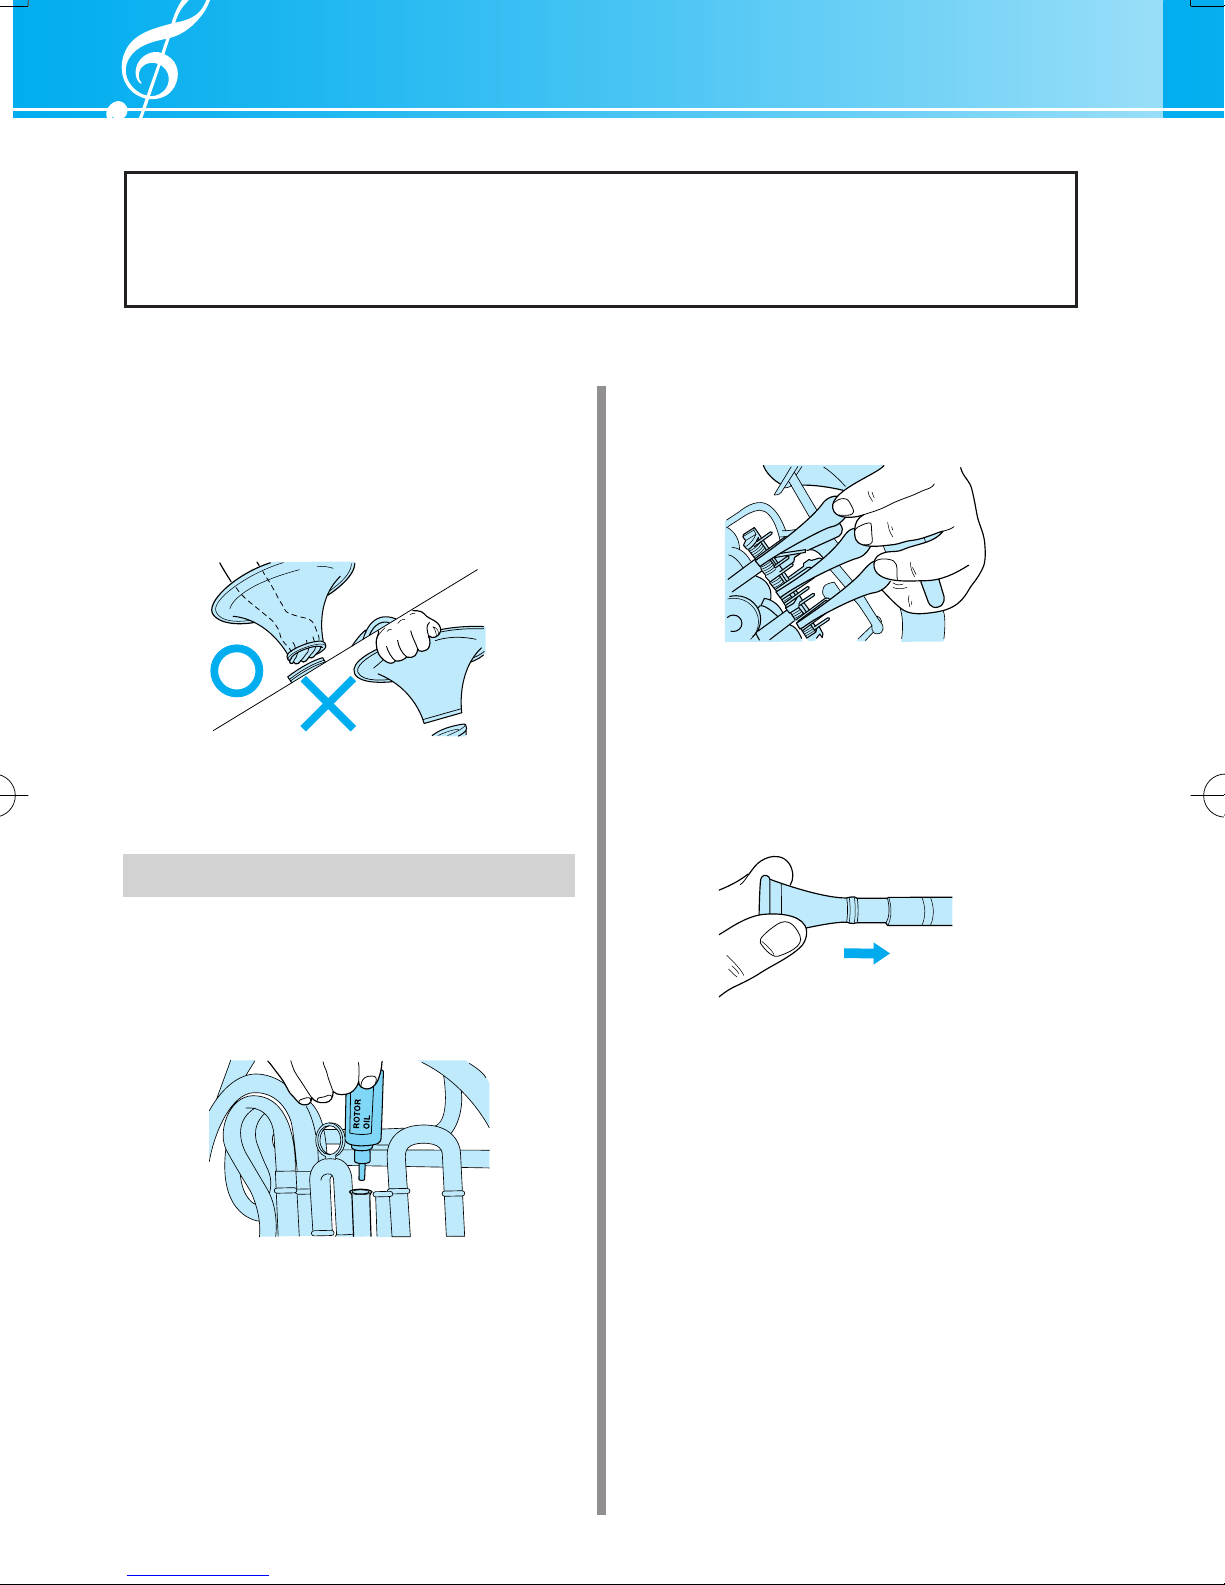
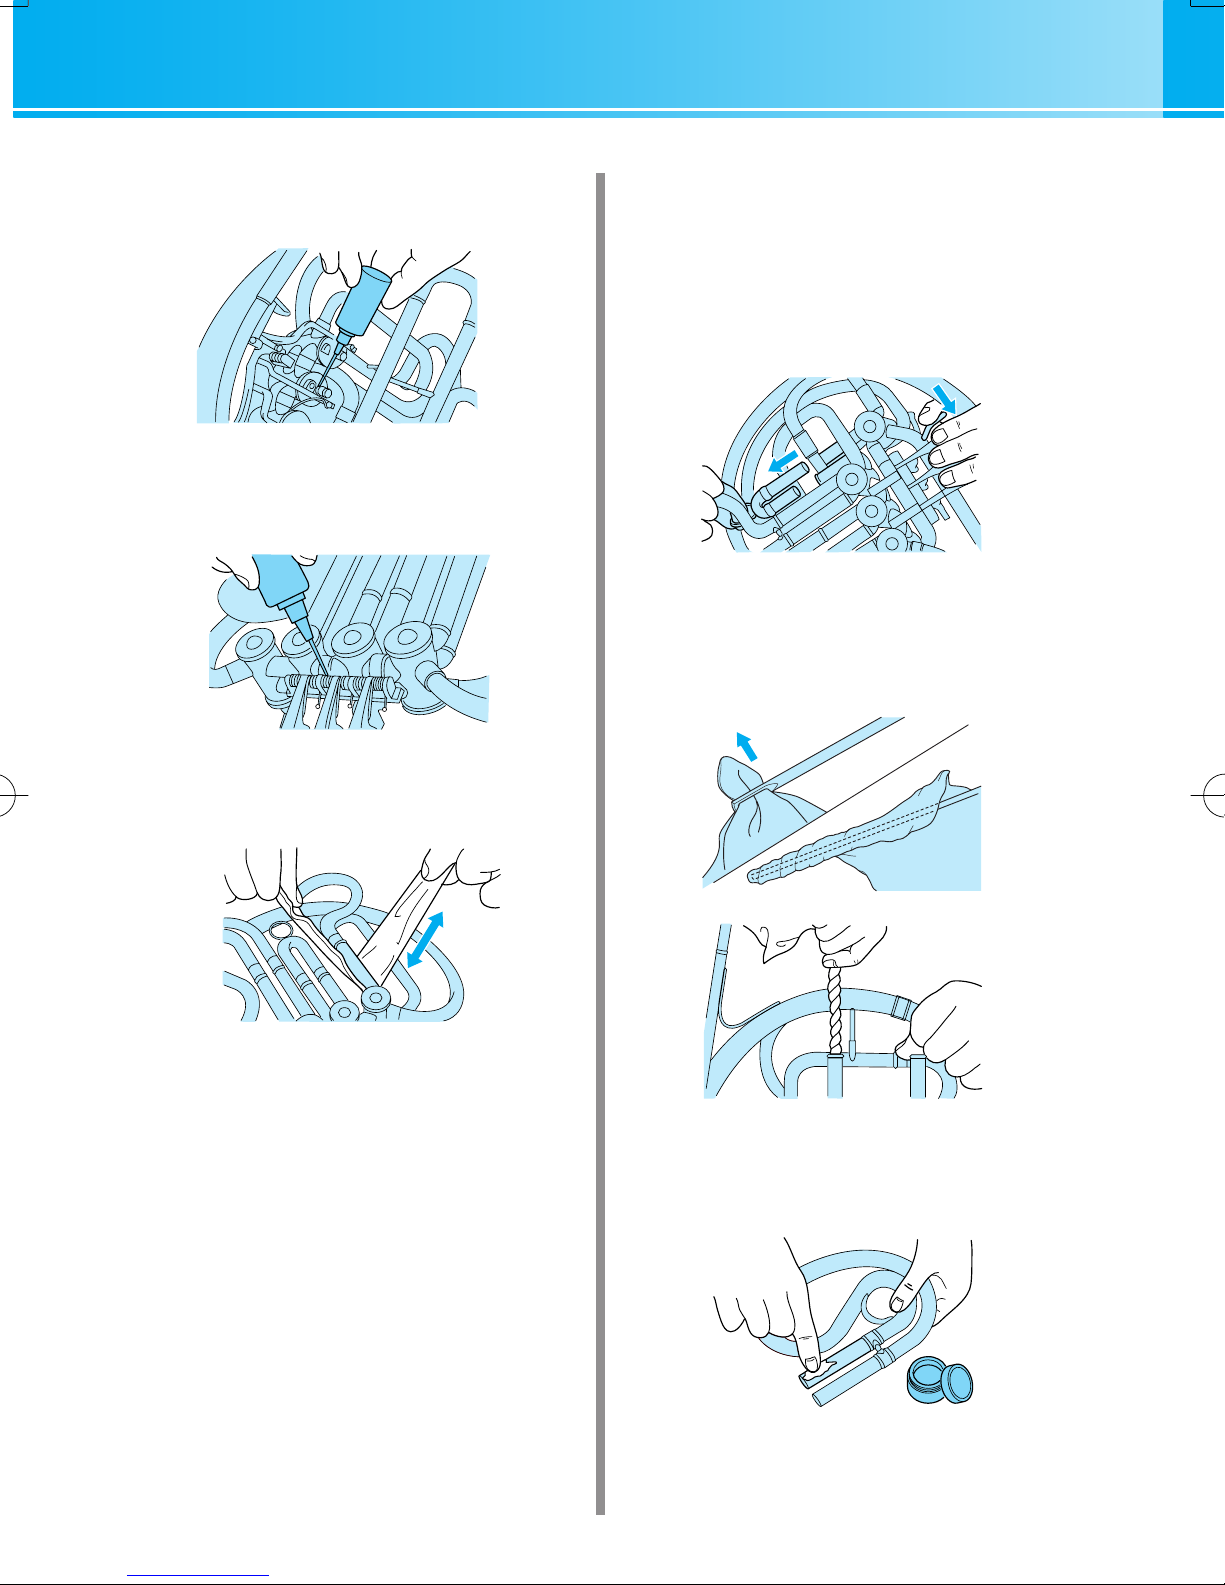
Never use benzene or thinner for maintenance on
instruments with a lacquer finish.
Doing so may result in damage to the finish’s top coat.
Take care not to disfigure the instrument.
Placing the instrument where it is unstable may cause the
instrument to fall or drop resulting in disfigurement. Take care
as to where and how you place the instrument.
Do not modify the instrument.
Besides voiding the warranty, modification of the instrument
may make repairs impossible.
The precautions given below concern the proper and safe use of the instrument, and are to
protect you and others from any damage or injuries. Please follow and obey these precautions.
If children are using the instrument, a guardian should clearly explain these precautions to the child and make
sure they are fully understood and obeyed. After reading this manual, please keep it in a safe place for future
reference.
■About the Icons
: This icon indicates points which should be paid attention to. : This icon indicates actions that are prohibited.
Caution Disobeying the points indicated with this mark may
lead to damage or injury.
In regards to brass instruments with a plate finish, the color of the finish may change over time however, it should
be of no concern in regards to the instrument’s performance. Discoloration in its early stage can easily be removed
with maintenance. (As discoloration progresses, it may be difficult to remove.)
* Please use the accessories that are specified for use with the particular type of finish found on the instrument. Also, metal polishes remove
a thin layer of the finish’s top coat which will make the finish thinner. Please be aware of this before using polish.
hornom003-074080711.pm 08.9.22, 1:54 PMPage 19 AdobePageMaker6.5J/PPC

20
■F Single
■BbSingle
Mouthpiece
Nomenclature
Mouthpipe
1st Lever
2nd Lever
3rd Lever
Finger Hook 3rd Valve
2nd Valve
1st Valve
3rd Valve Slide
Bell
2nd Valve
Slide
1st Valve Slide
Main Tuning Slide
Mouthpiece
Mouthpipe
4th Lever
1st Lever
2nd Lever
3rd Lever
Finger Hook 4th Valve
3rd Valve
2nd Valve
1st Valve
3rd Valve Slide
Bell
2nd Valve Slide
1st Valve Slide
4th Valve Slide
Main Tuning Slide(Back side)
hornom003-074080711.pm 08.9.22, 1:54 PMPage 20 AdobePageMaker6.5J/PPC

21
■F/BbFull Double
Nomenclature
Mouthpiece
Mouthpipe
4th Lever
1st Lever
2nd Lever
3rd Lever
Finger Hook
1st Valve
4th Valve
3rd Valve
2nd Valve
Bb3rd Valve Slide
F 3rd Valve Slide
Bell
Bb2nd Valve Slide
F 2nd Valve
Slide
F 1st Valve Slide
F Tuning Slide
Bb1st Valve Slide
Main Tuning Slide
Mouthpiece
Mouthpipe
4th Lever
1st Lever
2nd Lever
3rd Lever
Finger Hook 4th Valve
3rd Valve
2nd Valve
1st Valve
Bb3rd Valve Slide
Bell
F 3rd Valve Slide
F Tuning Slide(1)
Bb2nd Valve Slide
F 2nd Valve Slide
F 1st Valve Slide
Bb1st Valve Slide
Main Tuning Slide
BbTuning Slide
F Tuning Slide(2)
* Specifications and/or design may change without notice for reasons of improvement.
hornom003-074080711.pm 08.9.22, 1:54 PMPage 21 AdobePageMaker6.5J/PPC

22
Handling the Instrument
The instrument is made of a thin metal so please handle it with care. Do not apply any
excessive force to the instrument, or bump it in a manner that will dent or damage it.
Before You Play
■Attaching the Screw-On Bell
When attaching the screw-on bell, always hold
the bell by its mid section and assemble. Do
not over-tighten.
■Lubrication
Oiling the Rotors
1. While holding the levers down, remove the
valve slides then apply rotor oil to the ro-
tors as shown in the illustration below (a
few drops per rotor).
* Apply oil if the lever does not work
smoothly.
* When applying oil, do not let the oil mix
with the slide grease adhering to the valve
slide’s interior.
2. Move the levers so that the oil is spread
evenly.
■Attaching the Mouthpiece
Gently insert the mouthpiece into the
mouthpipe.
* Never force the mouthpiece into the
mouthpipe. The mouthpiece may become
stuck in the mouthpipe.
hornom003-074080711.pm 08.9.22, 1:54 PMPage 22 AdobePageMaker6.5J/PPC

23
Tuning
Use the main tuning slide to make sure that the instrument is in tune before playing.
Since temperature has an effect on the instrument’s pitch, blow some warm air through
it to warm it up before tuning.The amount of tuning slide adjustment needed to get the
horn in tune will vary between individuals so there is no standard rule to follow
(however, at 68°F pulling the main tuning slide out about 0.6” should more or less tune
the instrument to A=442Hz).
Take notice that when temperatures are warmer, the main tuning slide should be pulled
out a little more, while cooler temperatures will require that you push the slide in. Also,
the position and angle of your right hand in the bell will have an influence on pitch as
well.
Single Horns
Slide the main tuning slide in or out to tune the
instrument.
Double Horns
1. Use the main tuning slide to tune the Bbside.
* Instruments with a Bbtuning slide should
tune with the main tuning slide as well.
2. Use the F tuning slide to tune the F side of
the instrument.
hornom003-074080711.pm 08.9.22, 1:54 PMPage 23 AdobePageMaker6.5J/PPC

24
Tuning
3. Pull out each of the valve slides between 1/
5-2/5 inch. When pulling out the slides,
make sure that the lever corresponding to
the slide is depressed.
4. When the hand stopping technique is used,
the 4th valve on the YHR-332 lets you use
regular fingerings in combination with this
technique. Also, when setup as shown in
the illustration below, it can be used in the
same way as the 2nd valve, lowering the
pitch a half-step.
* What is Gestopft or hand stopping?
This is a technique used on F Single or
Double Horns(using F side) where the
hand is placed further into the bell to raise
the horn’s pitch by a half-step and change
the tone of the instrument. But doing so
requires the player to transpose the score
down a half step to produce the correct
pitch. The 4th valve on the YHR-322
compensates for the difference in pitch
when using the hand stop technique, so
you can read the score as is and still get
the correct pitch.
hornom003-074080711.pm 08.9.22, 1:54 PMPage 24 AdobePageMaker6.5J/PPC

25
Maintenance
■Caring for your instrument after playing
To keep your instrument both looking and playing well, make sure you take proper
care of it after you have finished playing. When caring for the instrument, place it
on a table or, hold it securely in your hands, taking care not to drop it.
●Valve Slide Maintenance
1. Remove the valve slides to remove any
moisture.
* Removing the valve slide without holding the
corresponding lever down creates a drop in
air pressure within the pipe, creating a
suction that can result in poor rotor function
or damage to the inside of the pipe.
2. If the instrument has a water key, remove
moisture from the water key too.
* The valve slides are made of brass or
nickel silver, which are both excellent at
resisting corrosion. However, corrosion
may appear if moisture is left in the
instrument for an extended period of time.
Please use caution.
●Body Maintenance
Use a polishing cloth to gently wipe the
instrument’s surface. If dirt or tarnish is obvi-
ous, the following products can be used.
For lacquer finishes…
Polishing cloth + lacquer polish
For silver plate…
Silver cloth + silver polish
For a beautiful shine, buff the instrument with
a silicone cloth.
■Once a Week Maintenance
●Rotor Maintenance
1. Remove the cap on the rotor valve and ap-
ply a little rotor spindle oil to the rotor bear-
ings.
* After applying the oil, remove the excess
oil. After applying oil, replace the cap and
move the lever a few times to distribute the
oil evenly.
hornom003-074080711.pm 08.9.22, 1:54 PMPage 25 AdobePageMaker6.5J/PPC

26
Maintenance
2. Apply a little rotor spindle oil to the rotor
spindle and receiver.
3. Apply a little lever oil to each linkage of the
lever assembly.
* Remove excess oil and use a gauze cloth to
clean the smaller parts.
■Once or Twice a Month Main-
tenance
●Valve Slide Maintenance
1. Depress the valve levers and remove the
valve slides.
2. Wrap a cleaning rod with a gauze cloth leav-
ing no bare metal exposed, and remove dirt
from the valve slides and the insides of the
outer pipes.
3. Use the gauze to remove dirt from the sur-
face of the valve slide, then apply a little
slide grease.
4. Slide the valve slide in and out a few times
to distribute the grease evenly. Then wipe
off any extra grease that comes off the slide.
hornom003-074080711.pm 08.9.22, 1:54 PMPage 26 AdobePageMaker6.5J/PPC

27
Maintenance
■Twice Yearly Maintenance
●Cleaning the Instrument
1. Prepare a brass soap water solution using
between 10 to 15 parts warm water (78°F to
88°F) and 1 part brass soap. Before putting
the instrument into the solution, remove the
valve slides.
2. Apply some soap water solution to the brush
on the end of flexible cleaner and use the
cleaner to clean the inside of the instrument’s
tubing.
3. After cleaning the instrument, use clean
water to thoroughly rinse out the dirt and
soap.
4. After completely removing all moisture with
a gauze, apply oil and grease.
Take Care When Cleaning Inside of the In-
strument
Never dismantle the rotors. Also, when rinsing
the tubing with water, run water through the
main tuning slides in the opposite direction of
the airflow. If water is run through the instru-
ment from the mouthpiece, dirt can become
clogged in the valves causing the valves to be-
come sluggish.
5. Apply some soap water solution to a mouth-
piece brush and insert it into the throat to
clean the mouthpiece, then thoroughly rinse
it out with clean water.
hornom003-074080711.pm 08.9.22, 1:54 PMPage 27 AdobePageMaker6.5J/PPC

28
Tying the Rotor Strings
●Wind the string as shown in the illustration below, and tighten the string
stopper screw.
Wind the string around the screw in the same direction that the screw tightens. After winding, use
the String Stopper Screw B to adjust the lever’s height.
Rotor Stem Screw
String Stopper
Screw B
String Stopper
Screw A
Lever Linkage Lowers the lever
Raises the lever The YHR-567/567D is used in this illustration.
■Switching the 4th Lever Function
●F/BbDouble Horn
The Yamaha double horn is designed so that it normally plays in the key of F (open F) when the 4th
lever is not depressed, and in the key of Bbwhen the 4th lever is depressed. However, by re-configur-
ing the linkage as shown in the illustration below, this function can be reversed so that the horn plays
in Bb(open Bb) when the lever is not depressed, and in the key of F when the lever is depressed.
To use this setup, move the string and the string seat, then place the string over the string seat.
String Stopper
Screw B
Rotor Stem Screw
Lever Linkage
String Stopper
Screw A
Open F Open Bb
The YHR-567/567D is used in the illustration.
hornom003-074080711.pm 08.9.22, 1:54 PMPage 28 AdobePageMaker6.5J/PPC

29
Other Adjustments
You can change the stroke from long to short by changing the position of the bearing stopper
screw on the YHR-567GDB. (Open F is shown in the illustration.)
The 4th lever on the YHR-667V/VS, YHR-668D/ND, YHR-567/567GDB can be adjusted to better
fit the players hand size and position.
Use a screw driver and adjust the lever length as shown in the illustration below.
Bearing stopper
screw
Install here for
Open Bb.
* When the bearing stopper screw is installed near the rotating center, the stroke will become short. When
the screw is installed far from the rotating center, the stroke will become long.
hornom003-074080711.pm 08.9.22, 1:54 PMPage 29 AdobePageMaker6.5J/PPC

30
Options
●EbCrook (optional)
This optional main tuning slide is designed for the YHR-314 and transforms the single F horn into
an Ebhorn so that you can play Ebparts without transposing.
The crook is designed so that the horn fits in the case when it is attached.
Main Tuning Slide
EbCrook
When using the Ebcrook, the 1st through 3rd valve
tuning slides should be pulled out a little.
hornom003-074080711.pm 08.9.22, 1:54 PMPage 30 AdobePageMaker6.5J/PPC

31
Options
●F Natural Slide (optional)
Attached to the YHR-322’s 4th valve slide the F natural slide offers the sound of an open F horn.
It enhances clarity in the mid-low range such as C (actual F) or G (actual C) and stable intonation.
The F Natural Slide is designed so that the horn fits in the case when attached.
F Natural Slide
hornom003-074080711.pm 08.9.22, 1:54 PMPage 31 AdobePageMaker6.5J/PPC

32
Tone is not clear and pitch is poor.
•
Dirt has accumulated inside the tubing.
➞Use the procedure described in the
“Valve Slide Maintenance” section and
wash out the insides of the tubing.
• The water key cork is cracked causing
air to leak.
➞Replace the water key cork with a new
one.
• The mouthpiece is loose and rattles,
and air is leaking from around the
mouthpiece.
• There is a large dent in the tubing,
and air is leaking from the ferrules
where the tubing connects.
• There is a foreign object in the tubing.
• Holes in the rotors are not aligned
with holes in the valve casing
branches.
➞Contact the dealer from whom you
purchased the instrument.
The rotors are sluggish.
• The string is loose.
➞Use a screwdriver and tighten the string.
• Dirt has accumulated between the
valve casing and rotor.
• The valve casing is deformed.
• The rotary valve was disassembled,
then reassembled.
➞Contact the dealer from whom you
purchased the instrument.
The valve slide is stuck and can not
be removed. The slide is sluggish.
• Dirt or dust has accumulated between
the outer and inner slides and the
valve slide is damaged.
➞Remove dirt from the slides then apply
some slide grease.
• Dropping or hitting the slide has
created a dent, or the slide was bent
while cleaning.
➞Contact the dealer from whom you
purchased the instrument.
The screw is too tight and can not
be loosened.
• The screw is corroded.
• Hitting the screw has damaged it.
➞Contact the dealer from whom you
purchased the instrument.
The mouthpiece can not be
removed.
• The instrument was dropped or hit
with the mouthpiece attached. Or, the
mouthpiece was inserted with too
much force.
• The instrument was left for a long
period of time with the mouthpiece
inserted in the instrument.
➞Contact the dealer from whom you
purchased the instrument.
The instrument makes an abnor-
mal sound when played.
• Solder on the instrument has come
loose.
• There is a foreign object in the tubing.
➞Contact the dealer from whom you
purchased the instrument.
Troubleshooting
hornom003-074080711.pm 08.9.22, 1:54 PMPage 32 AdobePageMaker6.5J/PPC

120
3
2
1
4
3
2
1
4
3
2
1
A
B
C
1
2
フィンガリングチャート/Fingering Chart/Grifftabelle/
3
inF
1
2
34
F シングル
F Single Horn
F-Einfachhorn
Cor en Fa
Trompa sencilla de F
F 调单一调性法国圆号
Одинарная валторна
в строе F
F 싱글 호른
B
b
シングル
B
b
Single Horn
B-Einfachhorn
Cor en Si
b
Trompa sencilla de B
b
降 B 调单一调性法国圆号
Одинарная валторна в
строе B
b
B
b
싱글 호른
A
B
horn_om_117-122-080826.indd 120 08.9.11 3:03:13 PM

121
Tablature/Tabla de digitaciones/ 指法表 /Аппликатура/운지법
フルダブルホルンの第 4 レバーは、F 管と B
b
管の切り替えに使
用します。工場出荷時は、第 4 レバーを押すと、F 管から B
b
管
に切り替わるようにセットされています。
The 4th lever on full double horns is used to switch between the F and B
b
sides of the horn. When shipped from the factory, this valve is set so that the
horn changes from the F side to the B
b
side when the 4th
lever is pressed.
Der vierte Hebel von echten Doppelhörnern dient zum Umschalten
zwischen der F- und B-Seite des Horns. Bei der Auslieferung des
Instruments ist dieses Ventil so eingerichtet, dass das Horn beim
Betätigen des Hebels von der F-Seite zur B-Seite wechselt.
La 4ème palette des cors doubles sert à faire passer l’instru-
ment de Fa en Si
b
. Par défaut, elle est confi gurée de telle sorte
que le cor joue en Fa lorsqu’elle n’est pas enfoncée et qu’il joue
en SI
b
lorsqu’elle est enfoncée.
La cuarta espátula de las trompas dobles completas se emplea
para cambiar entre los lados de F y B
b
de la trompa. Cuando
la trompa sale de fábrica, este cilindro está ajustado para que
la trompa cambie del lado de F al de B
b
cuando se presiona la
cuarta espátula.
双管法国圆号的第四连杆用于 F 调与降 B 调之间的转换。
出厂设置为 : 按下第四连杆时 , 圆号从原来的 F 调改发降 B 调。
4-я клавиша на двойных валторнах используется для
переключения между строями F и Bb. При поставке с завода
клапан настроен таким образом, что переключение
между F и
Bb осуществляется нажатием 4-й клавиши.
풀 더블 호른의 4th 레버는 호른의 F 및 B ♭ 사이드 간의
전환을 위해 사용됩니다 . 공장 출고 시 , 본 밸브는 4th 레
버를 누를경우 F 사이드에서 B ♭ 사이드로 바뀌도록 설정된
상태로 출고됩니다 .
3
2
1
4
3
2
1
4
3
2
1
A
B
C
:
押さえる /
Close/Geschlossen/Fermé/Cerrado/
按下
/
Закрыт
/
닫기
:
放す /
Open/Offen/Ouvert/Abierto/
放开
/
Открыт
/
열기
1
2
34
F/B
b
フルダブル
F/B
b
Double Horn
F/B-Doppelhorn
Cor double Fa/Si
b
Trompa doble de F/B
b
F/ 降 B 调双管法国圆号
Двойная валторна в
строе F/Bb
F/B
b
더블 호른
フィンガリングチャート/Fingering Chart/Grifftabelle/
C
horn_om_117-122-080826.indd 121 08.9.11 3:03:16 PM

122
3
2
1
4
3
2
1
4
3
2
1
A
B
C
フィンガリングチャート/Fingering Chart/Grifftabelle/Tablature/
3
2
1
4
3
2
1
4
3
2
1
A
A
B
C
:
押さえる /
Close/Geschlossen/Fermé/Cerrado/
按下
/
Закрыт
/
닫기
:
放す /
Open/Offen/Ouvert/Abierto/
放开
/
Открыт
/
열기
horn_om_117-122-080826.indd 122 08.9.11 3:03:18 PM

123
Tabla de digitaciones/ 指法表 /Аппликатура/운지법
A
慣例上古典派、ロマン派等の曲で、ヘ音記号はこれより 1 オクターブ下げて書かれるもの
もあります。同一の音で 2 種類ある運指は、一般的に左側に書かれている運指を用います。
右側は替え指です。
Some bass clef parts in Classical and Romantic, etc., music are customarily written
an octave lower. The fingering on the left should be played for notes that have double
fingerings. The fingering on the right is an alternate fingering.
Manche Bassschlüssel-Partituren sind in der Romantischen oder Klassischen Musik oft eine
Oktave tiefer geschrieben. Noten mit Doppelgriff sollten mit dem linken Griff gespielt werden.
Beim rechts angegebenen Griff handelt es sich um einen alternativen Griff.
Certaines parties de basse des musiques classiques, romantiques, etc. sont écrites une
octave plus bas. Les doigtés de gauche doivent être utilisés pour les notes à double doigté.
Les doigtés de droite représentent un autre doigté possible.
Algunas partes de a clave de bajos de música clásica y romántica, etc., están escritas
especialmente una octava menos. El digitado de la izquierda debe tocarse para notas que
tienen doble digitado. El digitado de la derecha es un digitado alternativo.
古典和浪漫主义音乐的一些低音谱号在习惯上会降低一个八度。应当注意左手指法是双指法 ,
而右手指法为交替指法。
Некоторые партии в басовом ключе в жанрах классицизма и романтизма и т.д.
традиционно пишутся на октаву ниже. Аппликатура слева используется для нот с двойной
аппликатурой. С правой стороны - альтернативное положение пальцев.
고전주의 , 낭만주의 계열 음악에서는 일반적으로 낮은음자리표 부분을 1 옥타브 낮게 표
시합니다 . 왼쪽의 운지법은 양손 운지법 악보를 위해 사용해야 합니다 . 오른쪽의 운지법
은 대체 운지법입니다 .
A
ダブルホルンの場合、通常は Bbに切り替えて演奏する音域です。
For double horns, this range is usually played on the Bb side of the horn.
Bei Doppelhörnern wird dieser Bereich gewöhnlich auf der B-Seite des Horns gespielt.
Sur les cors doubles, ce registre est en général joué avec le cor réglé en Si b.
Para las trompas dobles, este margen se toca normalmente en el lado de Bb de la trompa.
通常使用双管圆号的降 B 调演奏此音域。
Для двойных валторн эта последовательность обычно играется в строе Bb.
더블 호른의 경우 이 음역은 보통 B♭ 음역에서 연주합니다 .
A
horn_om_cover_080709.indd 123 08.7.9 4:37:26 PM
This manual suits for next models
1
Table of contents
Other Yamaha Horn manuals
Popular Horn manuals by other brands

Vixen Horns
Vixen Horns VXO8325/3311C installation guide

UTC Fire and Security
UTC Fire and Security Ziton ZP755HA-2 Installation sheet

Vixen Horns
Vixen Horns VXO8325/4124B installation guide

Vixen Horns
Vixen Horns VXO8315/3311B installation guide

Valcom
Valcom IP Solutions VIP-483 user guide

Vixen Horns
Vixen Horns VXH1164BX2 installation guide