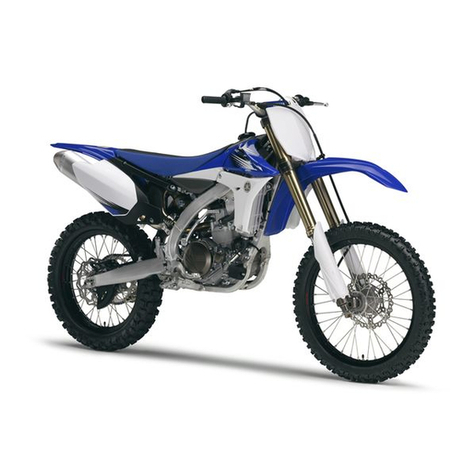
Yamaha YZ125 2009 Application guide

PRINTED IN JAPAN
2008.4—0.4 ×1!
(E)
YAMAHA MOTOR CO., LTD.
2500 SHINGAI IWATA SHIZUOKA JAPAN
PRINTED ON RECYCLED PAPER
PROTECT YOUR INVESTMENT
Use Genuine YAMAHA Parts And Accessories
YZ125Y 2009
OWNER’S SERVICE MANUAL
YZ125Y
1C3-28199-14
LIT-11626-22-54
2009
qRead this manual carefully before operating this vehicle.
1C3-9-14cover 08.4.25 13:43 ページ1

Q
Read this manual carefully before operating this vehicle. This manual should stay with this vehicle if it is sold.
1C3-9-14cover 08.4.25 13:43 ページ2

YZ125Y
OWNER'S SERVICE MANUAL
©2008 by Yamaha Motor Corporation, U.S.A.
1st Edition, April 2008
All rights reserved.
Any reprinting or unauthorized use
without the written permission of
Yamaha Motor Corporation U.S.A.
is expressly prohibited.
Printed in Japan
P/N. LIT-11626-22-54

INTRODUCTION
Congratulations on your purchase of a Yamaha
YZ series. This model is the culmination of
Yamaha's vast experience in the production of
pacesetting racing machines. It represents the
highest grade of craftsmanship and reliability
that have made Yamaha a leader.
This manual explains operation, inspection, ba-
sic maintenance and tuning of your machine. If
you have any questions about this manual or
your machine, please contact your Yamaha
dealer.
Yamaha continually seeks advancements in
product design and quality. Therefore, while
this manual contains the most current product
information available at the time of printing,
there may be minor discrepancies between
your machine and this manual. If you have any
questions concerning this manual, please con-
sult your Yamaha dealer.
PLEASE READ THIS MANUAL CAREFULLY
AND COMPLETELY BEFORE OPERATING
THIS MACHINE. DO NOT ATTEMPT TO OP-
ERATE THIS MACHINE UNTIL YOU HAVE
ATTAINED A SATISFACTORY KNOWL-
EDGE OF ITS CONTROLS AND OPERATING
FEATURES AND UNTIL YOU HAVE BEEN
TRAINED IN SAFE AND PROPER RIDING
TECHNIQUES. REGULAR INSPECTIONS
AND CAREFUL MAINTENANCE, ALONG
WITH GOOD RIDING SKILLS, WILL ENSURE
THAT YOU SAFETY ENJOY THE CAPABILI-
TIES AND THE RELIABILITY OF THIS MA-
CHINE.
IMPORTANT MANUAL
INFORMATION
Particularly important information is distin-
guished in this manual by the following nota-
tions.
This is the safety alert symbol. It is used to
alert you to potential personal injury haz-
ards. Obey all safety messages that follow
this symbol to avoid possible injury or
death.
A WARNING indicates a hazardous situa-
tion which, if not avoided, could result in
death or serious injury.
A NOTICE indicates special precautions
that must be taken to avoid damage to the
vehicle or other property.
A TIP provides key information to make proce-
dures easier or clearer.

SAFETY INFORMATION
THIS MACHINE IS DESIGNED STRICTLY
FOR COMPETITION USE, ONLY ON A
CLOSED COURSE. It is illegal for this machine
to be operated on any public street, road, or
highway. Off-road use on public lands may also
be illegal. Please check local regulations be-
fore riding.
• THIS MACHINE IS TO BE OPERATED BY
AN EXPERIENCED RIDER ONLY.
Do not attempt to operate this machine at
maximum power until you are totally familiar
with its characteristics.
• THIS MACHINE IS DESIGNED TO BE RID-
DEN BY THE OPERATOR ONLY.
Do not carry passengers on this machine.
• ALWAYS WEAR PROTECTIVE APPAREL.
When operating this machine, always wear an
approved helmet with goggles or a face
shield. Also wear heavy boots, gloves, and
protective clothing. Always wear proper fitting
clothing that will not be caught in any of the
moving parts or controls of the machine.
• ALWAYS MAINTAIN YOUR MACHINE IN
PROPER WORKING ORDER.
For safety and reliability, the machine must be
properly maintained. Always perform the pre-
operation checks indicated in this manual.
Correcting a mechanical problem before you
ride may prevent an accident.
• GASOLINE IS HIGHLY FLAMMABLE.
Always turn off the engine while refueling.
Take care to not spill any gasoline on the en-
gine or exhaust system. Never refuel in the vi-
cinity of an open flame, or while smoking.
• GASOLINE CAN CAUSE INJURY.
If you should swallow some gasoline, inhale
excess gasoline vapors, or allow any gasoline
to get into your eyes, contact a doctor imme-
diately. If any gasoline spills onto your skin or
clothing, immediately wash skin areas with
soap and water, and change your clothes.
• ONLY OPERATE THE MACHINE IN AN
AREA WITH ADEQUATE VENTILATION.
Never start the engine or let it run for any
length of time in an enclosed area. Exhaust
fumes are poisonous. These fumes contain
carbon monoxide, which by itself is odorless
and colorless. Carbon monoxide is a danger-
ous gas which can cause unconsciousness or
can be lethal.
• PARK THE MACHINE CAREFULLY; TURN
OFF THE ENGINE.
Always turn off the engine if you are going to
leave the machine. Do not park the machine
on a slope or soft ground as it may fall over.
• THE ENGINE, EXHAUST PIPE, MUFFLER,
AND OIL TANK WILL BE VERY HOT AFTER
THE ENGINE HAS BEEN RUN.
Be careful not to touch them or to allow any
clothing item to contact them during inspec-
tion or repair.
• PROPERLY SECURE THE MACHINE BE-
FORE TRANSPORTING IT.
When transporting the machine in another ve-
hicle, always be sure it is properly secured
and in an upright position and that the fuel
cock is in the "OFF" position. Otherwise, fuel
may leak out of the carburetor or fuel tank.

YAMAHA MOTOR CORPORATION, U.S.A. YZ MOTORCYCLE

LIMITED WARRANTY

F.I.M. MACHINE WEIGHTS
Weights of machines without fuel
The minimum weights for motocross machines
are:
for the class 125 cc: minimum 88 kg (194 lb)
for the class 250 cc: minimum 98 kg (216 lb)
for the class 500 cc: minimum 102 kg (225 lb)
In modifying your machine (e.g., for weight re-
duction), take note of the above limits of weight.

HOW TO USE THIS MANUAL
FINDING THE REQUIRED PAGE
1. This manual consists of seven chapters; "General Information", "Specifications", "Regular inspec-
tion and adjustments", "Engine", "Chassis", "Electrical" and "Tuning"
2. The table of contents is at the beginning of the manual. Look over the general layout of the book
before finding then required chapter and item.
Bend the book at its edge, as shown, to find the required fore edge symbol mark and go to a page
for required item and description.
MANUAL FORMAT
All of the procedures in this manual are organized in a sequential, step-by-step format. The informa-
tion has been complied to provide the mechanic with an easy to read, handy reference that contains
comprehensive explanations of all disassembly, repair, assembly, and inspection operations.
In this revised format, the condition of a faulty component will precede an arrow symbol and the
course of action required will follow the symbol, e.g.,
• Bearings
Pitting/damage →Replace.

HOW TO READ DESCRIPTIONS
To help identify parts and clarify procedure steps, there are exploded diagrams at the start of each
removal and disassembly section.
1. An easy-to-see exploded diagram "1" is provided for removal and disassembly jobs.
2. Numbers "2" are given in the order of the jobs in the exploded diagram. A number that is enclosed
by a circle indicates a disassembly step.
3. An explanation of jobs and notes is presented in an easy-to-read way by the use of symbol marks
"3". The meanings of the symbol marks are given on the next page.
4. A job instruction chart "4" accompanies the exploded diagram, providing the order of jobs, names
of parts, notes in jobs, etc.
5. For jobs requiring more information, the step-by-step format supplements "5" are given in addition
to the exploded diagram and job instruction chart.

ILLUSTRATED SYMBOLS (Refer
to the illustration)
Illustrated symbols "1" to "7" are used to identi-
fy the specifications appearing in the text.
1. With engine mounted
2. Filling fluid
3. Lubricant
4. Special tool
5. Tightening
6. Specified value, Service limit
7. Resistance (Ω), Voltage (V), Electric cur-
rent (A)
Illustrated symbols "8" to "14" in the exploded
diagrams indicate grade of lubricant and loca-
tion of lubrication point.
8. Apply engine mixing oil
9. Apply transmission oil
10. Apply molybdenum disulfide oil
11. Apply brake fluid
12. Apply lightweight lithium-soap base grease
13. Apply molybdenum disulfide grease
14. Apply silicone grease
Illustrated symbols "15" to "16" in the exploded
diagrams indicate where to apply a locking
agent and where to install new parts.
15. Apply locking agent (LOCTITE®)
16. Use new one

TABLE OF CONTENTS
GENERAL INFORMATION 1
SPECIFICATIONS 2
REGULAR INSPECTION AND
ADJUSTMENTS 3
ENGINE 4
CHASSIS 5
ELECTRICAL 6
TUNING 7

CONTENTS
CHAPTER 1
GENERAL INFORMATION
LOCATION OF IMPORTANT LABELS ..... 1-1
DESCRIPTION ........................................... 1-2
MACHINE IDENTIFICATION ..................... 1-3
INCLUDED PARTS.................................... 1-4
IMPORTANT INFORMATION .................... 1-5
CHECKING OF CONNECTION ................. 1-7
SPECIAL TOOLS....................................... 1-8
CONTROL FUNCTIONS.......................... 1-11
STARTING AND BREAK-IN .................... 1-13
TORQUE-CHECK POINTS ...................... 1-15
CLEANING AND STORAGE ................... 1-16
CHAPTER 2
SPECIFICATIONS
GENERAL SPECIFICATIONS................... 2-1
MAINTENANCE SPECIFICATIONS.......... 2-3
TIGHTENING TORQUES........................... 2-9
CABLE ROUTING DIAGRAM.................. 2-15
CHAPTER 3
REGULAR INSPECTION AND
ADJUSTMENTS
MAINTENANCE INTERVALS.................... 3-1
PRE-OPERATION INSPECTION AND
MAINTENANCE ......................................... 3-5
ENGINE...................................................... 3-6
CHASSIS.................................................. 3-13
ELECTRICAL ........................................... 3-29

CHAPTER 4
ENGINE
SEAT, FUEL TANK AND SIDE COVERS . 4-2
EXHAUST PIPE AND SILENCER ............. 4-4
RADIATOR................................................. 4-6
CARBURETOR AND REED VALVE ......... 4-9
CYLINDER HEAD, CYLINDER AND
PISTON .................................................... 4-17
CLUTCH................................................... 4-28
KICK SHAFT AND SHIFT SHAFT........... 4-34
YPVS GOVERNOR .................................. 4-42
WATER PUMP ......................................... 4-45
CDI MAGNETO ........................................ 4-48
ENGINE REMOVAL ................................. 4-51
CRANKCASE AND CRANKSHAFT........ 4-55
TRANSMISSION, SHIFT CAM AND
SHIFT FORK ............................................ 4-62
CHAPTER 5
CHASSIS
FRONT WHEEL AND REAR WHEEL ....... 5-2
FRONT BRAKE AND REAR BRAKE........ 5-9
FRONT FORK .......................................... 5-23
HANDLEBAR........................................... 5-36
STEERING ............................................... 5-43
SWINGARM ............................................. 5-48
REAR SHOCK ABSORBER.................... 5-55

CHAPTER 6
ELECTRICAL
ELECTRICAL COMPONENTS AND
WIRING DIAGRAM .................................... 6-2
IGNITION SYSTEM.................................... 6-4
CHAPTER 7
TUNING
ENGINE...................................................... 7-1
CHASSIS.................................................. 7-10

1-1
LOCATION OF IMPORTANT LABELS
GENERAL INFORMATION
LOCATION OF IMPORTANT LABELS
Please read the following important labels carefully before operating this vehicle.
1

1-2
DESCRIPTION
DESCRIPTION
• The machine you have purchased may differ slightly from those shown in the following.
• Designs and specifications are subject to change without notice.
1. Clutch lever
2. Engine stop switch
3. Front brake lever
4. Throttle grip
5. Radiator cap
6. Fuel tank cap
7. Kickstarter crank
8. Fuel tank
9. Radiator
10. Coolant drain bolt
11. Check bolt (Transmission oil level)
12. Rear brake pedal
13. Valve joint
14. Fuel cock
15. Air filter
16. Drive chain
17. Shift pedal
18. Starter knob
19. Front fork

1-3
MACHINE IDENTIFICATION
There are two significant reasons for knowing
the serial number of your machine:
1. When ordering parts, you can give the num-
ber to your Yamaha dealer for positive iden-
tification of the model you own.
2. If your machine is stolen, the authorities will
need the number to search for and identify
your machine.
VEHICLE IDENTIFICATION NUMBER
The vehicle identification number "1" is
stamped on the right of the steering head pipe.
ENGINE SERIAL NUMBER
The engine serial number "1" is stamped into
the elevated part of the right-side of the engine.
MODEL LABEL
The model label "1" is affixed to the frame un-
der the rider's seat. This information will be
needed to order spare parts.

1-4
INCLUDED PARTS
INCLUDED PARTS
DETACHABLE SIDESTAND
This sidestand "1" is used to support only the
machine when standing or transporting it.
• Never apply additional force to the side-
stand.
• Remove this sidestand before starting out.
VALVE JOINT
This valve joint "1" prevents fuel from flowing
out and is installed to the fuel tank breather
hose.
In this installation, make sure the arrow fac-
es the fuel tank and also downward.
COLLAR (tool for YPVS)
This collar "1" is used to remove and install the
push rod of the engine.
NIPPLE WRENCH
This nipple wrench "1" is used to tighten the
spoke.

1-5
IMPORTANT INFORMATION
PREPARATION FOR REMOVAL AND
DISASSEMBLY
1. Remove all dirt, mud, dust, and foreign ma-
terial before removal and disassembly.
• When washing the machine with high pres-
sured water, cover the parts follows.
Silencer exhaust port
Side cover air intake port
Crankcase cover hole at the bottom
Water pump housing hole at the bottom
End of each hose
2. Use proper tools and cleaning equipment.
Refer to "SPECIAL TOOLS" section.
3. When disassembling the machine, keep
mated parts together. They include gears,
cylinders, pistons, and other mated parts
that have been "mated" through normal
wear. Mated parts must be reused as an as-
sembly or replaced.
4. During the machine disassembly, clean all
parts and place them in trays in the order of
disassembly. This will speed up assembly
time and help assure that all parts are cor-
rectly reinstalled.
5. Keep away from fire.
ALL REPLACEMENT PARTS
1. We recommend to use Yamaha genuine
parts for all replacements. Use oil and/or
grease recommended by Yamaha for as-
sembly and adjustment.
GASKETS, OIL SEALS AND O-RINGS
1. All gaskets, oil seals, and O-rings should be
replaced when an engine is overhauled. All
gasket surfaces, oil seal lips, and O-rings
must be cleaned.
2. Properly oil all mating parts and bearings
during reassembly. Apply grease to the oil
seal lips.
LOCK WASHERS/PLATES AND COTTER
PINS
1. All lock washers/plates "1" and cotter pins
must be replaced when they are removed.
Lock tab(s) should be bent along the bolt or
nut flat(s) after the bolt or nut has been prop-
erly tightened.

1-6
IMPORTANT INFORMATION
BEARINGS AND OIL SEALS
1. Install the bearing(s) "1" and oil seal(s) "2"
with their manufacturer's marks or numbers
facing outward. (In other words, the
stamped letters must be on the side ex-
posed to view.) When installing oil seal(s),
apply a light coating of lightweight lithium
base grease to the seal lip(s). Oil the bear-
ings liberally when installing.
Do not use compressed air to spin the bear-
ings dry. This causes damage to the bearing
surfaces.
CIRCLIPS
1. All circlips should be inspected carefully be-
fore reassembly. Always replace piston pin
clips after one use. Replace distorted cir-
clips. When installing a circlip "1", make sure
that the sharp-edged corner "2" is positioned
opposite to the thrust "3" it receives. See the
sectional view.
Table of contents
Other Yamaha Motorcycle manuals

Yamaha
Yamaha TDM900 User manual

Yamaha
Yamaha Star XVS1100T User manual

Yamaha
Yamaha QT50 User manual

Yamaha
Yamaha 2009 YW125Y User manual

Yamaha
Yamaha 2010 YZF-R6 User manual

Yamaha
Yamaha TW200 User manual

Yamaha
Yamaha Star XVS13CB(C) User manual

Yamaha
Yamaha XJ6N User manual

Yamaha
Yamaha XS650D Manual

Yamaha
Yamaha PW50(A1) User manual

Yamaha
Yamaha XVS6501997 User manual

Yamaha
Yamaha midnight star XVS1300A User manual

Yamaha
Yamaha WR450F 2021 Application guide

Yamaha
Yamaha XMAX Connected 2023 User manual

Yamaha
Yamaha MT09 User manual

Yamaha
Yamaha FJR1300AT(C) User manual

Yamaha
Yamaha 1981 XS850G User manual

Yamaha
Yamaha YZ85(B) User manual

Yamaha
Yamaha XT660R User manual

Yamaha
Yamaha WR 155 User manual