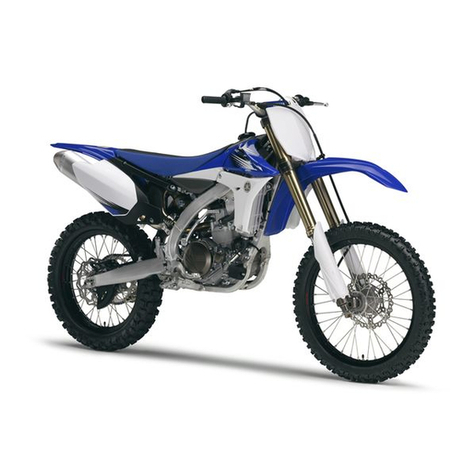
Yamaha YZ450FX 2021 Application guide

Read this manual carefully before operating this vehicle.
2021
OWNER’S SERVICE MANUAL
YZ450FX
YZ450FXM
LIT-11626-34-52 BEX-2819U-10

EAM20161Read this manual carefully
Operating, servicing and
maintaining a passenger vehicle or off-road vehicle can
expose you to chemicals including engine exhaust,
carbon monoxide, phthalates, and lead, which are
known to the State of California to cause cancer and
birth defects or other reproductive harm. To minimize
exposure, avoid breathing exhaust, do not idle the
engine except as necessary, service your vehicle in a
well-ventilated area and wear gloves or wash your
hands frequently when servicing your vehicle. For more
information go to
www.P65Warnings.ca.gov/passenger-vehicle

Read this manual carefully before operating this vehicle. This manual should stay with this vehicle
if it is sold.
FCC CAUTION
Changes or modifications not expressly approved by the party responsible for compliance could void the user’s
authority to operate the equipment.
This transmitter must not be co-located or operated in conjunction with any other antenna or transmitter.
This equipment complies with FCC radiation exposure limits set forth for an uncontrolled environment and meets
the FCC radio frequency (RF) Exposure Guidelines. This equipment has very low levels of RF energy that is
deemed to comply without maximum permissive exposure evaluation (MPE).

EAM20080
YZ450FXM
OWNER’S SERVICE MANUAL
©2021 by Yamaha Motor Corporation, U.S.A.
First edition, July 2020
All rights reserved.
Any reproduction or unauthorized use
without the written permission of
Yamaha Motor Corporation, U.S.A.
is expressly prohibited.
P/N. LIT-11626-34-52

EAM20180
IMPORTANT
Congratulations on your purchase of a Yamaha YZ series. This model is the culmination of Yamaha’s
vast experience in the production of pacesetting racing machines. It represents the highest grade of
craftsmanship and reliability that have made Yamaha a leader.
This manual explains operation, inspection, basic maintenance and tuning of your machine. If you have
any questions about this manual or your machine, please contact your Yamaha dealer.
TIP
•Yamaha continually seeks advancements in product design and quality. Therefore, while this manual
contains the most current product information available at the time of printing, there may be minor dis-
crepancies between your machine and this manual. If you have any questions concerning this man-
ual, please consult your Yamaha dealer.
•This manual is intended for those who have basic knowledge and skill concerning the servicing of
Yamaha motorcycles (e.g., Yamaha dealers, service engineers, etc.). Those who have little knowl-
edge and skill concerning servicing are requested not to undertake inspection, adjustment, disassem-
bly, or reassembly only by reference to this manual. It may lead to servicing trouble and mechanical
damage.
WARNING
EWA20270
PLEASE READ THIS MANUAL CAREFULLY AND COMPLETELY BEFORE OPERATING THIS
MACHINE. DO NOT ATTEMPT TO OPERATE THIS MACHINE UNTIL YOU HAVE ATTAINED A
SATISFACTORY KNOWLEDGE OF ITS CONTROLS AND OPERATING FEATURES AND UNTIL
YOU HAVE BEEN TRAINED IN SAFE AND PROPER RIDING TECHNIQUES. REGULAR INSPEC-
TIONS AND CAREFUL MAINTENANCE, ALONG WITH GOOD RIDING SKILLS, WILL ENSURE
THAT YOU SAFETY ENJOY THE CAPABILITIES AND THE RELIABILITY OF THIS MACHINE.
EAM30001
IMPORTANT MANUAL INFORMATION
Particularly important information is distinguished in this manual by the following notations.
This is the safety alert symbol. It is used to alert you to potential per-
sonal injury hazards. Obey all safety messages that follow this symbol
to avoid possible injury or death.
A WARNING indicates a hazardous situation which, if not avoided, could
result in death or serious injury.
A NOTICE indicates special precautions that must be taken to avoid
damage to the vehicle or other property.
A TIP provides key information to make procedures easier or clearer.
WARNING
NOTICE
TIP

EAM20162
YAMAHA MOTOR CORPORATION, U.S.A. YZ MOTORCYCLE LIMITED
WARRANTY

EAM20082
HOW TO USE THIS MANUAL
In this manual, descriptions of installation, removal, disassembly, assembly, check, and adjustment
procedures are laid out with the individual steps in sequential order.
•The manual is divided into chapters and each chapter is divided into sections. The current section title
“1” is shown at the top of each page.
•Sub-section titles “2” appear in smaller print than the section title.
•To help identify parts and clarify procedure steps, there are exploded diagrams “3” at the start of each
removal and disassembly section.
•Numbers “4” are given in the order of the jobs in the exploded diagram. A number indicates a removal
or a disassembly step.
•Symbols “5” indicate parts to be lubricated or replaced.
Refer to “SYMBOLS”.
•A job instruction chart “6” accompanies the exploded diagram, providing the order of jobs, the names
of parts, the notes in jobs, etc. This step explains removal and disassembly procedure only. For in-
stallation and assembly procedure, reverse the steps.
•Jobs “7” requiring more information (such as special tools and technical data) are described sequen-
tially.
1
7
3
5
4
6
2
G088877

EAM20083
SYMBOLS
The following symbols are used in this manual for easier understanding.
TIP
The following symbols are not relevant to every vehicle.
SYMBOL DEFINITION SYMBOL DEFINITION
Serviceable with engine mounted Gear oil
Filling fluid Molybdenum disulfide oil
Lubricant Brake fluid
Special tool Wheel bearing grease
Tightening torque Lithium-soap-based grease
Wear limit, clearance Molybdenum disulfide grease
Engine speed Silicone grease
Electrical data Apply locking agent (LOCTITE®).
Engine oil Replace the part with a new one.
G
M
BF
B
T
R
.
.
LS
M
S
LT
E
New


1
2
3
4
5
6
7
8
9
10
GENERAL INFORMATION
SAFETY INFORMATION ..................................................................................1-1
FOR SAFETY, BE SURE TO OBEY THE FOLLOWING:...........................1-1
LOCATION OF IMPORTANT LABELS.............................................................1-4
DESCRIPTION..................................................................................................1-5
IDENTIFICATION ..............................................................................................1-6
VEHICLE IDENTIFICATION NUMBER ......................................................1-6
ENGINE SERIAL NUMBER........................................................................1-6
INCLUDED PARTS ...........................................................................................1-7
NIPPLE WRENCH......................................................................................1-7
HANDLEBAR PROTECTOR ......................................................................1-7
FUEL HOSE JOINT COVER ......................................................................1-7
POWER TUNER.........................................................................................1-7
IMPORTANT INFORMATION ...........................................................................1-9
PREPARATION FOR REMOVAL AND DISASSEMBLY............................1-9
REPLACEMENT PARTS............................................................................1-9
GASKETS, OIL SEALS AND O-RINGS .....................................................1-9
LOCK WASHERS/PLATES AND COTTER PINS ....................................1-10
BEARINGS AND OIL SEALS ...................................................................1-10
CIRCLIPS .................................................................................................1-10
BASIC SERVICE INFORMATION...................................................................1-11
ELECTRICAL SYSTEM............................................................................1-11
SPECIAL TOOLS............................................................................................1-15
INSTRUMENT AND CONTROL FUNCTIONS ...............................................1-21
WARNING LIGHTS ..................................................................................1-21
ENGINE STOP SWITCH ..........................................................................1-21
START SWITCH.......................................................................................1-21
MODE SWITCH........................................................................................1-21
SHIFT PEDAL...........................................................................................1-22
FRONT BRAKE LEVER ...........................................................................1-22
REAR BRAKE PEDAL..............................................................................1-22
SIDESTAND .............................................................................................1-22
STARTER KNOB......................................................................................1-22
FUEL TANK CAP......................................................................................1-23
STARTING AND BREAK-IN ...........................................................................1-24
FUEL.........................................................................................................1-24
STARTING A COLD ENGINE ..................................................................1-24

STARTING A WARM ENGINE .................................................................1-25
BREAK-IN PROCEDURES ......................................................................1-25
ENGINE STARTING PRECAUTION ........................................................1-25
MAINTENANCE AFTER BREAK-IN ..............................................................1-26
MAJOR MAINTENANCE ..........................................................................1-26
AIR FILTER MAINTENANCE ...................................................................1-26
TORQUE-CHECK POINTS.............................................................................1-27
MOTORCYCLE CARE AND STORAGE.........................................................1-29
CARE........................................................................................................1-29
STORAGE ................................................................................................1-30

SAFETY INFORMATION
1-1
EAM20168
SAFETY INFORMATION
Be sure to read this manual carefully and com-
pletely in order to operate the machine safely
and correctly prior to riding the Yamaha ma-
chine, and take care to maintain it properly and
operate it safely.
EAM30401
FOR SAFETY, BE SURE TO OBEY THE
FOLLOWING:
Be a Responsible Owner
As the vehicle’s owner, you are responsible for
the safe and proper operation of your motorcy-
cle.
Motorcycles are single-track vehicles.
Their safe use and operation are dependent
upon the use of proper riding techniques as well
as the expertise of the operator. Every operator
should know the following requirements before
riding this motorcycle.
He or she should:
1. Obtain thorough instructions from a compe-
tent source on all aspects of motorcycle oper-
ation.
2. Observe the warnings and maintenance re-
quirements in this manual.
3. Obtain qualified training in safe and proper
riding techniques.
4. Obtain professional technical service as indi-
cated in this manual and/or when made nec-
essary by mechanical conditions.
5. Never operate a motorcycle without proper
training or instruction. Take a training course.
Beginners should receive training from a cer-
tified instructor. Contact an authorized motor-
cycle dealer to find out about the training
courses nearest you.
Safe Riding
Perform the pre-operation checks each time you
use the vehicle to make sure it is in safe operat-
ing condition. Failure to inspect or maintain the
vehicle properly increases the possibility of an
accident or equipment damage. Refer to “PRE-
OPERATION INSPECTION AND MAINTE-
NANCE” on page 3-5 for a list of pre-operation
checks.
1. This motorcycle is designed for off-road use
only, therefore, it is illegal to operate it on
public streets, roads, or highways, even a dirt
or gravel one. Off-road use on public lands
may be illegal. Please check local regulations
before riding.
2. This motorcycle is designed to carry the oper-
ator only. No passengers.
3. The failure of motorists to detect and recog-
nize motorcycles in traffic is the predominat-
ing cause of automobile/motorcycle
accidents. Many accidents have been
caused by an automobile driver who did not
see the motorcycle. Making yourself conspic-
uous appears to be very effective in reducing
the chance of this type of accident.
Therefore:
•Wear a brightly colored jacket.
•Use extra caution when you are approaching
and passing through intersections, since in-
tersections are the most likely places for mo-
torcycle accidents to occur.
•Ride where other motorists can see you.
Avoid riding in another motorist’s blind spot.
•Never maintain a motorcycle without proper
knowledge. Contact an authorized motorcy-
cle dealer to inform you on basic motorcycle
maintenance. Certain maintenance can only
be carried out by certified staff.
4. Many accidents involve inexperienced opera-
tors.
•Make sure that you are qualified and that you
only lend your motorcycle to other qualified
operators.
•Know your skills and limits. Staying within
your limits may help you to avoid an accident.
•We recommend that you practice riding your
motorcycle until you have become thoroughly
familiar with the motorcycle and all of its con-
trols.
5. Many accidents have been caused by error of
the motorcycle operator. A typical error made
by the operator is veering wide on a turn due
to excessive speed or under cornering (insuf-
ficient lean angle for the speed). Never travel
faster than warranted by conditions.
6. Ride cautiously in unfamiliar areas. You may
encounter hidden obstacles that could cause
an accident.
7. The posture of the operator is important for
proper control. The operator should keep
both hands on the handlebar and both feet on
the operator footrests during operation to
maintain control of the motorcycle.
8. Never ride under the influence of alcohol or
other drugs.
9. Be sure the transmission is in neutral before
starting the engine.
Protective Apparel
The majority of fatalities from motorcycle acci-

SAFETY INFORMATION
1-2
dents are the result of head injuries. The use of
a safety helmet is the single most critical factor
in the prevention or reduction of head injuries.
1. Always wear an approved helmet.
2. Wear a face shield or goggles. Wind in your
unprotected eyes could contribute to an im-
pairment of vision that could delay seeing a
hazard.
3. The use of a jacket, heavy boots, trousers,
gloves, etc., is effective in preventing or re-
ducing abrasions or lacerations.
4. Never wear loose-fitting clothes, otherwise
they could catch on the control levers, foot-
rests, or wheels and cause injury or an acci-
dent.
5. Always wear protective clothing that covers
your legs, ankles, and feet. The engine or ex-
haust system become very hot during or after
operation and can cause burns.
Avoid Carbon Monoxide Poisoning
All engine exhaust contains carbon monoxide, a
deadly gas. Breathing carbon monoxide can
cause headaches, dizziness, drowsiness, nau-
sea, confusion, and eventually death.
Carbon Monoxide is a colorless, odorless, taste-
less gas which may be present even if you do
not see or smell any engine exhaust. Deadly lev-
els of carbon monoxide can collect rapidly and
you can quickly be overcome and unable to save
yourself. Also, deadly levels of carbon monoxide
can linger for hours or days in enclosed or poorly
ventilated areas. If you experience any symp-
toms of carbon monoxide poisoning, leave the
area immediately, get fresh air, and SEEK MED-
ICAL TREATMENT.
1. Do not run engine indoors. Even if you try to
ventilate engine exhaust with fans or open
windows and doors, carbon monoxide can
rapidly reach dangerous levels.
2. Do not run engine in poorly ventilated or par-
tially enclosed areas such as barns, garages,
or carports.
3. Do not run engine outdoors where engine ex-
haust can be drawn into a building through
openings such as windows and doors.
Genuine Yamaha Accessories
Choosing accessories for your vehicle is an im-
portant decision. Genuine Yamaha accessories,
which are available only from a Yamaha dealer,
have been designed, tested, and approved by
Yamaha for use on your vehicle.
Many companies with no connection to Yamaha
manufacture parts and accessories or offer oth-
er modifications for Yamaha vehicles. Yamaha
is not in a position to test the products that these
aftermarket companies produce. Therefore,
Yamaha can neither endorse nor recommend
the use of accessories not sold by Yamaha or
modifications not specifically recommended by
Yamaha, even if sold and installed by a Yamaha
dealer.
Aftermarket Parts, Accessories, and Modifi-
cations
While you may find aftermarket products similar
in design and quality to genuine Yamaha acces-
sories, recognize that some aftermarket acces-
sories or modifications are not suitable because
of potential safety hazards to you or others. In-
stalling aftermarket products or having other
modifications performed to your vehicle that
change any of the vehicle’s design or operation
characteristics can put you and others at greater
risk of serious injury or death. You are responsi-
ble for injuries related to changes in the vehicle.
Keep the following guidelines in mind, as well as
those provided under “Loading” when mounting
accessories.
1. Never install accessories that would impair
the performance of your motorcycle. Careful-
ly inspect the accessory before using it to
make sure that it does not in any way reduce
ground clearance or cornering clearance, lim-
it suspension travel, steering travel or control
operation.
•Accessories fitted to the handlebar or the
front fork area can create instability due to im-
proper weight distribution. If accessories are
added to the handlebar or front fork area,
they must be as lightweight as possible and
should be kept to a minimum.
•Bulky or large accessories may seriously af-
fect the stability of the motorcycle. Wind may
attempt to lift the motorcycle, or the motorcy-
cle may become unstable in cross winds.
•Certain accessories can displace the opera-
tor from his or her normal riding position. This
improper position limits the freedom of move-
ment of the operator and may limit control
ability, therefore, such accessories are not
recommended.
2. Use caution when adding electrical accesso-
ries. If electrical accessories exceed the ca-
pacity of the motorcycle’s electrical system,
an electric failure could result, which could
cause a dangerous loss of lights or engine
power.

SAFETY INFORMATION
1-3
Aftermarket Tires and Rims
The tires and rims that came with your motorcy-
cle were designed to match the performance ca-
pabilities and to provide the best combination of
handling, braking, and comfort. Other tires, rims,
sizes, and combinations may not be appropriate.
Refer to “CHECKING THE TIRES” on page 3-33
for tire specifications and more information on
replacing your tires.
Transporting the Motorcycle
Be sure to observe following instructions before
transporting the motorcycle in another vehicle.
1. Remove all loose items from the motorcycle.
2. Check that the fuel cock (if equipped) is in the
“OFF” position and that there are no fuel
leaks.
3. Point the front wheel straight ahead on the
trailer or in the truck bed, and choke it in a rail
to prevent movement.
4. Shift the transmission in gear (for models with
a manual transmission).
5. Secure the motorcycle with tie-downs or suit-
able straps that are attached to solid parts of
the motorcycle, such as the frame or upper
front fork triple clamp (and not, for example,
to rubber-mounted handlebars or turn sig-
nals, or parts that could break). Choose the
location for the straps carefully so the straps
will not rub against painted surfaces during
transport.
6. The suspension should be compressed
somewhat by the tie-downs, if possible, so
that the motorcycle will not bounce exces-
sively during transport.

LOCATION OF IMPORTANT LABELS
1-4
EAM20085
LOCATION OF IMPORTANT LABELS
Please read the following important labels carefully before operating this vehicle.
21 3
6
4, 5
Premium unleaded
gasoline only.
3FB-2415E-02
4AA-22259-80
WARNING
This unit contains high pressure nitrogen gas.
Mishandling can cause explosion.
Read owner's manual for instructions.
Do not incinerate, puncture or open.
17D-2812P-00
For use only on a closed course
in sanctioned competition.
This motorcycle does not meet
EPA noise and emissions
standards and is not for general
off-road recreational riding.

DESCRIPTION
1-5
EAM20086
DESCRIPTION
TIP
Designs and specifications of the vehicle are subject to change without notice. Therefore, please note
that the descriptions in this manual may be different from those for the vehicle you have purchased.
1
12
1314
15
1617181920
4
57 68910
11
2, 3
1. Clutch lever
2. Engine trouble warning light “ ”
3. Fuel level warning light “ ”
4. Front brake lever
5. Throttle grip
6. Start switch
7. Radiator cap
8. Fuel tank cap
9. Mode switch
10.Engine stop switch
11.Fuel tank
12.Radiator
13.Coolant drain bolt
14.Rear brake pedal
15.Air filter
16.Drive chain
17.Shift pedal
18.Oil level check window
19.Starter knob
20.Front fork

IDENTIFICATION
1-6
EAM20087
IDENTIFICATION
There are two significant reasons for knowing
the serial number of your vehicle:
1. When ordering parts, you can give the num-
ber to your Yamaha dealer for positive identi-
fication of the model you own.
2. If your vehicle is stolen, the authorities will
need the number to search for and identify
your vehicle.
EAM30002
VEHICLE IDENTIFICATION NUMBER
The vehicle identification number “1” is stamped
into the right side of the frame.
EAM30003
ENGINE SERIAL NUMBER
The engine serial number “1” is stamped into the
elevated part of the right-side of the engine.
1
1
1
1

INCLUDED PARTS
1-7
EAM20088
INCLUDED PARTS
EAM30005
NIPPLE WRENCH
The nipple wrench “1” is used to tighten the
spoke.
EAM30006
HANDLEBAR PROTECTOR
Install the handlebar protector “1” with the mark
“a” facing forward.
EAM30007
FUEL HOSE JOINT COVER
The fuel hose joint covers “1” are used to pre-
vent mud, dust, and other foreign materials from
entering the inside when the fuel hose is discon-
nected.
EAM30443
POWER TUNER
By downloading the Power Tuner app to your
smartphone and wirelessly connecting to the
CCU wireless network, you can adjust various
vehicle settings.
WARNING
EWA20460
• Do not operate the engine in a closed area.
The exhaust gas is poisonous.
• Never let flames near the servicing area.
NOTICE
ECA26050
• This application is designed for adjusting
the settings on a standard vehicle. In case
the engine specifications (muffler, com-
pression ratio, etc.) have been changed,
the performance may not match to the actu-
al settings.
• Do not run the engine with the smartphone
carried with you. Otherwise, the smart-
phone could be damaged.
TIP
•Download the Power Tuner app from the
Google© or Apple© store.
•For details about handling the smartphone,
read the owner’s manual of the smartphone.
Before connecting to the CCU wireless net-
work (in case of initial use of the Power Tun-
er app)
1. Remove the bolts and side cover (left).
2. Remove the CCU and record the CCU serial
number.
A
a
1
A
1
1. Bolt
2. Side cover (left)
1
1
1
2

INCLUDED PARTS
1-8
3. Install the removed CCU and side cover (left).
Connecting to the CCU wireless network
NOTICE
ECA26060
The CCU (Communication Control Unit) uses
weak radio waves. The CCU may not work in
the following situations.
• The CCU is placed in a location exposed to
strong radio waves or other electromagnet-
ic noise
• There are facilities nearby that are emitting
strong radio waves (TV or radio towers,
power plants, broadcasting stations, air-
ports, etc.)
• You are carrying or using communication
equipment such as radios or mobile
phones in close proximity of the CCU
• The CCU is in contact with or covered by a
metallic object
• Other vehicles equipped with a CCU are
nearby
In such situations, move the CCU to another
location and perform the operation again.
1. Turn on the smartphone.
2. For two minutes after the start switch is
pressed or while the engine is running (the
CCU is activated), input the CCU serial num-
ber into your smartphone and establish a
wireless connection.
3. Activate the Power Tuner app.
TIP
If the CCU wireless network cannot be detected,
operate the start switch again.
1. CCU coupler
2. Holder
3. CCU (Communication Control Unit)
a. CCU serial number
123
P/N: --
S/N:
MAC:
COMMUN.CONT.UNIT ASSY.
3
a
Table of contents
Other Yamaha Motorcycle manuals

Yamaha
Yamaha Super Tenere ABS 2018 User manual

Yamaha
Yamaha MIO AL115S 2010 User manual

Yamaha
Yamaha TW125 User manual

Yamaha
Yamaha 2008 XV250X User manual

Yamaha
Yamaha NMAX 155 User manual

Yamaha
Yamaha XV250E User manual

Yamaha
Yamaha FZ8NB User manual

Yamaha
Yamaha MT-03 User manual

Yamaha
Yamaha XSR MTM690 User manual

Yamaha
Yamaha T135SE User manual

Yamaha
Yamaha WR450F 2022 User manual

Yamaha
Yamaha YZF-R1 Manual

Yamaha
Yamaha 2002 YZ250FR User manual

Yamaha
Yamaha TT250RA User manual

Yamaha
Yamaha BOLT 2019 User manual

Yamaha
Yamaha TW200 User manual

Yamaha
Yamaha MTN850-A 2017 User manual

Yamaha
Yamaha XJR1300 User manual

Yamaha
Yamaha XSR125 User manual

Yamaha
Yamaha YZF-R6T Manual