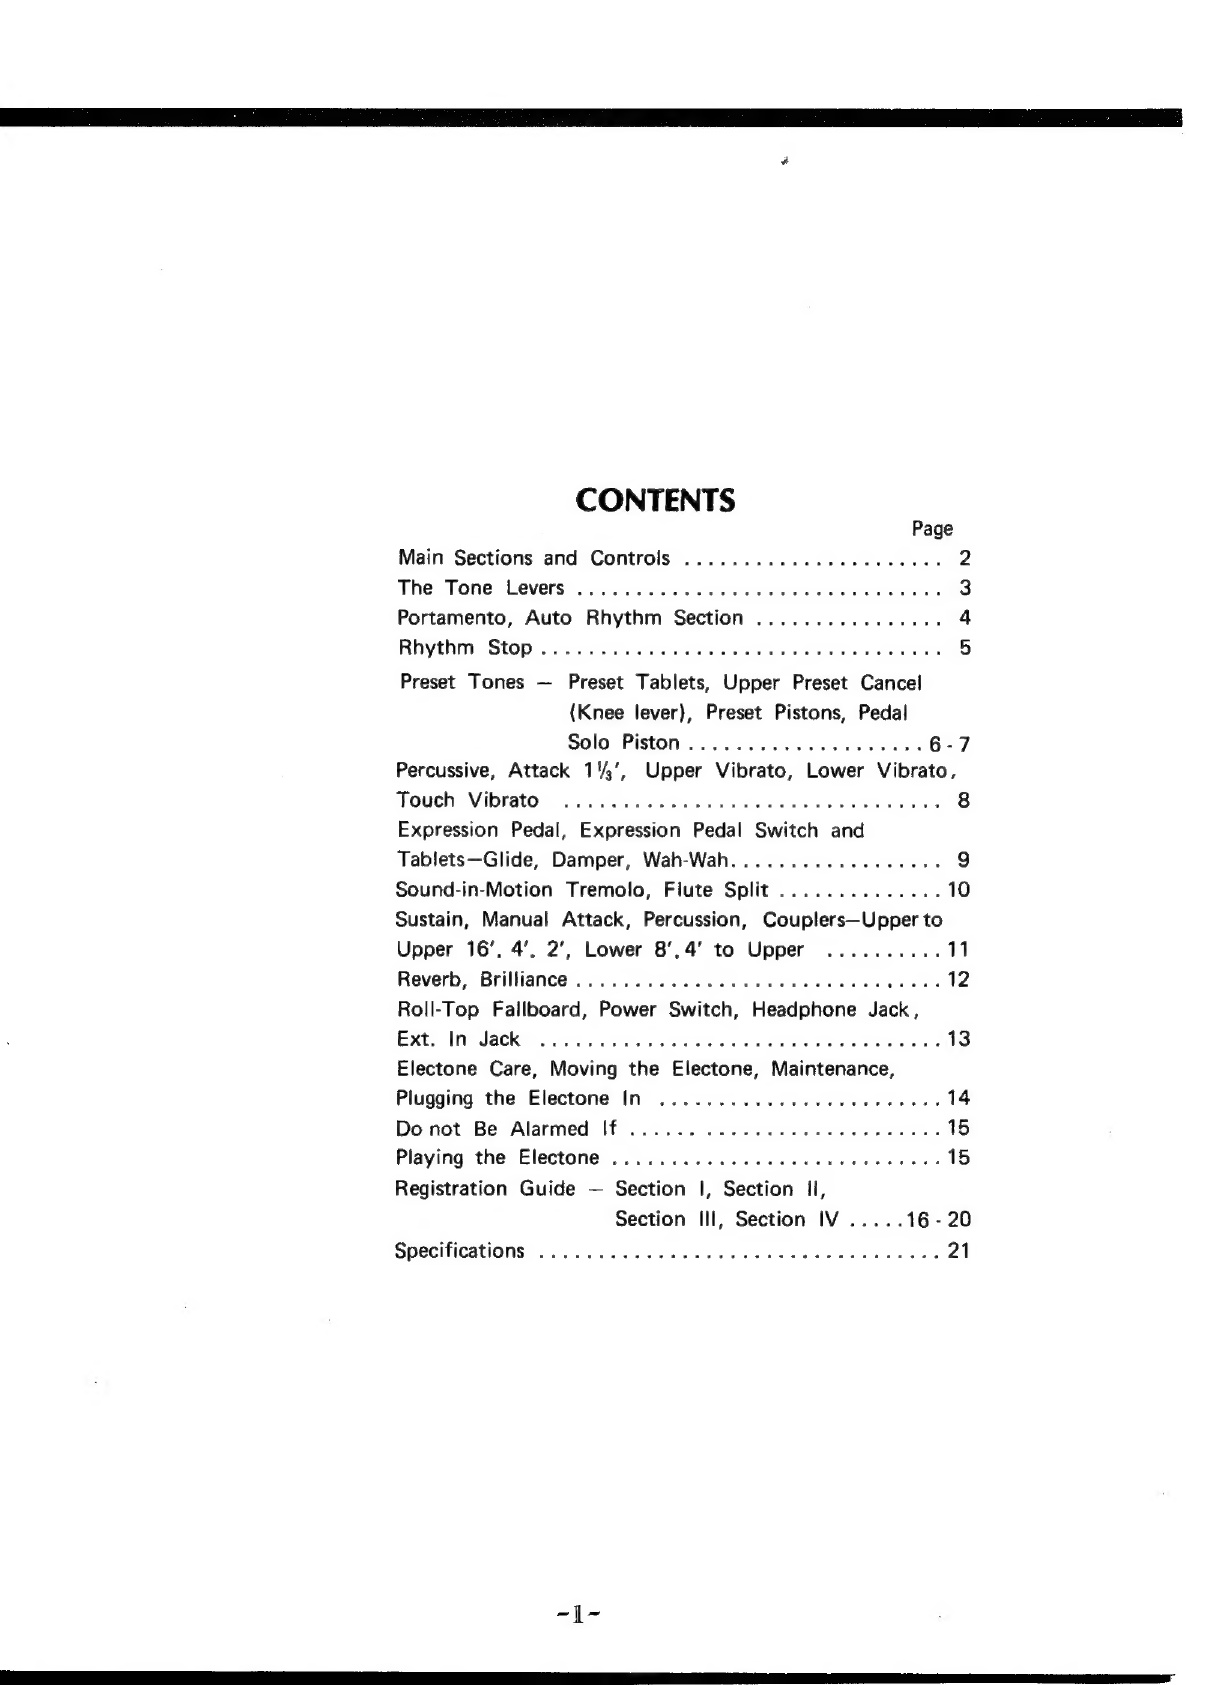
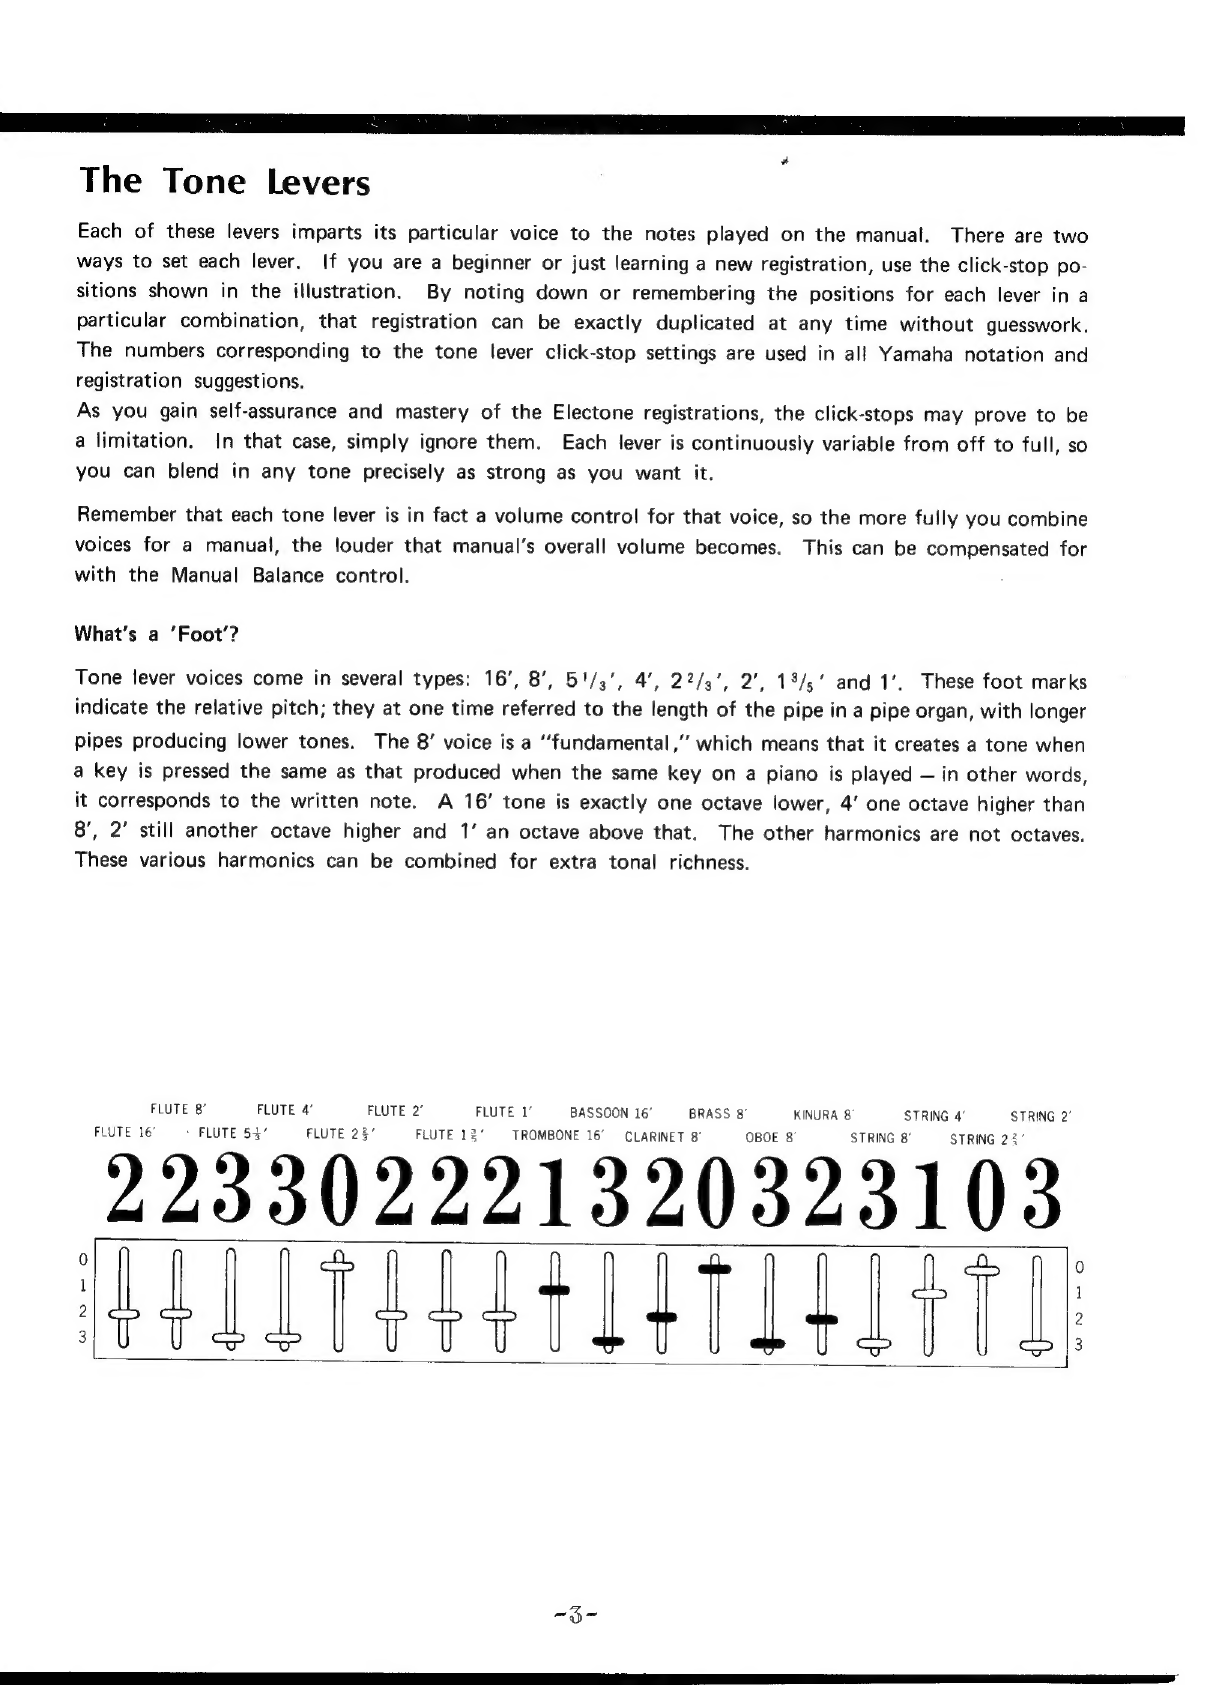
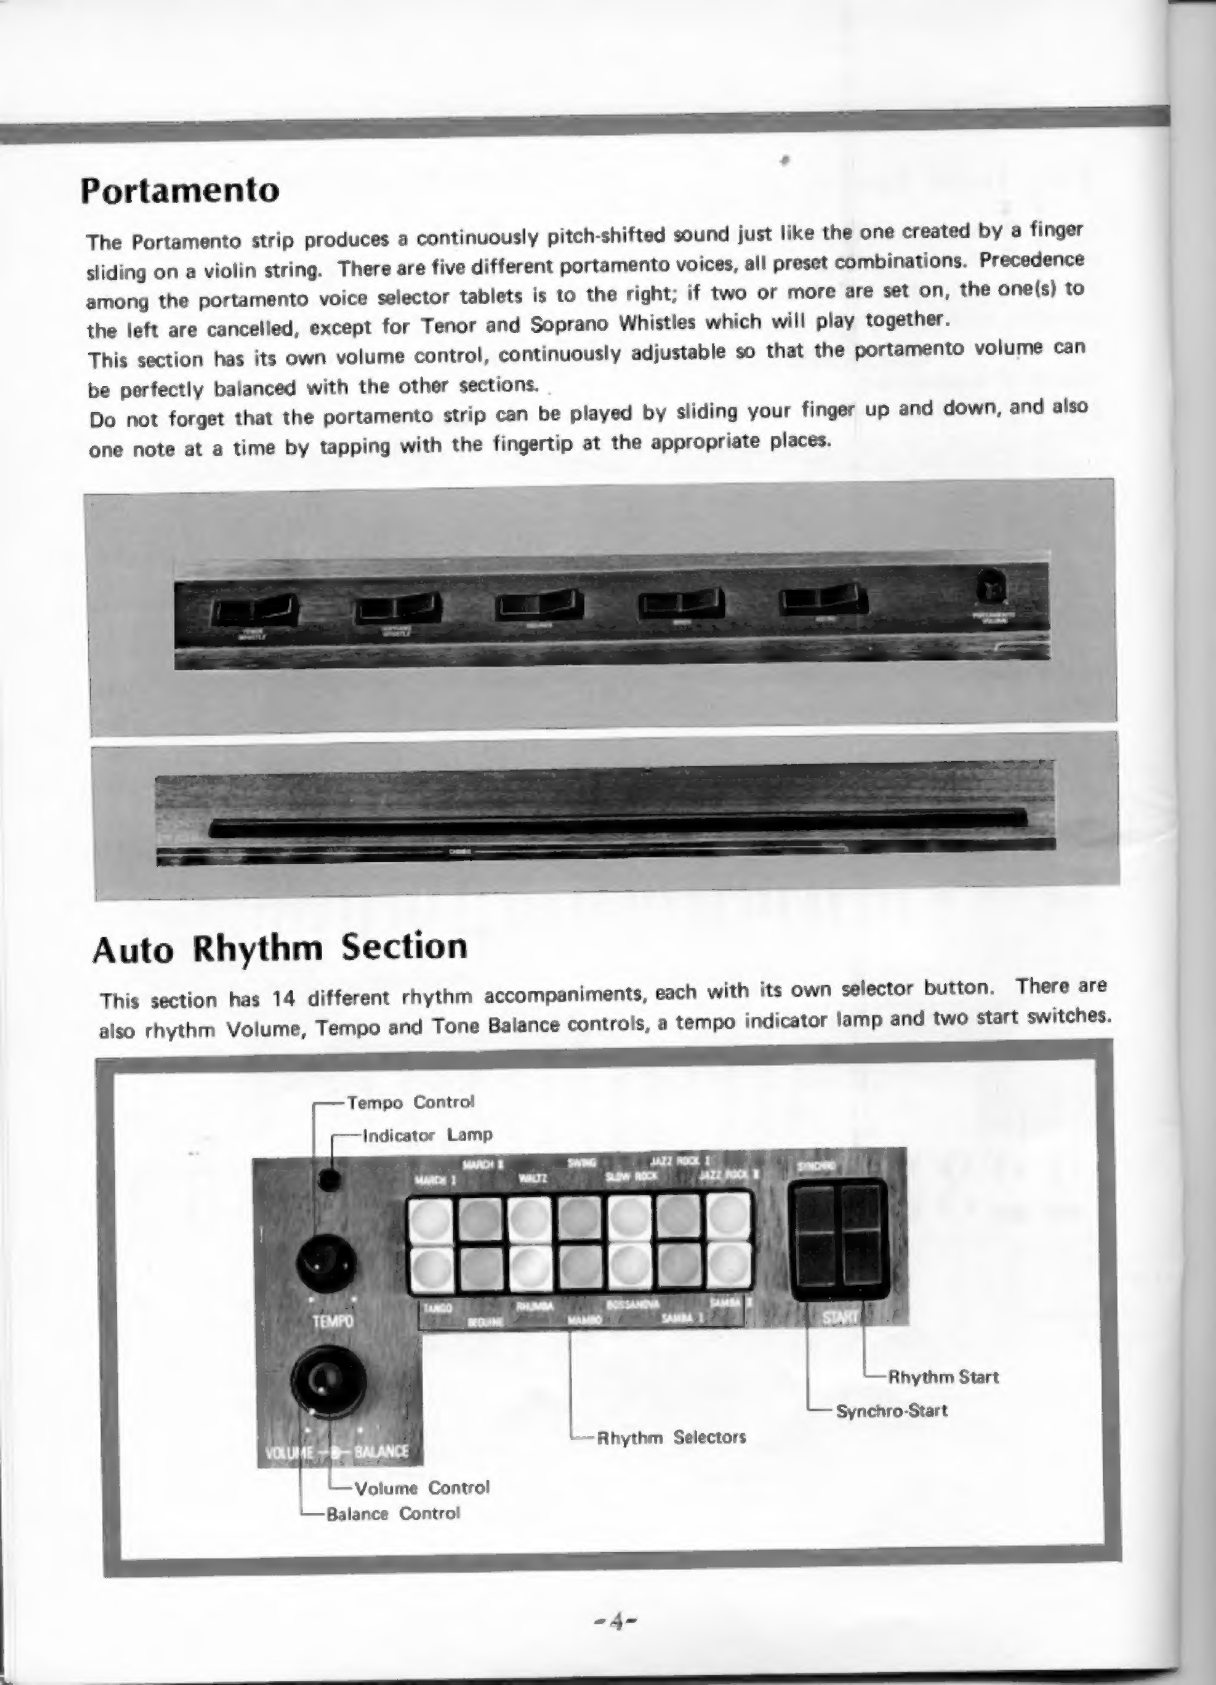
Yamaha Electone E-5AR User manual
Other Yamaha Musical Instrument manuals

Yamaha
Yamaha PortaTone User manual

Yamaha
Yamaha PDP-100 User manual

Yamaha
Yamaha YC-25D User manual

Yamaha
Yamaha Arius YDP-161 User manual

Yamaha
Yamaha Clavinova CLP-98 User manual

Yamaha
Yamaha Clavinova CLP-670 User manual

Yamaha
Yamaha YPP-55 User manual

Yamaha
Yamaha Electone CHX-1 User manual

Yamaha
Yamaha PortaTone PSR-7000 User manual

Yamaha
Yamaha PortaTone PSR-A300 User manual

Yamaha
Yamaha Silent Cello SVC110 User manual

Yamaha
Yamaha Clavinova CLP-123 User manual

Yamaha
Yamaha PSS-A50 Service manual

Yamaha
Yamaha Clavinova CLP-480 Instruction Manual

Yamaha
Yamaha Electone CSY-1 User manual

Yamaha
Yamaha P-95B Instruction Manual

Yamaha
Yamaha Clavinova CVP-900 Instruction Manual

Yamaha
Yamaha P-155 User manual

Yamaha
Yamaha Electone FX-20 User manual

Yamaha
Yamaha PSR-SX600 User manual