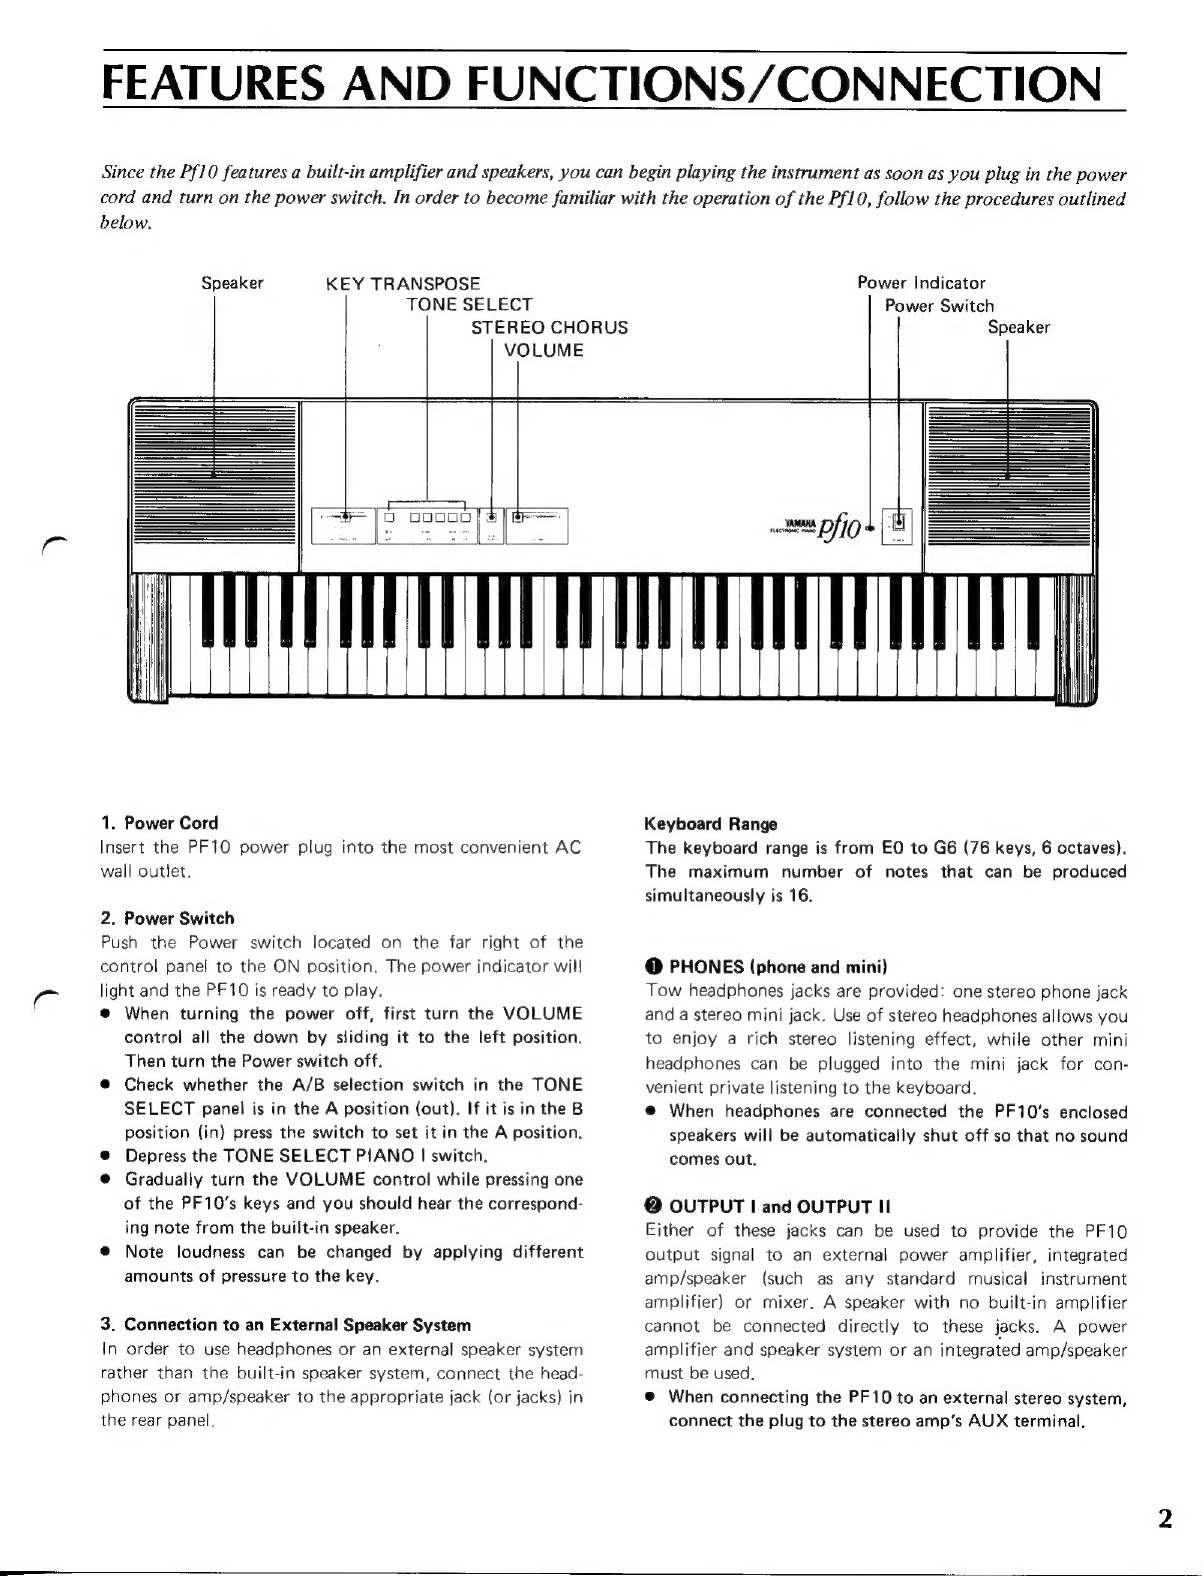
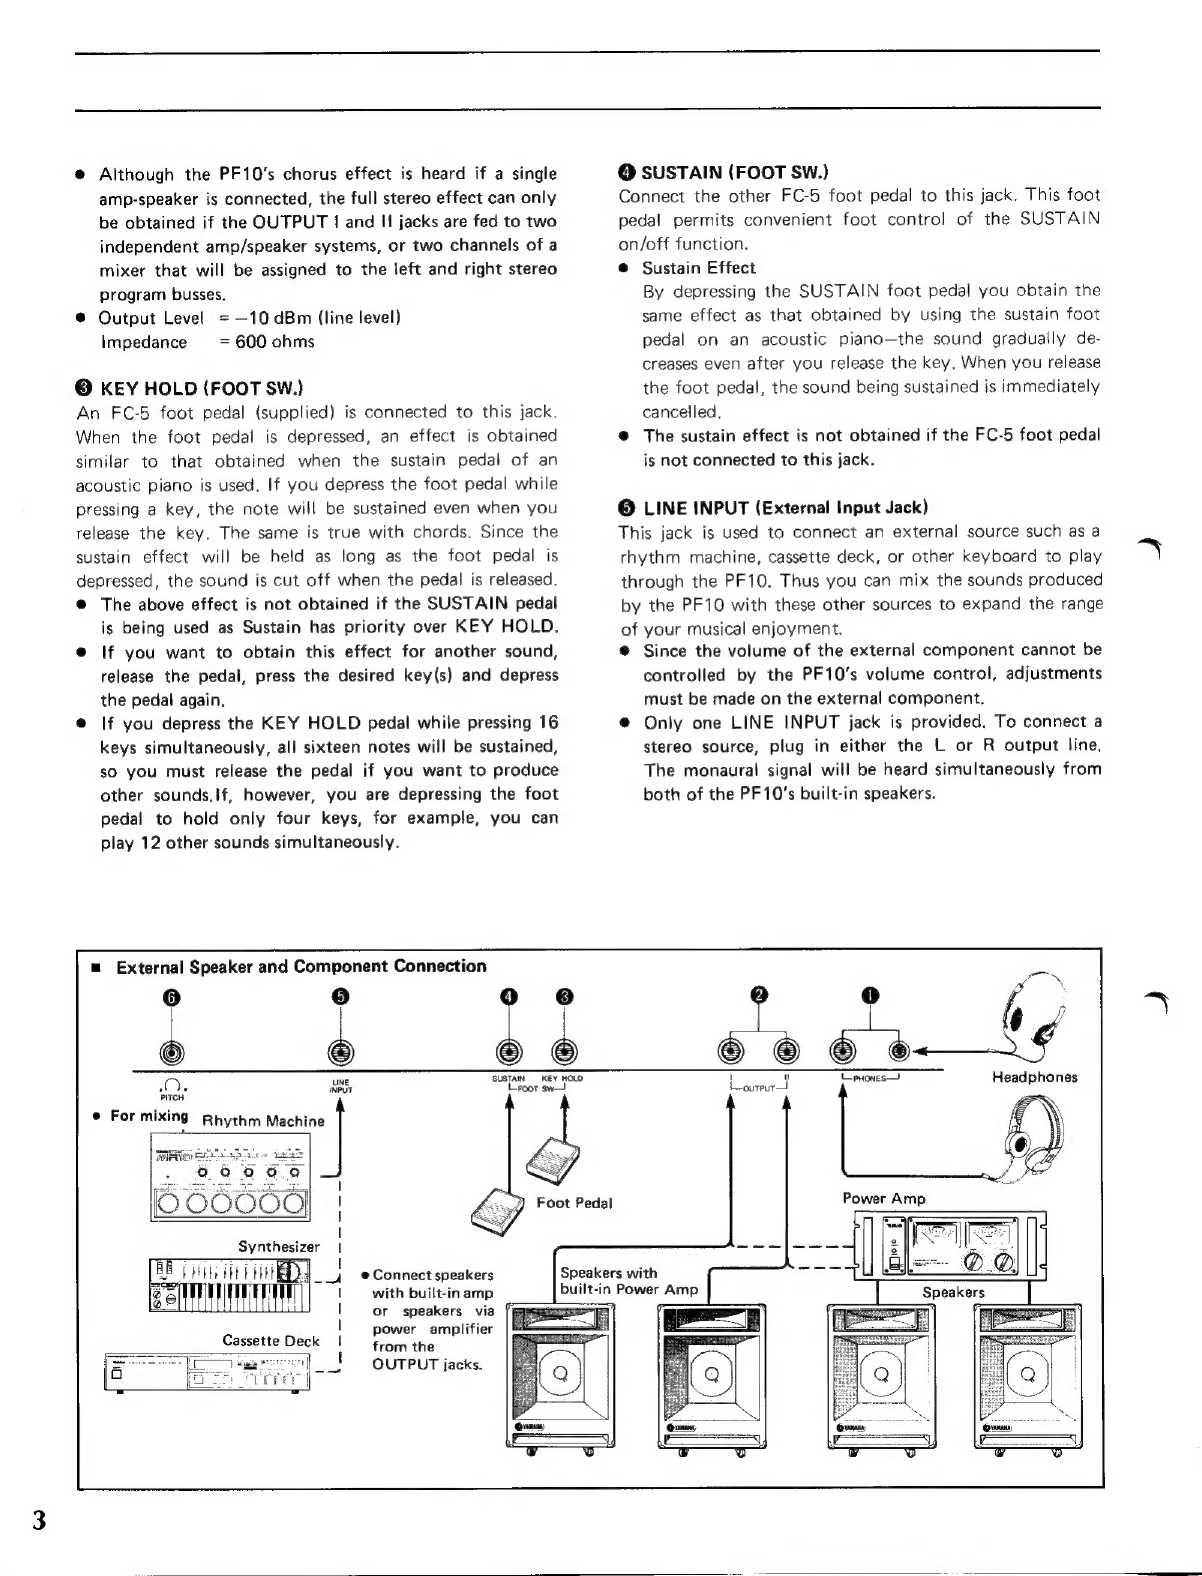
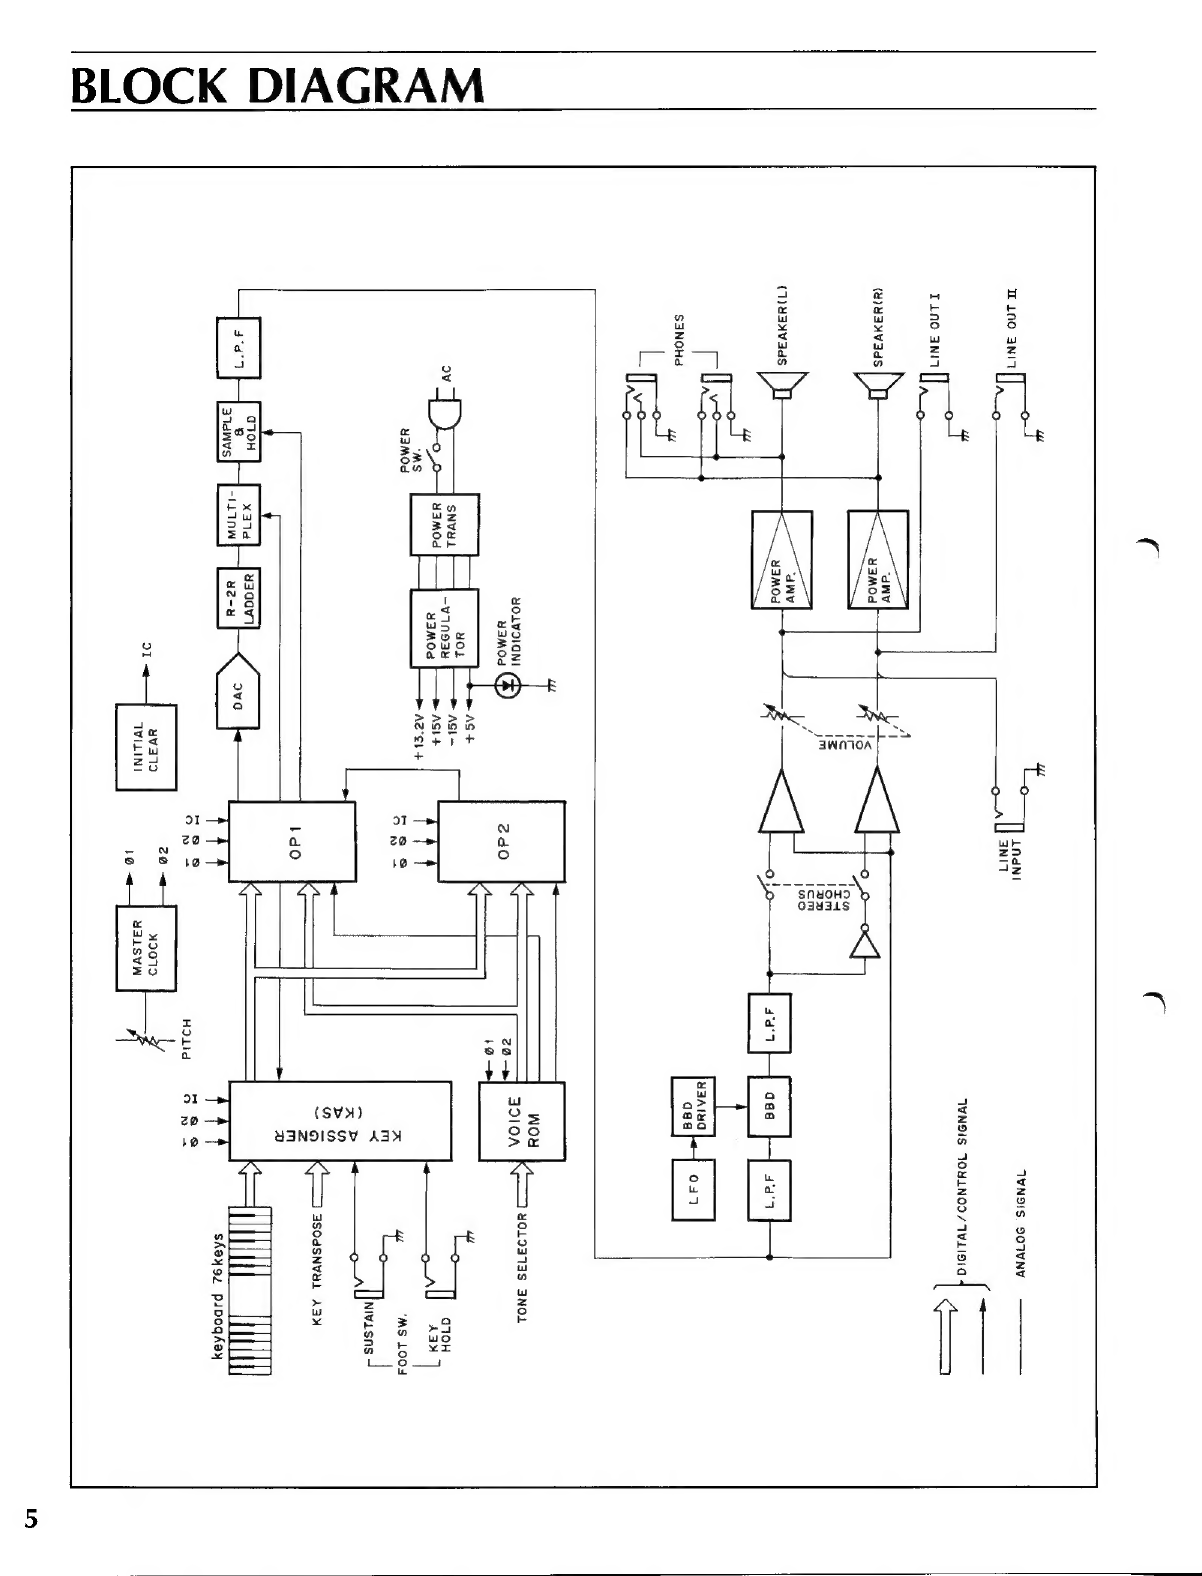
Yamaha pf10 User manual
Other Yamaha Musical Instrument manuals

Yamaha
Yamaha CPX900 User manual

Yamaha
Yamaha CP4 Stage User manual

Yamaha
Yamaha Portatone PSR-E213 Technical document

Yamaha
Yamaha YT-280D User manual

Yamaha
Yamaha Clavinova CLP-950 User manual

Yamaha
Yamaha Clavinova CLP-S308 Operating and maintenance manual

Yamaha
Yamaha Electone STAGEA ELB-01 User manual

Yamaha
Yamaha Electone D-80 User manual

Yamaha
Yamaha Disklavier E3 User manual

Yamaha
Yamaha DGX-650 User manual

Yamaha
Yamaha Electone D-600 User manual

Yamaha
Yamaha PortaTone PSR-A1000 Instruction Manual

Yamaha
Yamaha Electone C-40 User manual

Yamaha
Yamaha AES FG User manual

Yamaha
Yamaha SILENT ELECTRIC Cello SVC50 User manual

Yamaha
Yamaha Clavinova CLP-320 User manual

Yamaha
Yamaha YPP-35 User manual

Yamaha
Yamaha Keyboards and Digital - Pianos User manual

Yamaha
Yamaha Electone BK-7 User manual

Yamaha
Yamaha Electone E-70 User manual